Klaviyo is a marketing automation and email platform created to help e-commerce companies. This platform allows businesses to deliver personalized marketing messages to their customers through various channels like email, text messages, and more.
Installation #
- Firstly, you need to purchase the User Registration Premium Plan.
- After the successful purchase, you will get the plugin zip file under your WPEverest account page.
- Now, you can download the User Registration Pro plugin and Klaviyo add-on from there.
- Through your WordPress Dashboard, visit Plugins -> Add New -> Upload and then choose the downloaded zip file and then install and activate it.
- Now you are ready to use this add-on for your site.
Alternative Method:
- Once you have entered the User Registration Pro license on your site, go to User Registration > Extensions.
- Search for the ‘Klaviyo‘ add-on.
- Click on ‘Install‘.
- Once the installation is finished, click on ‘Activate‘. The add-on will be activated.
Setup and Configuration #
In order to integrate Klaviyo with the User Registration plugin, you will need an API key from your Klaviyo account. You can follow the steps below to generate and use the API key.
Generate Klaviyo API Key #
- Log in to your Kalviyo Account.
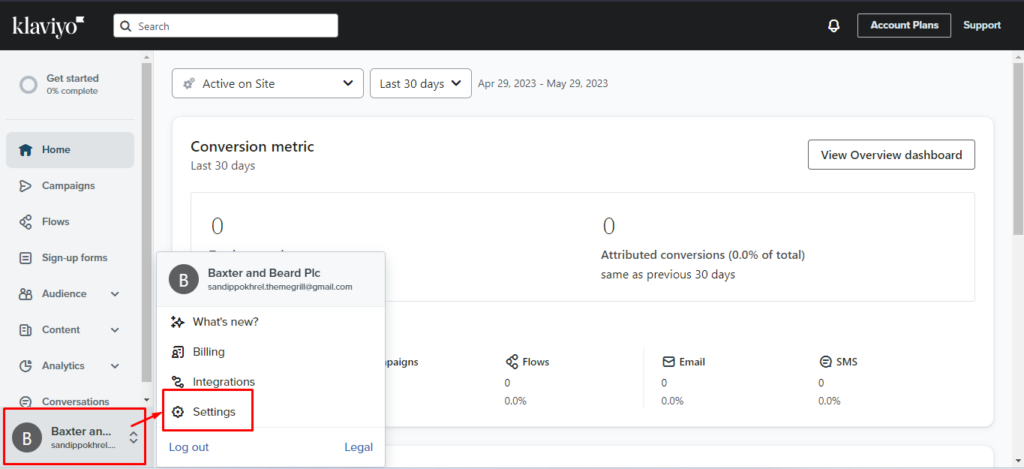
- On your account dashboard, click on the Account Name on the bottom left.
- Now, click on ‘Settings‘.

- Under ‘Account‘, you will find ‘Api Keys‘.
- Click on ‘API Keys‘.

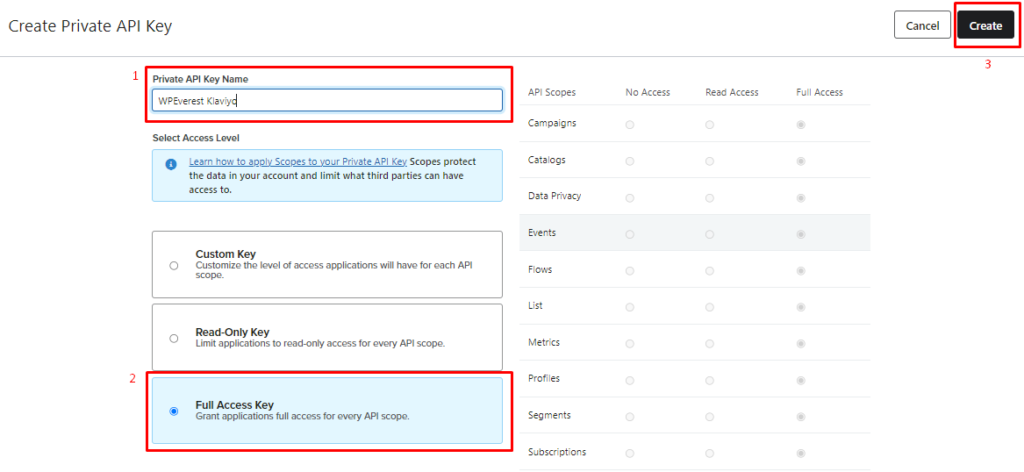
- Click on ‘Create Private API Key‘.

- Provide an API Key name.
- Choose ‘Full Access Key‘ on the Access Level
- Click on ‘Create‘.
You will then get an API key. Copy this key on a clipboard for further use.

Integrating Klaviyo with the User Registration #
Once you generate the API key, navigate to your site’s Dashboard > User Registration > Settings > Integration > Kalviyo. You will need to add the API key here and provide an account name. The account name can be anything.

Click on Connect.
Mapping User Registration form fields to Klaviyo #
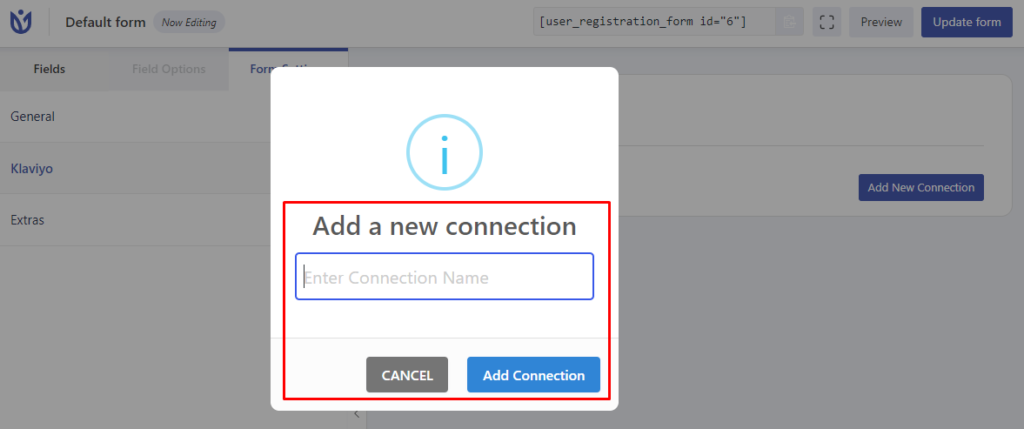
For the last step, you will need to map the User Registration form fields to your Klaviyo account in order to get the contacts. For this, go to User Registration > All Forms. Choose the registration form for mapping and click on Edit. Now, navigate to Form Settings > Klaviyo. Here, click on ‘Add New Connection‘.

Provide the connection name and click on Add Connection.

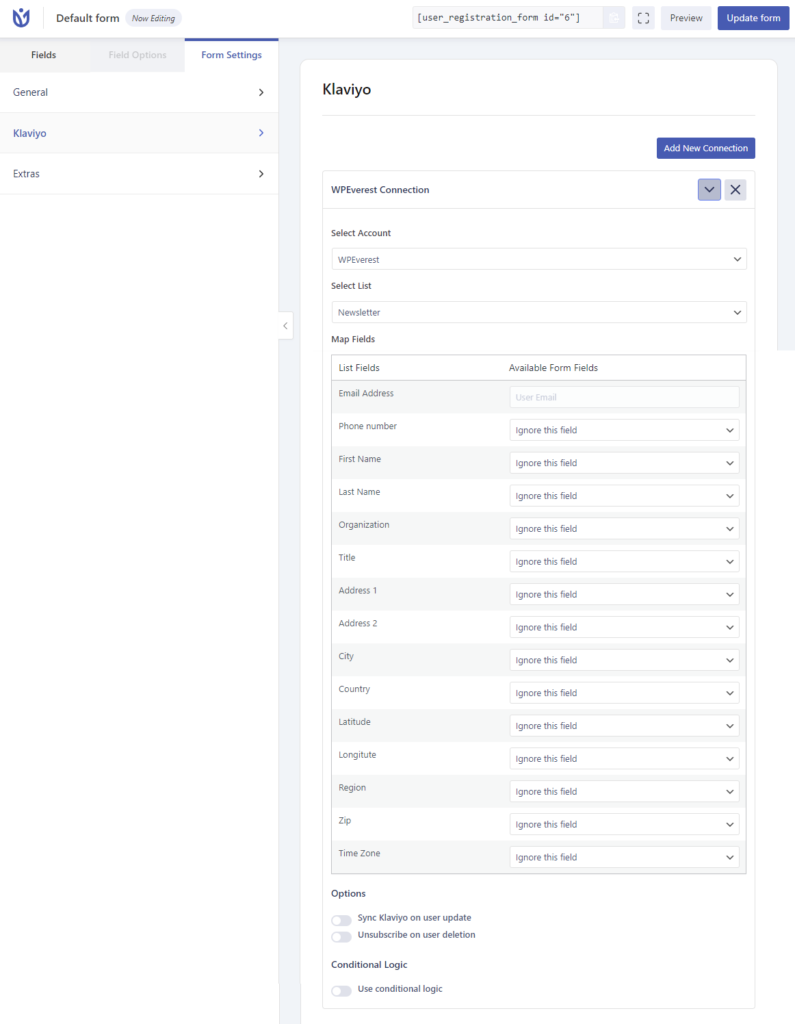
Now, you will see the option to map the fields to the Klaviyo Account.

Sync Klaviyo on User Update #
You can enable this option if you want to sync the user details when they update it to the contact list on your Klaviyo Account.
Unsubscribe on User Deletion #
You can enable this option if you want to unsubscribe the users from your Klaviyo contacts if the users are deleted.
Once you have finished all the above steps, submit the registration form and you will be able to map the contact to the selected list on your Klaviyo Account.


