Want to protect your website from lousy hackers and digital vulnerabilities? The Two Factor Authentication add-on, also known as 2FA, will provide OTP-based verification for the users for maintaining a secure site and preventing data breaching. When you enable two-factor authentication for your logins, you must confirm your identity through an additional authentication step after entering your correct username and password. This documentation shows how to enable the 2FA verification for the users registered via the User Registration plugin.
Installation #
- Firstly, you need to purchase the User Registration Premium Plan.
- After the successful purchase, you will get the plugin zip file under your WPEverest account page.
- Now, you can download the User Registration Pro plugin and Two Factor Authentication add-on from there.
- Through your WordPress Dashboard, visit Plugins -> Add New -> Upload and then choose the downloaded zip file and then install and activate it.
- Now you are ready to use this add-on for your site.
Alternative Method:
- Once you have entered the User Registration Pro license on your site, go to User Registration > Extensions.
- Search for the ‘Two Factor Authentication‘ add-on.
- Click on ‘Install‘.
- Once the installation is finished, click on ‘Activate‘. The add-on will be activated.
Setup and Configuration #
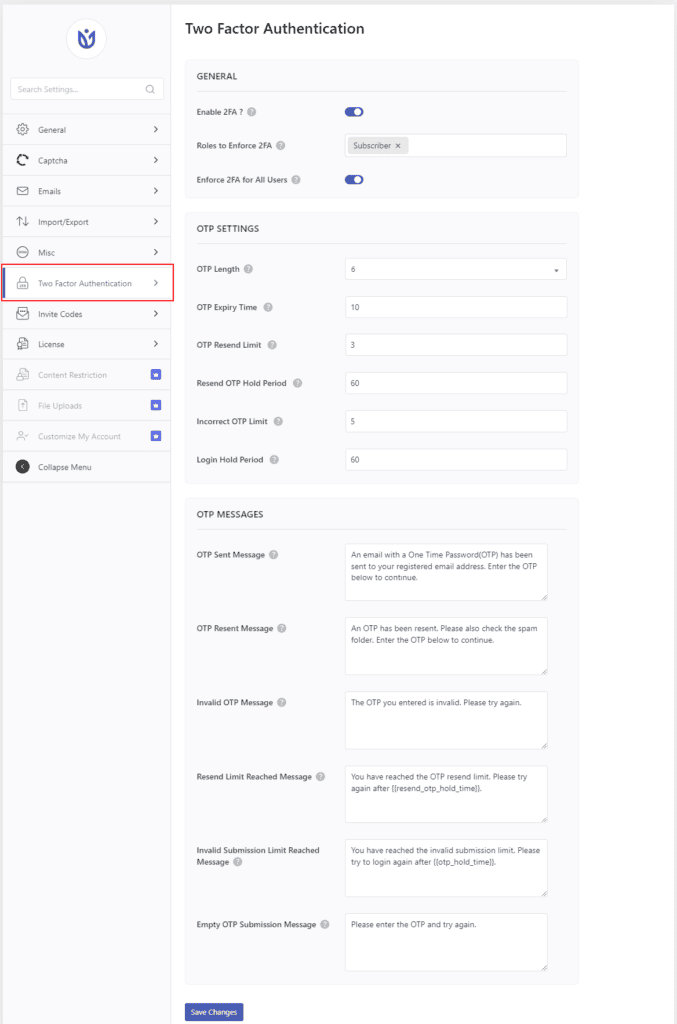
After the successful installation of the 2FA add-on, go to the User Registration > Settings > Two Factor Authentication to manage the settings related to this feature.

There is a total of three options to set in the Two Factor Authentication settings. They are:
- General
- OTP Settings
- OTP Messages
Settings #
General #
- Enable 2FA?: Mark this feature in order to enable the two-factor authentication for user verification.
- Roles to Enforce 2FA: Select the user roles for which you would like to force the two-factor authentication.
- Enable 2FA for all Users: Enable this option if you want to enable 2FA for all the users on your site regardless of the registration source.
OTP Settings #
In this setting, you will set the factors to shape the OTP sent to the users.
- OTP Length: Set the total number of characters for the OTP.
- OTP Expiry Time: Set the time. in minutes, for the expiry of the OTP.
- OTP Resend Limit: Set the total number of times to resend the OTP.
- Incorrect OTP Limit: Set the total number of times the user can enter an incorrect OTP before he/she has to ask for a new one.
- Login Hold Period: Set the time to prevent the user from logging in when the user hits the incorrect OTP submission limit.
OTP Messages #
You can edit the messages shown on the frontend when using the 2FA feature from here. Add or edit the required messages as their names suggest.
Login Form with OTP #
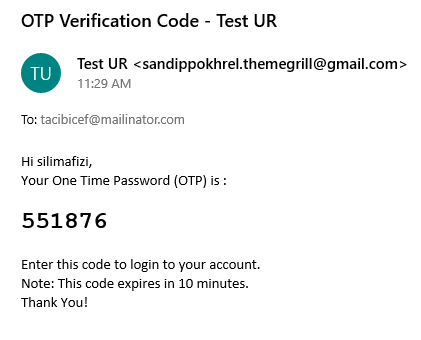
Once the two-factor authentication is enabled for the required user roles, they will get an OTP on their email while logging in to your site. It will look like this:

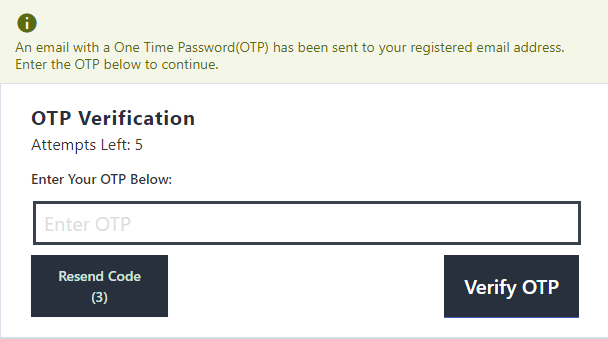
The email will have the OTP and expiration time limit for that OTP. Now, the users will have to enter and verify the OTP for logging in.

Enter the OTP and click on ‘Verify OTP‘.


