Once you have purchased the premium plan and registered on the site, you must follow the steps below to unlock all the premium features of the plugin.
User Registration Pro is a stand-alone add-on that doesn’t require the User Registration free version to be activated i.e. User Registration Pro will work as the core version.
Steps to Unlock Premium Features #
Install User Registration Pro #
- First, you need to purchase the User Registration Premium to get the User Registration Pro plugin/add-on.
- After the successful purchase, go to your account at https://wpeverest.com/login/.
- Go to Dashboard > Downloads.
- Now, you can download the User Registration Pro’s zip file from here.
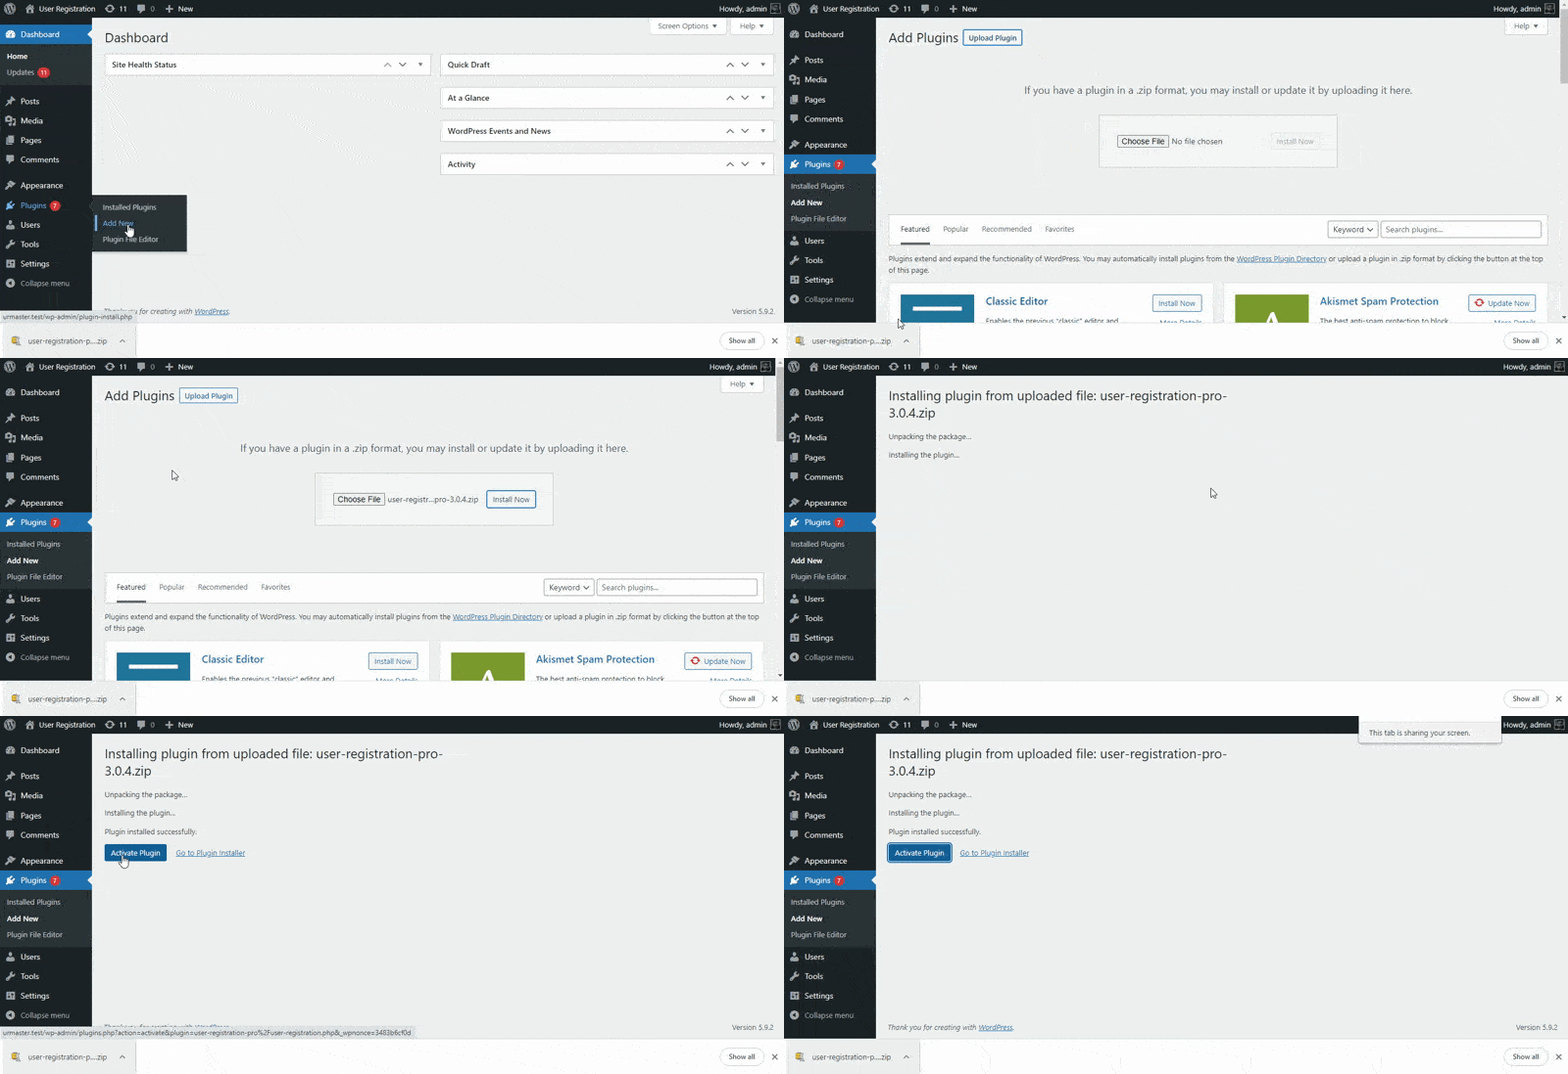
- Through your WordPress Dashboard, visit Plugins -> Add New -> Upload and then choose the downloaded zip file(or drag and drop), and then install and activate it.
- Now you are ready to use this add-on for your site.

The following gif image shows an example of installing the User Registration Pro.
Activate Premium License #
You will then see an option to add a license key on the User Registration > Settings > License.
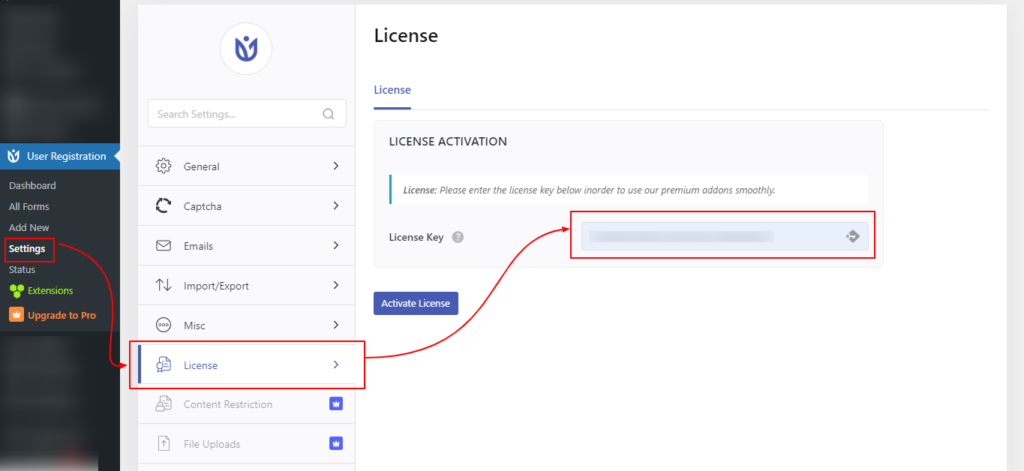
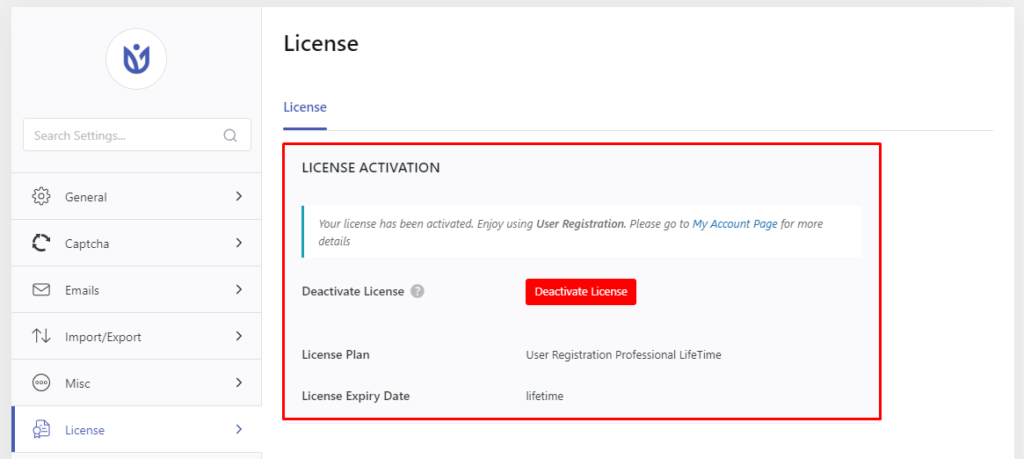
After entering the license key, click on the ‘Activate License‘ button. You will then see the license details as below.
Install and Activate Required Add-ons #
The last and final process to unlock the premium features is to activate the add-ons as per your need. Since the User Registration premium is an add-on-based system, you will find various add-ons specified to their unique features as per the plan you have purchased.
Let’s say you need advanced custom fields on your forms. You will then have to activate the User Registration – Advanced Fields add-on.
Follow the guidelines below to install and activate the User Registration premium add-ons. You can follow any of the two methods to install the premium add-ons on your site. These methods are described below.
Method Number One: #
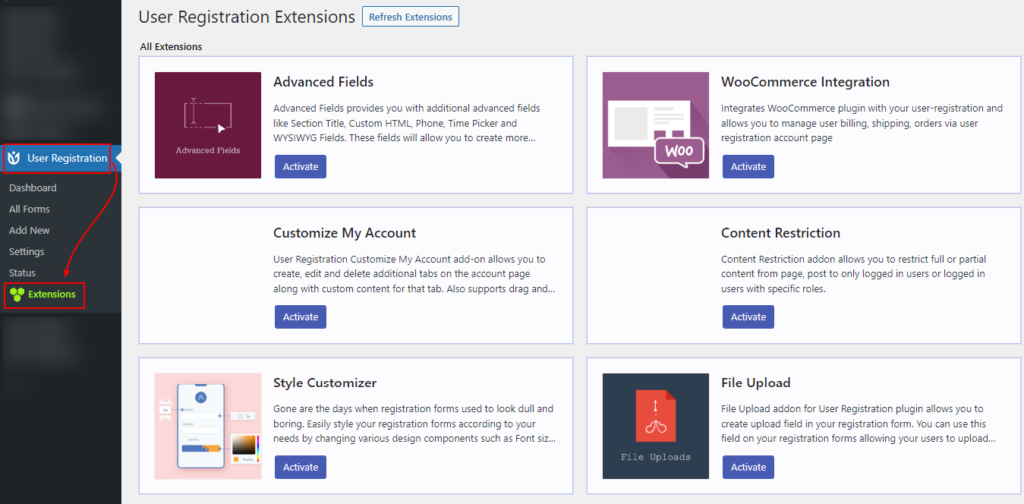
In this method, you will have to activate the license key first. Once you have activated the license key from User Registration > Settings > License or from the Dashboard > Plugins you can follow this method.

Now, please go to User Registration > Extensions. Here, you can find the option to activate the available add-ons as per your plan.
Method Number Two: #
Simply
Now click on the Downloads tab. All the add-ons in the purchased plan will be listed along with the download links. Click on the download links beside the addon which you want to download.
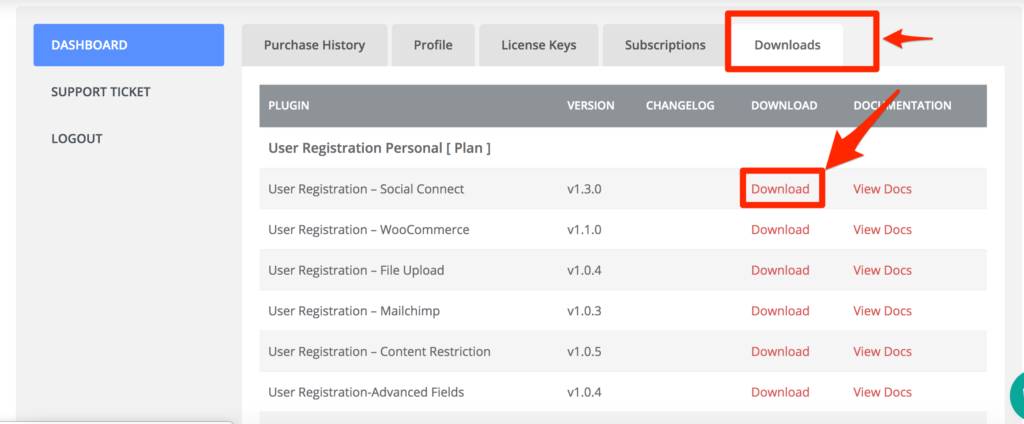
Once you download click the Download link, and you will get a zip file for the addon. You can now install this zip file like any other plugin.
- Simply go to Plugins >Add New in the WordPress Dashboard.
- Click the Upload Plugin button.
- You will get the option to upload the plugin. Click on the choose file button and select your addon zip file.
- After the file is uploaded simply click the Install Now button.
- Once the plugin is installed, It will ask to activate simply click Activate Plugin button.


