
MailChimp add-on to the User Registration plugin synchronizes MailChimp with the User Registration plugin.
Installation #
- First, purchase the User Registration – MailChimp add-on.
- After the process succeeds, you will get the add-on zip file under your WPEverest account page.
- Now, you can download the add-on zip file from there.
- After you log into your WordPress Dashboard, go to Plugins > Add New and click Upload Plugin button available there and choose the file you’ve downloaded and click Install Now button.
- This will install the add-on. Now, you’ve to activate the addon from the Install plugin list.
- Now you are ready to use this add-on for your site.
Setup and Configuration #
After activating the add-on, you’ll see the MailChimp tab added to User Registration > Settings > Integration, you will find the MailChimp dropdown.

User Registration MailChimp #
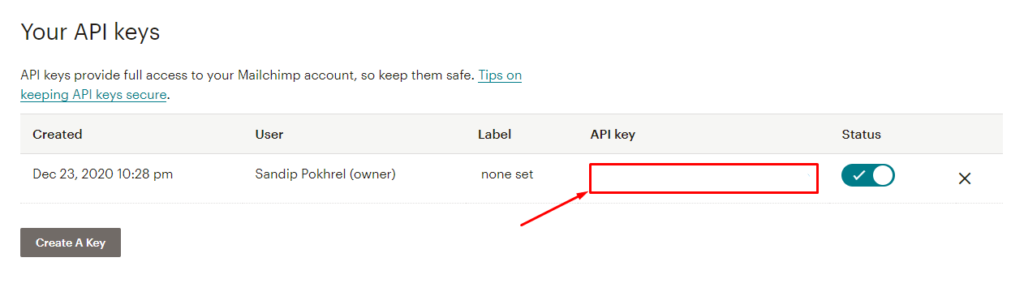
On that MailChimp tab, you need to add MailChimp API Key from your MailChimp account which is available under Account name > Profile > Extra( Menu ) > API Keys. Also, you will have to add your profile name(username) too. ( Know about API Keys )
Now, create a MailChimp list as instructed here if you’ve not created one. After you create a list, you can copy your Mailchimp API key to the Mailchimp Integration Tab in the User Registration Settings. Once you enter the API key, the Mailchimp API will be connected and all the lists will be ready to be synchronized.
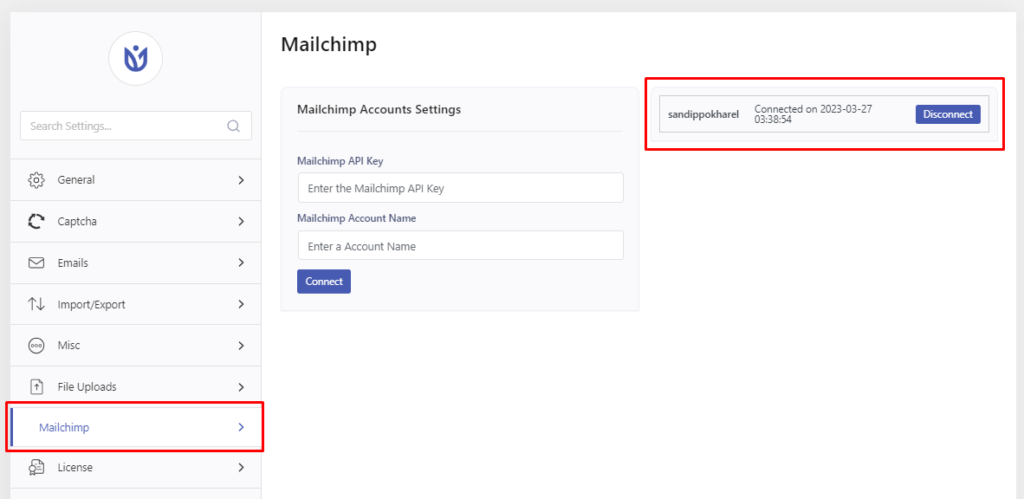
Note: the synchronization occurs every 24 hours automatically in the background. Also, you can add multiple API keys in your MailChimp settings.
Creating a Mailchimp Registration Form #
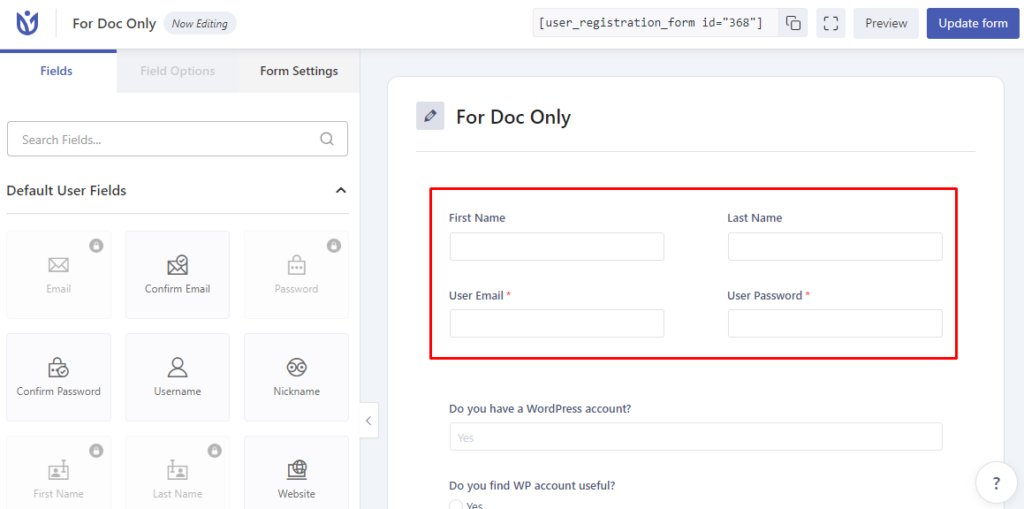
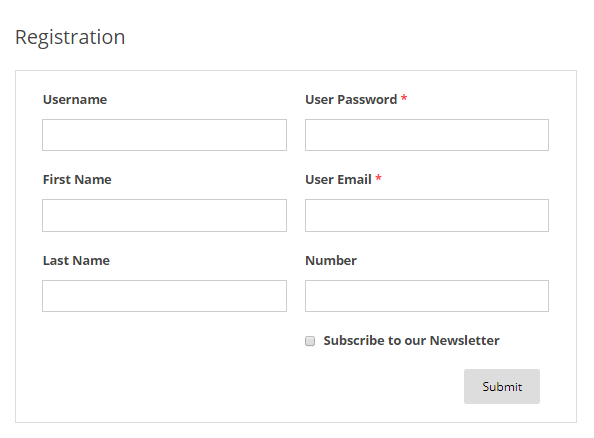
To create a Mailchimp registration form, you can go to User Registration -> Add New and add the necessary form fields.
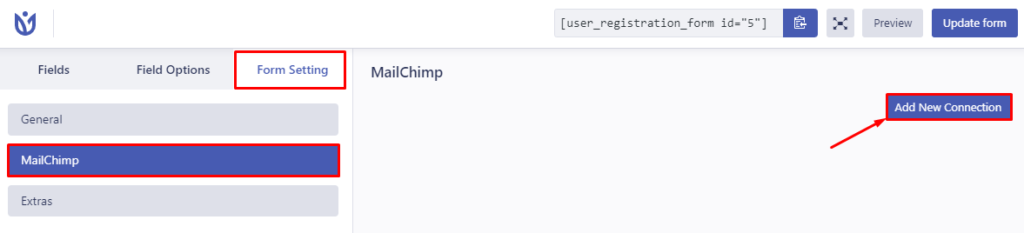
Adding New Connection #
We have updated the method to add a new connection for your MailChimp Registration Form. For this, go to the form’s settings of the MailChimp Registration Form. Here, you will see a tab on the right named ‘MailChimp’. Now, click on ‘Add Connection’.
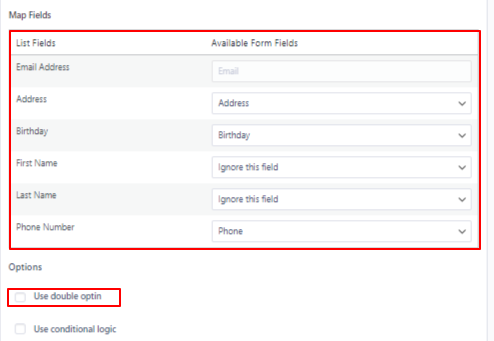
After adding the connection, you will get the following options. Here, you can select the available accounts and the lists associated with these accounts. From here, you can map the fields from your MailChimp form to the available fields on your list.
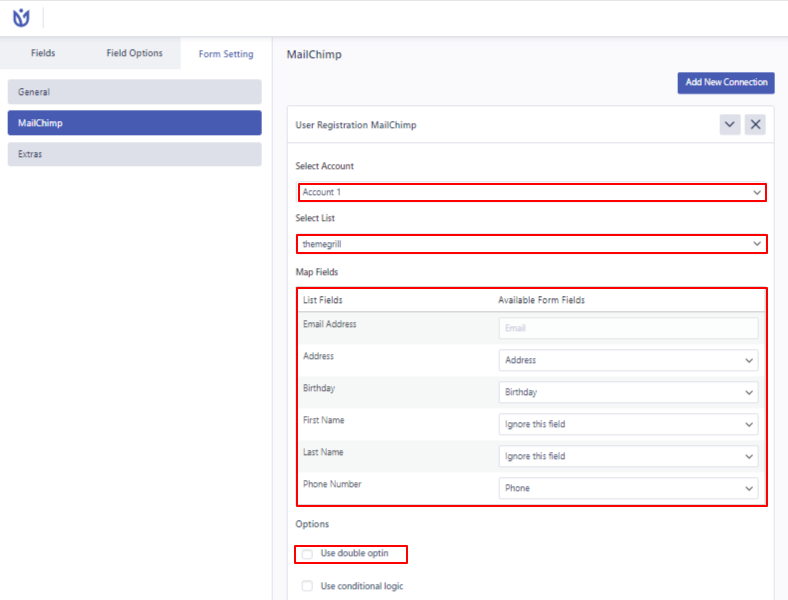
Here, be aware that your User Registration form should match the data type with the field that is in the MailChimp form ( under List > Setting > List fields and *|MERGE|* tags ) to get the data User registration form to the MailChimp list.
For example, we have Email Address, First Name, Last Name, and Phone Number in our MailChimp list fields, so our User Registration also has fields to represent that information.
Select/Create Tags #

You can either select the MailChimp tags or add new tags. For adding a new tag, just write the name of the tag and click on ‘Add New Tags‘.
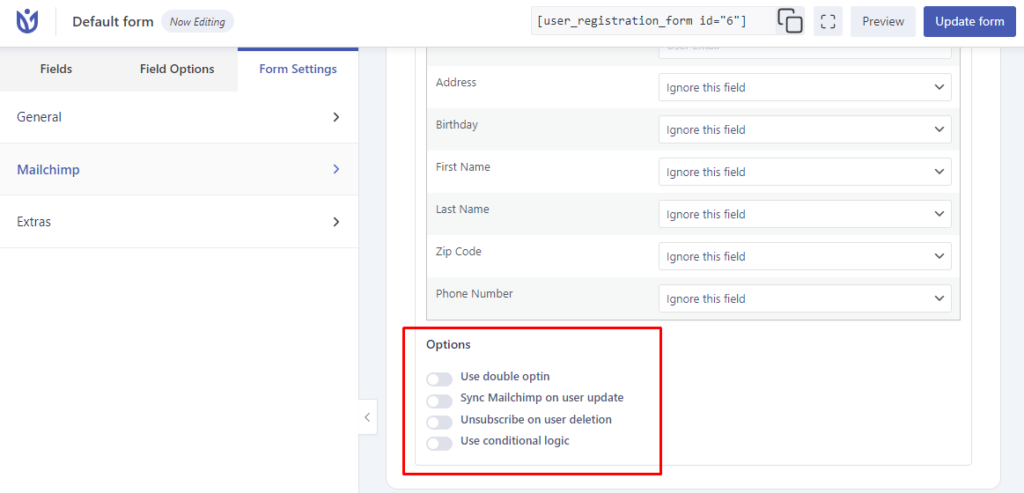
Use Double Optin #
If you want to send a verification message to users before subscribing, check the ‘Use double option’ checkbox.
Sync Mailchimp on user update #
Enable this option to sync the user’s data to Mailchimp when the users update their profile details from the My Account page.
Unsubscribe on user deletion #
Enable this option to delete the user’s contact from the Mailchimp account then their account is deleted from the site.
Conditional Logic #
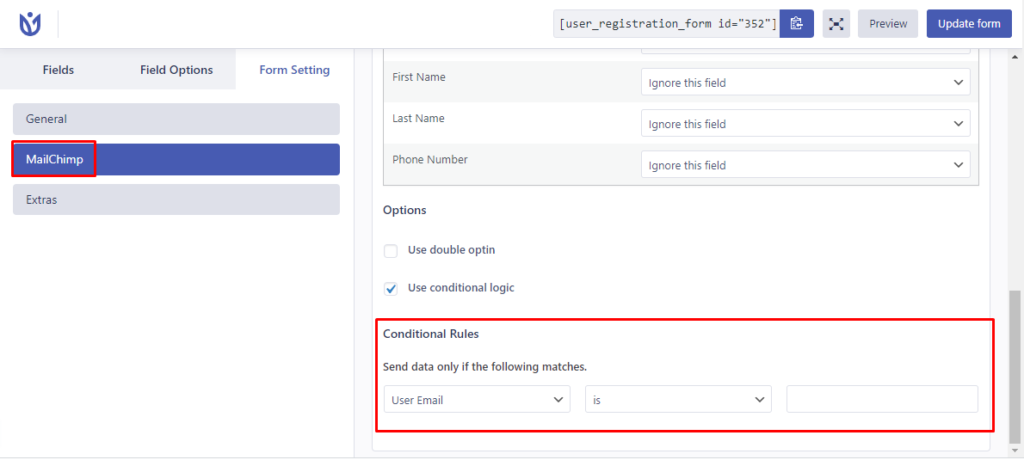
You can use conditional logic while sending the data to the Mailchimp groups/list. For this, enable the ‘Use Conditional Logic’ option on the ‘Connection’ settings for each individual form.
Edit Mapping
This button shows you to change options to map the MailChimp field with User registration fields.
Now, if you go to the MailChimp dashboard screen, you’ll see the MailChimp list,
Select your list from the drop-down which will show up the option to select an appropriate User registration form field to synchronize with and save.
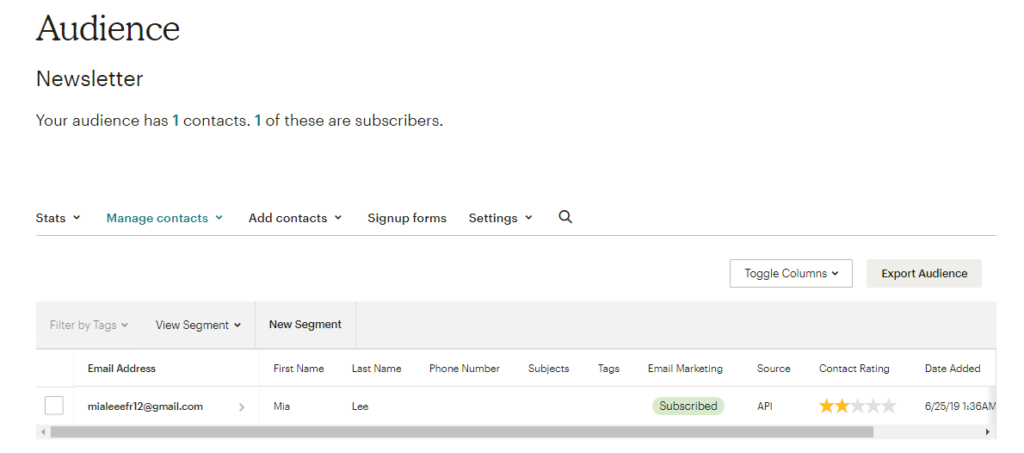
After that, if any user registers to your site from the User registration sign-up form, it will be synchronized to the MailChimp list.
Note that, if you’ve checked Enable Double-Opt-In, the subscription occurs only after the user verifies it from email. After the user is subscribed, you can find the user is added to your contacts.
Mailchimp Groups #
If you use Mailchimp groups then, this add-on supports it too. You can select the groups you want to add the users to. For this go to the form’s settings > MailChimp and select the groups that you want to be integrated.


