
Customize Email Content
Learn how to personalize email notifications for user registration events by configuring sender details, branding, and custom templates in the plugin settings.
Last updated on Jul 15, 2026
Would you like to personalize the emails sent to users and admins after registration events? User Registration & Membership allows you to customize email notifications with your own branding, messaging, and dynamic content. This tutorial will show you how to configure email settings and create custom email templates.
Before Getting Started
Before getting started, make sure you've installed and activated the User Registration & Membership plugin on your WordPress site.
Configuring Global Email Options
To customize your email notifications, go to User Registration & Membership → Settings → Emails. Here, you'll see tabs for configuring global email options and customizing individual email templates.
From the General section of the Emails tab, you can configure settings that apply to all emails sent by the plugin.
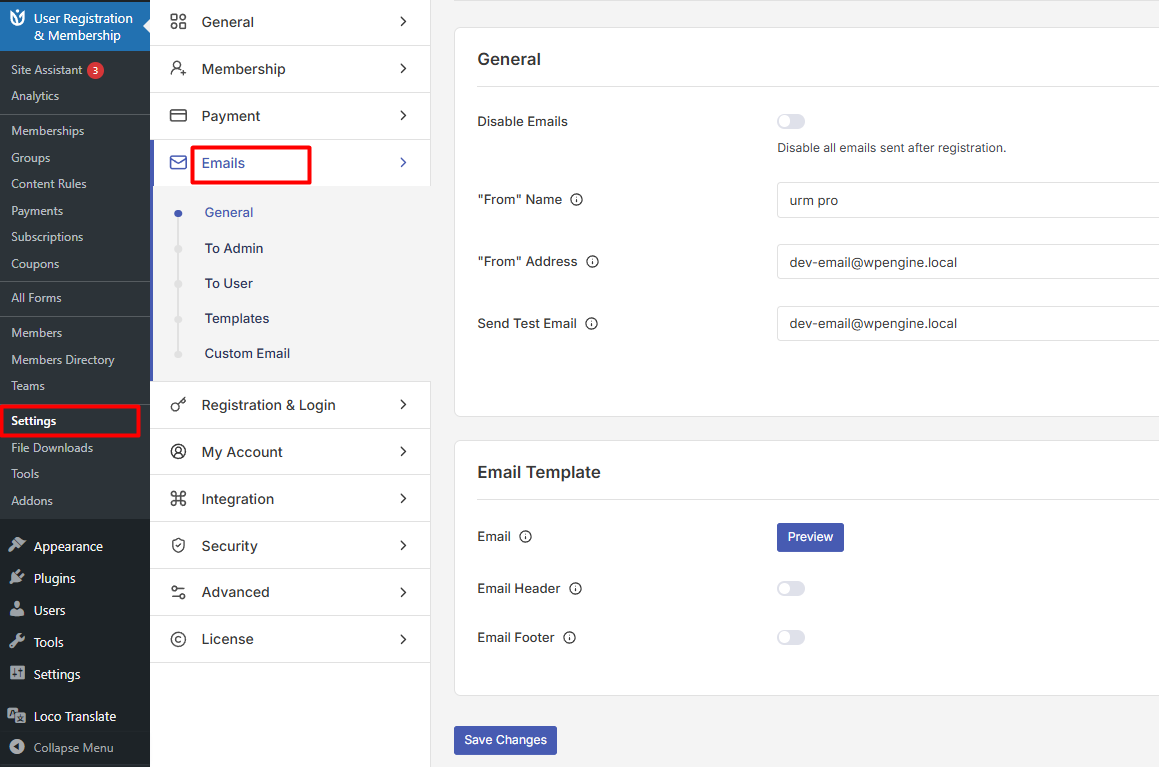
Set the From Name to your site or brand name - this is what recipients see as the sender. Then, enter your From Address as the email address used for all plugin-generated emails.
If you need to temporarily stop all emails, toggle the Disable Emails option to on. This prevents any emails from being sent after user registration.
To verify your email configuration is working correctly, use the Send Test Email option. Enter an email address and click the button to send a test message.
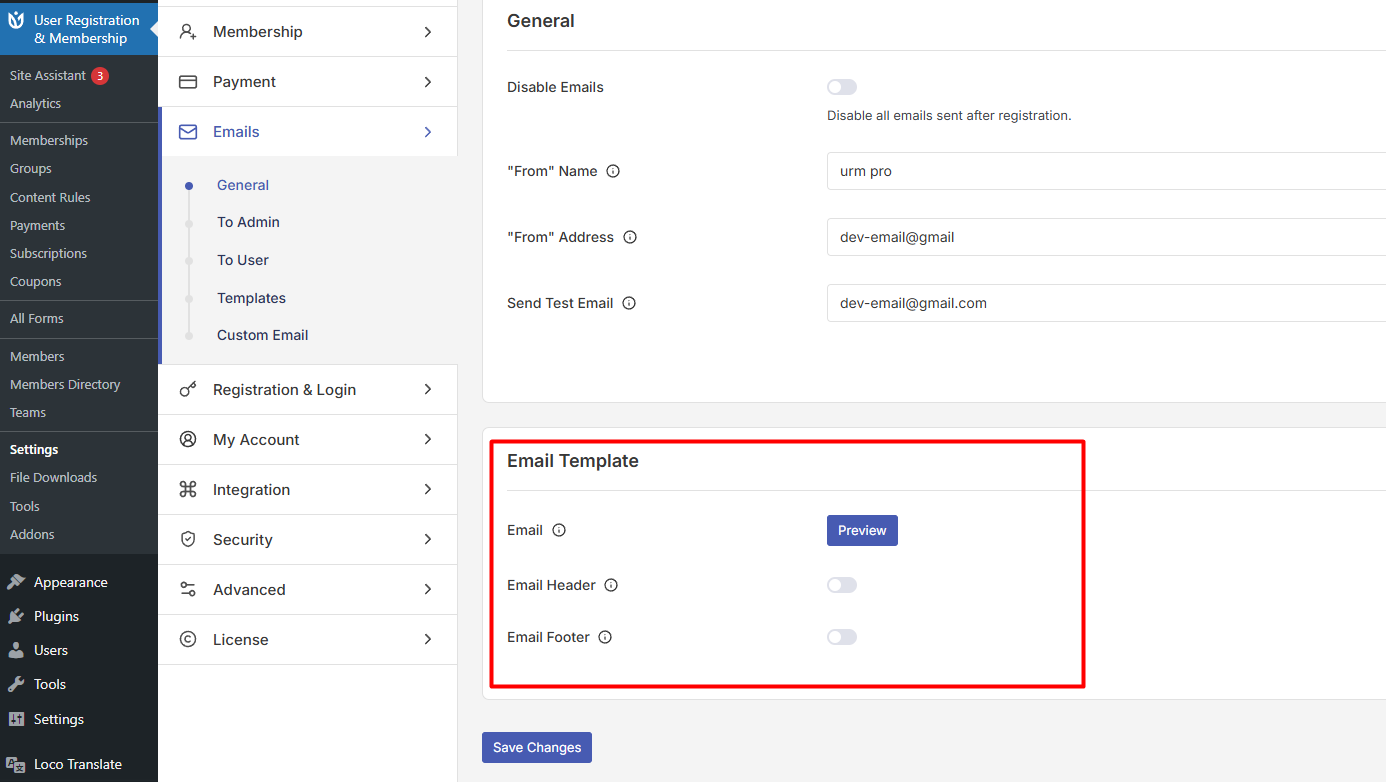
There, you can manage Email, Header and Footer.
Customizing Individual Email Templates
User Registration & Membership provides separate email templates for admins and users. To customize a specific email, navigate to either the To Admin or To User tab depending on which emails you want to edit.
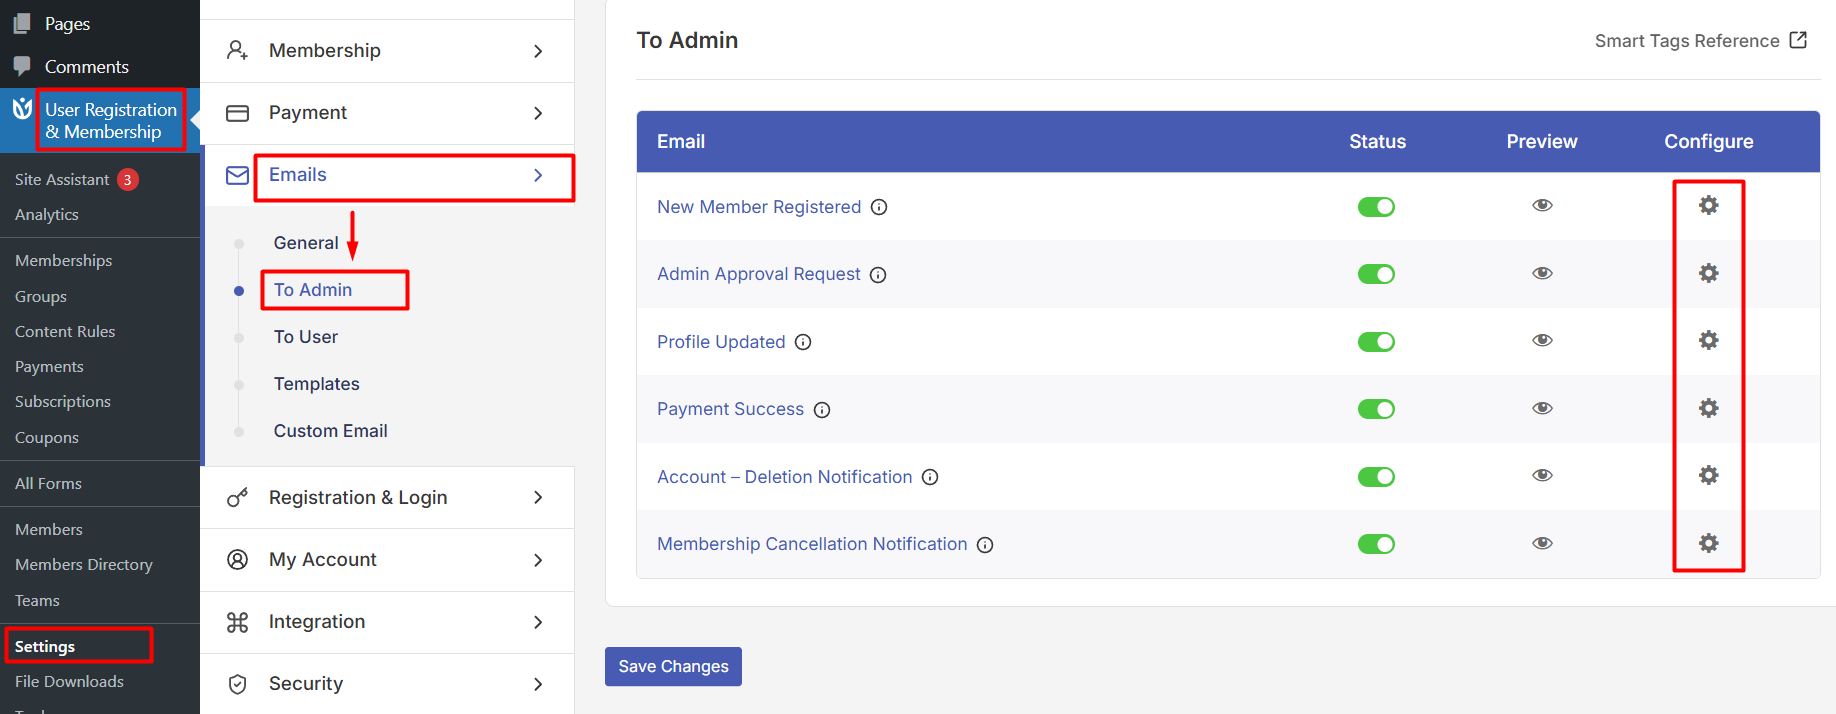
Click the configure icon on the right side of the email you want to customize. This opens the configuration screen where you can modify the email's content and settings.
In the configuration screen, you can enable or disable the email using the Enable this email checkbox. Then, add email recipients in the Email Recipients field—you can enter multiple addresses separated by commas.
Customize the Email Subject to set the subject line that appears in recipients' inboxes. Then, edit the Email Content using the visual editor to write and format your message.
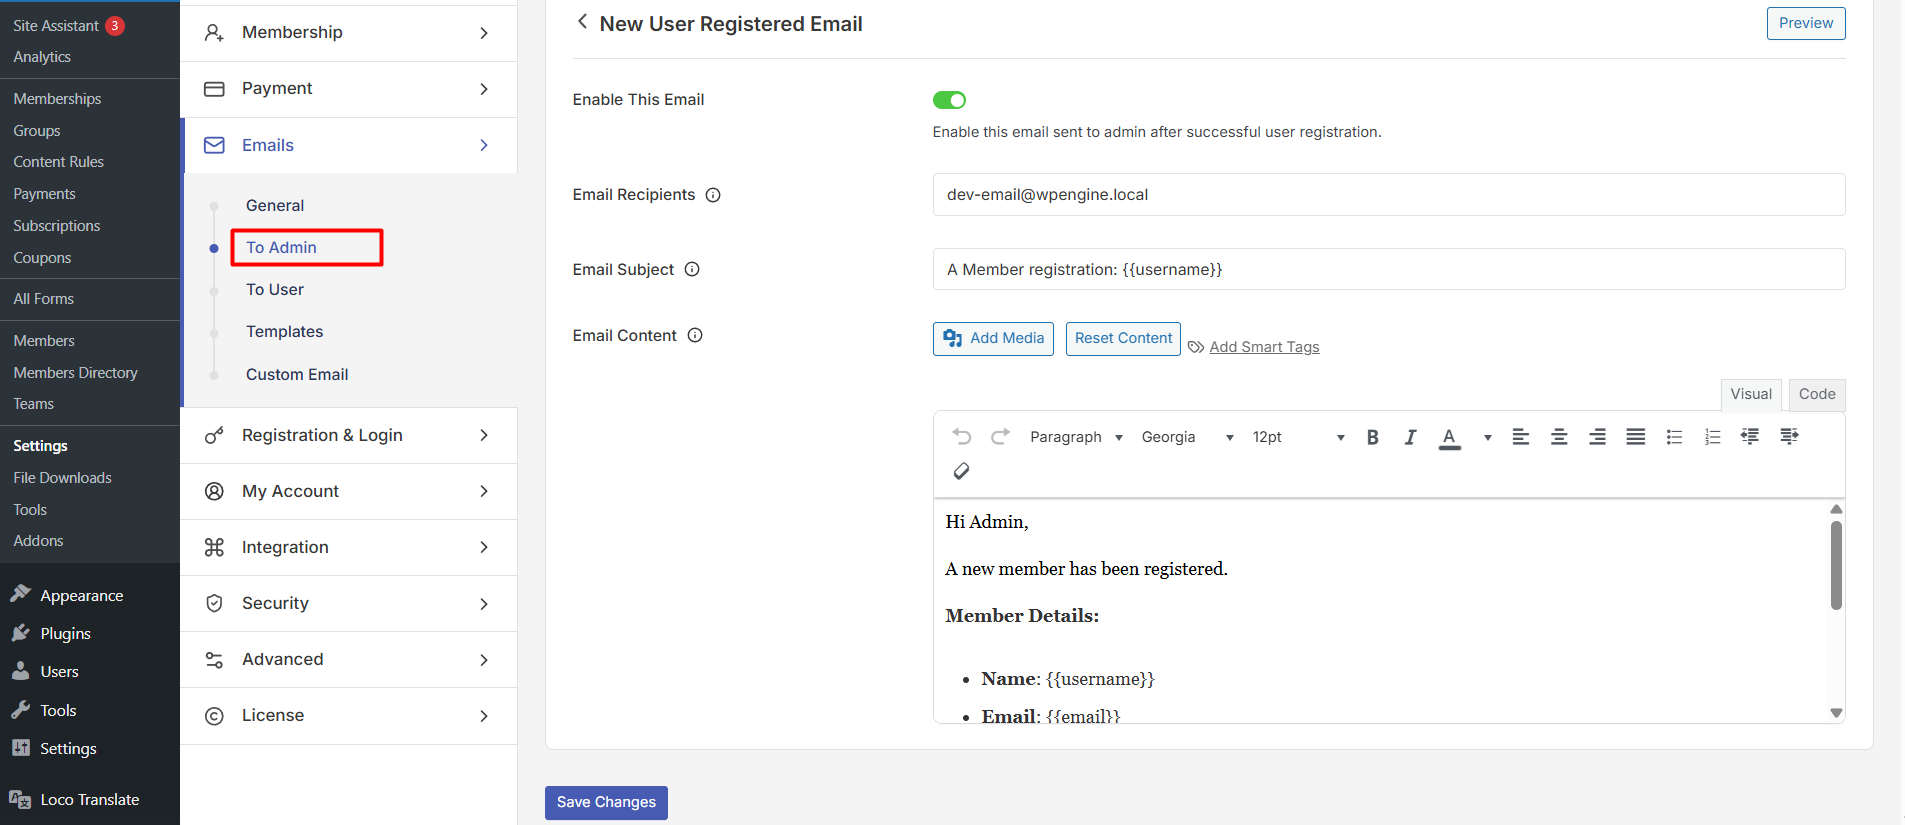
Do the same for email content for To User option as well.
Adding Dynamic Content with Smart Tags
Smart tags allow you to insert dynamic variables into your email content. Click the Add Smart Tags button to see available options like username, email address, and other user-specific information.
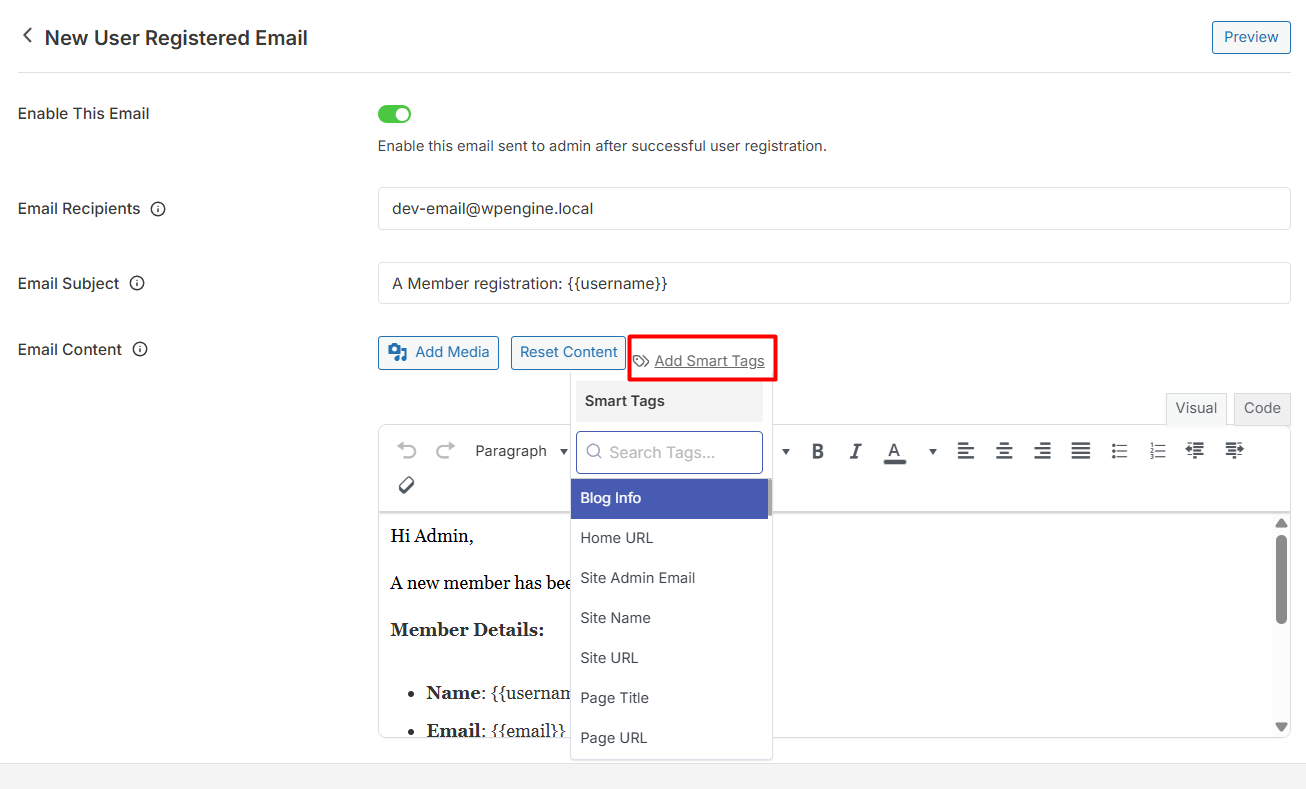
When the email is sent, these smart tags are automatically replaced with the actual user data. For example, {{username}} becomes the registered user's username.
Adding HTML to Email Content
If you'd like to add custom HTML formatting to your emails, click the Code option in the editor. This switches to HTML/code mode where you can add HTML codes for advanced formatting.
Previewing Your Email
Before saving your changes, click the Preview button to see how the email will look when sent to users. You can preview emails both from the configuration screen and from the main Emails tab.
Saving Your Changes
Once you're satisfied with your email customization, click the save button to apply your changes. Your customized email template is now ready to be sent automatically when the corresponding event occurs.
That's it! Now you know how to customize email content in User Registration & Membership. Next, would you like to learn how to create professional branded emails with custom templates? Be sure to check out our guide on using the Email Templates add-on for advanced email design options.