Payments ( PayPal ) #
This add-on helps you integrate PayPal into your forms for registration fee payments, donations, and more. Pay for registration without directly using your credit or debit card, with a connected email address.
Installation #
- First, you need to purchase the User Registration Premium to get the User Registration Pro plugin/add-on.
- After the successful purchase, you will get the plugin zip file under your WPEverest account page.
- Now, you can download the plugin zip file from there.
- Through your WordPress Dashboard, visit Plugins -> Add New -> Upload and then choose the downloaded zip file and then install and activate it.
- Now you are ready to use this add-on for your site.
Setup and Configuration #
Once, you have completed the above-mentioned task of installing and activating the plugin, now let’s move ahead on setting up this add-on for your site. We will now see the single item payment field to drag and drop.
Payment Fields #
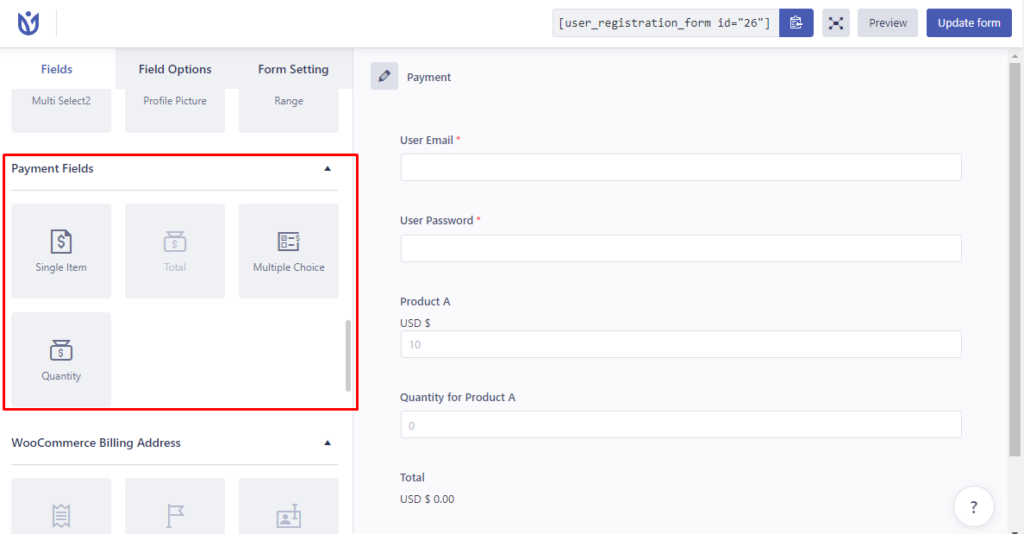
The payment field includes three form fields. Each of them is listed below:
- Single Item: This allows you to add the Name, Description, and Price for a single item on your form.
- Multiple Choice: This allows you to add multiple items and their relative prices so users can choose one or more items from it.
- Total: This shows the total price of all the items selected by the users.
- Quantity: This field can be mapped with a single item field or the multiple choice field. Using this item, users can choose the number of items they are purchasing.
Note: Although the Range Slider field doesn't come under the Payment Field category as listed on the form builder, it can also be used as a payment field if required.
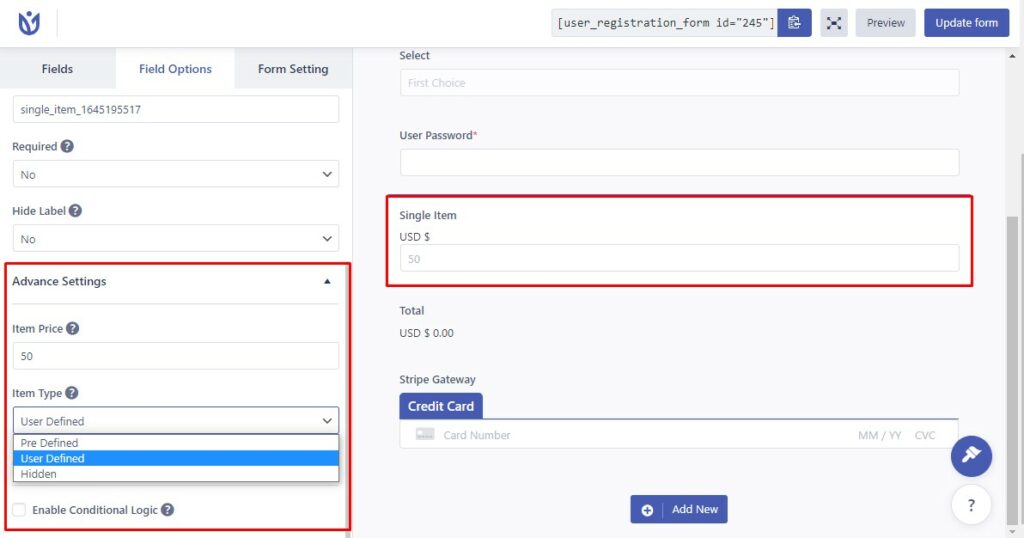
Single Item Field #
This field can be used to represent a price of a single item. There are various options available in this field. The most important options are Item Price and Item Type. Here, the Item Price is used to set the price of the item if the Item Type is set as ‘pre-defined’. If the Item Type is set as ‘user-defined’, then the users will add the price on the frontend.
You can also have multiple single items in the registration form with separate prices and item type. For e.g. in the form below, three single-item fields are chosen with separate item types.

In this case, the total of the three fields will be the product’s price.
Since the registration fee has the item type user-defined, the user can input the amount they wish. The charge here will be the Registration Fee + Other Charges + Hidden Charge.
Enable Discount Option #
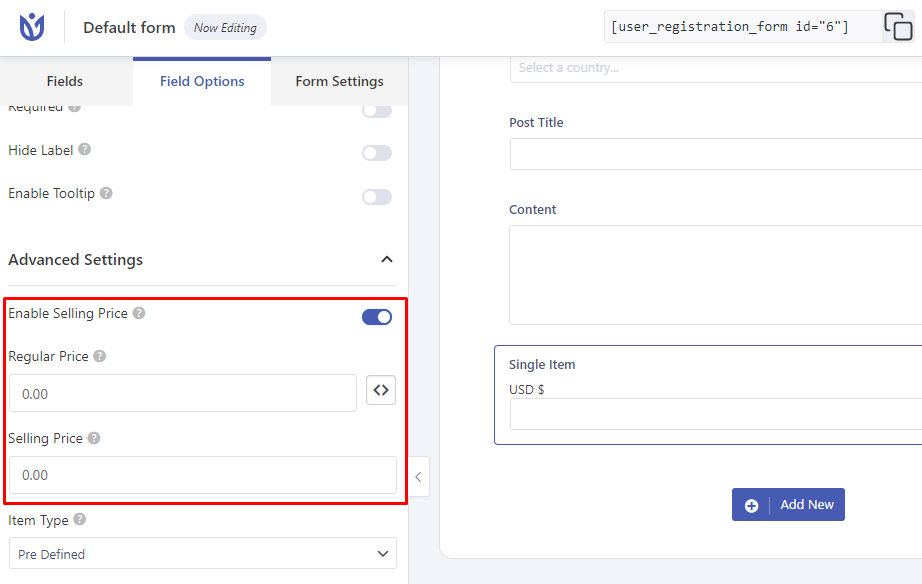
In the Advanced Settings, you can enable the Selling price option and set regular and selling prices. This lets you provide discounts to the users.
Multiple Choice #
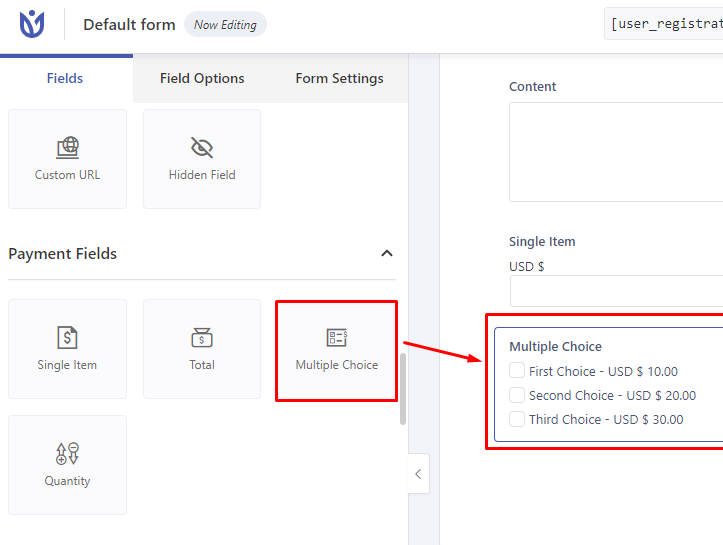
This allows you to add multiple items and their relative prices on your form so the users can choose one item from it. Also, there is the image choice option which lets you add an image for each item for a better representation of your items.
Enable Discount Option #

You can enable the Selling price in the Multiple Choice field as well. Doing this will let you add two prices for an option. The first price will be the regular price and the second one will be the selling price.
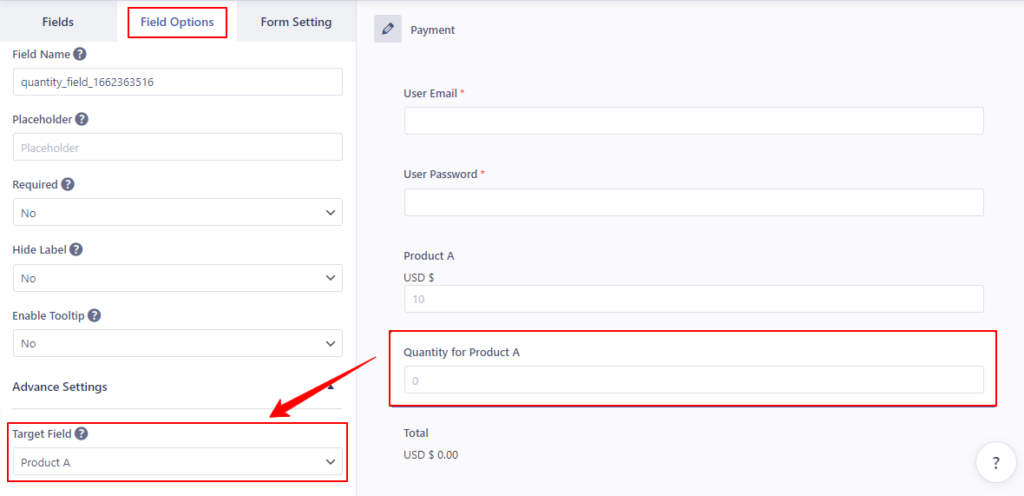
Quantity #
This field can be mapped with the single item field and multiple-choice field to allow the users to allocate the amount of the product they will purchase. In the field settings, you can select the field to map the quantity field with.
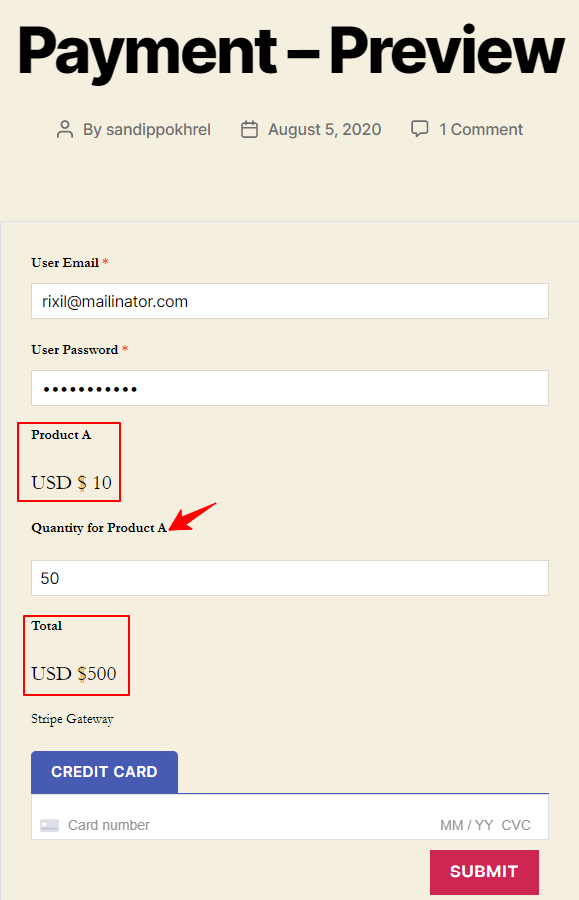
Now, when the user fills out the registration form, they will be asked to fill in the amount of the product they will purchase.
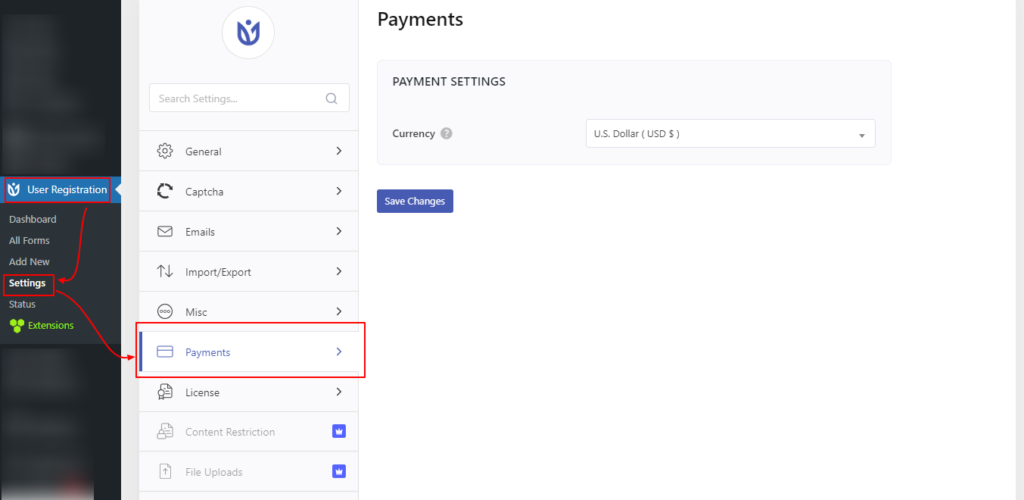
Global Settings #
In the global settings for the Payment, you will find the option to tweak the currency used. The currency of the price is by default US $. You can change the currency from User Registration->Settings->Payments. There are plenty of currencies you can select from. Just click on the Currency dropdown and select the one you need.
Individual Form Settings #
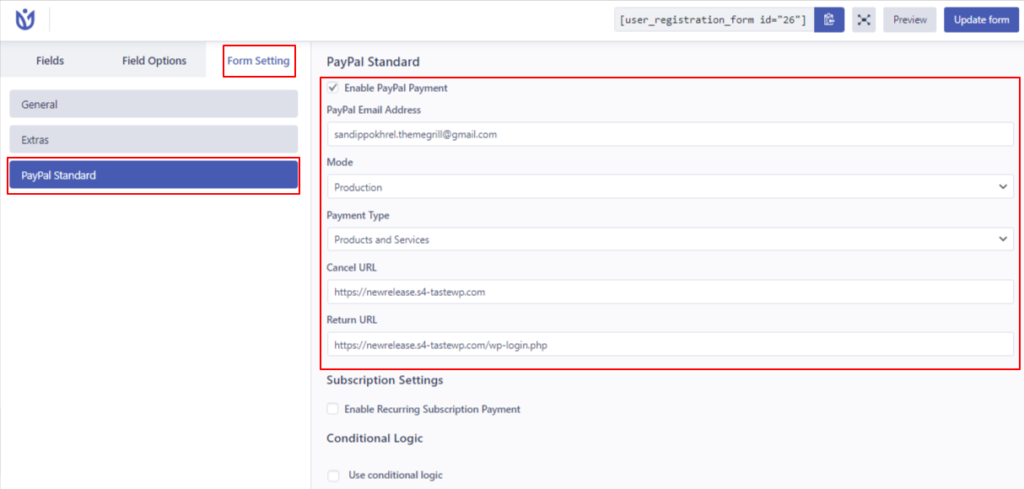
Enable PayPal Payment: To enable or disable the PayPal Payment Option.
PayPal Email Address: The email address of the payment receiver. Must be a business email.
Mode: Sandbox or production mode. Sandbox mode for testing purposes.
Payment Type: Products and Services or donations. The type of payment.
Cancel URL: Redirect the URL if the user cancels after redirecting to PayPal.
Return URL: Redirect the URL after the payment process.
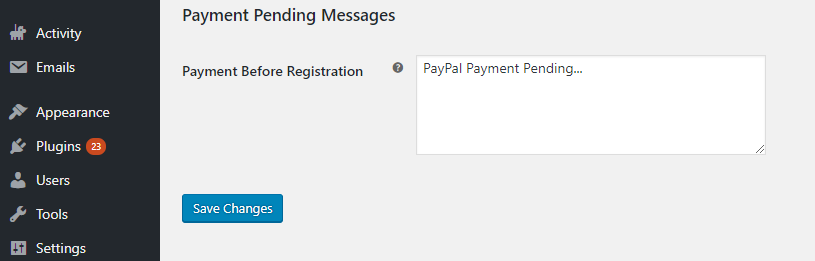
You can also, customize the frontend message after registration from User Registration->Settings->General->Frontend Messages->Payment Before Registration.
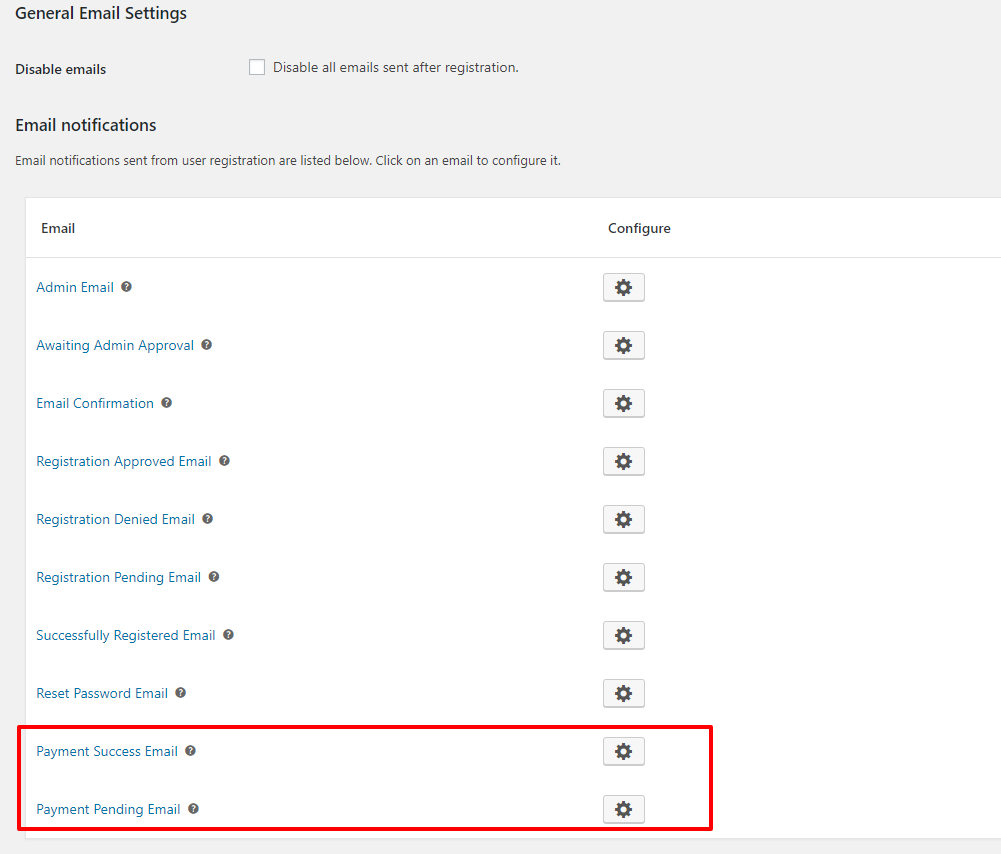
Email Settings #
If you have chosen payment before login, emails will be triggered notifying the pending and successful emails. You can customize the emails from User Registration->Settings->Emails.
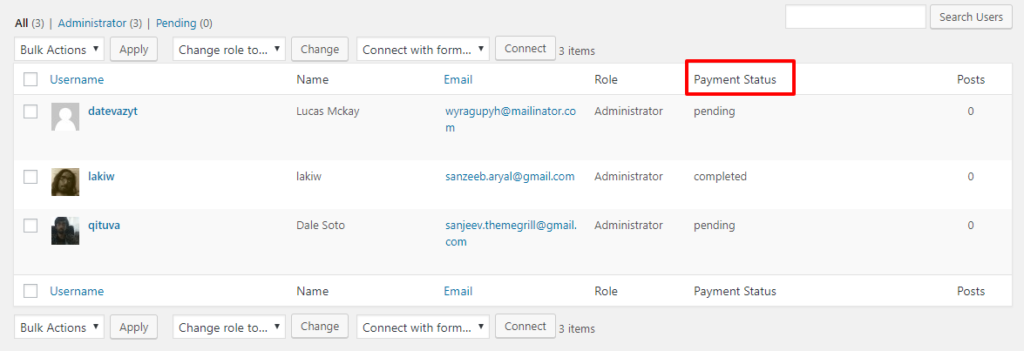
Admins can view the users’ payment status from the user’s tab.
Also, the whole payment information from their profile is right below the user’s extra information.
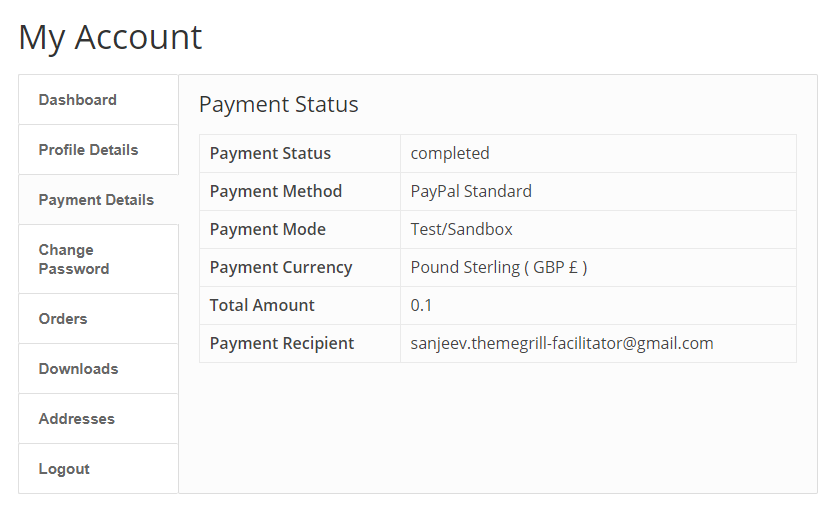
Users can also view their payment status from the payments tab in the user’s my account.
Compatibility with Conditional Logic: #
User Registration Pro allows you to enable conditional logic using the Conditional Logic addon. You can not only integrate conditional logic on each and every form field but also, on both the payment options. This lets you set up a more responsive and situationally adaptive payment for your users.
How to allow users to choose between PayPal and Stripe payments? #
If you have both the Paypal standard and the Stripe addons, you can create options for your customers to choose between the two payment methods.
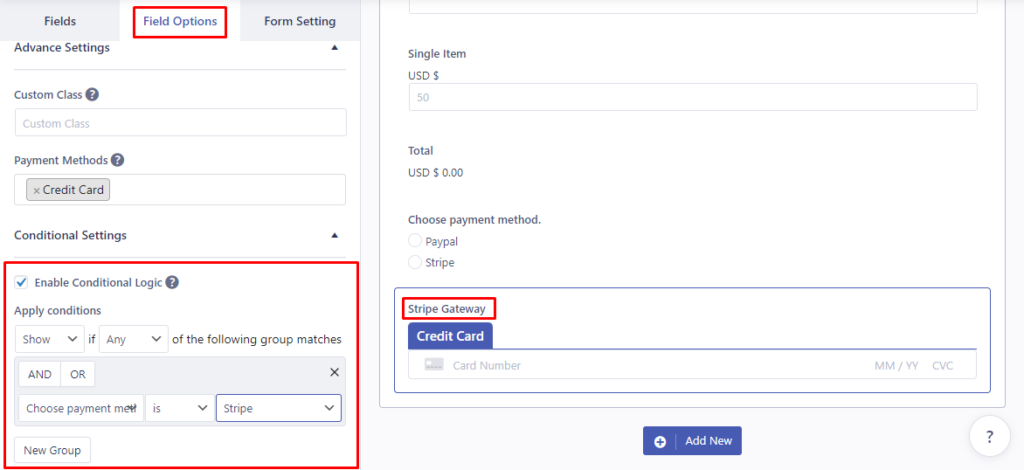
For this, insert a radio button field on your form. Then, add Paypal and Stripe as the two available options to choose from.

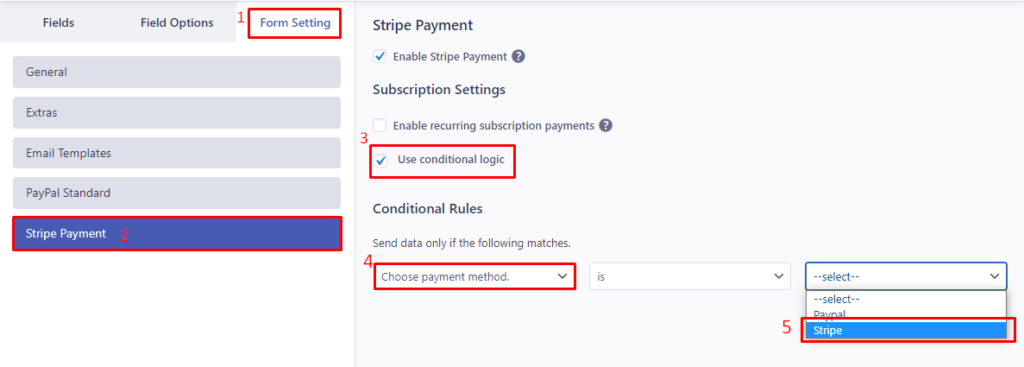
For the ‘Stripe Gateway’ field to be hidden, you will have to apply conditional logic to this field as shown in the figure below.
Now, follow the steps below.
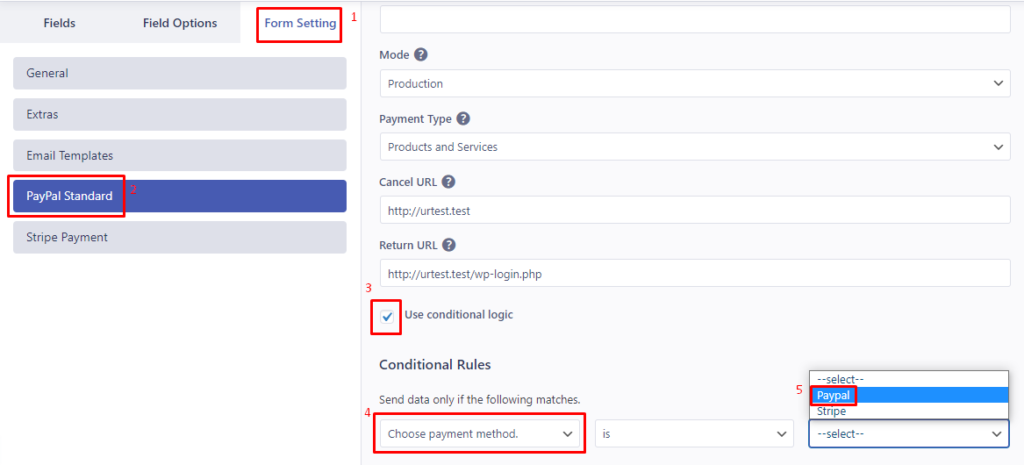
- Go to the form’s settings.
- Select PayPal Standard/Stripe Payment.
- Click on the ‘Use conditional logic’ option.
- Apply the condition as shown in the figures below. The first one is for PayPal and the second one is for Stripe payment.
PayPal Subscription for Recurring Payments #
User registration Payments also support Recurring Payments. To charge users on a periodic basis, you can enable recurring payment on the registration form, and then the users will be charged periodically. To do so, in the form builder, click on Form Settings > PayPal Standard and then tick both options, Enable PayPal Payments, and Enable Recurring Subscription Payments.
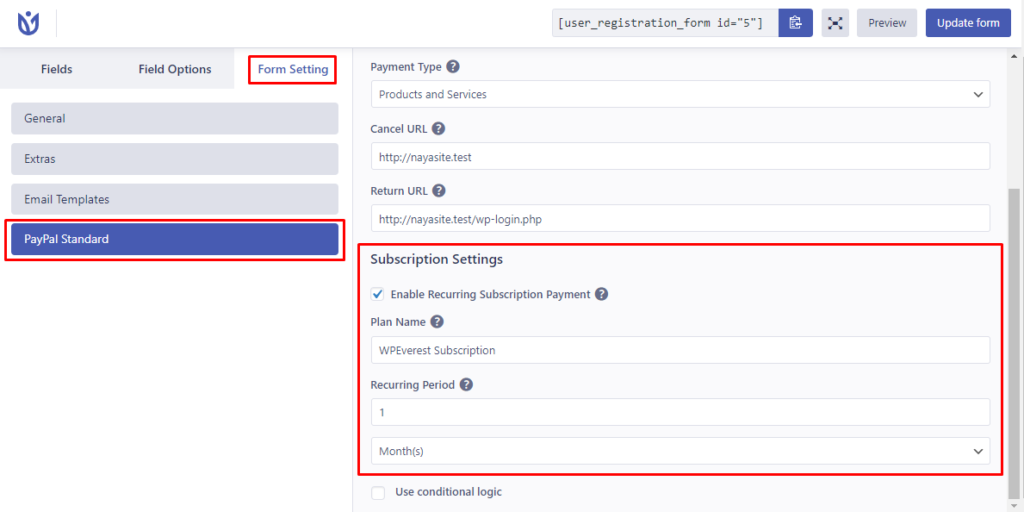
In the Plan Name, you can give a name to your recurring plan.
In the Recurring Period option, you can select the frequency when the next transaction will be done. Also, you can select intervals between the recurring payment i.e 15 days, 5 weeks, 6 months, and so on.
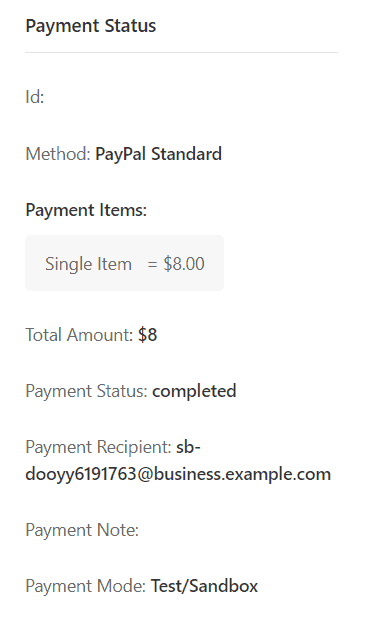
The Payment Info of any user can be seen by the admin in the Users Section of WordPress by clicking on the particular username. And similarly, users can view their Payment Info after they log into the site and visit the Account Dashboard. The Payment Details Tab will contain the Payment info.
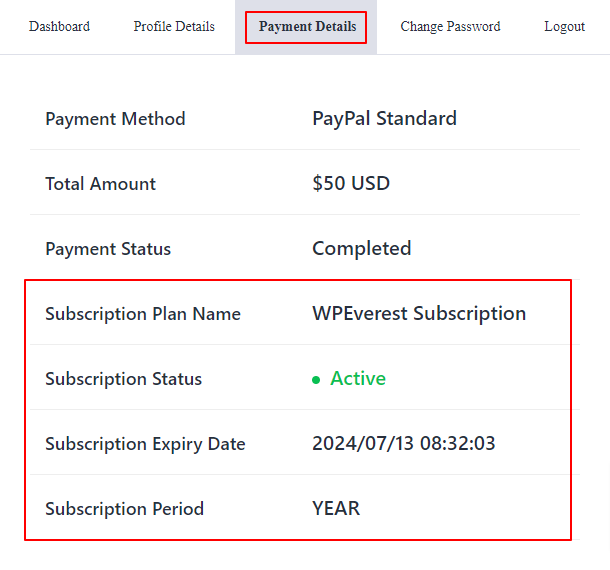
Detailed Payment Status #
As an admin, you can view the detailed payment status of the user from the following location.
User Registration > Users > View User