Form Restriction
ProControl registration form access with limits, scheduling, verification methods, and geographic restrictions using the Form Restriction addon.
Last updated on Jul 14, 2026
Would you like to control who can access your registration forms and when they're available? User Registration & Membership allows you to restrict form access using limits, scheduling, verification methods, and geographic controls. This tutorial will show you how to configure form restrictions to optimize your user registration system.
Before You Begin
Before getting started, make sure you've installed and activated the User Registration & Membership Pro plugin on your WordPress site. Then, make sure you've installed and activated the Form Restriction addon.
Requirements: Form Restriction is only available with Plus or Professional plan licenses.
Activating the Form Restriction Addon
To activate the Form Restriction addon, go to User Registration & Membership > Addons in your WordPress dashboard.
Locate the Form Restriction addon in the list and toggle the switch to Activate.
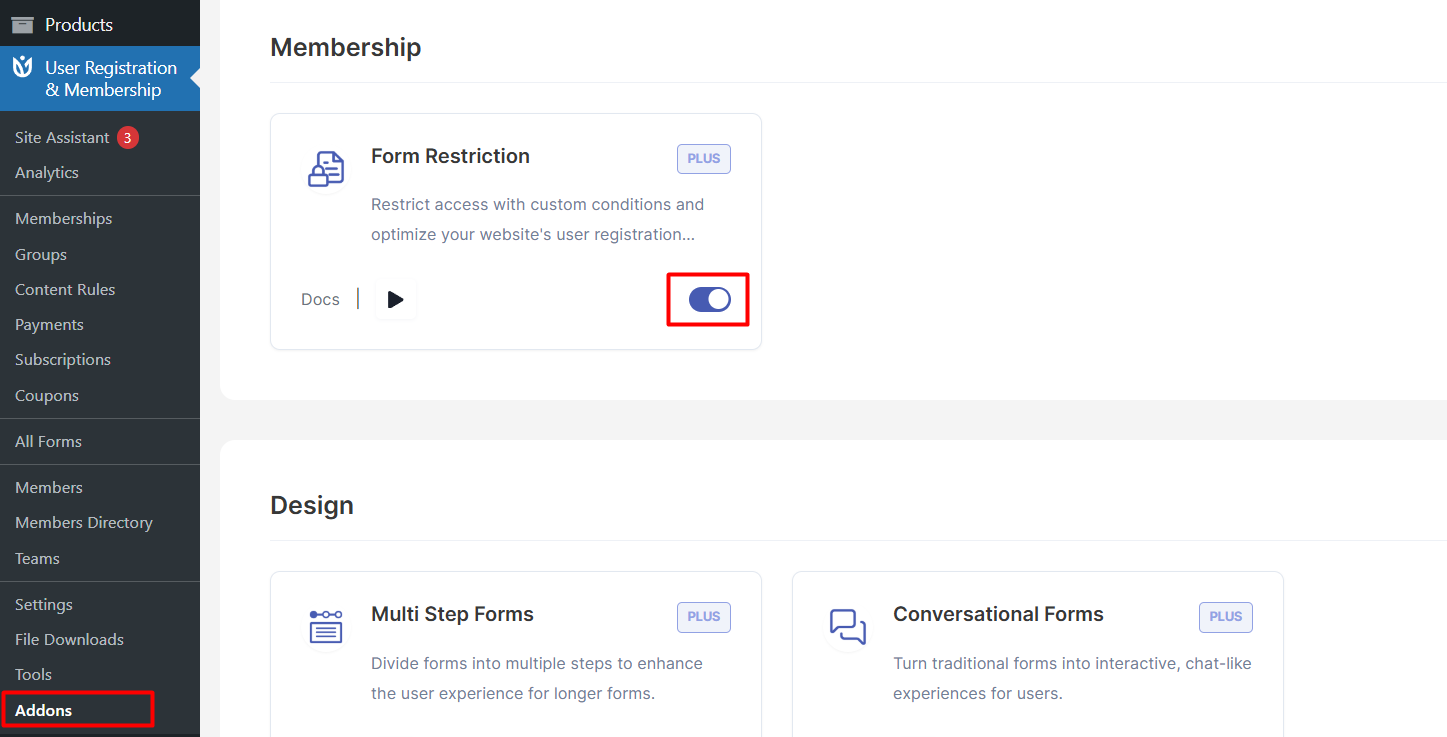
Once activated, you'll see Form Restriction settings appear in your form editor.
Accessing Form Restriction Settings
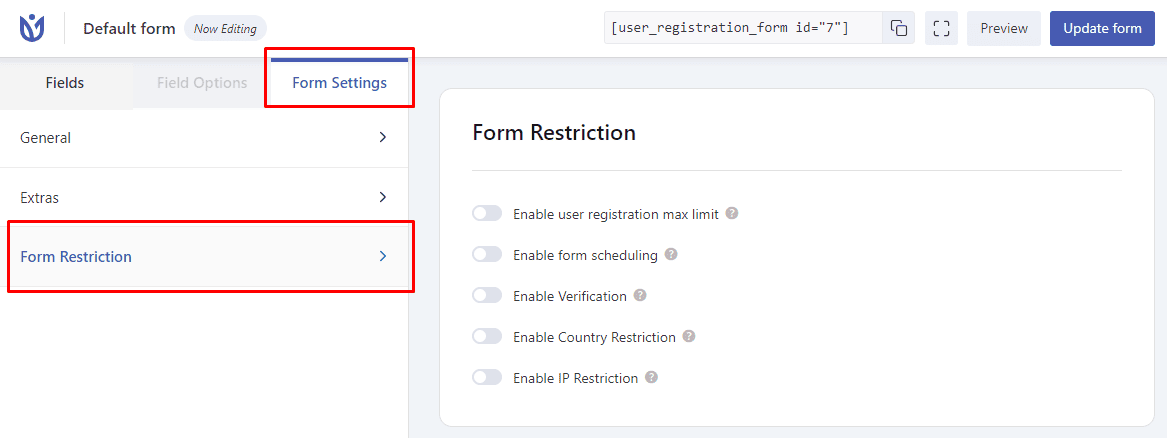
To configure form restrictions, navigate to the form editor by going to User Registration & Membership > All Forms and selecting the form you want to restrict.
Click Form Settings at the top of the form builder.
Here, you'll find the Form Restriction section where you can configure all restriction options.
Setting Registration Limits
To limit the number of registrations your form accepts, enable the User Registration Max Limit option in Form Restriction settings.
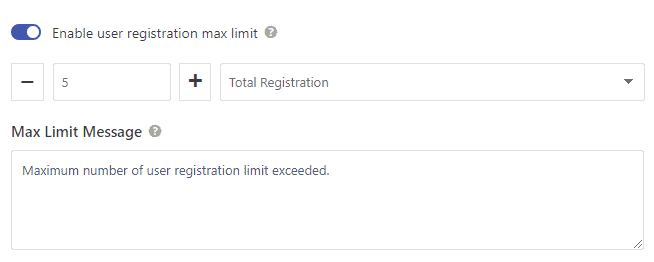
You can set a total limit for all registrations, or restrict registrations per time period by choosing day, week, month, or year.
For example, if you set a limit of 50 registrations per month, the form will stop accepting new registrations once 50 users have registered within the current month. The form will automatically reopen at the start of the next month.
Scheduling Form Availability
To control when your registration form is available, enable the Form Scheduling option.
Form scheduling allows you to set specific days, dates, and times when the form can be accessed.
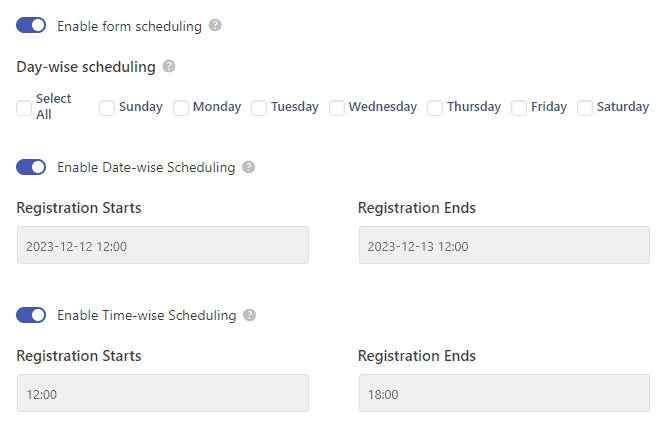
This is useful for event registrations, limited-time signups, or seasonal membership drives where you want the form available only during specific periods.
Adding Password Verification
To restrict form access with a password, select Password from the Form Verification restriction type dropdown.
Enter the password that users must provide to access the registration form.
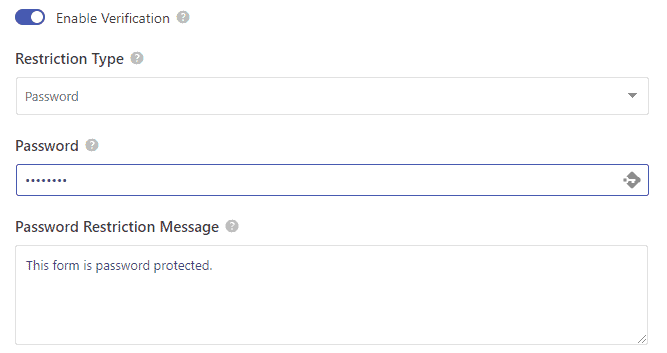
You can customize the restriction message that appears when users attempt to access the form without the correct password.
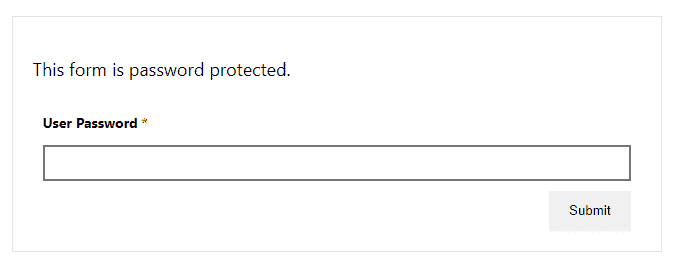
Users will need to enter this password before they can view or submit the registration form.
Configuring Age Verification
To restrict form access based on age requirements, select Age from the Form Verification restriction type dropdown.
You can set age restrictions in three ways: maximum age, minimum age, or exact age requirement.
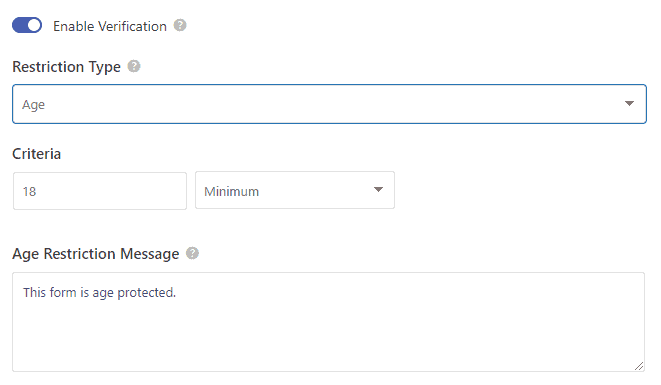
For example, if you set a minimum age of 18, only users who are 18 years or older will be able to access and submit the registration form.

Restricting by Country
To limit form access based on geographic location, use the Country Restriction option.
Select specific countries from the list to either block access to the registration form.
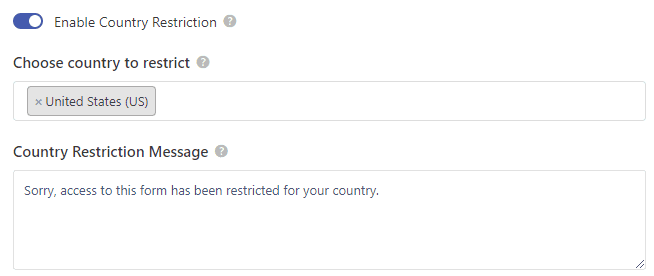
This is useful when you want to limit registrations to specific regions or comply with geographic licensing requirements.
Setting Up IP Verification
To restrict form access based on IP addresses, use the IP Verification option.
Define specific IP address ranges that are allowed or blocked from accessing the registration form.
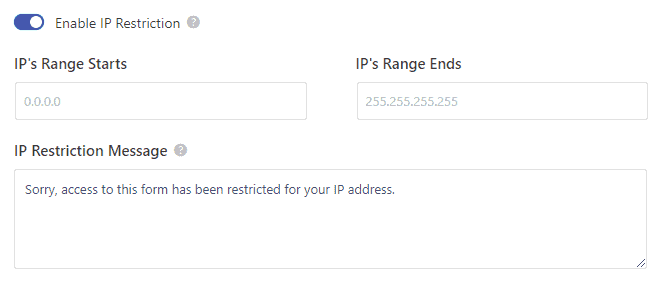
This is particularly useful for corporate or institutional registrations where you want to limit access to users on specific networks.
Combining Multiple Restrictions
You can configure multiple restriction types simultaneously on the same form.
For example, you might combine a registration limit with country restrictions and password verification to create a highly controlled registration process.
All configured restrictions must be satisfied before users can access and submit the form.
Customizing Restriction Messages
For password verification and other restriction types, you can customize the message that appears to users when they don't meet the access requirements.
Clear, helpful restriction messages improve the user experience by explaining why access is denied and what users need to do to gain access.
Be sure to save your form settings after configuring all restriction options.
That's it!
Now you know how to restrict access to your registration forms using limits, scheduling, verification methods, and geographic controls. Next, would you like to learn how to protect your forms from spam? Be sure to check out our guide on spam protection features for all the details.