Table of Contents
Install ACF and Add Custom Fields #
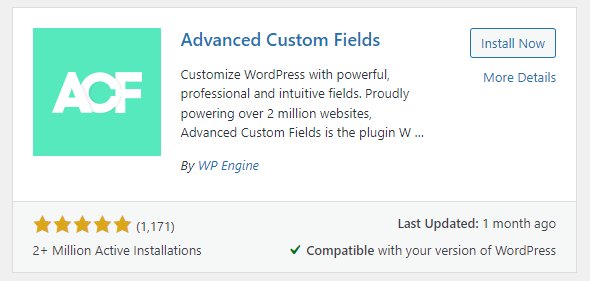
- Install and activate the Advanced Custom Fields plugin from Plugins > Add New.

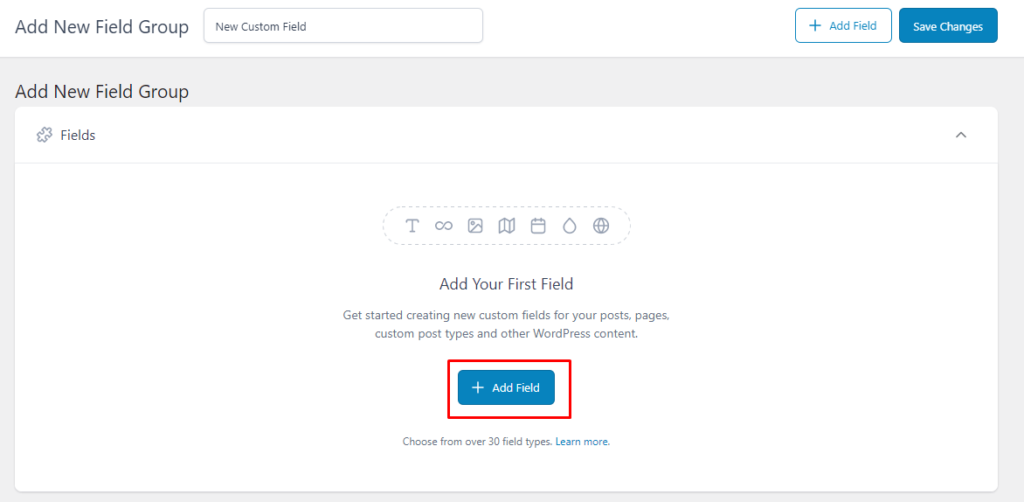
- After the installation is completed, go to ACF > Field Groups.

- At the top, add the group name as you desire and click Add Field.

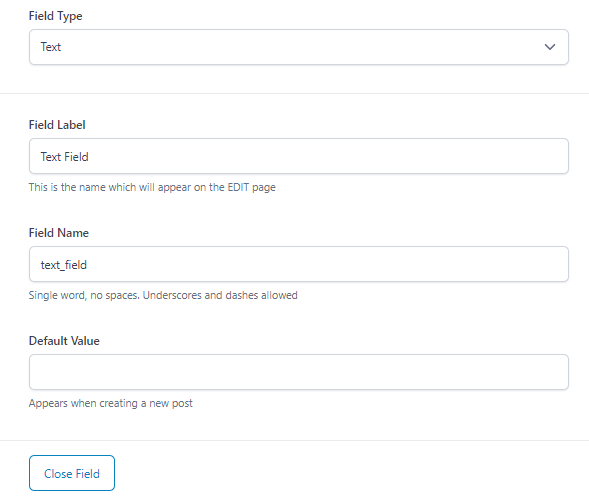
You will now see a dropdown menu to fill up the necessary field details. The following two details are necessary.
- Field Label – Give your new field a name.
- Field Type – We’re going to use a simple text field, so we left this set to Text.
The Field Name will automatically be assigned to the field.

- Scroll down to Settings > Location Rules and set where do you want to show the form field you created.

- Click on Save Changes.
Mapping Custom Fields with User Registration Form #
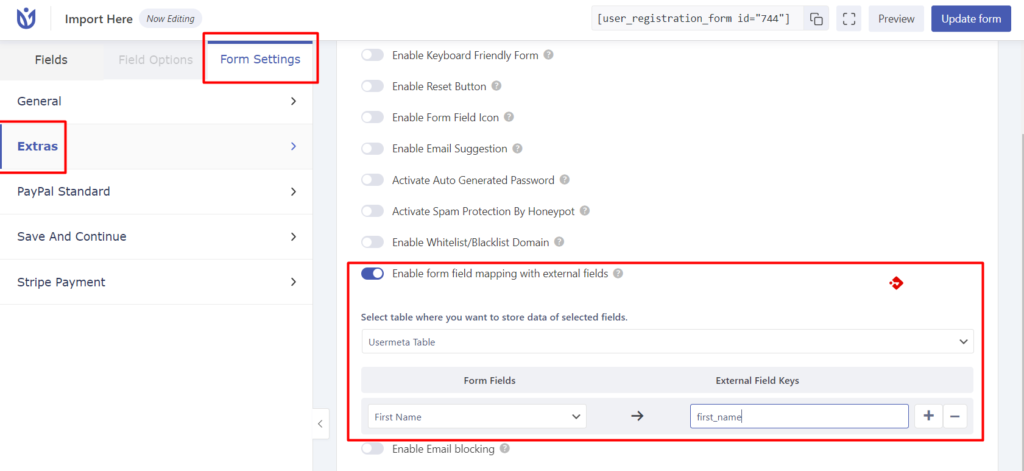
Once you have created the required custom fields, go to User Registration > All Forms. Choose a form of your choice and go to Form Editor > Settings > Extras. Then, follow the steps below.
- Enable form field mapping with external fields.

- Select Usermeta Table.
- In the Form Fields, you will see the list of the fields created in the User Registration form. Choose the required fields. For more than one field, click on + to add.
- In the External Field keys, you will need to add the Field Name for the fields you have created using ACF. Check the image below for reference.

Now, update the form and the form is ready to map its data with the ACF form fields. Whenever a user registers, you can find the custom fields created with the ACF have same value as the fields you have mapped from the User Registration forms.


