
This add-on allows our admins to write personal notes for specific sets of users, either all users, specific roles, or specific users, which will appear on their account profiles. These notes can include personalized messages, important updates, important files, or any other information that the admin wants to communicate directly to the user. Also, the users can write a reply on the notes as well. We hope that this feature will improve communication and make it easier for users to stay informed about their accounts and any related matters.
Installation #
- Firstly, you need to purchase the User Registration Premium Plan.
- After the successful purchase, you will get the plugin zip file under your WPEverest account page.
- Now, you can download the User Registration Pro plugin and Private Notes add-on from there.
- Through your WordPress Dashboard, visit Plugins -> Add New -> Upload and then choose the downloaded zip file and then install and activate it.
- Now you are ready to use this add-on for your site.
Alternative Method:
- Once you have entered the User Registration Pro license on your site, go to User Registration > Extensions.
- Search for the ‘Private Notes‘ add-on.
- Click on ‘Install‘.
- Once the installation is finished, click on ‘Activate‘. The add-on will be activated.
Setup and Configuration #
Create Note #
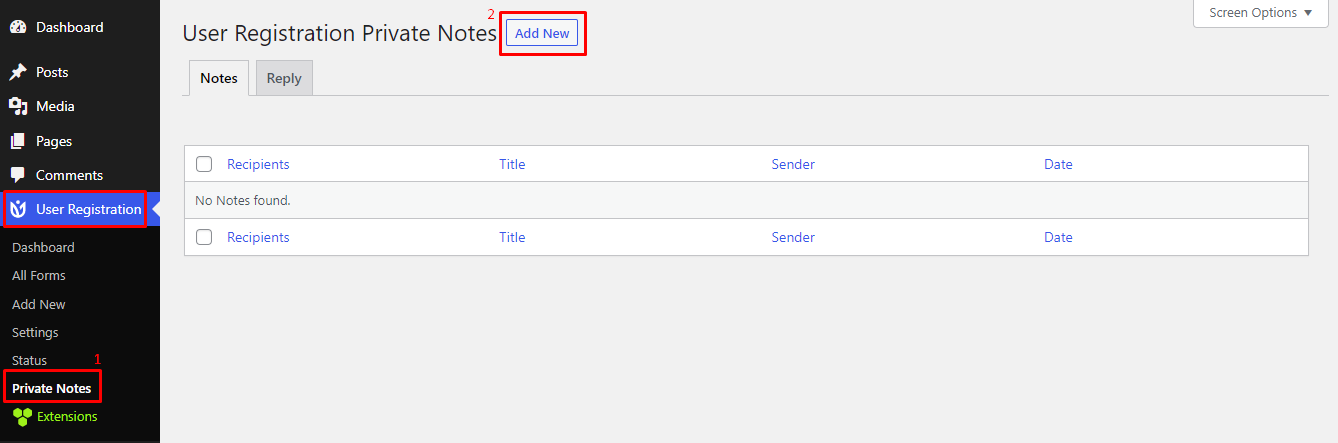
After the successful installation of the Private Notes add-on, go to User Registration > Private Notes. To create a new note, click on ‘Add New’.
Now, you will be shown with the note builder window.

- Select Target Audience: Here, you can select the targeted audiences for adding the private note.
- All Users: The created note will be shown on the My Account page of all the users.
- Roles: You can select specific roles and only the users with these roles will be able to see the note.
- Specific Users: Select specific users from the list of all the available users.
- Title: Write the title of the note.
- Enable Reply: Check this option to enable users to reply to the note.
- Note: Write the content of the note here.
- File Upload: If you want to provide any files to the users attached to the note, you can upload them here.
Now, click on ‘Add Note’ on the bottom of the screen and the note will be saved.
View Note #
Once the note is created, the users can view this note from their account page > Private Notes.
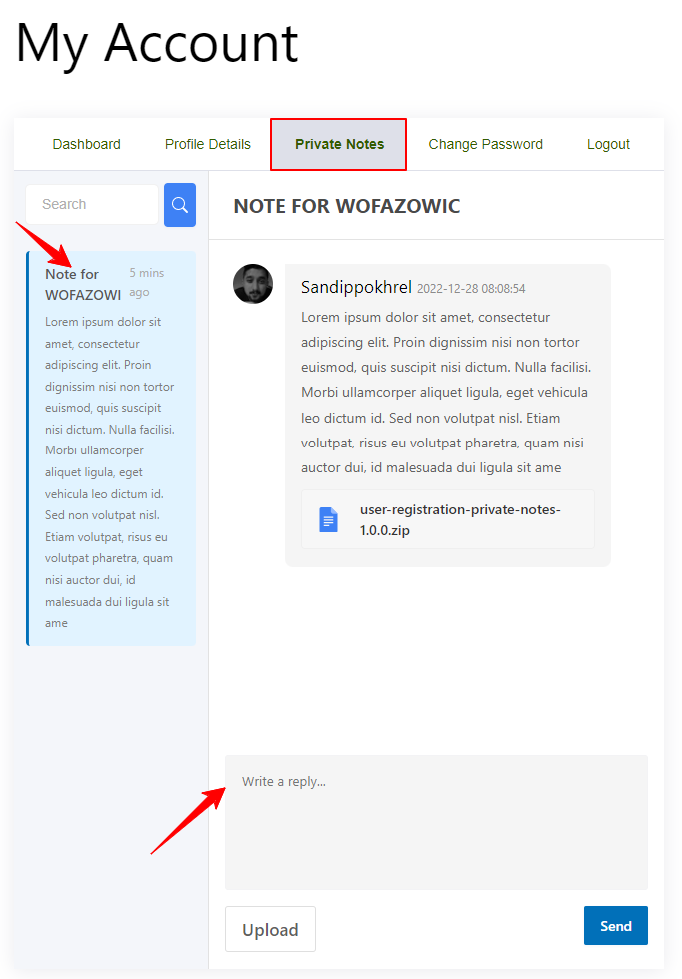
Click on any one of available notes from the left side to view the specific note. You can also write a reply on this note if it is enabled by the admin. After writing the reply, click on ‘Send’ and the reply will be posted.

Reply Archive #
All the replies can be viewed from User Registration > Private Notes > Reply.
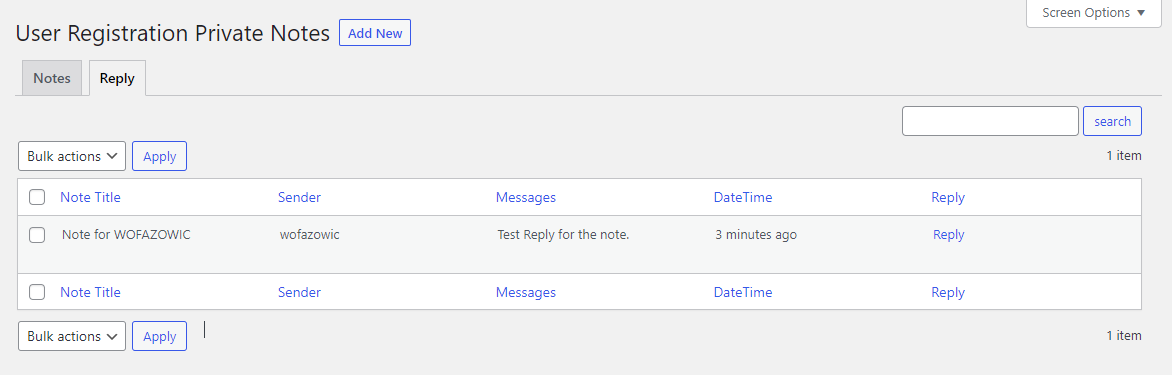
Admin can also reply to the user’s reply by clicking on the ‘Reply’ option from the Reply Archive.
The users and admin will be notified via their email whenever a new note or reply is added.


