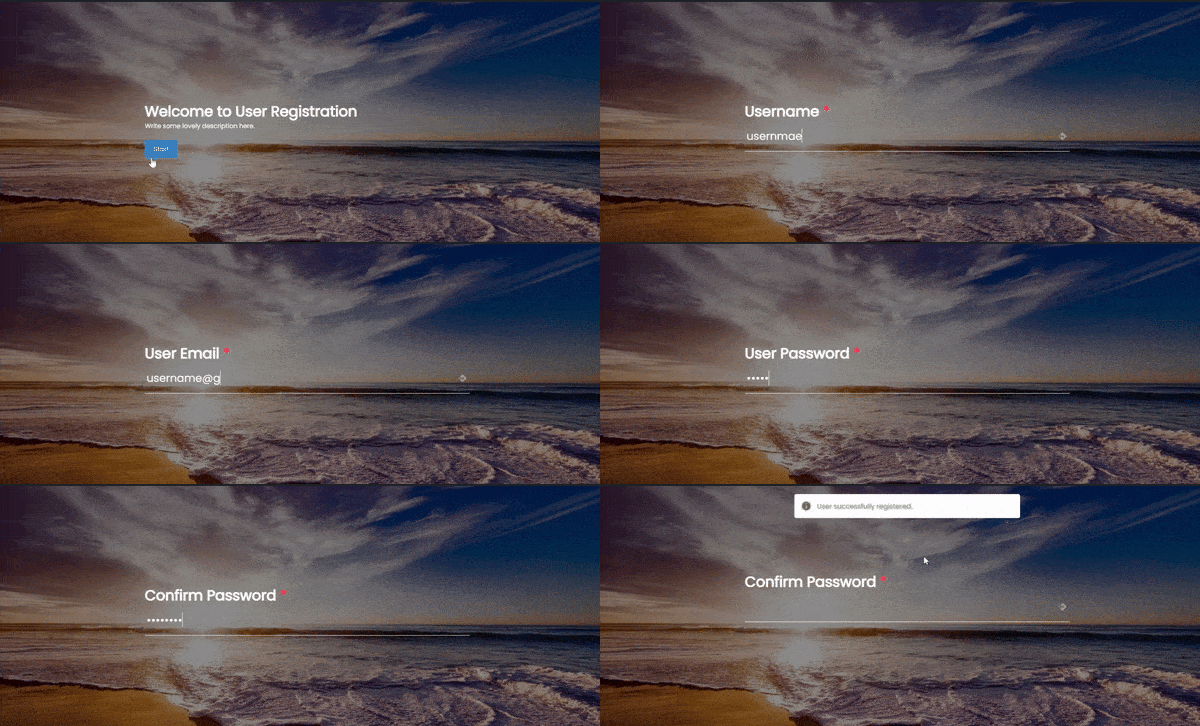
Are you fed up with traditional forms that bombard you with all the questions at once? Introducing a fresh and efficient way of displaying forms – the one-question-at-a-time approach. Experience a more human and user-friendly form-filling process with the User Registration-Conversation Forms add-on. Design your own distraction-free full-page conversational form layout quickly and effortlessly.
Installation #
- First, purchase the User Registration Premium Plan containing the Conversational Forms Add-on.
- After the successful purchase, you will get the plugin zip file under your WPEverest account page.
- Now, you can download the plugin zip file from there.
- Through your WordPress Dashboard, visit Plugins -> Add New -> Upload and then choose the downloaded zip file, and then install and activate it.
- Now you are ready to use this add-on for your site.
Alternative Method:
- Once you have entered the Everest Forms Pro license on your site, go to User Registration > Extensions.
- Search for the ‘Conversational Forms‘ add-on.
- Click on ‘Install‘.
- Once the installation is finished, click on ‘Activate‘. The add-on will be activated.
Setup And Configuration #
Once you have installed and activated the plugin, go to User Registration > Add New to add your first conversational form.
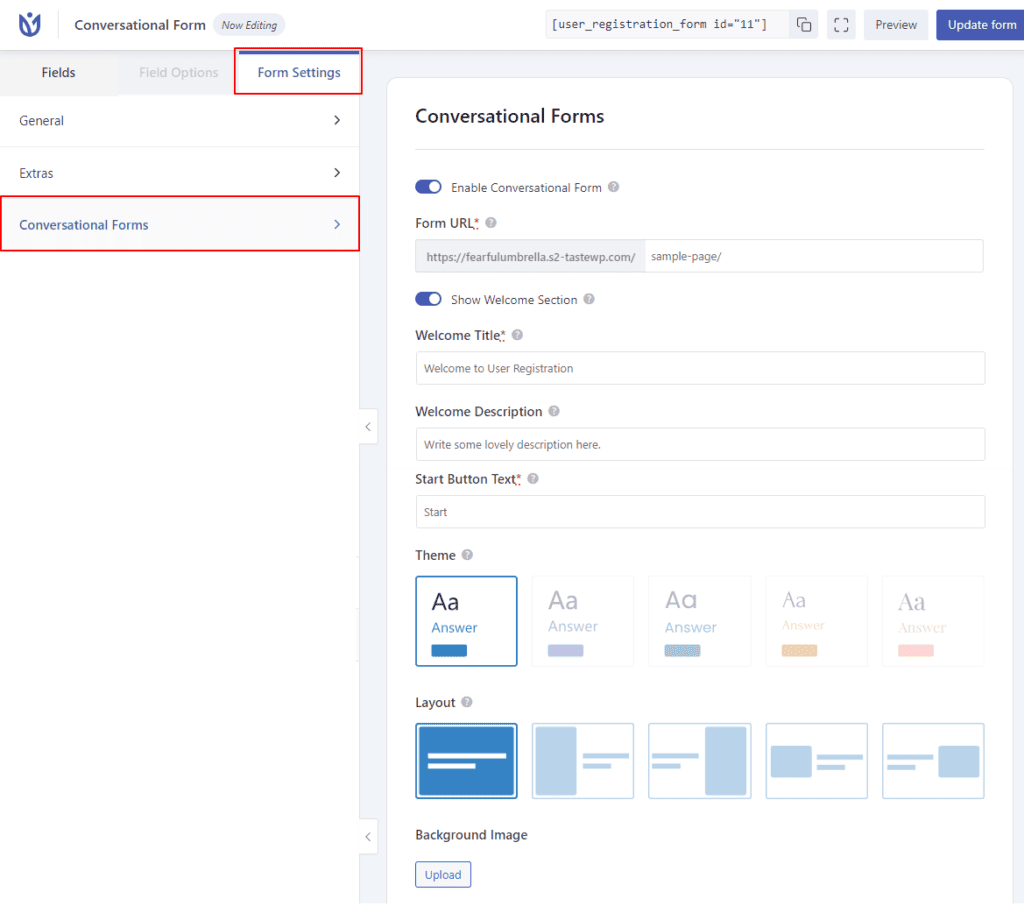
Add the form fields as per your requirements and go to Forms Settings > Conversational Forms. Click on ‘Enable Conversational Form‘.

- Form URL: Enter the page’s slug where you want to show the form. For example, sample-page/. Make sure you add the ‘/’ at last.
- Show Welcome Section: Enable this option to show the welcome section which has the following options.
- Welcome Title: Enter the title for the form to show on the Welcome Section
- Welcome Description: Enter the description for the form.
- Start Button Text: Enter the label of the start button on the Welcome Section.
- Theme: You can choose the color options from the available theme options.
- Layout: Choose how you want to show the form on the desired page.
- Background Image: You can upload any image to appear on the background of the conversational form.
Once you set all of the above options, you can just visit the URL of the selected page and you will be able to see the form.


