
Viewing Error Logs for Troubleshooting
Turn on logging, then view, search, and delete User Registration & Membership logs from Settings → Tools. Also find your system information.
Last updated on Oct 14, 2026
Would you like to find out why something on your site isn't working as expected? User Registration & Membership keeps logs of what the plugin is doing, so you can find the cause of a problem. This tutorial will show you how to turn on logging, read and delete logs, and find your system information.
Before getting started, make sure you've installed and activated the User Registration & Membership plugin on your WordPress site.
Turning On Logging
Logging is off by default. Turn it on, then repeat the problem, so the plugin records what happens.
Go to User Registration & Membership → Settings → Tools → Logs.
Switch on Enable Logs at the top right.
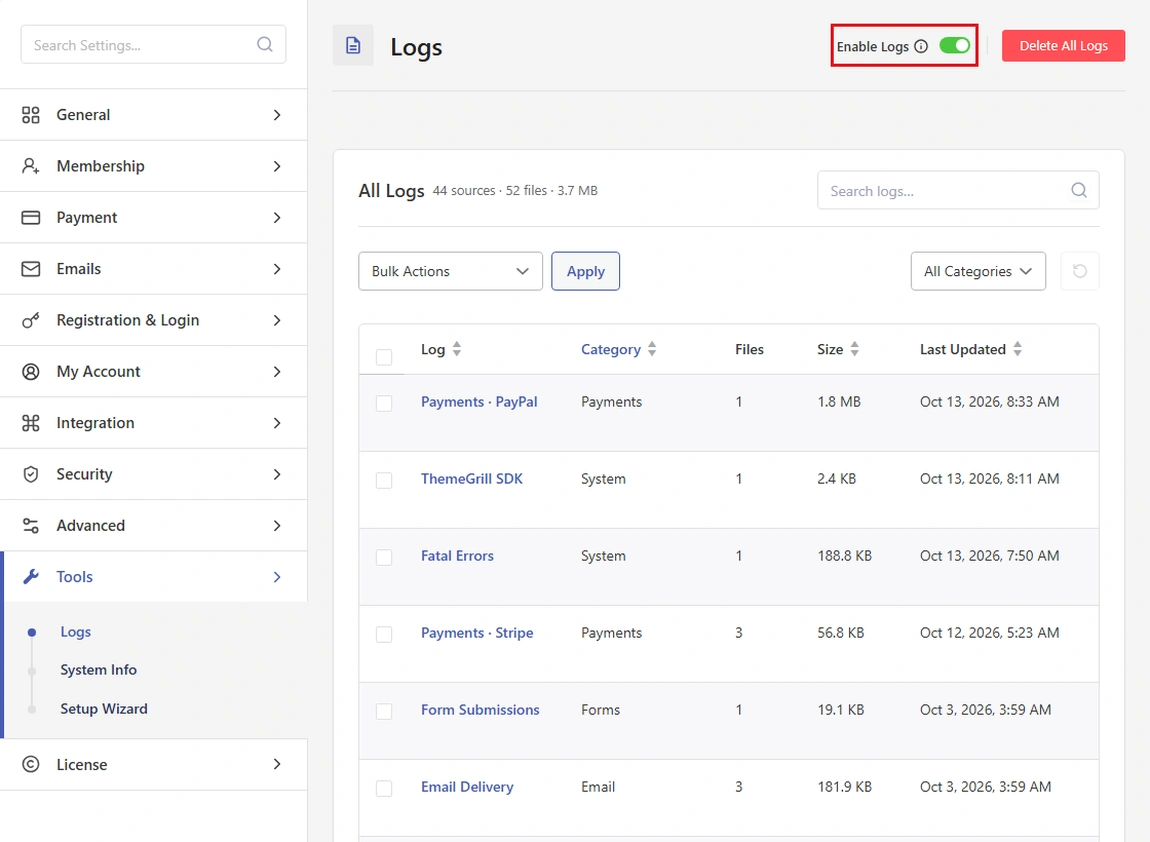
Fatal errors and email delivery events are recorded even when Enable Logs is off.
Reading a Log
Go to User Registration & Membership → Settings → Tools → Logs.
The All Logs table shows each log with its Category, number of Files, Size, and Last Updated time. The most recently updated logs are first.
Click a log's name, or hover over its row and click View.
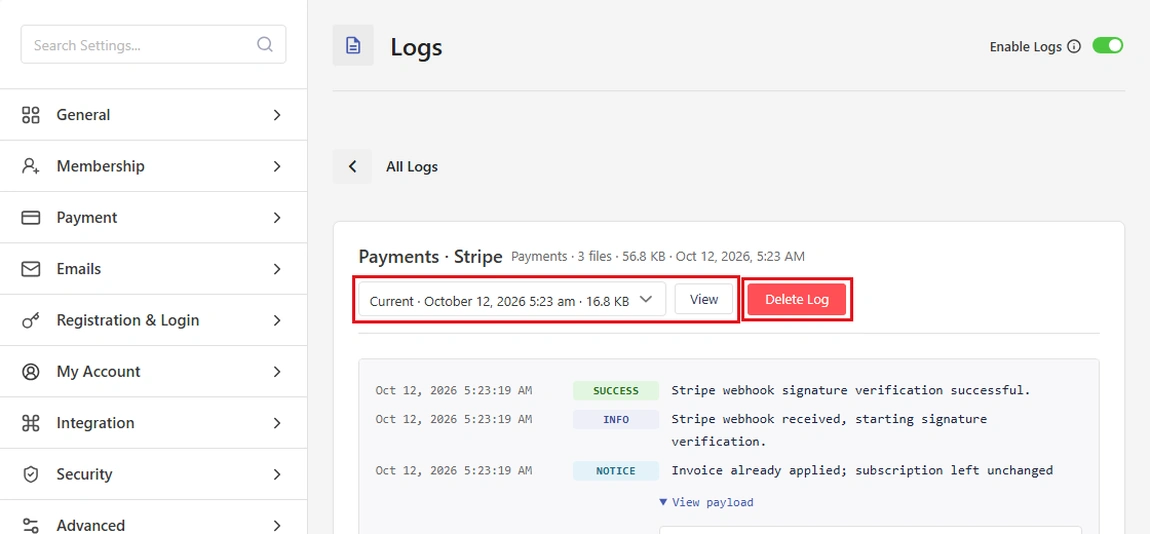
If a log has more than one file, choose the one you want from Log file, then click View. Entries inside a log are shown newest first.
To find a log faster:
Type in Search logs… and press Enter.
When your logs belong to more than one category, use the All Categories list to show only one category, such as System, Forms, Membership, Payments, Email, or Add-ons.
Click the reset icon next to the list to clear your filters.
Deleting Logs
Delete logs you no longer need so old entries don't get mixed up with new ones. If support asked for a log, open it and copy its contents into your ticket before you delete it. (There is no download button.)
One log: hover over its row and click Delete, or click Delete Log while viewing it, then confirm.
Several logs: when you have more than one log, tick their checkboxes, choose Delete from Bulk Actions, click Apply, then confirm.
All logs: when you have more than one log, click Delete All Logs at the top right of the list, then confirm. This can't be undone.
Finding Your System Information
Support often asks for your System Info. It shows your WordPress, plugin, and server details.
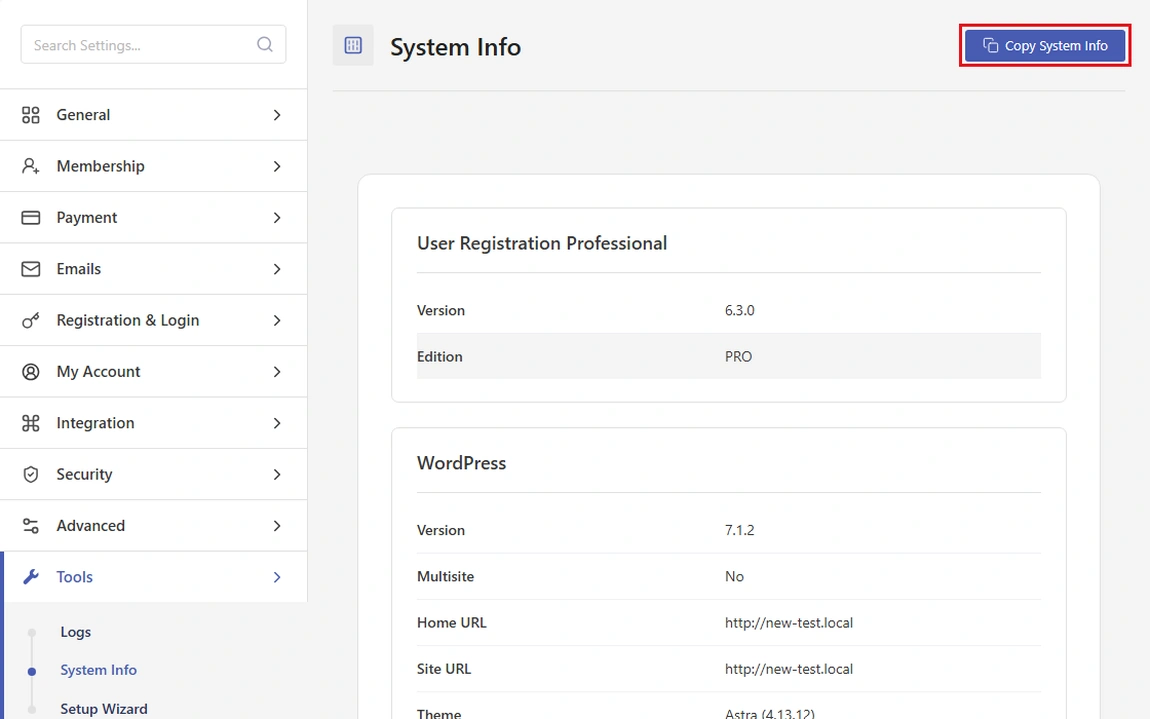
Go to User Registration & Membership → Settings → Tools → System Info.
Click Copy System Info at the top right.
Paste it into your support ticket.
For more, see Sharing System Info for Troubleshooting.
That's it! Now you know how to read the plugin's logs and find your system information. Next, would you like to learn what to do when your site shows a critical or fatal error? Be sure to check out our guide on fixing critical and fatal errors for all the details.