
Registration and Login Settings
Configure user registration and login settings, including customizable messages, access controls, and form handling options for your WordPress membership site.
Last updated on Jul 15, 2026
Would you like to customize how users register and log in to your WordPress site? User Registration & Membership allows you to control every aspect of the registration and login experience. This guide will walk you through all available settings to help you configure the perfect setup for your site.
Before Getting Started
Before configuring these settings, make sure you've installed and activated the User Registration & Membership plugin on your WordPress site.
Accessing Registration and Login Settings
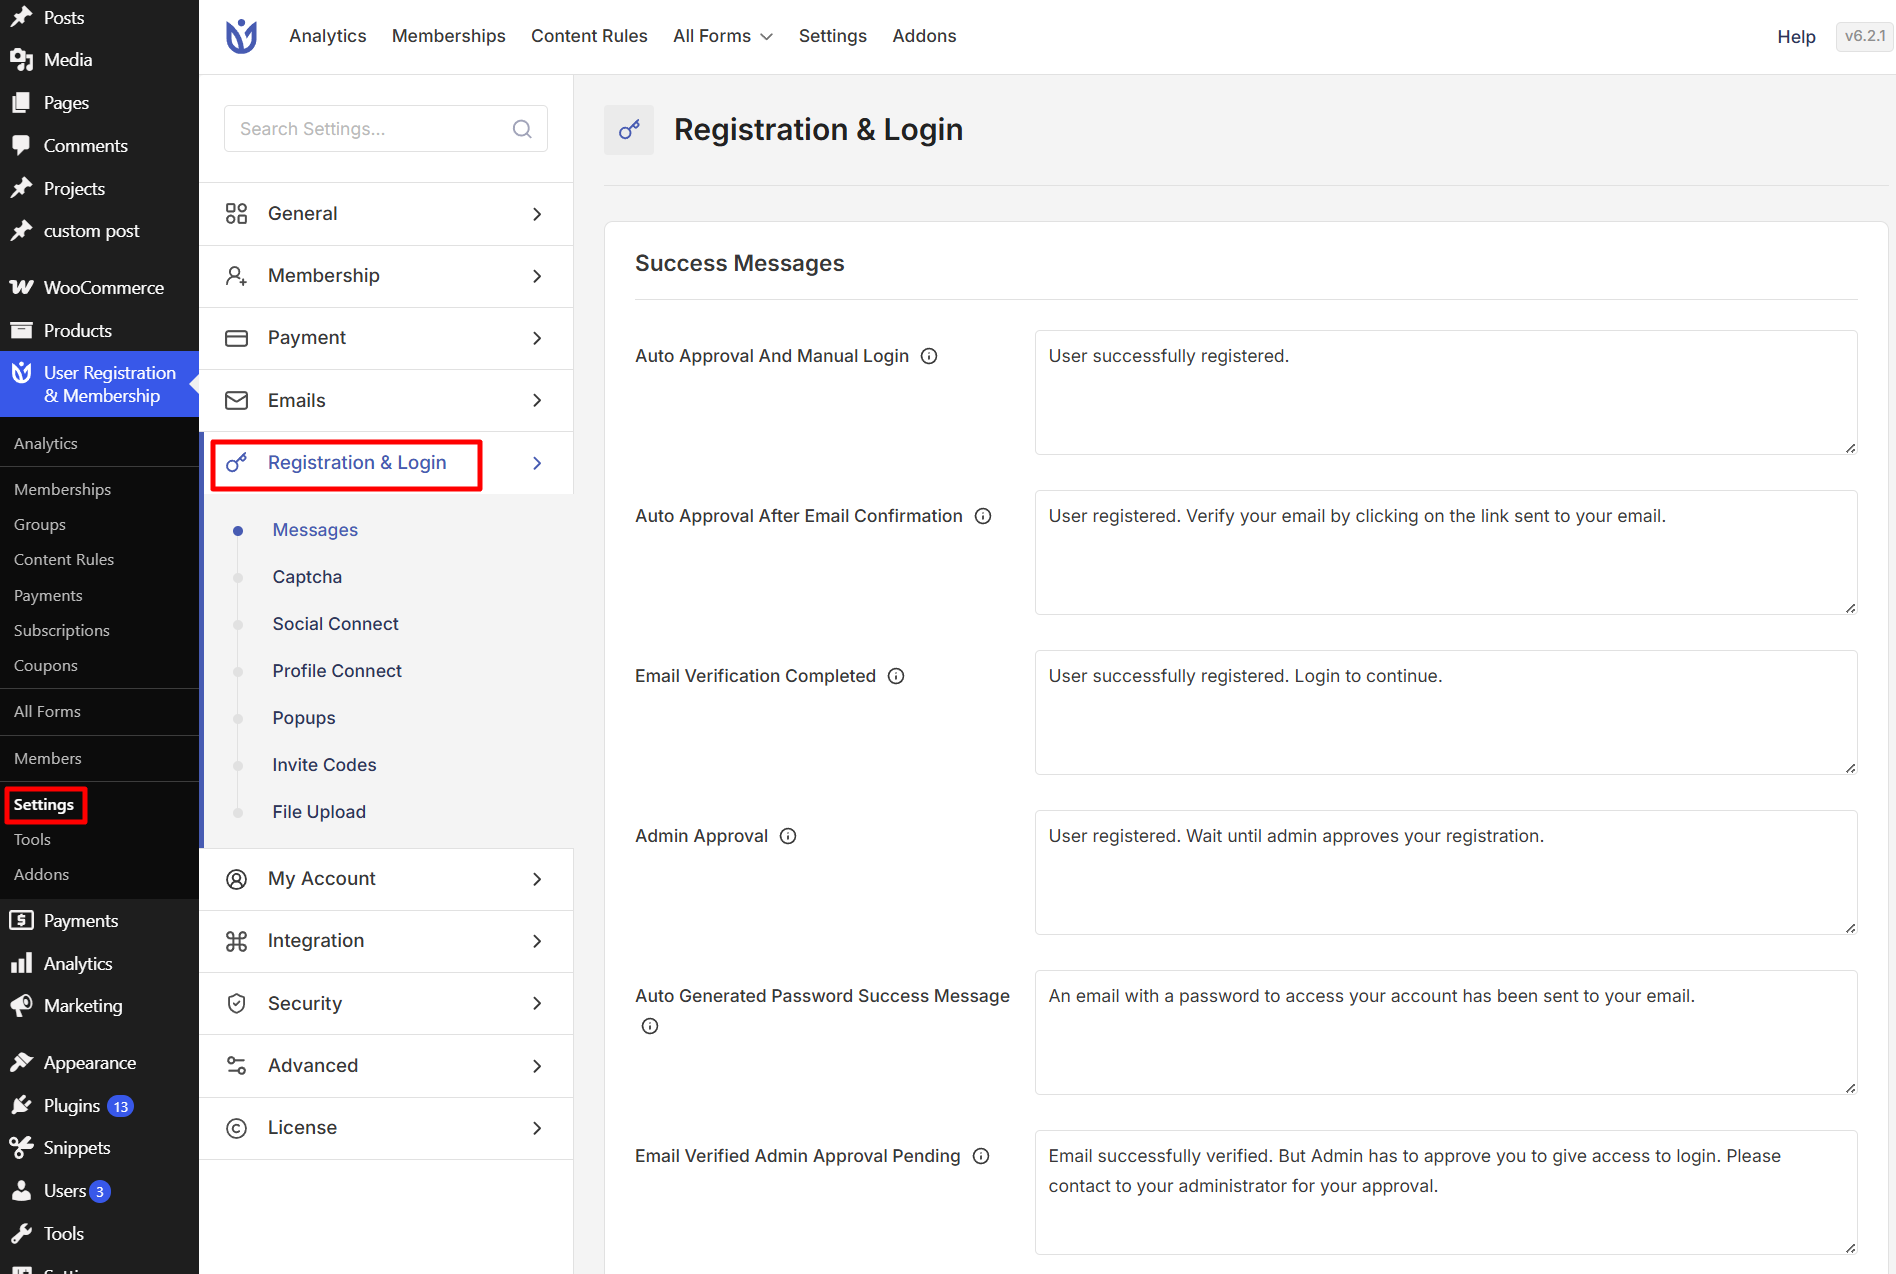
To access the Registration and Login settings, go to User Registration & Membership > Settings > Registration & Login from your WordPress dashboard. Here, you'll find several tabs that control different aspects of user registration and login.
Messages
The Messages settings in the User Registration & Membership plugin allow you to customize all system-generated messages shown to users during registration, form handling, and payment processes.
These include Success Messages, Error Messages, Advanced Fields Messages, and Payment Messages. Each section helps you control the feedback users receive, ensuring clear communication during registration, validation, and transactions, while maintaining a consistent tone aligned with your website.
You can configure these messages by navigating to: User Registration & Membership > Settings > Registration & Login >Messages.
CAPTCHA
CAPTCHA helps protect your registration and login forms from spam and automated submissions. User Registration & Membership supports Google reCAPTCHA v2, Google reCAPTCHA v3, hCaptcha, and Cloudflare Turnstile.
To set up a CAPTCHA, generate the required site and secret keys from your chosen provider, add them in User Registration & Membership → Settings → Registration & Login → Captcha, and enable CAPTCHA in the relevant form settings.
Detailed setup and configuration instructions are available in the documentation.
Social Connect
The Social Connect settings allow users to register or log in using their social media accounts instead of creating new passwords. This feature requires the Social Connect addon, available with Personal plan or higher.
Supported Social Platforms
User Registration & Membership supports social login through:
Auto-Registration via Social Login
When enabled, this option automatically creates member accounts when users sign in with their social accounts. You can enable or disable this feature based on your site's requirements.
Profile Connect
The Profile Connect addon allows you to connect existing WordPress users to User Registration & Membership forms and automatically map user data from the WordPress usermeta table or custom database tables. This helps migrate users without requiring re-registration and keeps profile information synchronized across different systems.
With Profile Connect, you can:
Connect existing users to a registration form using bulk actions.
Map external database fields to registration form fields.
Fetch user data from the WordPress us.ermeta table or custom external tables.
Automatically populate and synchronize form fields with external data sources.
Requirements: User Registration & Membership Pro and the Profile Connect addon (available in Personal plan or higher).
Detailed setup and configuration instructions are available in the
Popup
The Popup settings allow you to create login and registration forms that appear in modal windows instead of on dedicated pages.
Creating a Popup
To create a popup, navigate to User Registration and Membership > Settings > Registration & Login > Popups and click Add New. Configure the following settings:
Enable This Popup: Checkbox to enable or disable the popup
Select Popup Type: Choose between Registration or Login popup
Popup Name: Internal name for identifying the popup
Popup Header Content: Add content to the popup header using the editor
Select Form: Choose which registration form to display (registration popups only)
Popup Footer Content: Add content to the popup footer using the editor
Select Popup Size: Choose popup display size (Default, Large, or Extra Large)
Implementing Popups
After creating a popup, you can implement it in three ways:
Shortcode: Copy the generated shortcode and paste it into a page using a shortcode block
Menu: Add the popup to your site menu via Appearance > Menu
Button: Use shortcode parameters to display the popup as a button, for example: [user_registration_popup id="1" type="button" button_text="Register Me"]
Requirements: User Registration & Membership Pro (available in Personal plan or higher).
Invite Codes
The Invite Codes feature lets you make registration invite-only by requiring users to enter a special code you provide to join your site. This addon requires Plus plan or higher.
Creating Invite Codes
To create invite codes, go to User Registration & Membership > Settings > Invite Codes and click Add New. You can configure:
Code name: The actual invite code users will enter
User Limit: How many users can use this code (leave empty for unlimited)
Expiry Date: When the code expires (leave empty for no expiry)
Select Form: Which registration form this code applies to
User Role: Assign a specific role to users registering with this code
Generating Random Codes
You can bulk create invite codes using the Generate Random Codes section. Specify the number of codes to generate and add an optional prefix to identify them.
Managing Invite Codes
View all generated codes in the Raw List section. You can also import and export invite codes in both JSON and CSV formats for easy management.
Requirements: User Registration & Membership Pro and the Invite Code addon (available in Plus plan or higher).
Detailed setup and configuration instructions are available in the documentation
File Upload
The File Upload settings allow users to upload profile photos, documents, or other files during registration that you can review later.
Configuring File Upload Settings
To configure file upload settings, navigate to Settings > Registration Login > File Upload. Here you can:
Set maximum file size for uploads
Define valid file types including images, videos, and documents (CSV, PPT, XLS, XLSX, M4V, MP3, TXT)
Configure individual file upload field settings in the form builder
Files are stored in the user_registration_uploads/file-uploads folder on your server.
Supported File Types
User Registration & Membership supports 12 different file types including PDF, DOC, DOCX, JPEG, GIF, PNG, MP3, MP4, PPT, XLS, XLSX, and CSV.
Requirements: User Registration & Membership Pro and the File addon (available in Personal plan or higher).
Detailed setup and configuration instructions are available in the documentation.
That's it!
Now you know how to configure all Registration and Login settings in User Registration & Membership. Next, would you like to learn how to customize email notifications or set up membership plans? Be sure to check out our guide on email settings for all the details.