
Invite Codes
ProControl WordPress registration access by requiring special invite codes during signup for exclusive communities and managed membership sites.
Last updated on Jul 14, 2026
The Invite Codes add-on allows you to restrict registration on your WordPress site by requiring users to enter a special code during signup. This is perfect for creating exclusive communities, managing beta access, or controlling who can join your membership site.
Prerequisites
User Registration & Membership Pro plugin installed and activated
Plus plan or higher license (Professional or Plus Plan)
At least one registration form created
Activating the Invite Codes Add-on
Before you can use invite codes, you need to activate the add-on:
Navigate to User Registration & Membership → Addons in your WordPress dashboard
Locate the Invite Codes add-on in the list
Toggle the switch to Activate the add-on
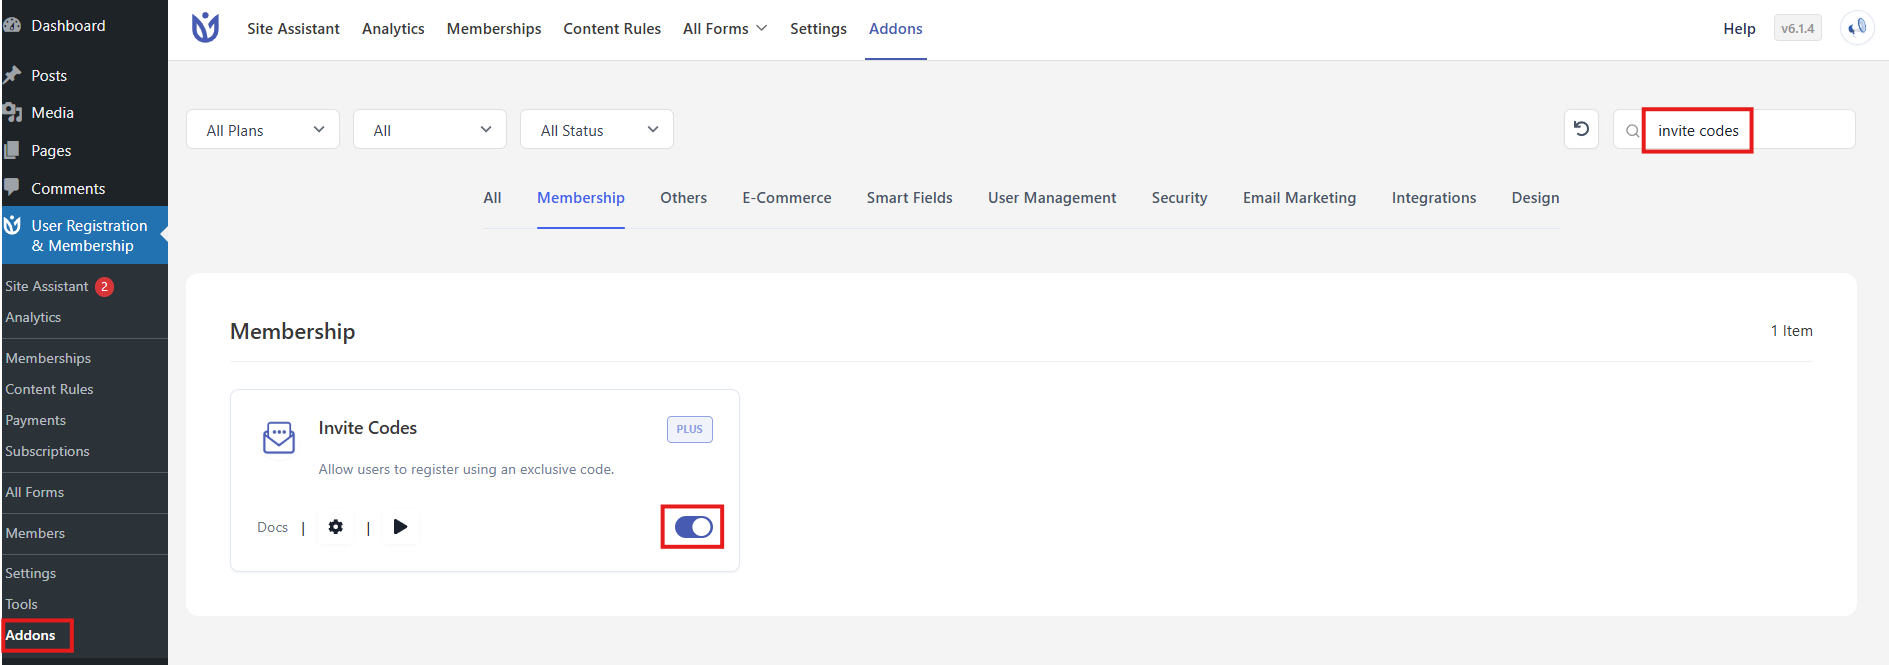
Activating the Invite Codes add-on
Creating Your First Invite Code
Once activated, you can create invite codes that users must enter during registration.
Step 1: Access Invite Code Settings
Go to User Registration & Membership → Settings
Click on the Invite Codes tab
Click the Add New button
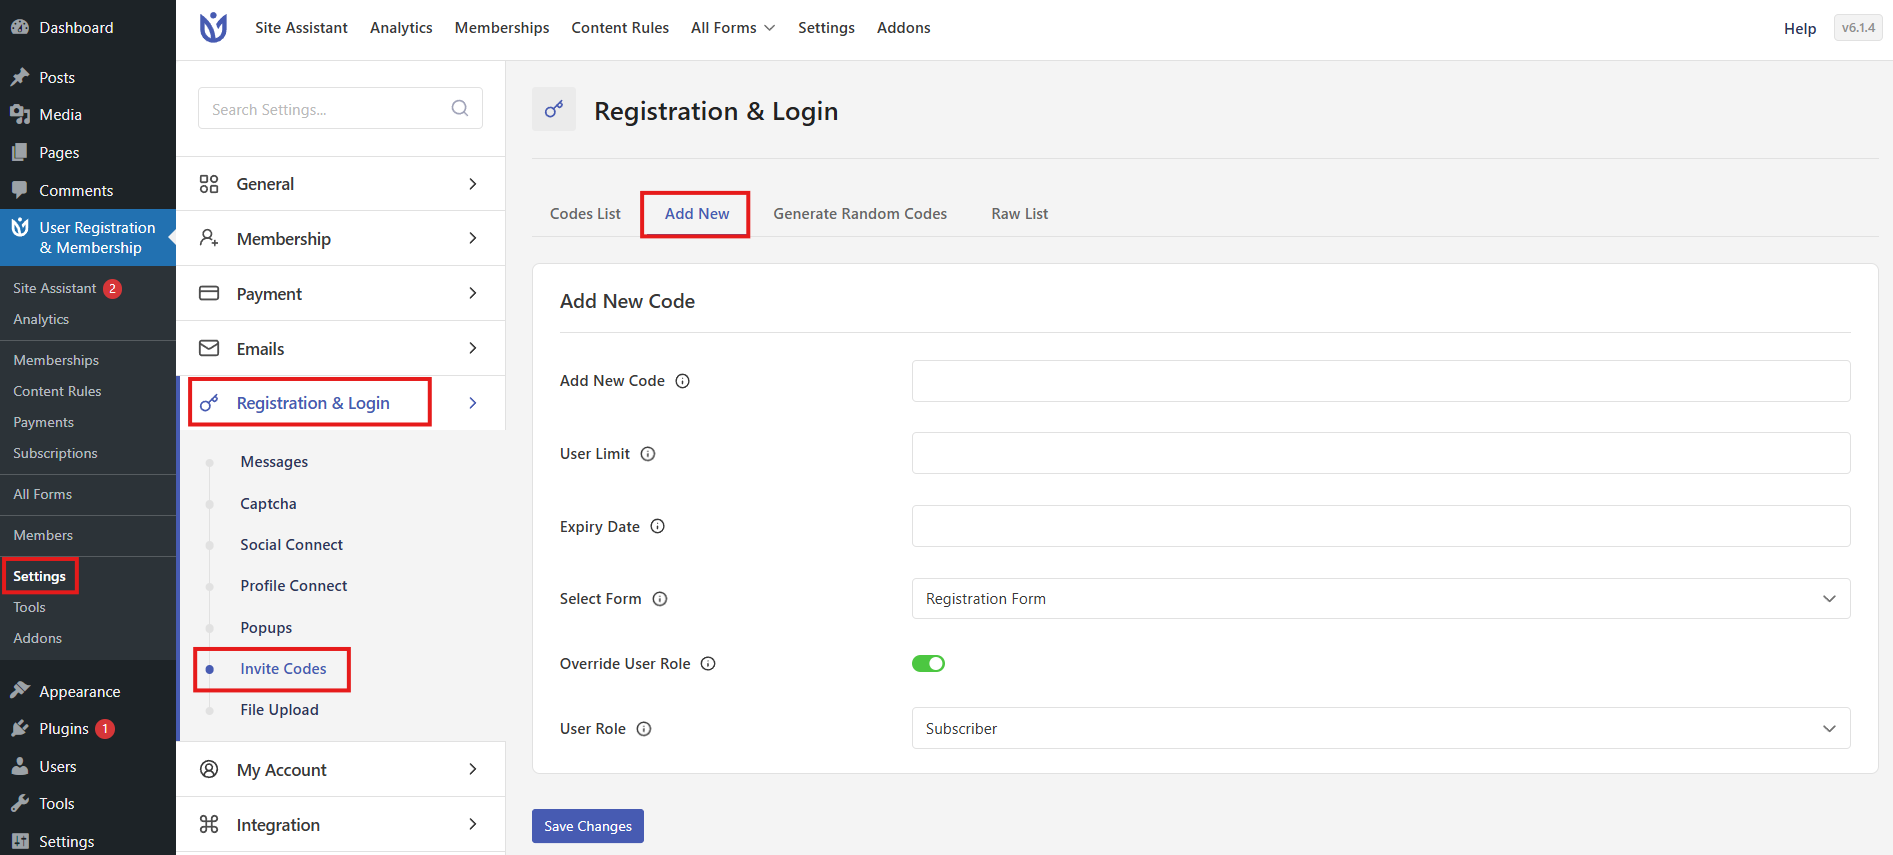
Invite Codes settings page
Step 2: Configure Code Settings
Fill in the following details for your invite code:
Code Name
Enter the actual invite code that users will type during registration (e.g., WELCOME2024, BETA-ACCESS, VIP-MEMBER).
User Limit (Optional)
Set how many users can register with this code. Leave empty for unlimited uses.
Example: Enter "50" to allow only 50 registrations with this code
Leave blank if you want unlimited registrations
Expiry Date (Optional)
Choose when the code should stop working. Leave empty for codes that never expire.
Click the calendar icon to select a date
Leave blank for permanent codes
Select Form
Choose which registration form this code applies to. You can select multiple forms if needed.
Override User Role (Optional)
Enable this option if you want users registering with this code to receive a different role than the form's default.
Toggle Enable to activate role override
Select the desired User Role from the dropdown (Subscriber, Contributor, Author, Editor, etc.)
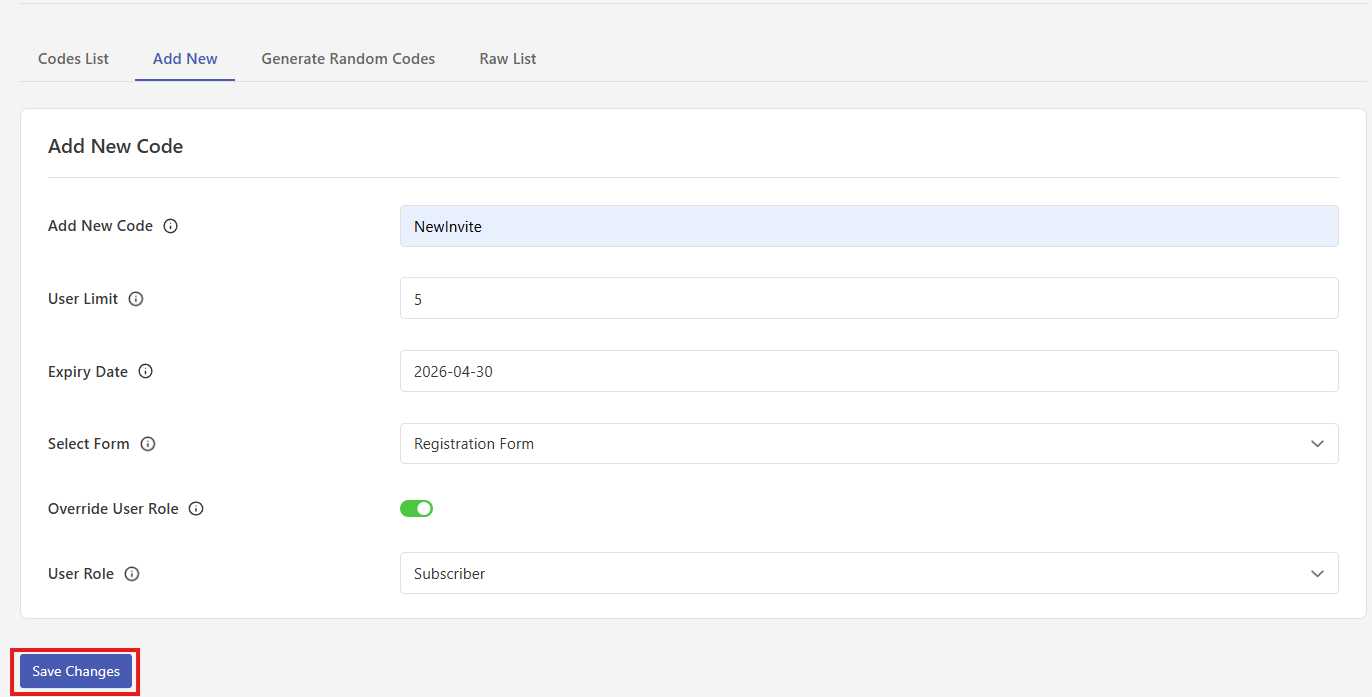
Invite code configuration form
Step 3: Save Your Invite Code
Click Save Changes to create your invite code. It will now appear in your invite codes list.
Generating Random Codes
Need to create many codes at once? Use the bulk generation feature to save time.
Scroll down to the Generate Random Codes section on the Invite Codes settings page
Enter the Code Numbers — how many codes you want to generate (e.g., 100)
Add a Code Prefix to identify these codes (e.g., BETA-, VIP-, LAUNCH-)
Configure the same settings as individual codes: User Limit, Expiry Date, Form Selection, and User Role Override
Click Save Changes
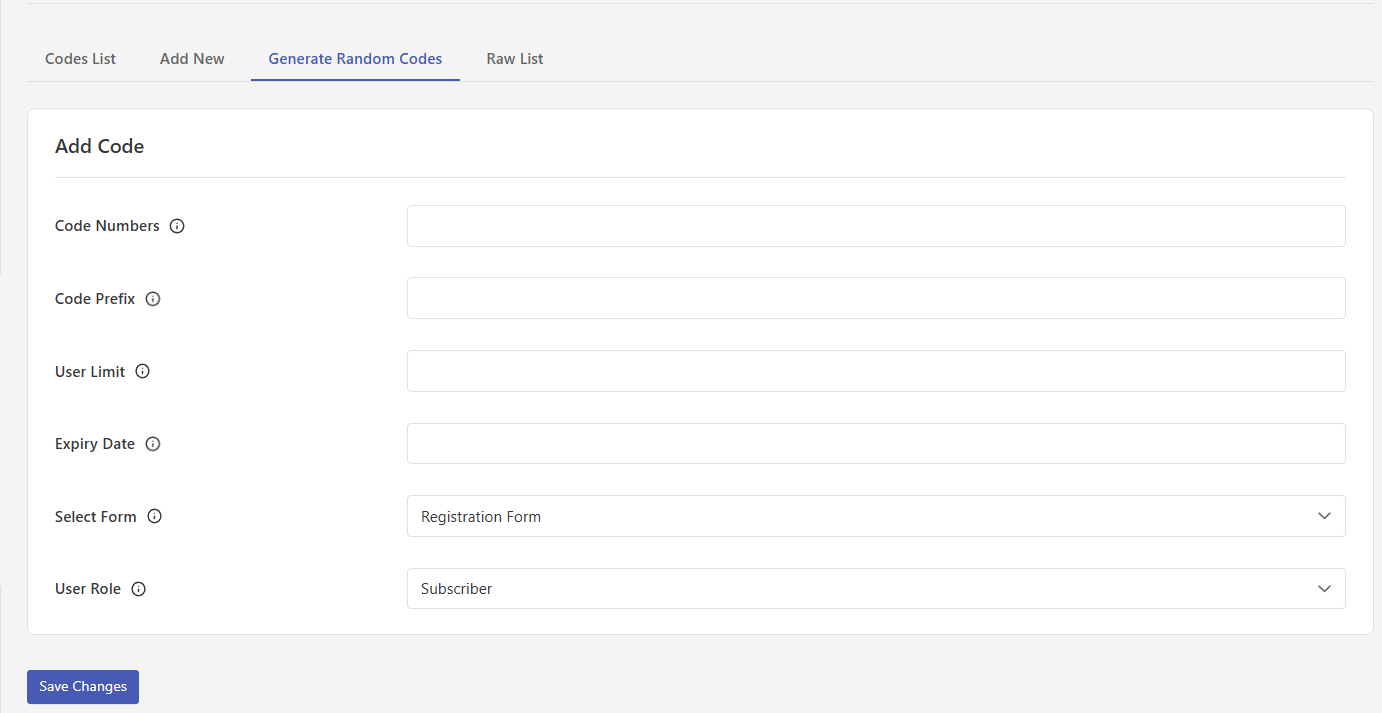
Bulk code generation interface
Raw List
All generated codes will appear in the Raw List section below, where you can view and copy them.
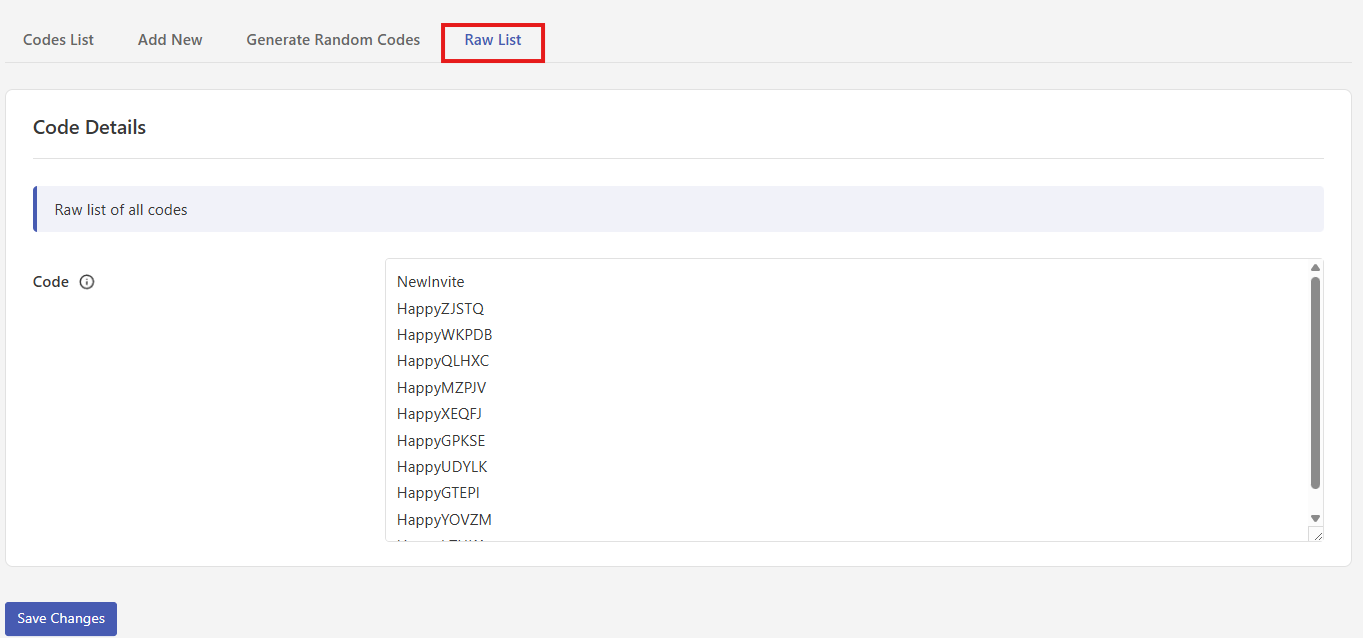
Adding the Invitation Code Field to Your Form
After creating invite codes, add the invitation code field to your registration form so users can enter their codes.
Step 1: Open Your Registration Form
Go to User Registration & Membership → All Forms
Click on the form where you want to add the invitation code field
Step 2: Add the Invitation Code Field
In the form builder, locate the Fields tab on the left sidebar
Find the Invitation Code field (usually under Extra Fields or a similar section)
Drag and drop the field onto your form where you want it to appear
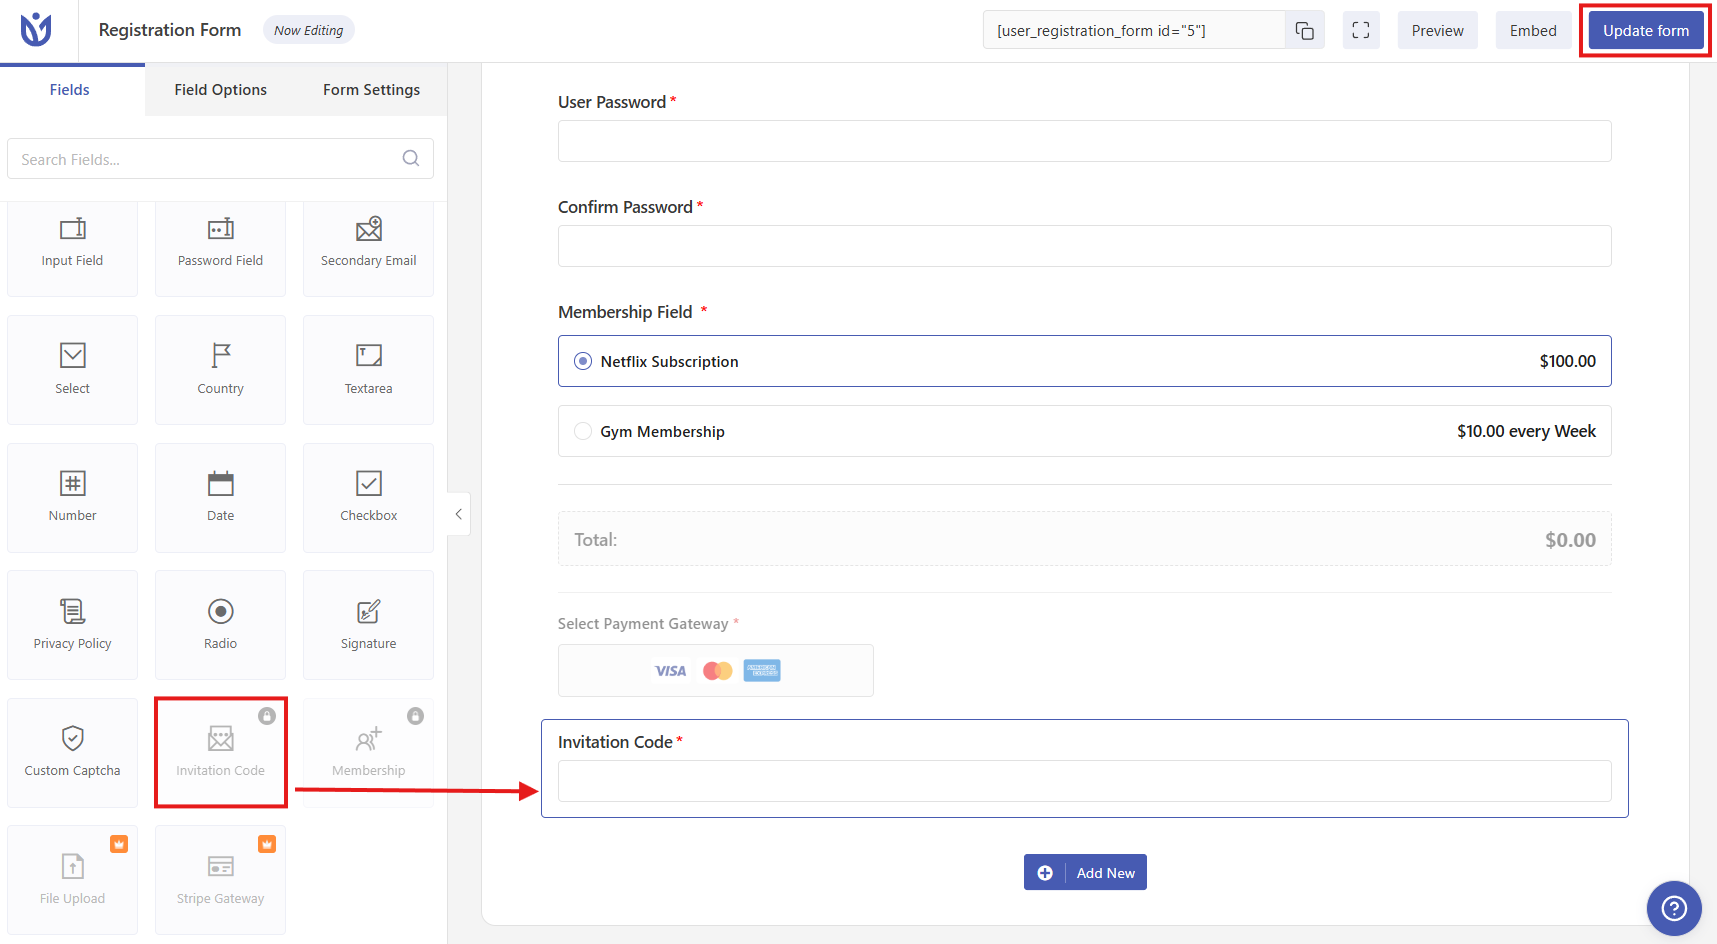
Dragging invitation code field to form
Step 3: Customize Field Options
Click on the Invitation Code field in your form to open the Field Options panel. You can customize:
Label: Change the text for the Invitation Code field label.
Description: Enter text description for the Invitation Code field.
Placeholder: Enter a placeholder for the Invitation Code field.
Hide: Toggle to show or hide the Invitation Code field label.
Enable Tooltip: Toggle to add a tooltip message for the Invitation Code field.
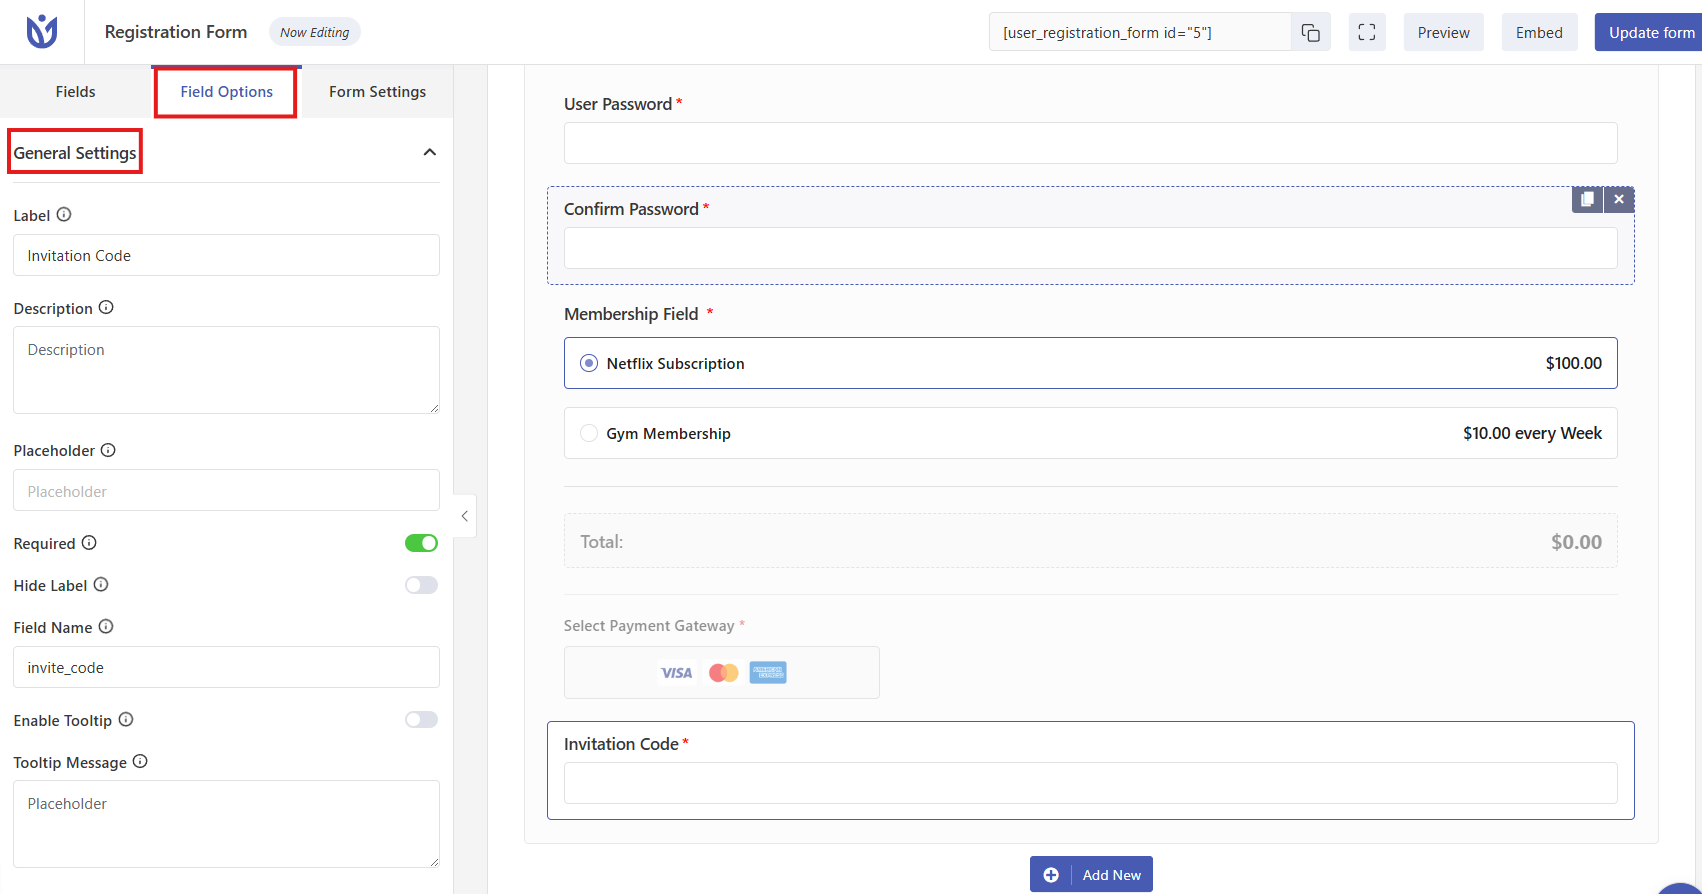
Field options panel for invitation code
Step 4: Configure Advanced Options (Optional)
Click the Advanced tab in Field Options to access additional settings:
Custom Class — Add CSS classes for custom styling
Allow field to be populated dynamically — Enable if you want to pre-fill codes via URL parameters
Step 5: Update Your Form
Click the Update Form button to save your changes.
Customizing Error Messages
You can customize the messages users see when they enter invalid or expired invite codes.
Go to User Registration & Membership → Settings
Click on Registration & Login tab
Select Messages from the sub-menu
Scroll to the Invite Codes Message section
Customize the error messages for different scenarios
Click Save Changes
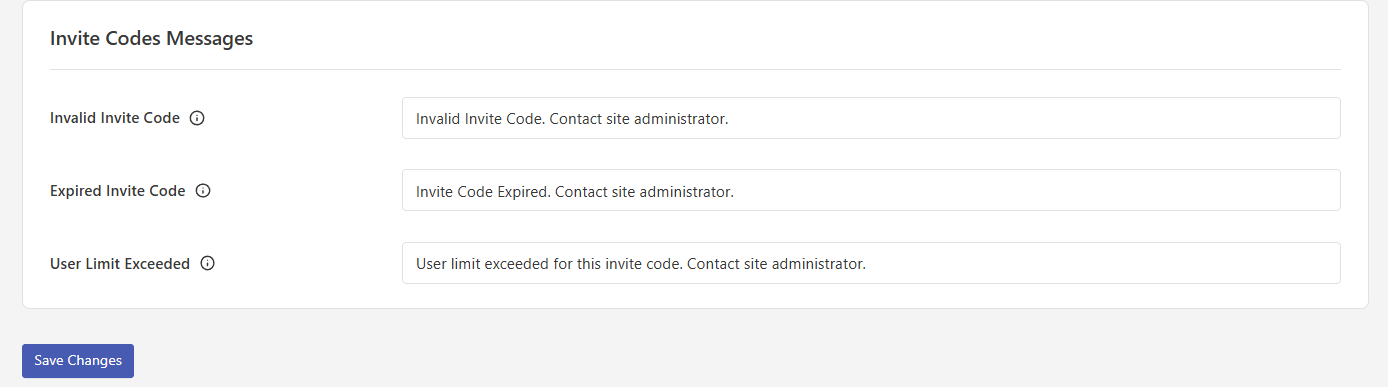
Invite codes message customization
Tracking Invite Code Usage
Monitor which users registered with invite codes and track code usage.
View Code Usage Statistics
Go to User Registration & Membership → Settings → Invite Codes
View all your invite codes in the list
Check the usage count for each code to see how many times it's been used
Check Which Users Used Invite Codes
Navigate to Dashboard → Users in WordPress
View the user list to see which invite code each user registered with
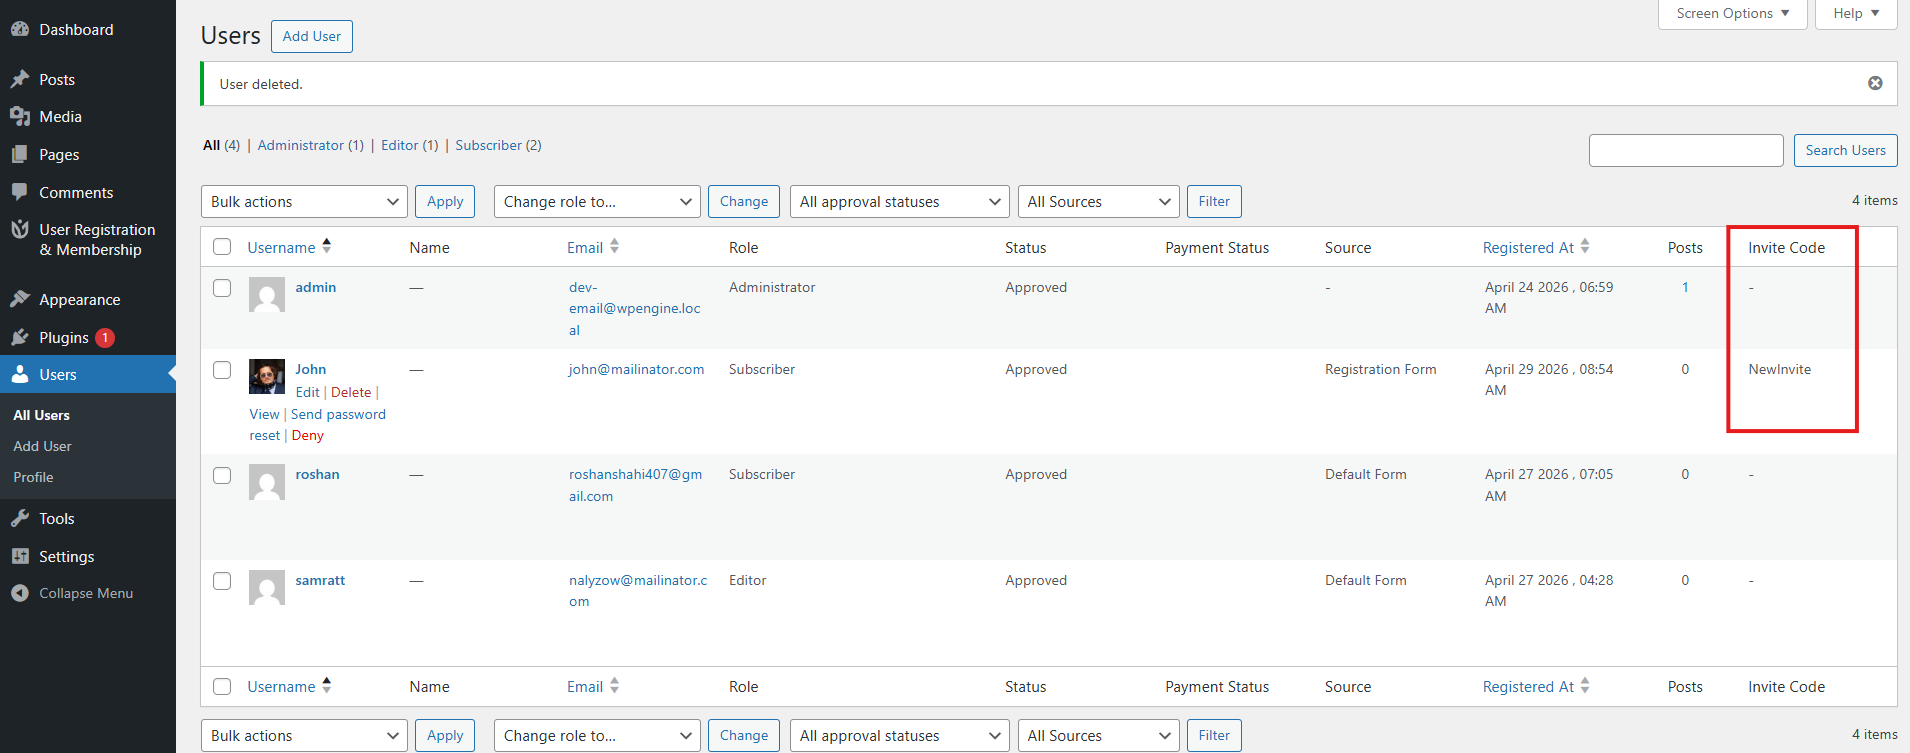
User list showing invite codes
Importing and Exporting Invite Codes
The Invite Codes add-on supports both JSON and CSV formats for importing and exporting codes.
Exporting Codes
Go to User Registration & Membership → Settings → Invite Codes
Look for the Export option
Choose your preferred format (JSON or CSV)
Download the file containing all your invite codes
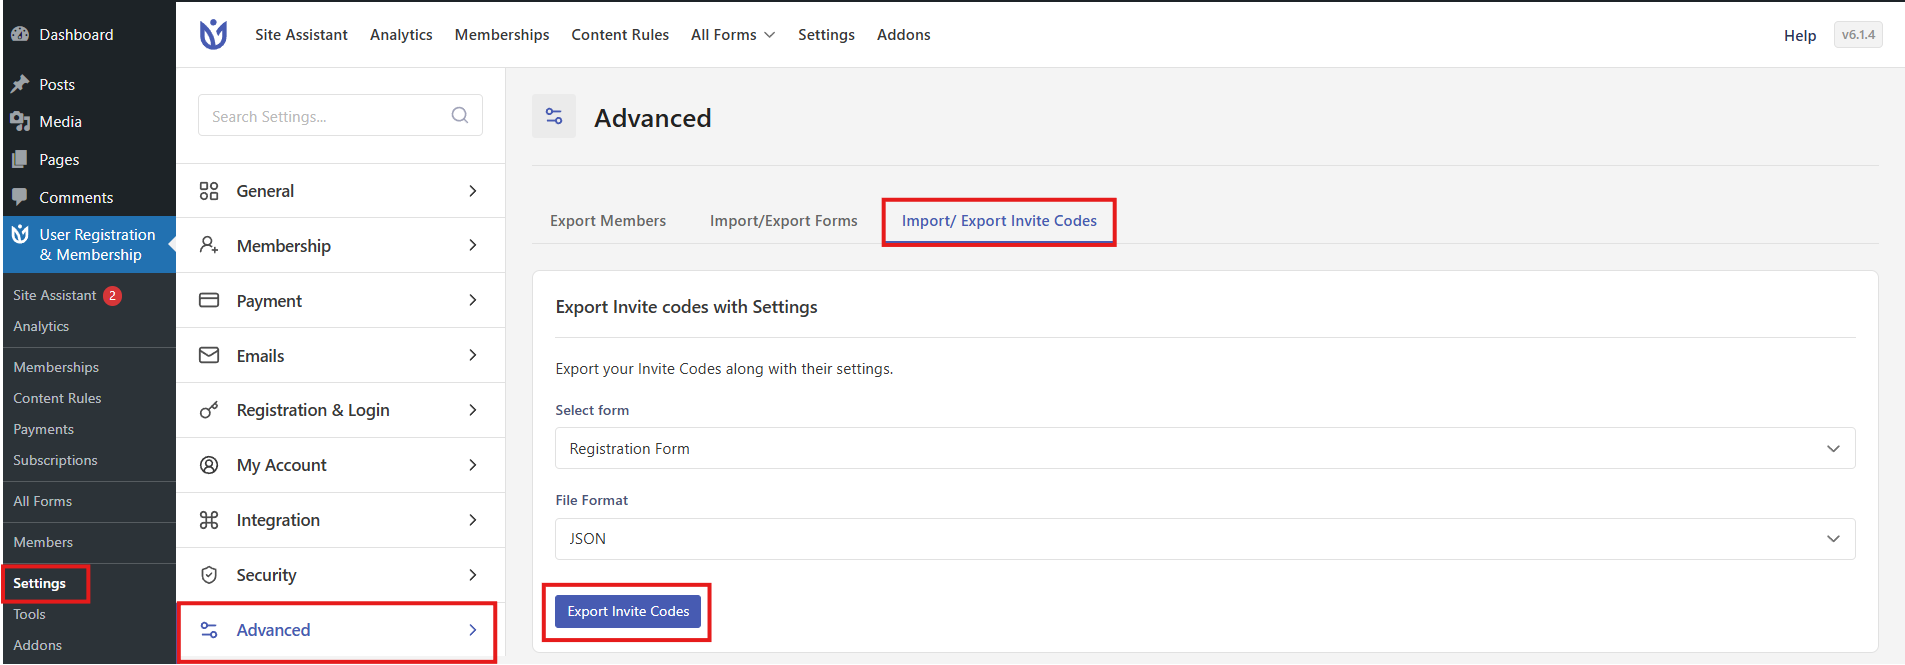
Importing Codes
Prepare your invite codes file in JSON or CSV format
Go to User Registration & Membership → Settings → Invite Codes
Click the Import button
Upload your file and follow the prompts
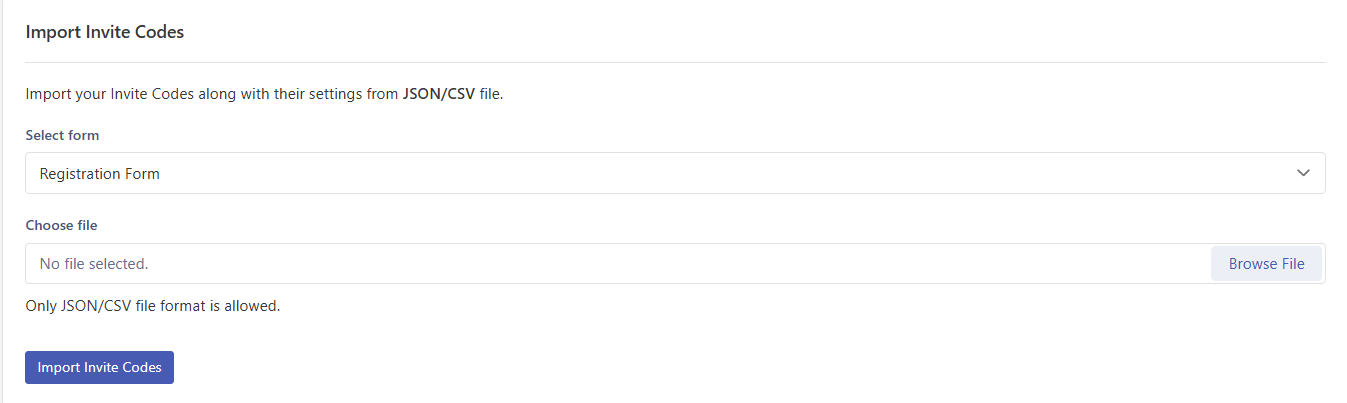
Testing Your Invite Code Setup
Before sharing invite codes with real users, test the functionality:
Open your registration form in an incognito/private browser window
Try submitting the form without entering an invite code — you should see an error message
Enter an invalid code — verify the error message appears
Enter a valid invite code and complete registration — the form should submit successfully
Check the user list to confirm the invite code is recorded
If you set a user limit, test that the code stops working after reaching the limit
Important Notes
Plan Requirement — Invite Codes is only available with Plus and Professional plans
User Limits — Leave the user limit empty for unlimited uses of a code
Expiry Dates — Leave the expiry date empty for codes that never expire
Role Override — User role override allows assigning different roles than the form's default setting
Code Tracking — Check which users registered with invite codes from Dashboard → Users
Raw List — View all generated codes in the Raw List section on the Invite Codes settings page
Troubleshooting
Invite Code Field Not Appearing
Verify the Invite Codes add-on is activated in User Registration & Membership → Addons
Check that you're using a Plus or higher plan
Clear your browser cache and refresh the form builder
Valid Code Showing as Invalid
Check if the code has reached its user limit
Verify the code hasn't expired
Ensure the code is assigned to the correct registration form
Check for typos in the code (codes are case-sensitive)
Users Not Getting Correct Role
Verify that "Override User Role" is enabled for the invite code
Check that the correct role is selected in the invite code settings
Ensure the role exists in your WordPress installation