
Global Payment Settings
Configure payment gateways, currencies, taxes, and processing options for your membership site's global payment system.
Last updated on Jul 15, 2026
Would you like to configure payment processing for your membership site? User Registration & Membership allows you to accept payments through multiple gateways, manage currencies, calculate taxes, and control how payments are processed across all your membership plans. This guide will walk you through all the global payment settings available in User Registration & Membership.
Before getting started, make sure you've installed and activated the User Registration & Membership plugin on your WordPress site.
Accessing Global Payment Settings
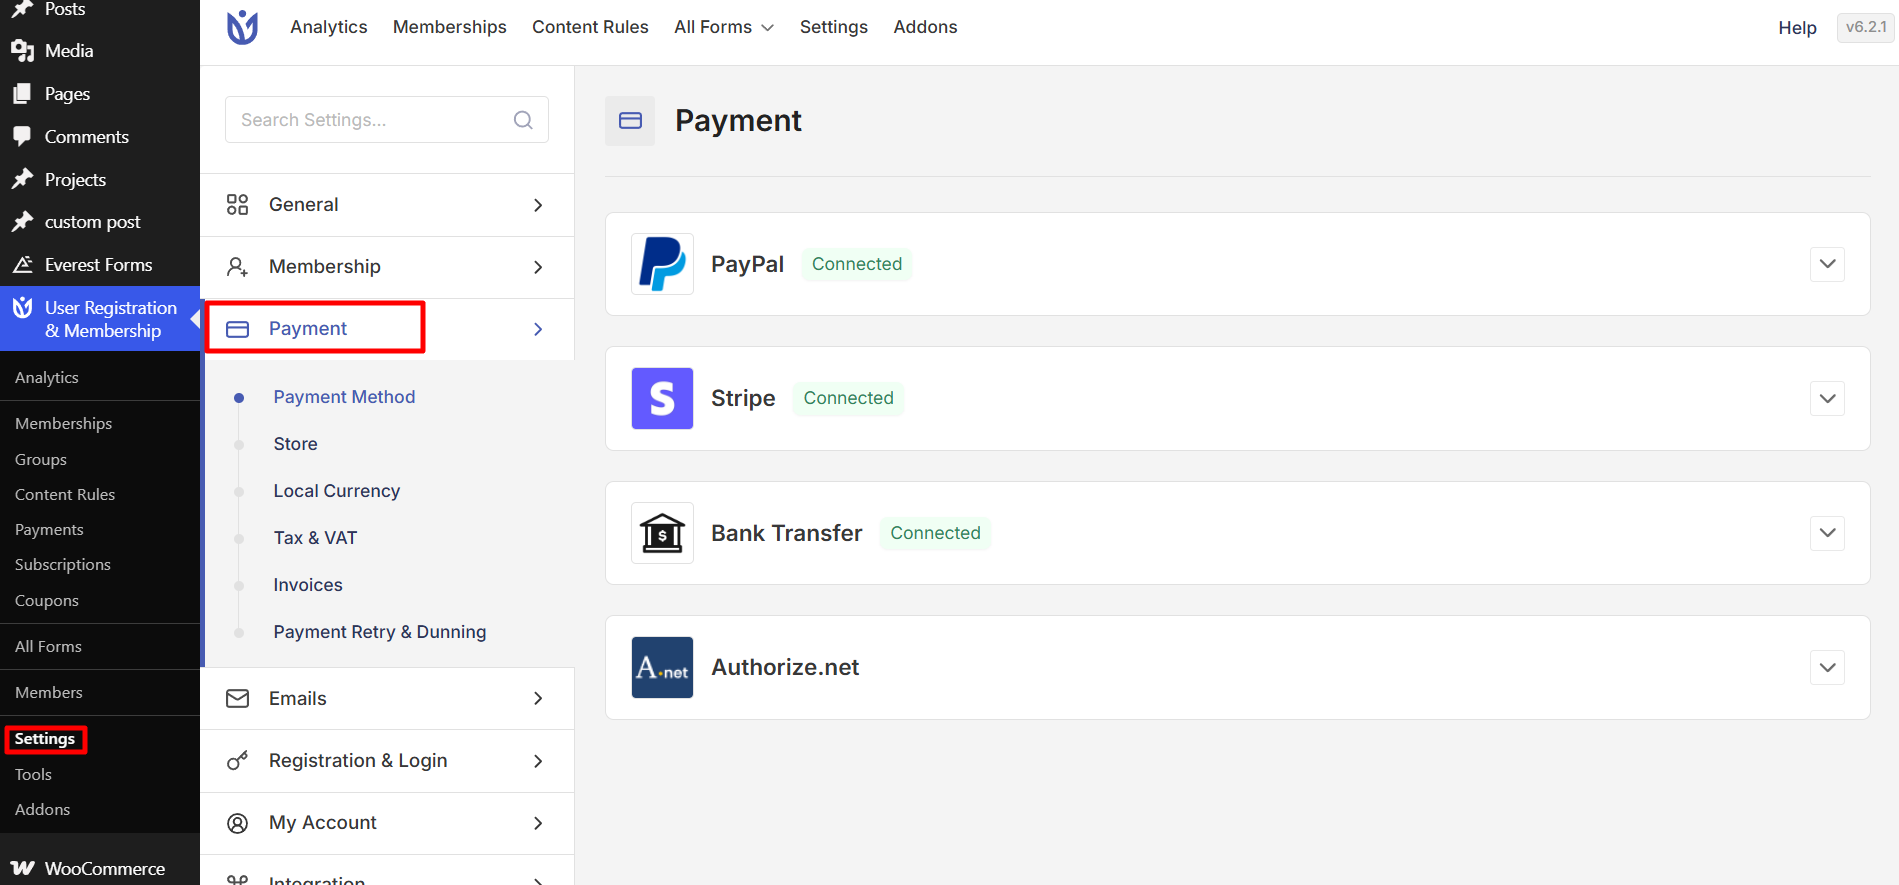
To access the global payment settings, go to User Registration & Membership > Settings > Payment from your WordPress dashboard. Here, you'll find all payment-related configuration options organized into several categories.
Payment Method
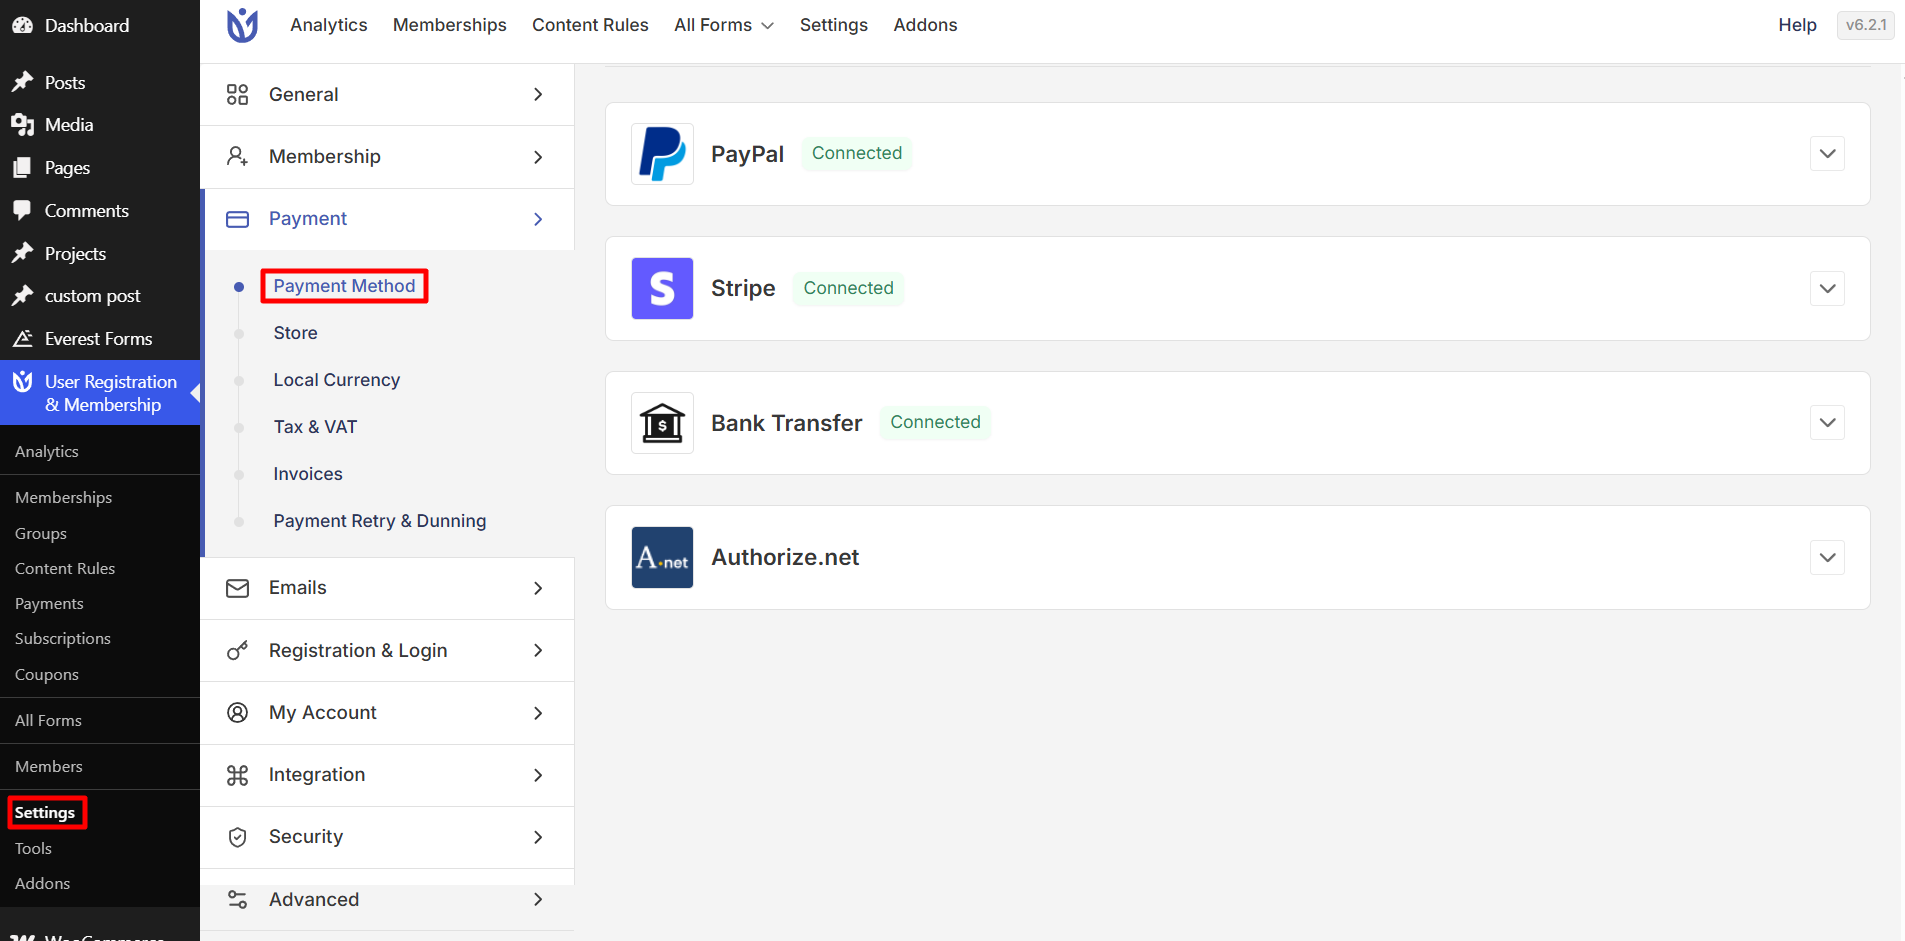
The Payment Method section is where you configure your payment gateways. User Registration & Membership supports multiple payment processors, each with its own configuration options.
PayPal
PayPal integration allows you to accept payments and subscriptions directly through your registration forms. To configure PayPal, you'll need a PayPal business account with API credentials.
Navigate to User Registration & Membership > Settings > Payment > Payment Method and expand the PayPal section. Here, you'll see the following configuration options:
Mode: Choose between Sandbox for testing or Production for live payments. Use Sandbox mode while you're setting up and testing your payment flow, then switch to Production when you're ready to accept real payments.
Cancel URL: Set the page where users are redirected if they cancel their payment at PayPal. This should be a page that explains what happened and offers next steps.
Return URL: Set the page where users are redirected after completing their payment. This is typically your thank you page.
PayPal Email Address: Enter your PayPal business email address. This is the email that will receive payments from your members.
Client ID: Enter your PayPal API Client ID from your PayPal Dashboard. You can find this under Developer > API keys in your PayPal account.
Client Secret: Enter your PayPal API Client Secret key. This works together with the Client ID to authenticate your PayPal integration.
Stripe
Stripe integration enables credit card payments and subscriptions through your registration forms. You'll need a Stripe account to use this payment gateway.
Go to User Registration & Membership > Settings > Payment > Payment Method and expand the Stripe section. Configure the following settings:
Enable Stripe: Toggle this on to activate Stripe as a payment gateway for your membership site.
Test Publishable Key: Enter your Stripe test mode publishable API key. This is used for processing test payments during development.
Test Secret Key: Enter your Stripe test mode secret API key. This works with the publishable key to process test payments.
Enable Test Mode: Toggle this on to process only test payments. When enabled, no real charges will be made. Turn this off when you're ready to accept real payments.
Live Publishable Key: Enter your Stripe live mode publishable API key. This is required for processing real payments from customers.
Live Secret Key: Enter your Stripe live mode secret API key. This is required for processing real payments from customers.
You can find your Stripe API keys by logging into your Stripe Dashboard and navigating to Developer > API keys.
Bank Transfer
Bank Transfer allows members to pay via direct bank deposit. This payment method requires manual verification by administrators.
Navigate to User Registration & Membership > Settings > Payment > Payment Method and expand the Bank Transfer section. You'll see:
Enter your details: Add your bank account details in this text area. This information will be displayed to users after they select bank transfer as their payment method. Include your bank name, account number, routing number, and any other relevant details.
Bank transfer payments appear as pending in your payment history and require manual approval after you verify the payment in your bank account.
Authorize.net
Authorize.net is an additional payment gateway option. To use Authorize.net, you must first install and activate the Authorize.net addon from User Registration & Membership > Addons.
Once activated, navigate to User Registration & Membership > Settings > Payment > Payment Method and expand the Authorize.net Settings section to configure your credentials.
For more detailed instructions, please refer to the documentation.
Mollie
Mollie is a European payment service provider that supports multiple payment methods. To use Mollie, you must first install and activate the Mollie addon from User Registration & Membership > Addons.
After activation, go to User Registration & Membership > Settings > Payment > Payment Method and expand the Mollie Settings section. Configure the following:
Mollie Test Mode: Enable this to use your Test API Key for testing payments without real charges.
Test API Key: Enter your Mollie test API key for development and testing.
Live API Key: Enter your Mollie live API key for processing real payments.
For more detailed instructions, please refer to the documentation.
Store
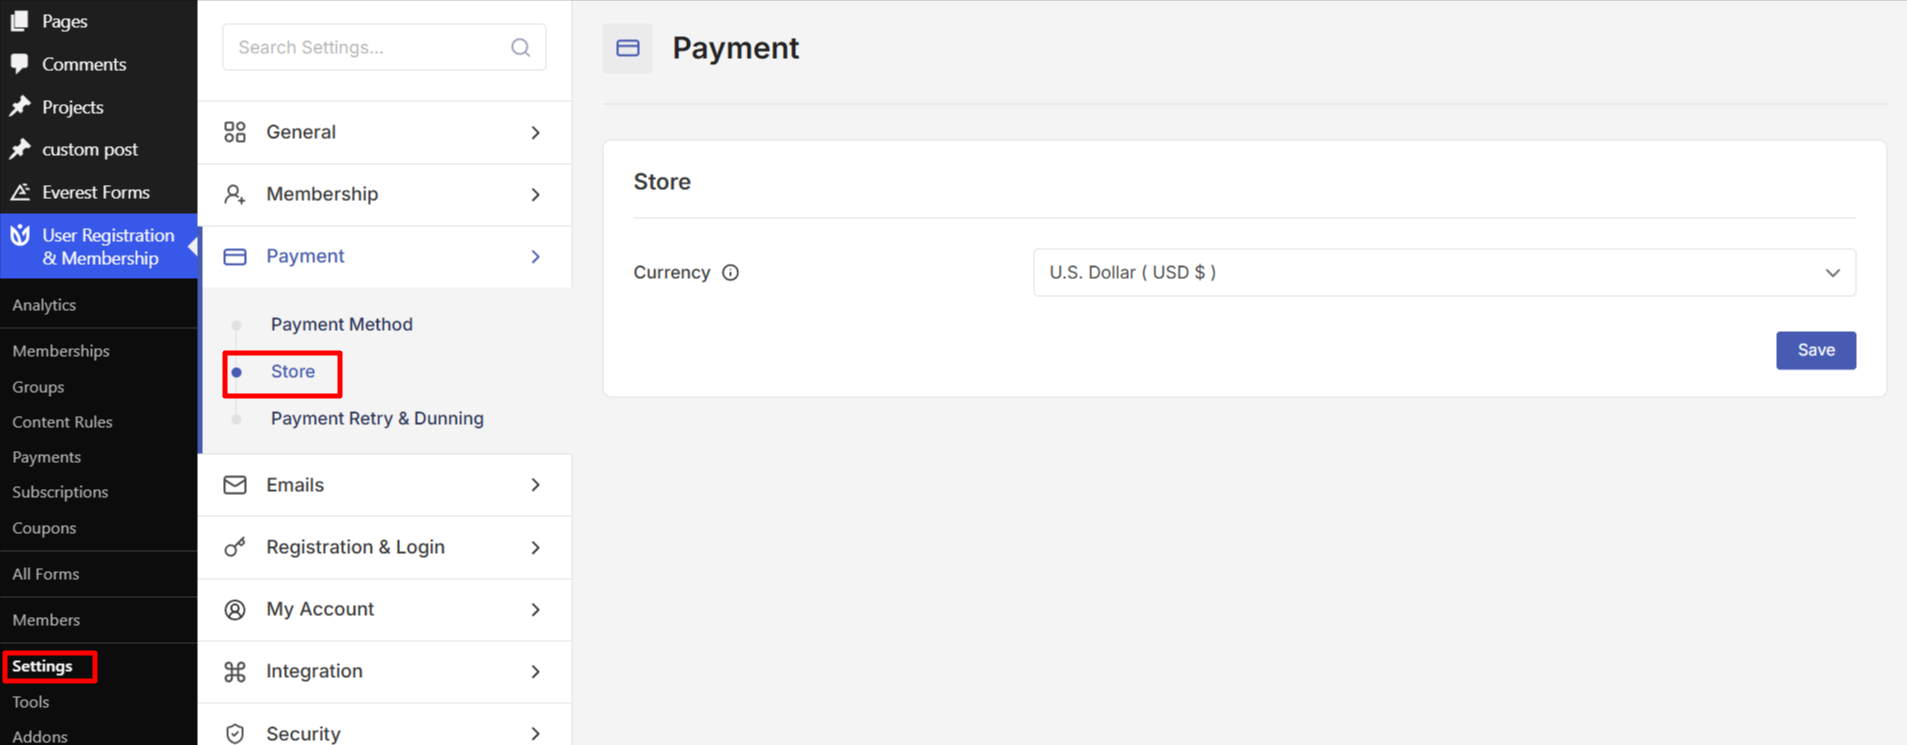
The Currency option in the store allows you to select the currency used for your store transactions. This determines which currency will be displayed and used for payments on your site.
Local Currency
The Local Currency section is available only when the Local Currency Add-on is activated. This feature enables you to display and charge membership prices in different currencies based on the user’s location.
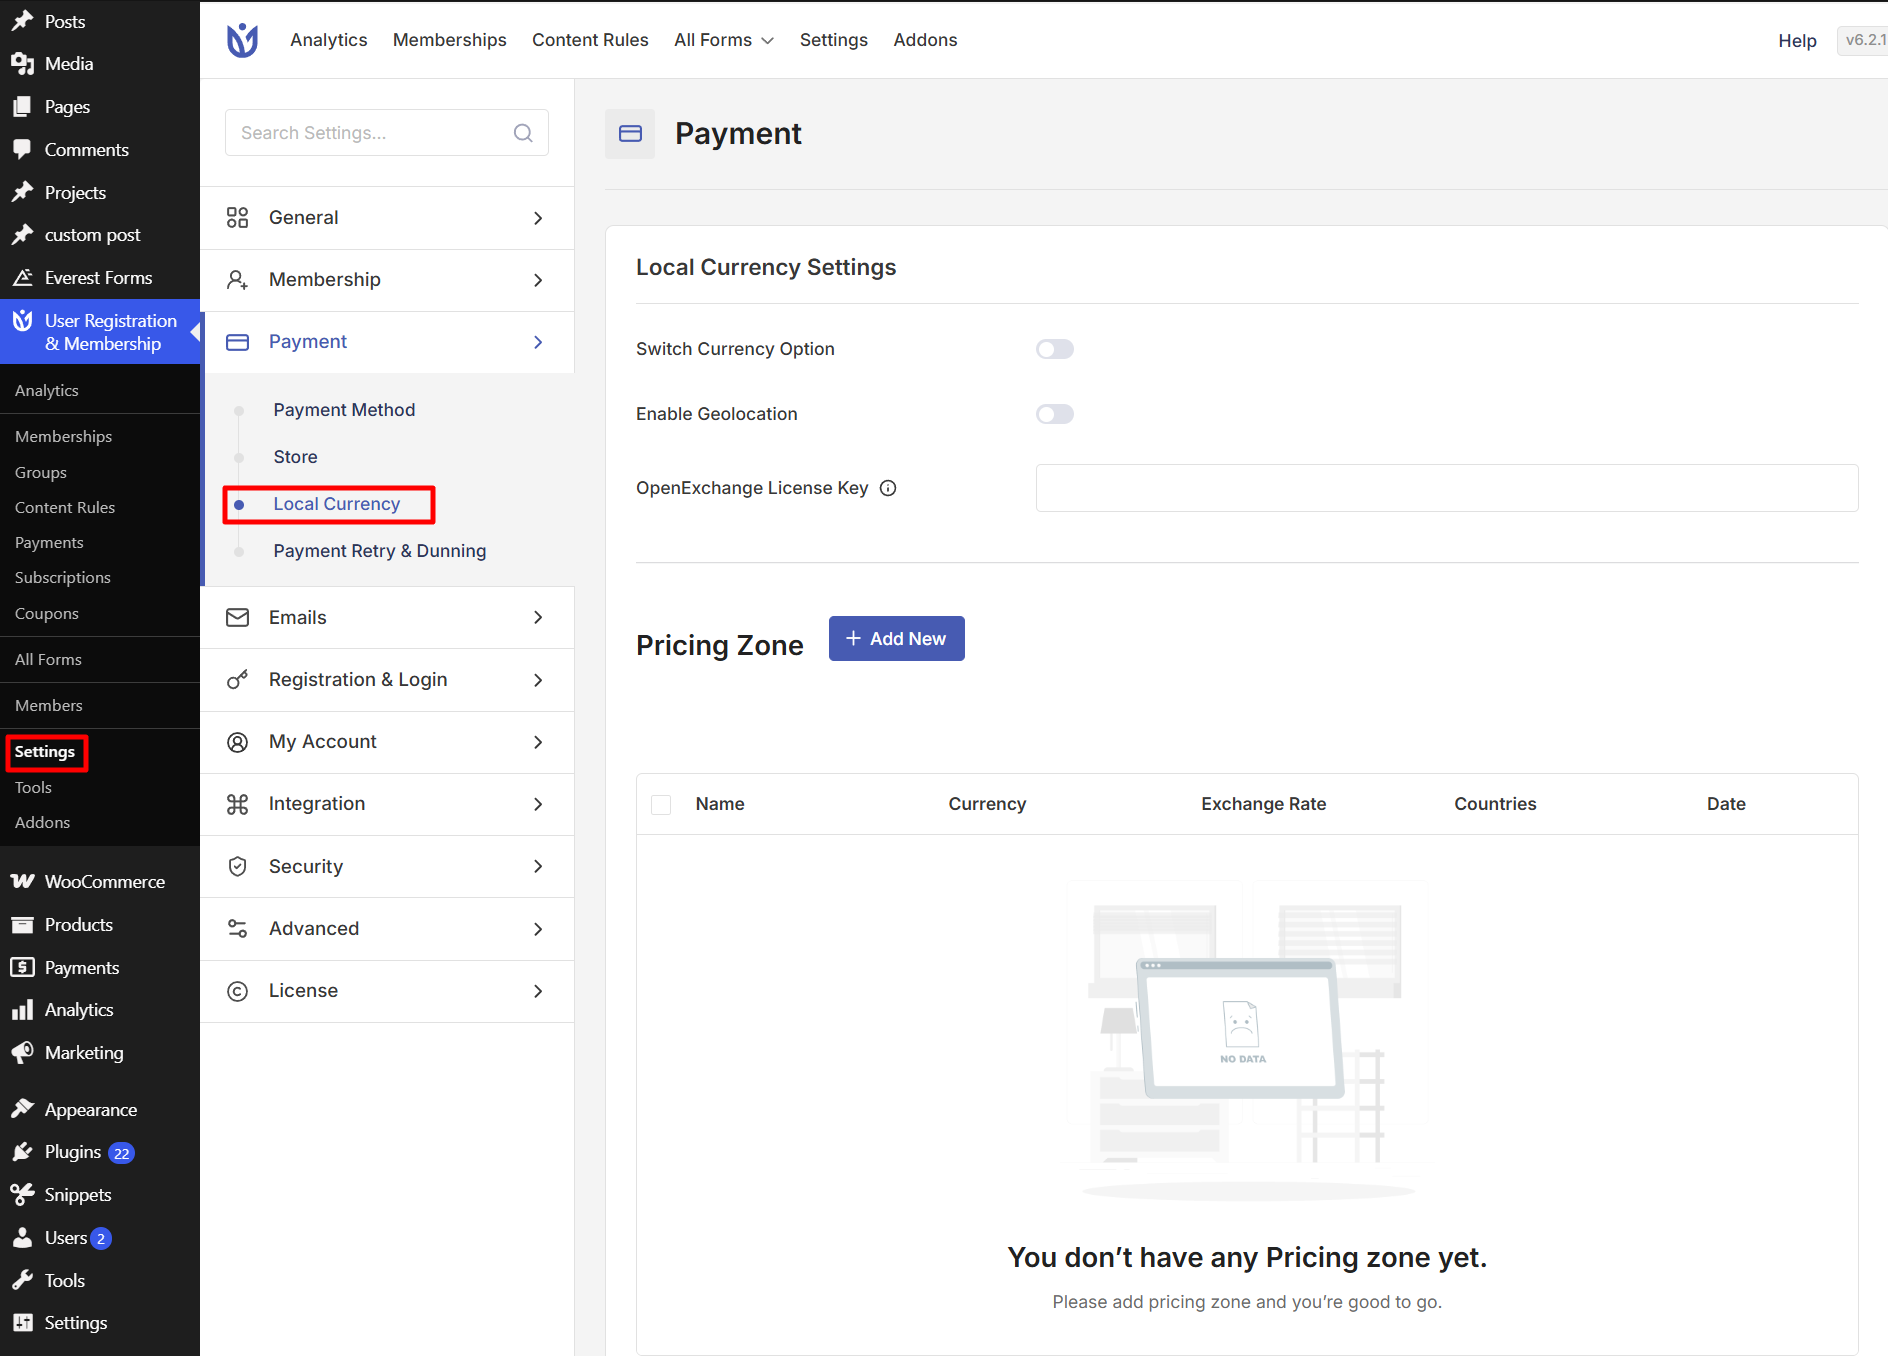
The Local Currency Add-on allows you to offer the same membership plan in multiple currencies depending on the user’s country. This provides a localized pricing experience for your members, improving usability and reducing confusion during checkout.
For additional details, refer to the documentation.
Tax & VAT
The Tax & VAT section is available when you have the Taxes addon activated. This feature enables automatic tax calculation during checkout based on user location.
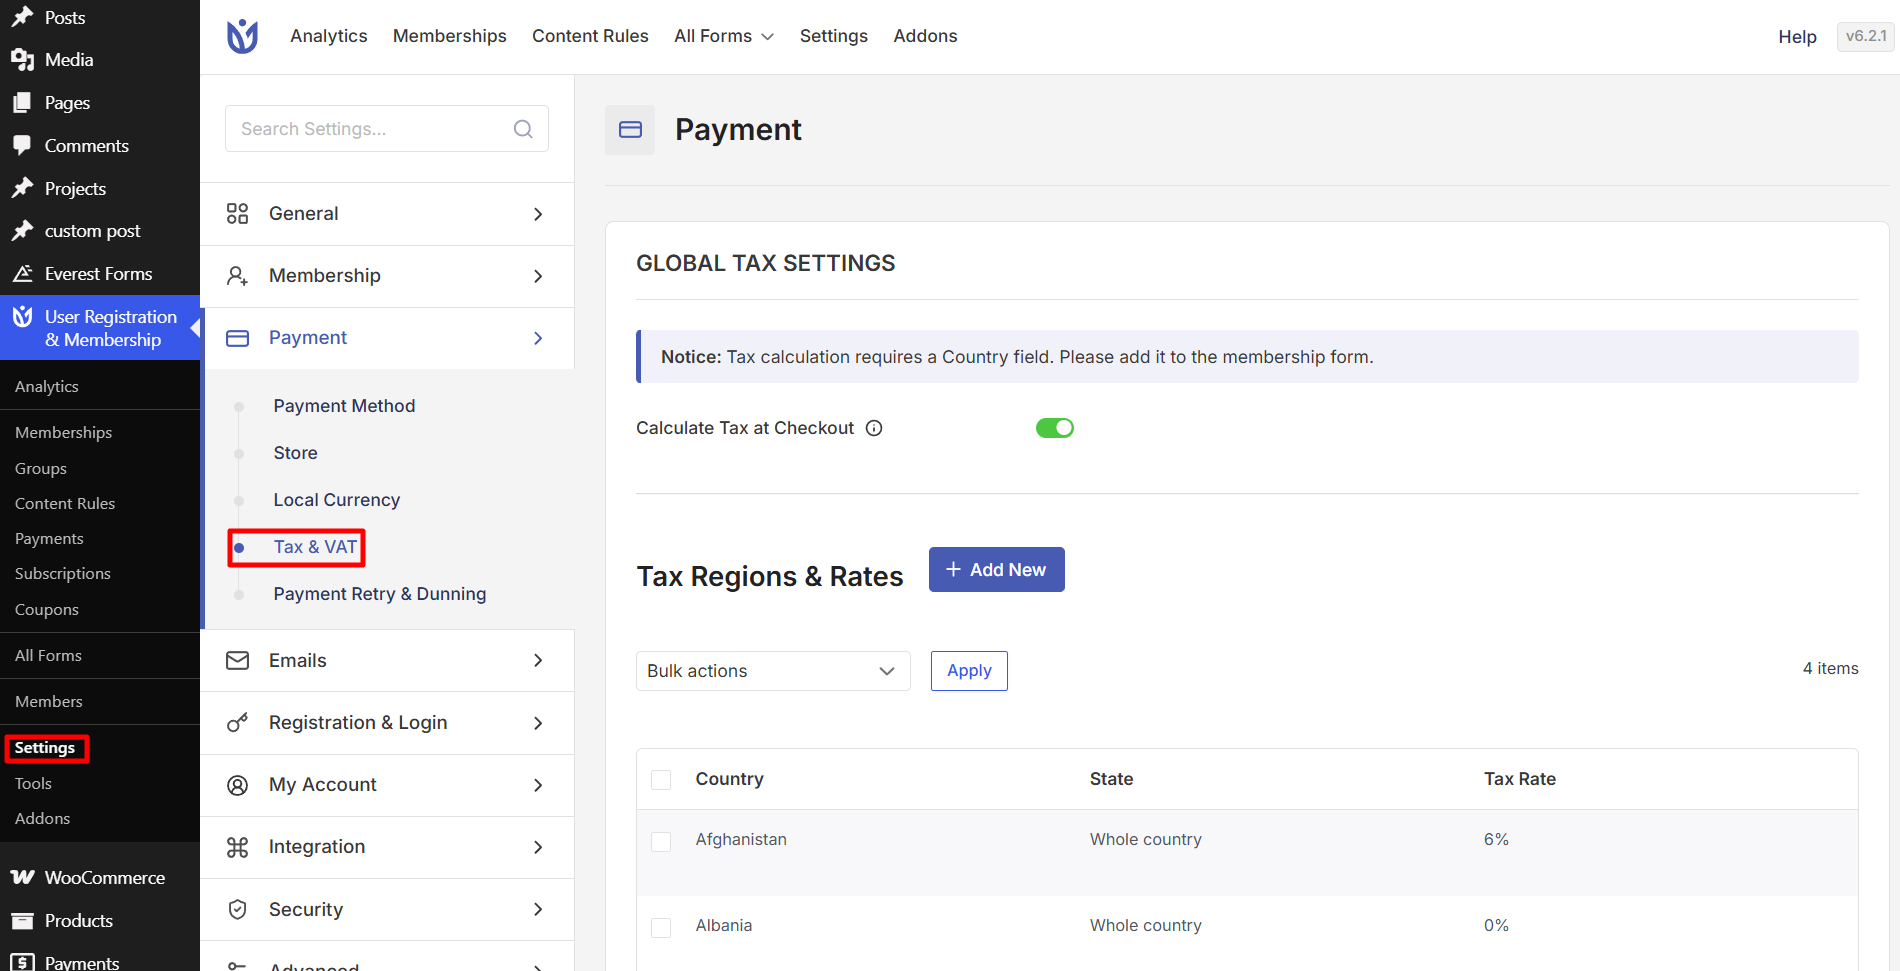
Calculate Tax at Checkout
Enable this option to automatically calculate and add taxes to membership fees during the checkout process based on the customer's country.
For additional details, refer to the documentation.
Payment Retry & Dunning
The Payment Retry Settings allow you to automatically manage failed payment attempts for recurring subscriptions. When enabled, the system will retry collecting the payment based on the configured rules.
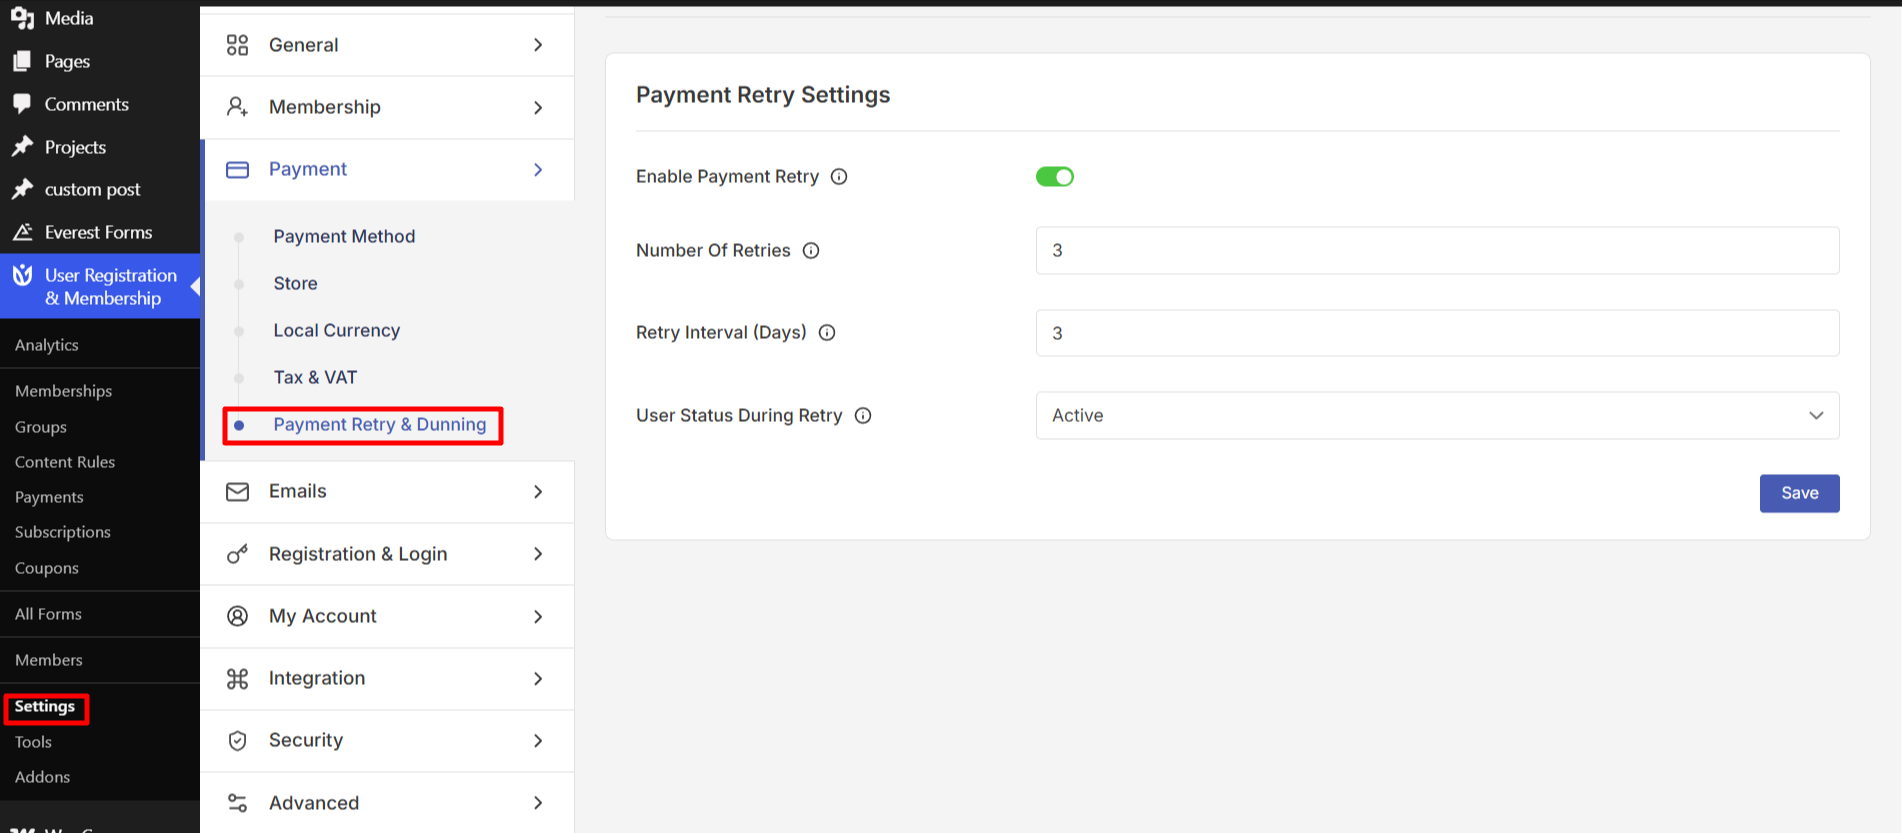
Enable Payment Retry
Turn this option on to activate automatic retry attempts for failed payments.
Number of Retries
Defines how many times the system will attempt to retry a failed payment. For example, setting this to 3 will allow up to three retry attempts before stopping.
Retry Interval (Days)
Specifies the time gap between each retry attempt. For example, if set to 3, the system will retry every 3 days after a failed payment.
User Status During Retry
Determines the user’s account status while retry attempts are in progress. If set to Active, the user will remain active during the retry period.
Invoices
The Invoices section is available when you have the PDF Invoice addon activated. This feature automatically generates downloadable PDF invoices for completed payments.
For additional details, refer to the .
That's it! Now you know how to configure all the global payment settings in User Registration & Membership. Next, would you like to learn how to create membership plans and connect them to these payment gateways? Be sure to check out our guide on creating membership plans for all the details.