
Profile Connect
ProImport and map existing user data from external registration systems to User Registration forms without losing information.
Last updated on Jul 14, 2026
Want to connect your existing user data to User Registration forms? User Registration & Membership's Profile Connect addon allows you to import users from other registration systems and map external database fields to your registration forms without losing any data. This guide will show you how to set up and configure Profile Connect to bridge your user data with User Registration forms.
Requirements: Profile Connect requires the Personal plan or higher. Make sure you've installed and activated the User Registration & Membership Pro plugin before getting started.
Activating Profile Connect
To begin using Profile Connect, you'll need to activate the addon from your WordPress dashboard.
From your WordPress admin area, go to User Registration & Membership → Addons. Locate the Profile Connect addon in the list and toggle it to Activate.
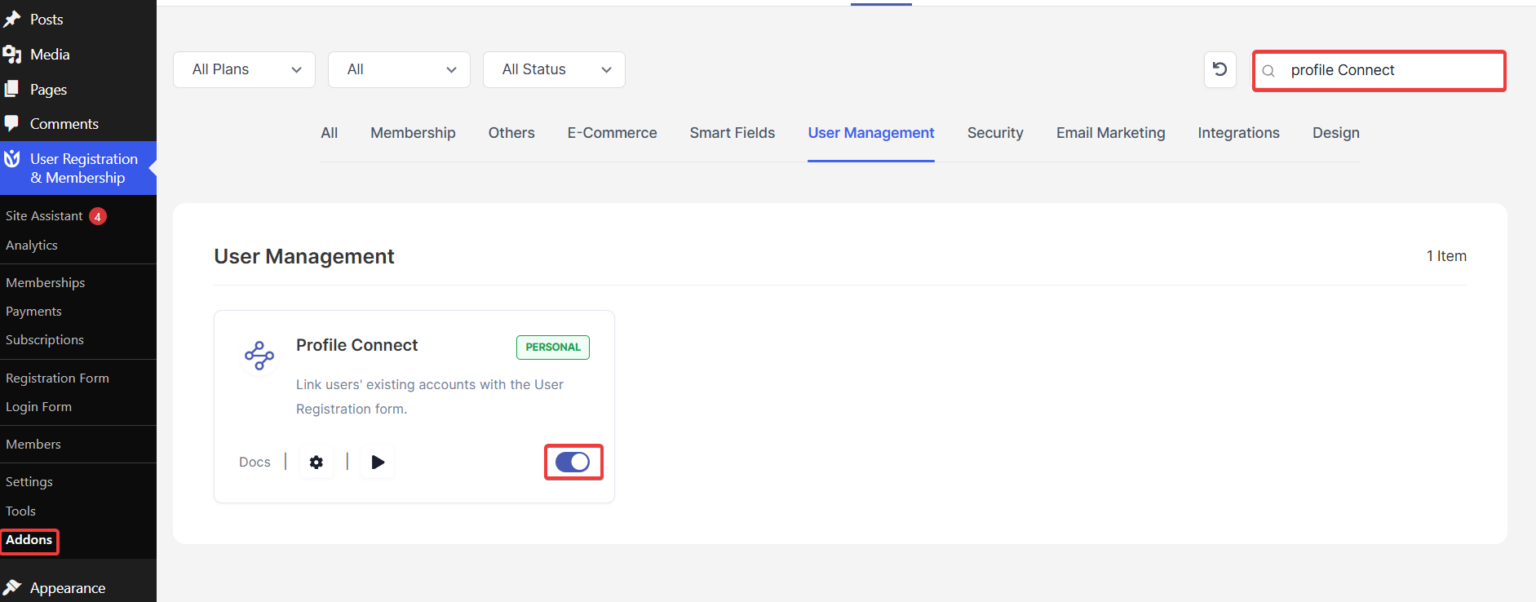
Once activated, you'll see a new Profile Connect tab appear in your settings.
Method 1: Connect Existing Users
Easily connect existing users (created via default WordPress registration or other plugins) to User Registration & Membership forms. This allows you to migrate users without requiring them to sign up again.
Steps
Go to Users → All Users
Select users using the checkboxes
Choose Connect with form… from the Bulk Actions dropdown
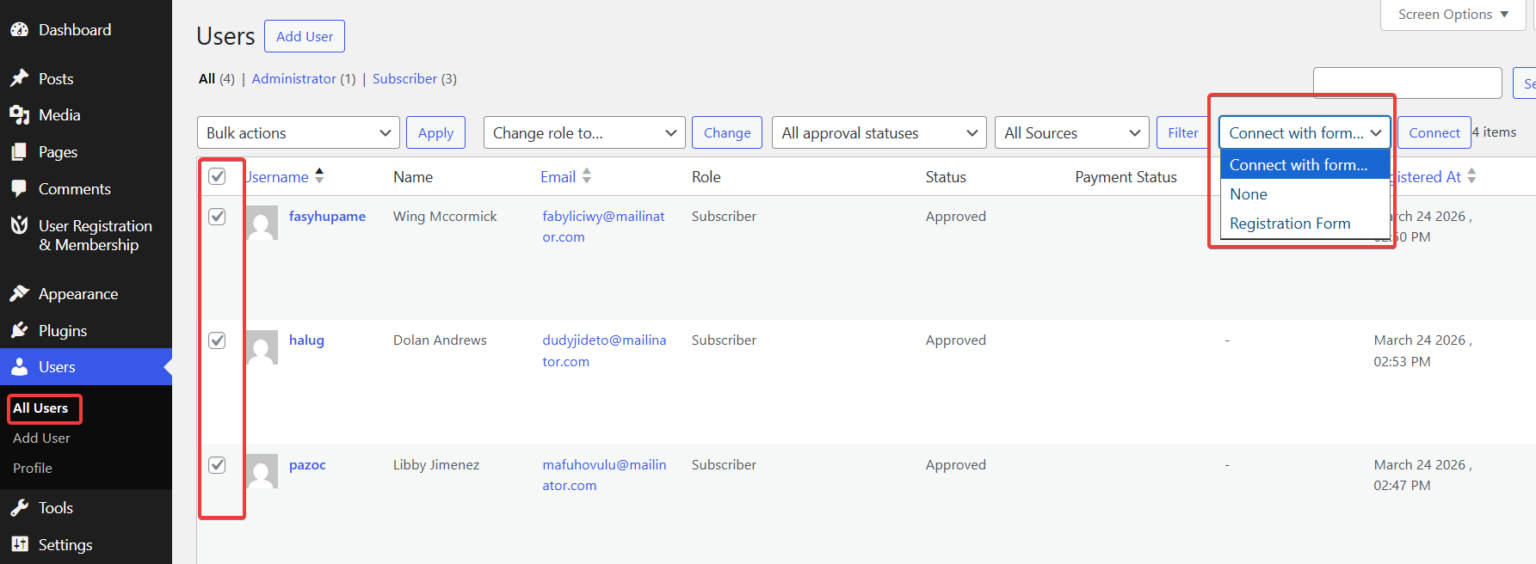
Select the desired form
Click Connect
Users will be assigned to the selected form
Method 2: Map External Plugin Fields
This feature allows you to automatically fetch and integrate data from external sources, such as the WordPress usermeta table or custom database tables, directly into your registration form fields.
Step 1: Accessing Profile Connect Settings
Finding and configuring Profile Connect settings is your first step.
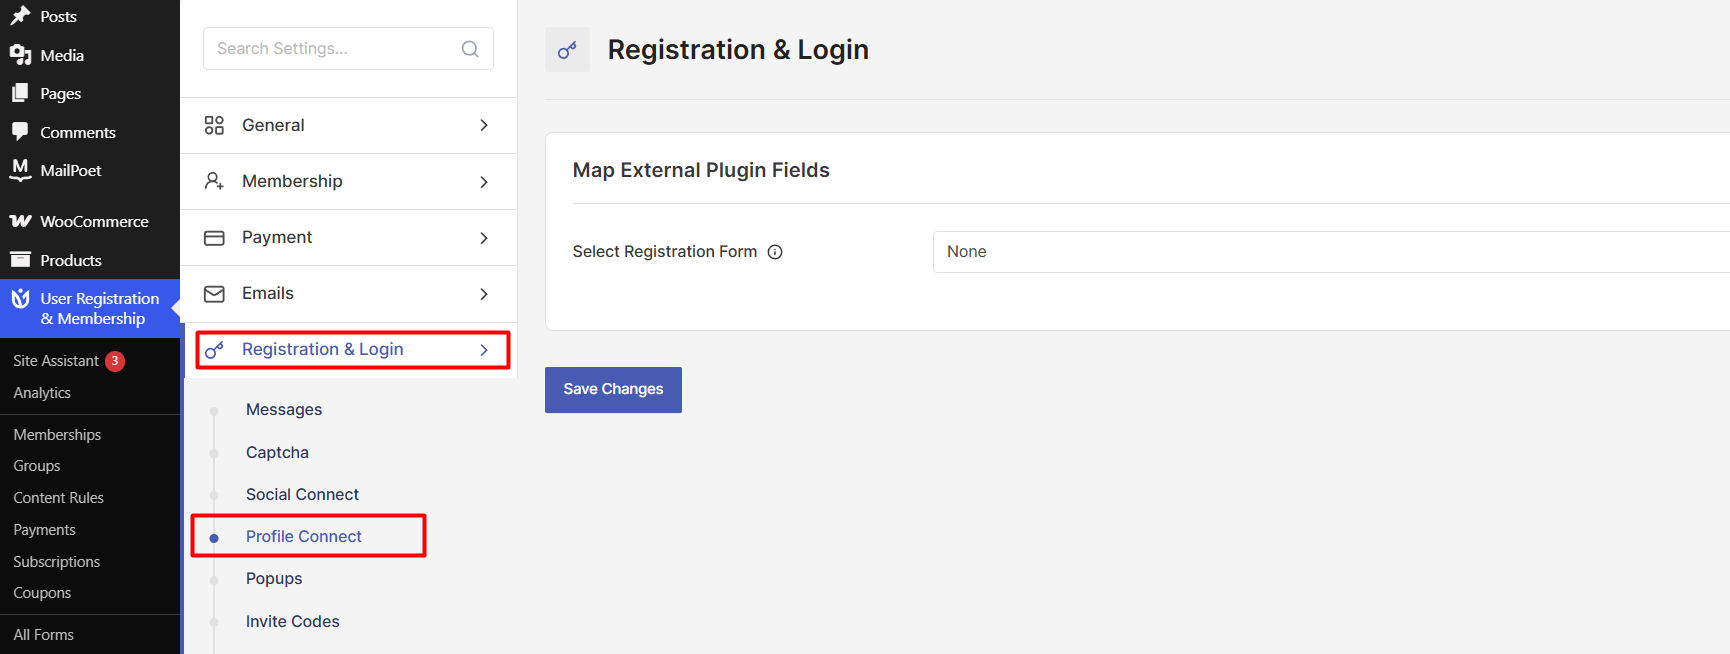
Navigate to User Registration & Membership > Settings > Registration and Login > Profile Connect > Map External Plugin Fields
Here you’ll find the interface similar to the image below:
Step 2: Map External Plugin Fields
Getting started with external field mapping requires selecting your target form and configuring the data source. These initial settings establish the foundation for all your field mappings.
Select Registration Form: This dropdown lets you choose which form will receive the mapped external data.
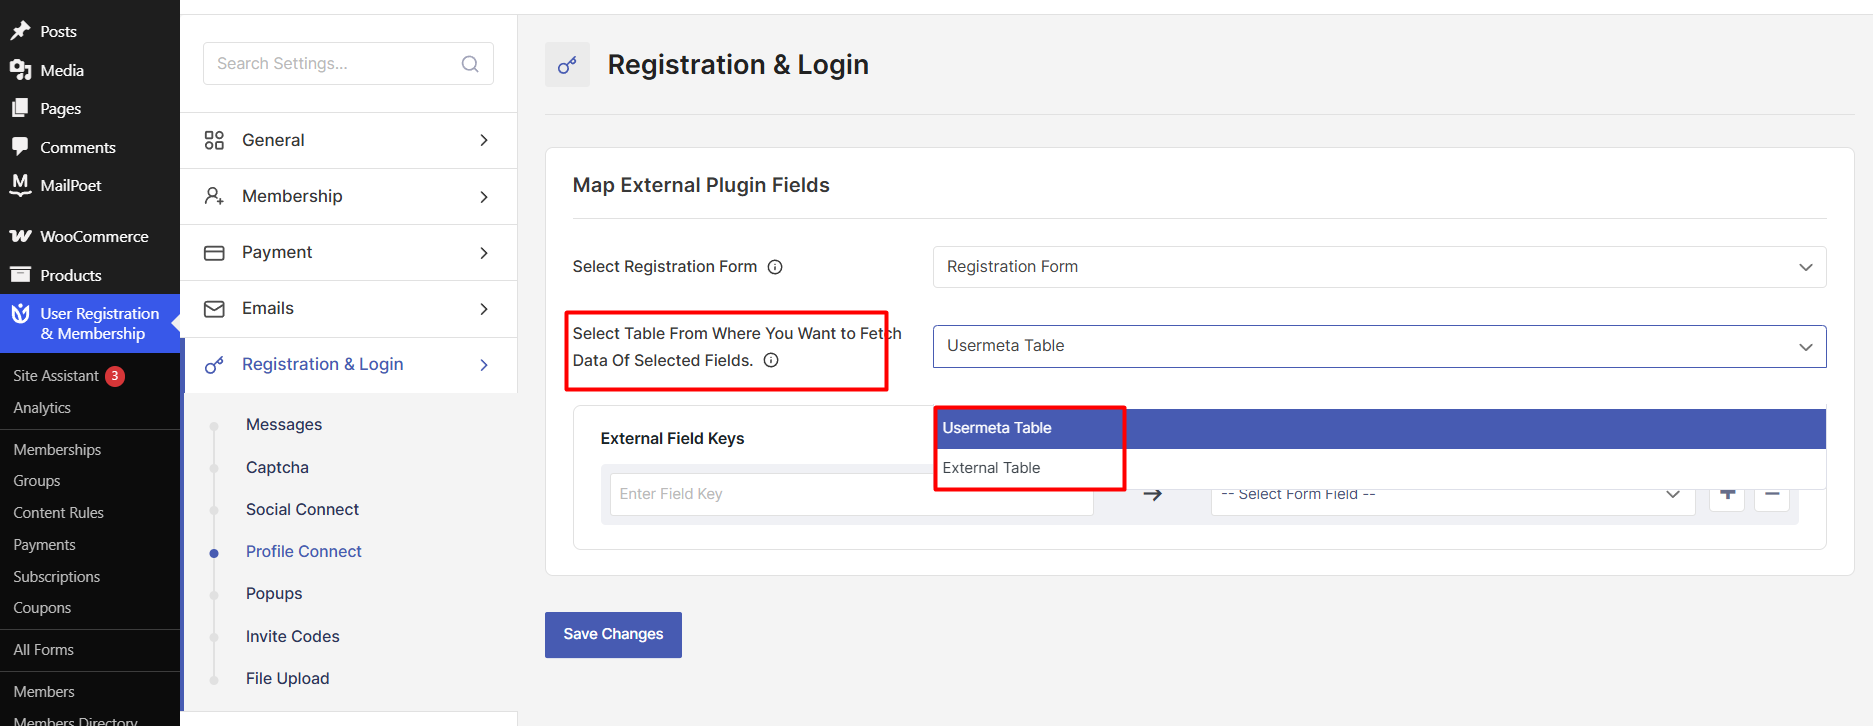
Select Table From Where You Want to Fetch Data of Selected Fields: This setting determines where Profile Connect will look for the data to populate your form fields. The choice between these options depends on your data structure and integration needs.
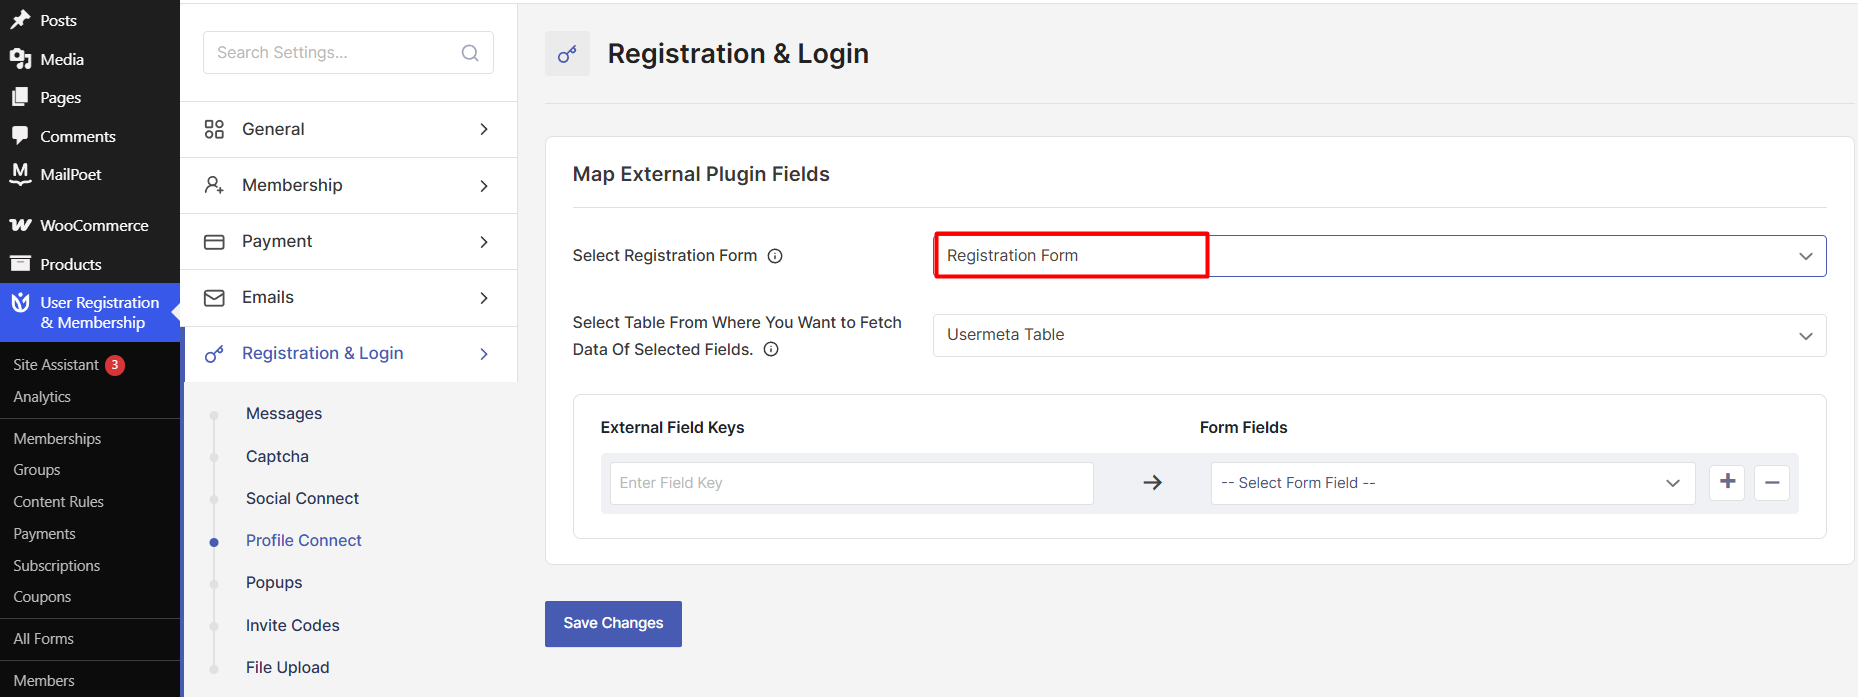
Usermeta Table: WordPress’s standard user metadata table (wp_usermeta)
External Table: Custom database tables from other plugins or custom applications. This means you’re connecting to custom database tables
If you select External Table, you must configure the following settings to define how Profile Connect should interpret your database structure:
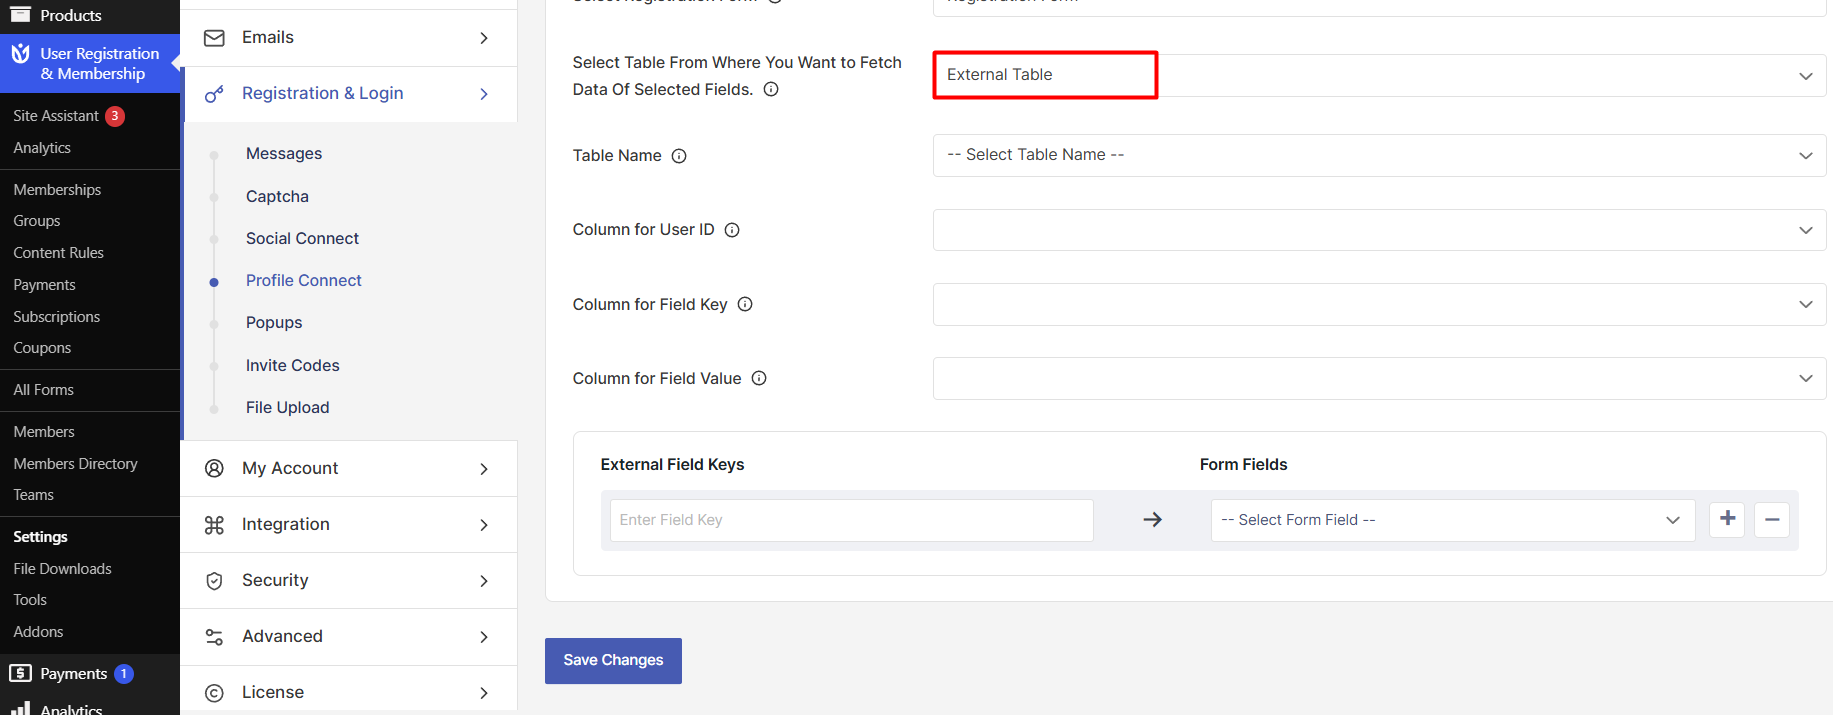
Table Name: This field specifies the exact database table that contains your external data. The table must exist in your current WordPress database and be accessible to the WordPress database user.
Format: Enter the complete table name (including prefix if applicable)
Example: wp_users (WordPress core users table)
Column for User ID: This setting identifies which column in your external table contains the user identifier that links records to specific WordPress users. This creates the relationship between your external data and WordPress user accounts.
Example: ID (for wp_users table)\
Important: This column must contain valid WordPress user IDs.Column for Field Key: This column contains the field identifiers or metadata keys describing each record’s data type. Think of this as the “label” that tells Profile Connect what information it looks at.
Example:meta_key (for WordPress metadata tables).
Column for Field Value: This column contains the data values that will populate your form fields. This is where the real information lives – the content your users will see pre-filled in their forms.
Example:meta_value (for WordPress metadata tables).
Step 3: Field Mapping configuration
This is where you create connections between your external data and form fields. Each mapping you configure here creates a dynamic link that automatically populates form fields with relevant user data.
External Field Keys: Specify the exact field keys from your database that you want to connect to your form. These must match the values stored in your “Column for Field Key.” So, manually enter the field key names.
Form Fields: Let’s you select which form field should receive the data from your external source. This dropdown shows all available fields from your selected registration form.
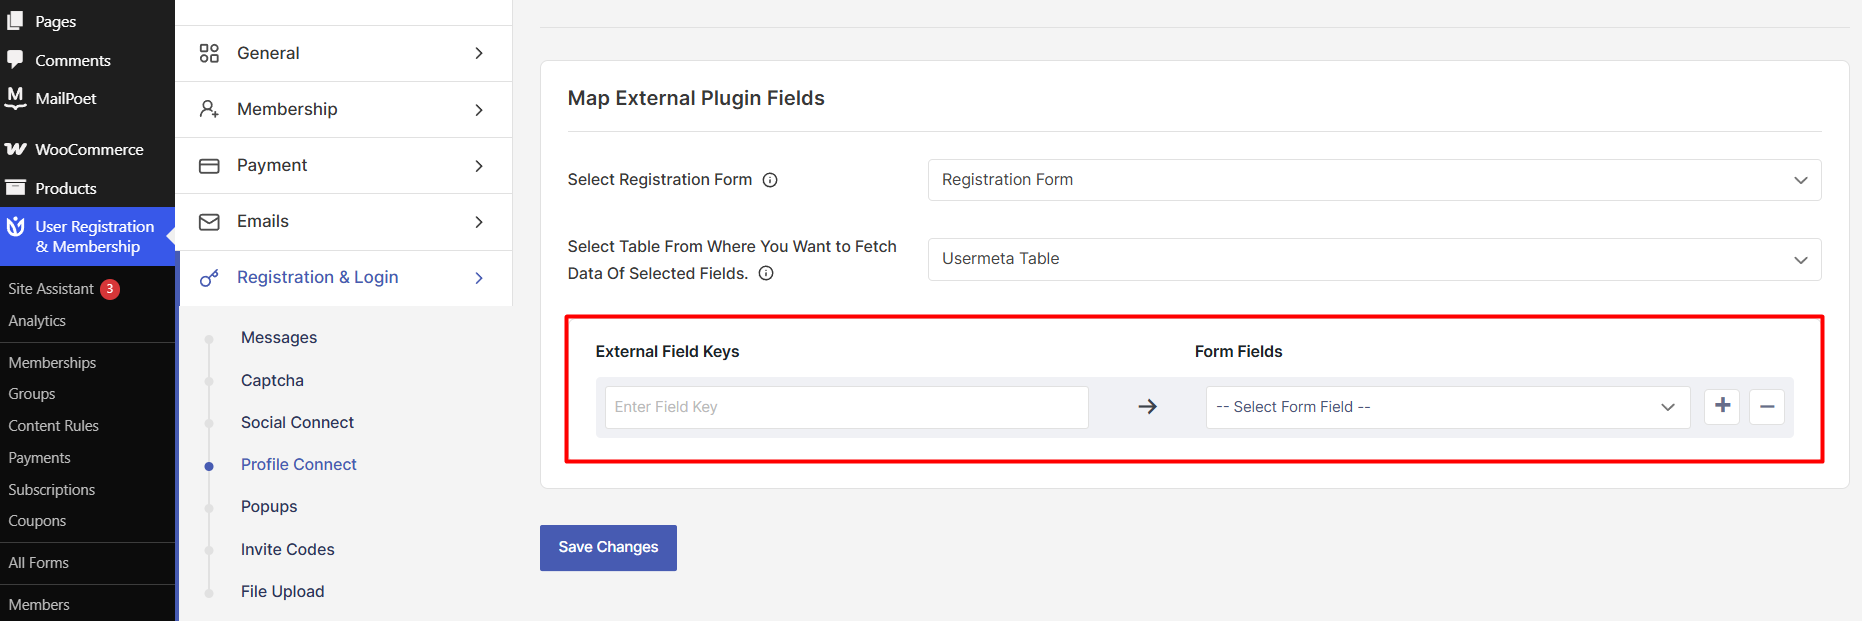
You can add or remove the fields by clicking the plus (+) and minus (-) buttons. Click on the Save Changes button to implement the change.