
Import users
ProAdd multiple WordPress users at once by importing them from a CSV file with the Import Users addon for User Registration & Membership Pro.
Last updated on Aug 12, 2026
Would you like to add multiple users to your WordPress site without entering them one by one? User Registration & Membership allows you to import users in bulk from a CSV file, saving time when migrating from another platform or adding team members. This tutorial will show you how to install the Import Users addon and import your user data.
Before getting started, make sure you've installed and activated the User Registration & Membership Pro plugin on your WordPress site. Then, make sure you've installed and activated the Import Users addon. Import Users is available with Plus plan or higher.
Activating the Import Users Add-on
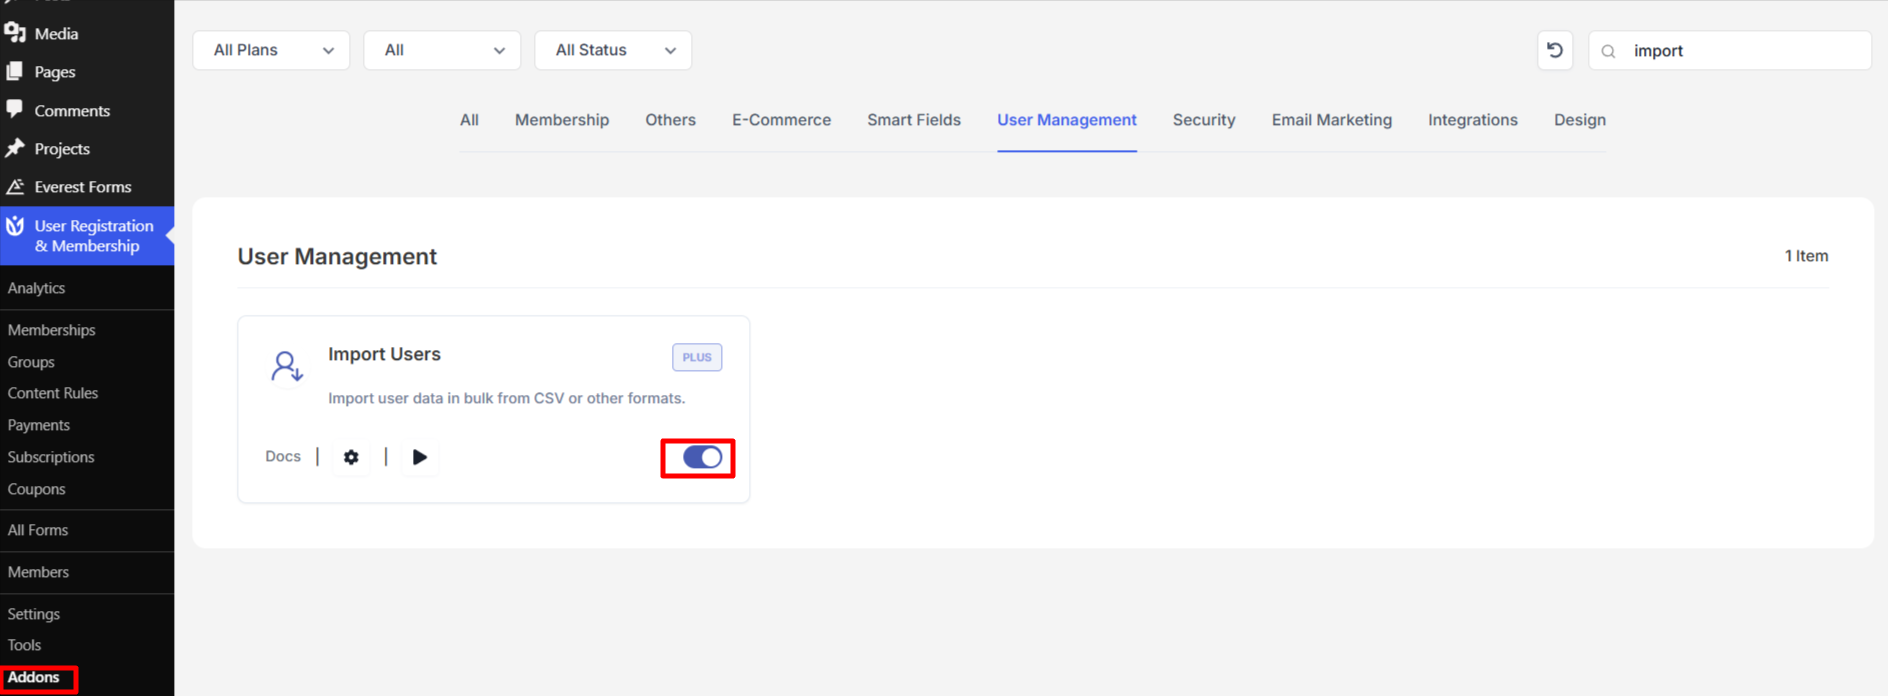
To enable Import Users on your site, go to User Registration & Membership → Addons. Here, you'll see a list of all available addons for your plan.
Locate the Import users addon and toggle the switch to Activate. Once it's activated, the Import Users option will appear in your User Registration & Membership settings.
Preparing Your CSV File
Before importing users, you need a CSV file containing your user data. The CSV file should include columns for user information like email, first name, last name, and any other fields you want to import.
Note: Only CSV file format is supported. Other file types will not work with the import feature.
Creating a Registration Form
You must have a registration form created with all the necessary fields before importing users. The form fields will be used to map your CSV data during the import process.
To create a registration form, go to User Registration & Membership > Add New and build a form with all the fields that match your CSV columns. For example, if your CSV has email, first name, and last name columns, your form should have those fields.
Importing Users from CSV
Once you have your CSV file and registration form ready, go to User Registration & Membership > Settings > Import/Export > Import Users.
From the Select form to import users dropdown, choose the registration form you created. This form determines which fields are available for mapping.
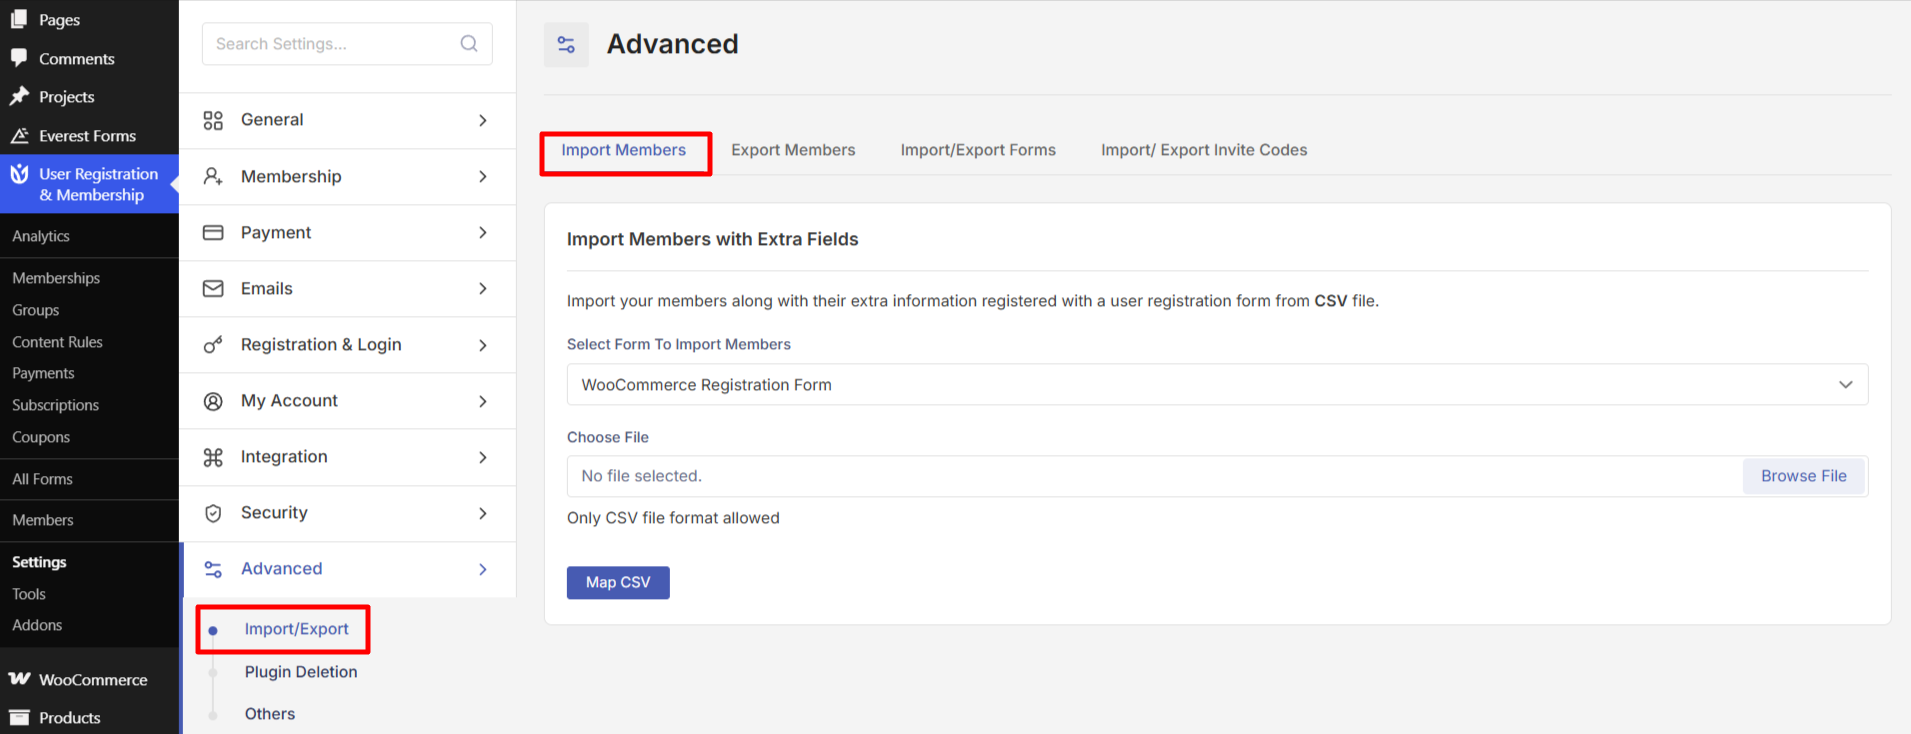
Click the Browse File button and select your CSV file from your computer. Then, click the Map CSV button to proceed to the field mapping screen.
Mapping CSV Fields to Form Fields
After clicking Map CSV, you will see your form fields listed on the left and your CSV columns listed on the right. You need to match each CSV column to the correct form field.
For example, map the Email column from your CSV to the Email field in your form. Map First Name to First Name, Last Name to Last Name, and so on. Make sure each field is mapped correctly to avoid import errors.
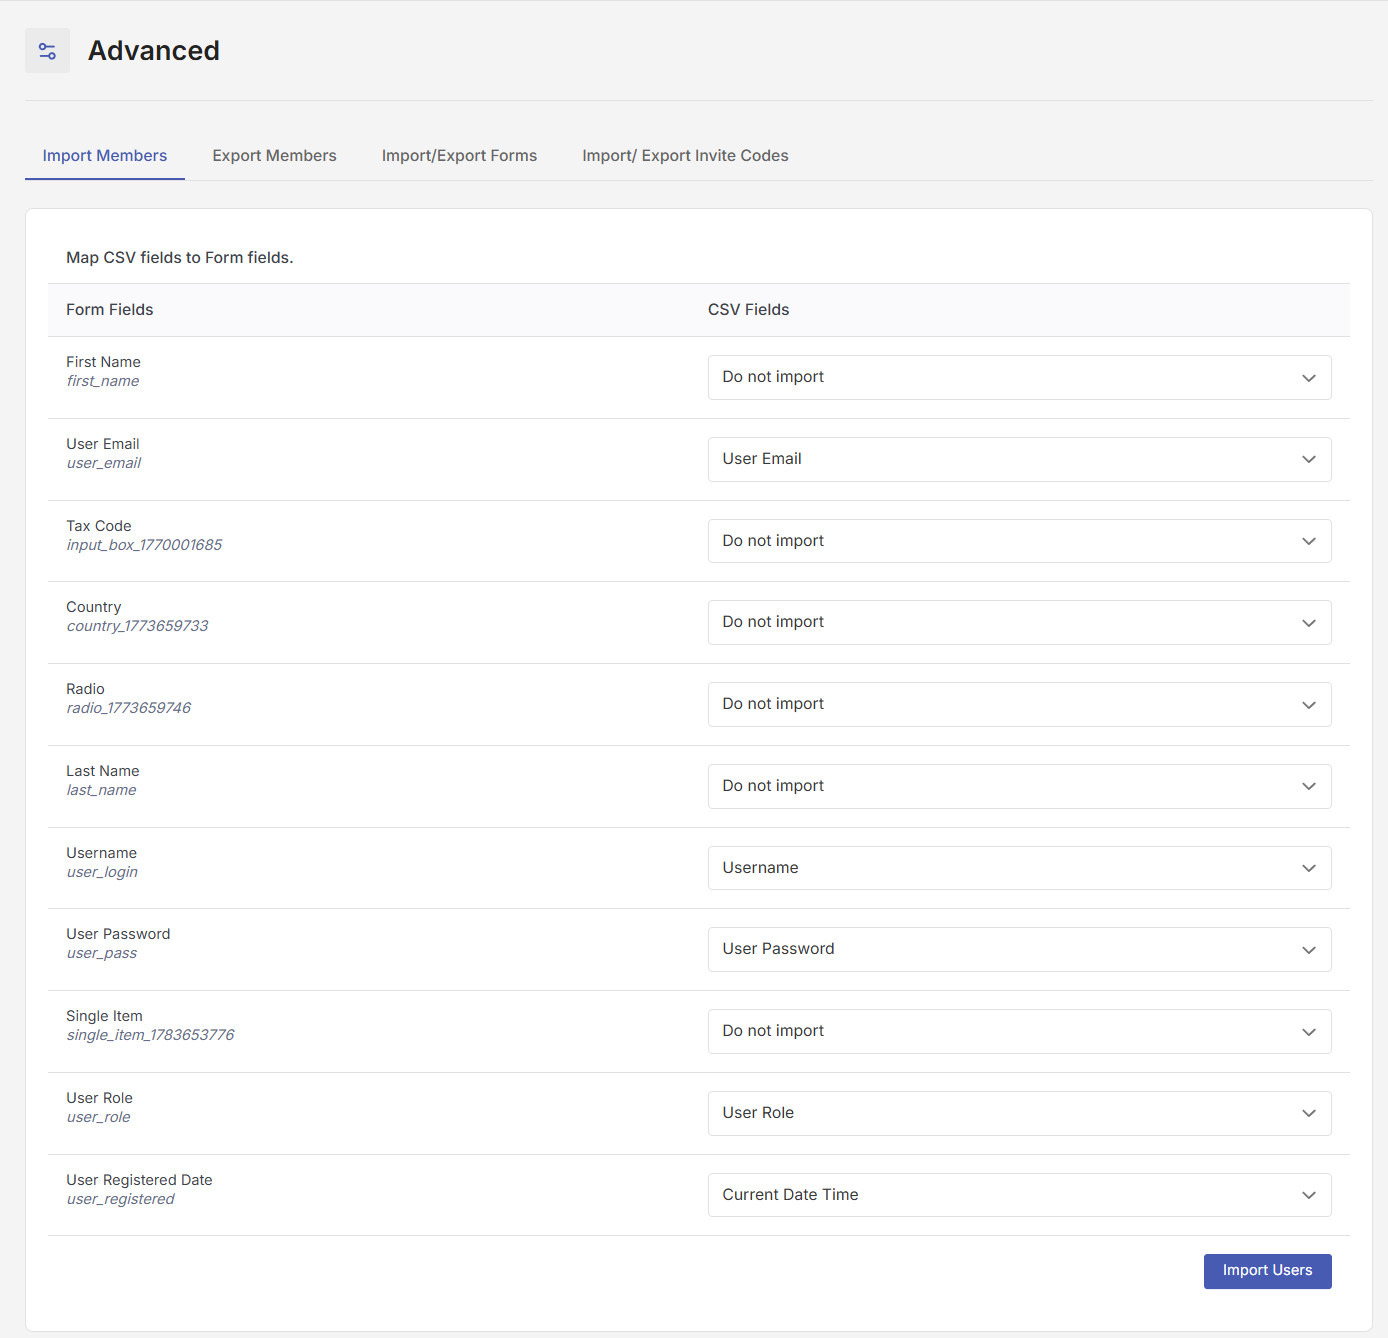
Once all fields are properly mapped, click the Import Users button to start the import process
Completing the Import
The import process will begin and may take some time depending on the number of users and your hosting speed. Once the import completes, you will see a success message confirming how many users were imported.
Note: If you are importing a large number of users, the process may take several minutes. Be patient and do not close the browser window during the import.
Troubleshooting Failed Imports
If some users fail to import, you will see a notice with a Download button. Click the button to download a list of users who could not be imported along with the reasons for failure.
The most common reasons for import failure are:
Improper field mapping - For example, mapping a First Name CSV column to an Email form field
User already exists - A user with the same email address is already registered on your site
To fix these issues, correct the field mapping or remove duplicate users from your CSV file, then try importing again.
Frequently Asked Questions
These are answers to some of the most common questions we receive about importing users.
What file format is supported for importing users?
Only CSV file format is supported. Excel files, text files, or other formats will not work. You must convert your data to CSV format before importing.
Can I import users without a registration form?
No, you must create a registration form first. The form fields are used to map your CSV data during import. Without a form, the import feature cannot determine where to place your user data.
What happens if a user already exists?
If a user with the same email address already exists on your site, that user will not be imported. The existing user data will not be changed or overwritten. You will see this user listed in the failed imports report.
How long does the import process take?
Import time depends on the number of users in your CSV file and your hosting server speed. Small imports with a few dozen users complete in seconds, while large imports with thousands of users may take several minutes.
That's it! Now you know how to import users into User Registration & Membership using a CSV file. Next, would you like to learn how to manage your imported users? Be sure to check out our guide on managing users and members for all the details.