
WPML Translation
Learn how to create multilingual registration forms and translate email notifications using WPML with User Registration & Membership plugin.
Last updated on Jul 15, 2026
Would you like to offer your registration forms in multiple languages to reach a global audience? User Registration & Membership is translation-ready and works seamlessly with WPML to create multilingual registration experiences.
This tutorial will show you how to translate your registration forms, email notifications, and form content into any language using WPML.
Before getting started, make sure you've installed and activated the User Registration & Membership plugin on your WordPress site. Then, make sure you've purchased and installed WPML Multilingual CMS (or higher plan) along with the WPML String Translation plugin.
Installing and Configuring WPML
To begin translating your registration forms, you'll need to set up WPML on your WordPress site.
You can easily translate User Registration and your registration forms to multiple languages. For this, you can use any multilingual plugins such as WPML or Polylang. Here, we are using the WPML plugin which is the most popular Multilingual plugin for WordPress. So, go ahead and install the WPML plugin on your website.
After you install and activate the plugin on your site, you can see the WPML tab on your admin dashboard. Now, you need to set up the plugin here. First, you need to select the current language of your website.
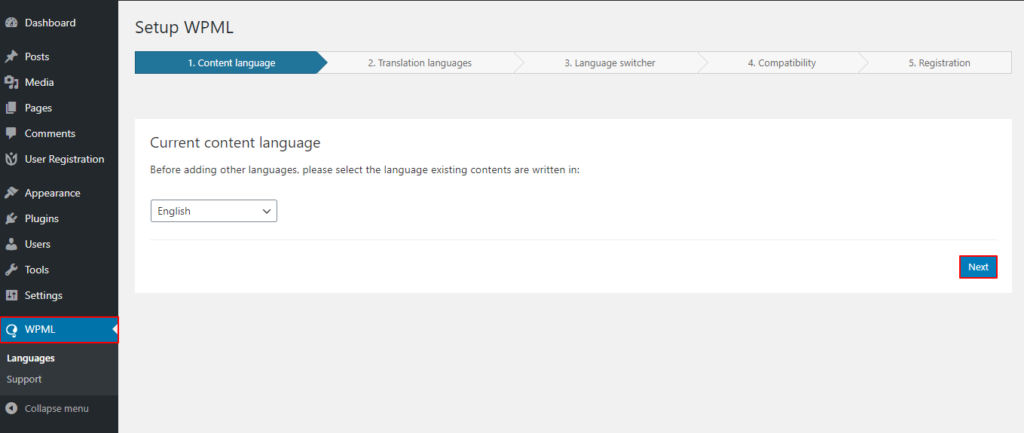
Once activated, navigate to WPML → Languages in your WordPress dashboard. WPML will launch a setup wizard to help you configure your multilingual site.
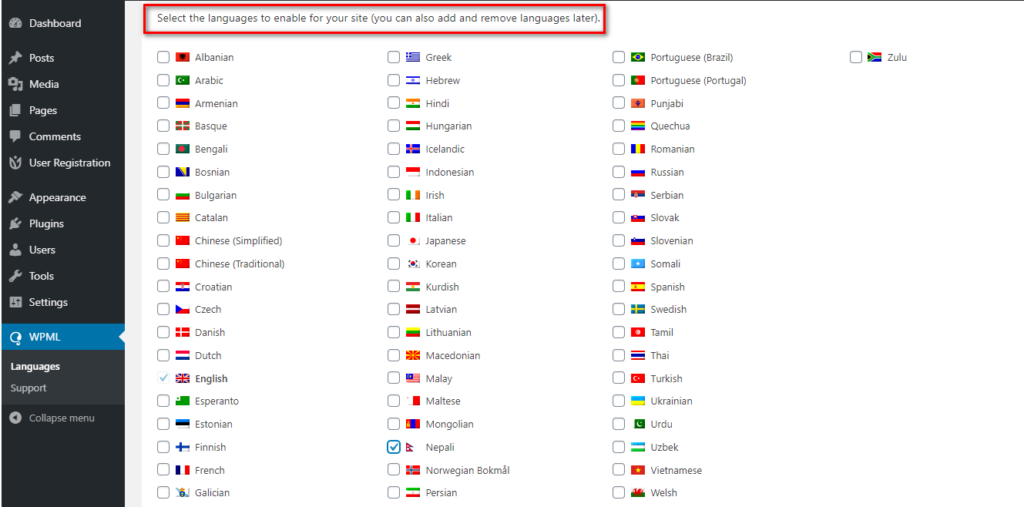
Setting Up Your Languages
The setup wizard will guide you through selecting your site's languages and URL structure.
First, select your site's default language - this is the language your content is currently written in. Then, click Next to add additional languages you want to translate your forms into. You can add as many languages as needed.
On the next screen, you can the change Language Switcher Options in the third step of the setup.
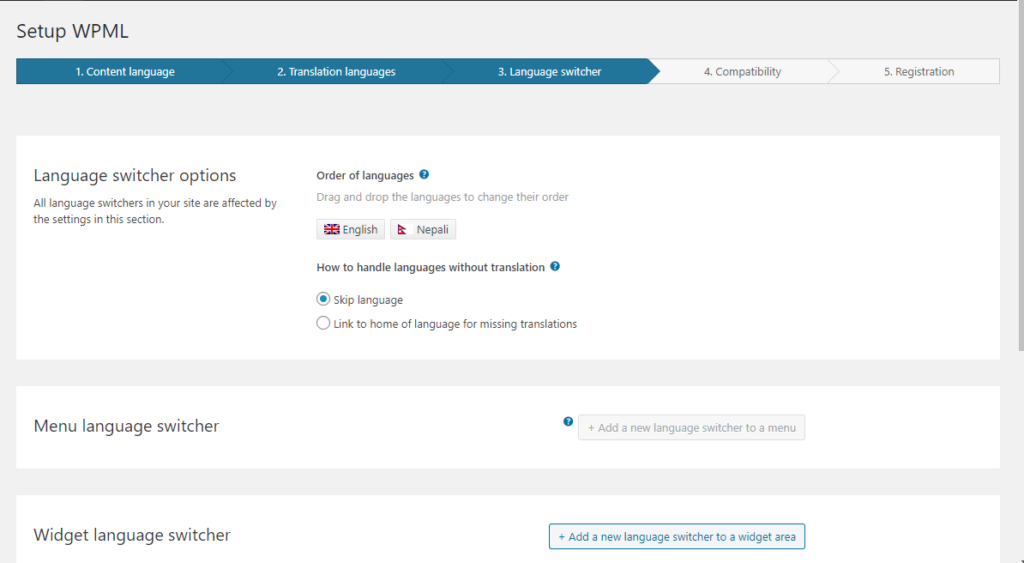
Click Save to complete the language setup.
Enabling String Detection
WPML needs to detect translatable strings from the User Registration plugin before you can translate them.
Go to WPML → String Translation and locate the option Select strings within domain. Enable this setting—it allows WPML to automatically find translatable text as you use your site.
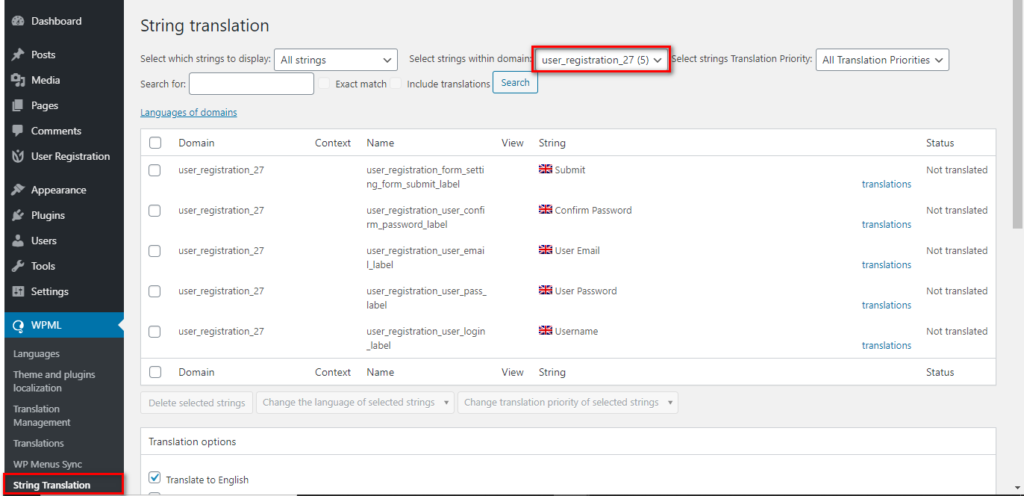
You can use two methods to register strings for translation: automatic scanning or manual triggering. We'll cover both approaches.
To add translations for these texts you can click on the translations and edit the translations.
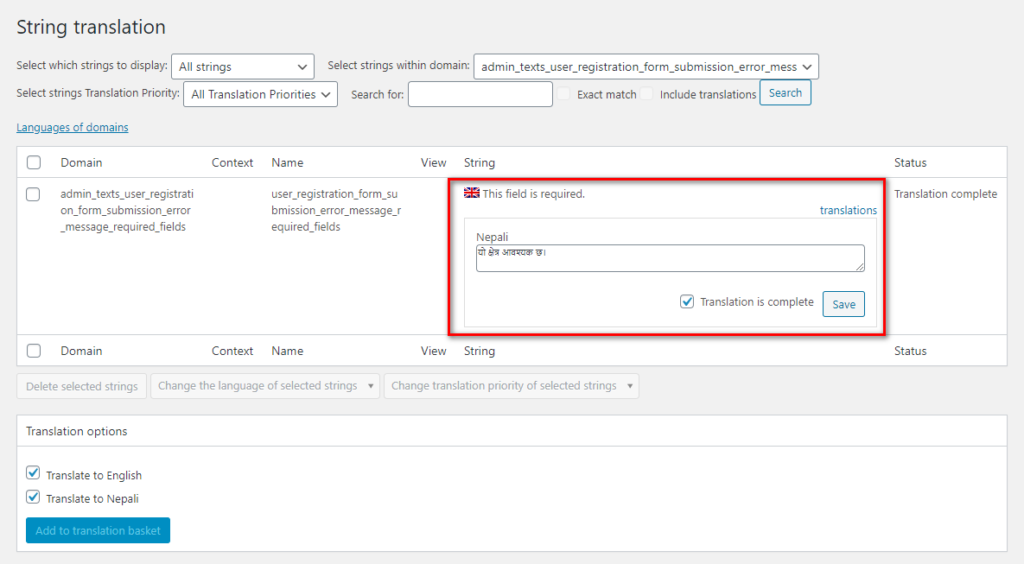
You can easily edit the translations and Save them right here.
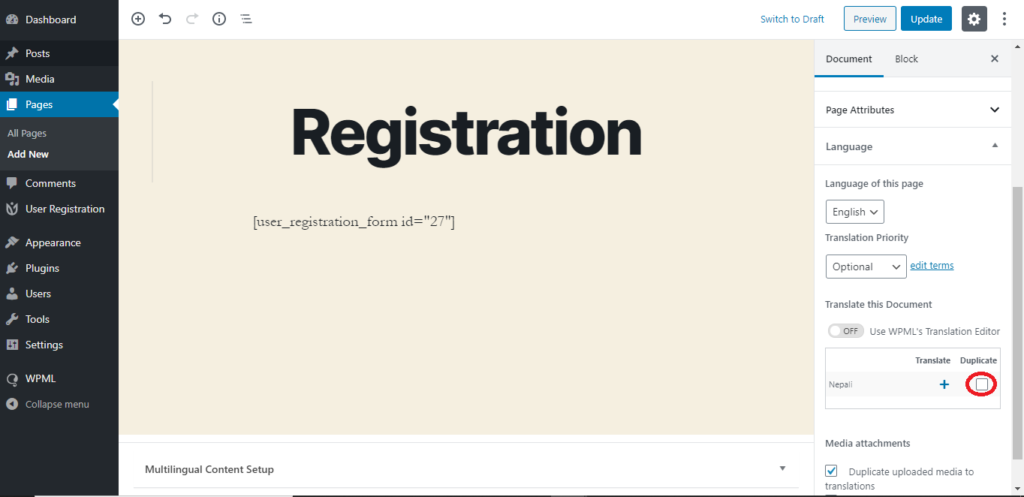
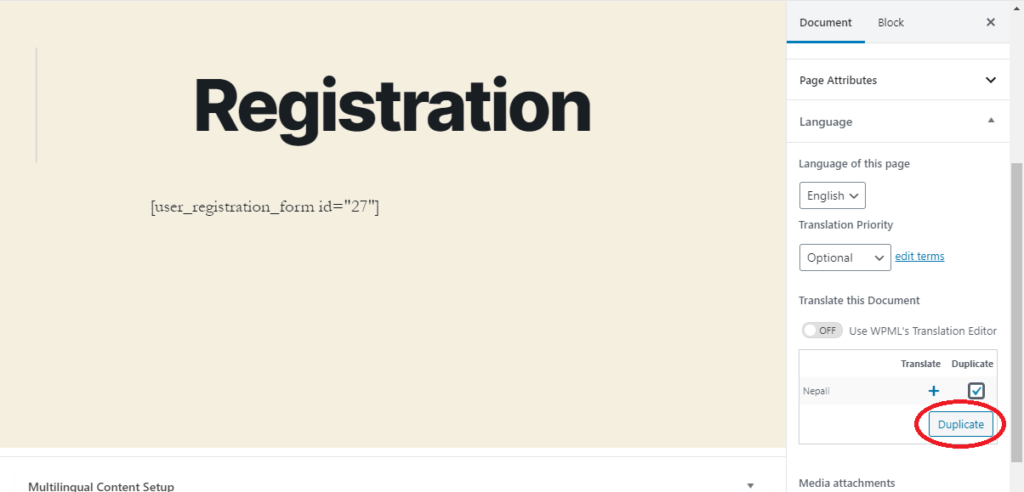
Now, go to the page where you have added your user registration form. You can see the WPML’s Translation Editor. Here, you can include the Translation languages for this document.
Testing Your Translations
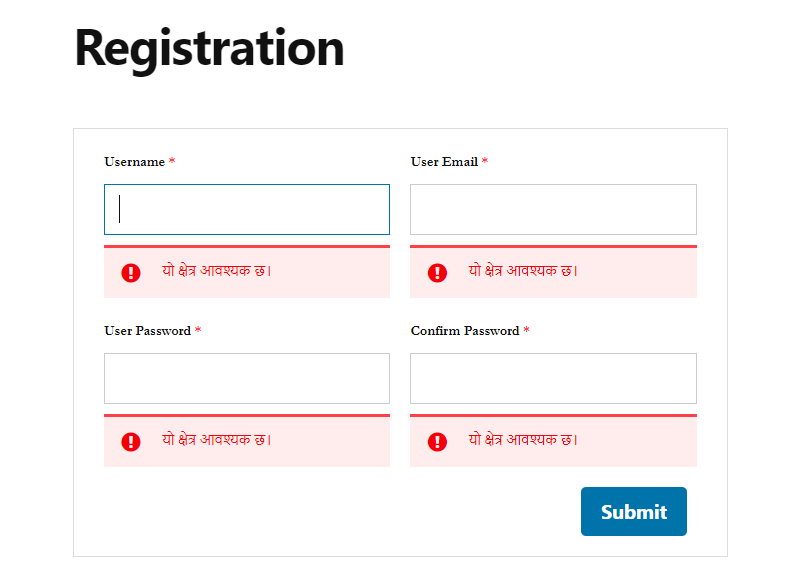
After you’re done with the translation Settings, you can update the page. The frontend view of the registration will look something like this.
Use the WPML language switcher on your site's frontend to change languages. Register a new test account in each language to confirm:
Form fields display in the correct language
Validation messages appear translated
Email notifications arrive in the user's selected language
Success messages and redirects work properly
If any strings appear untranslated, return to WPML → String Translation and verify the translation was saved correctly.