
Integrate Google reCAPTCHA
Learn how to add Google reCAPTCHA v2 or v3 to your registration and login forms to prevent spam and automated bot attacks on your WordPress site.
Last updated on Jul 14, 2026
Would you like to protect your registration and login forms from spam and bot attacks? User Registration & Membership allows you to add Google reCAPTCHA verification to your forms with just a few clicks. This tutorial will show you how to set up reCAPTCHA v2 or v3 to keep your site secure.
Before Getting Started
Before getting started, make sure you've installed and activated the User Registration & Membership plugin on your WordPress site. You'll also need a Google account to access the reCAPTCHA Console and generate your API keys.
Understanding reCAPTCHA Types
User Registration & Membership supports three types of Google reCAPTCHA protection:
reCAPTCHA v2 (Invisible) — Runs in the background without showing a checkbox. Most users won't see any challenge, but suspicious traffic may trigger verification.
reCAPTCHA v3 — Completely invisible and friction-free. It assigns a score from 0.0 to 1.0 based on user behavior, where 1.0 means likely human and 0.0 means likely bot. You set a threshold score to determine when to block requests.
Obtaining Your reCAPTCHA Keys
To integrate reCAPTCHA with your registration forms, go to the Google reCAPTCHA Console and sign in with your Google account.
Once signed in, click the Get Started button to register a new site. You'll need to provide a label for your site and your domain name. Then, choose which reCAPTCHA type you want to use — v2 Checkbox, v2 Invisible, or v3.
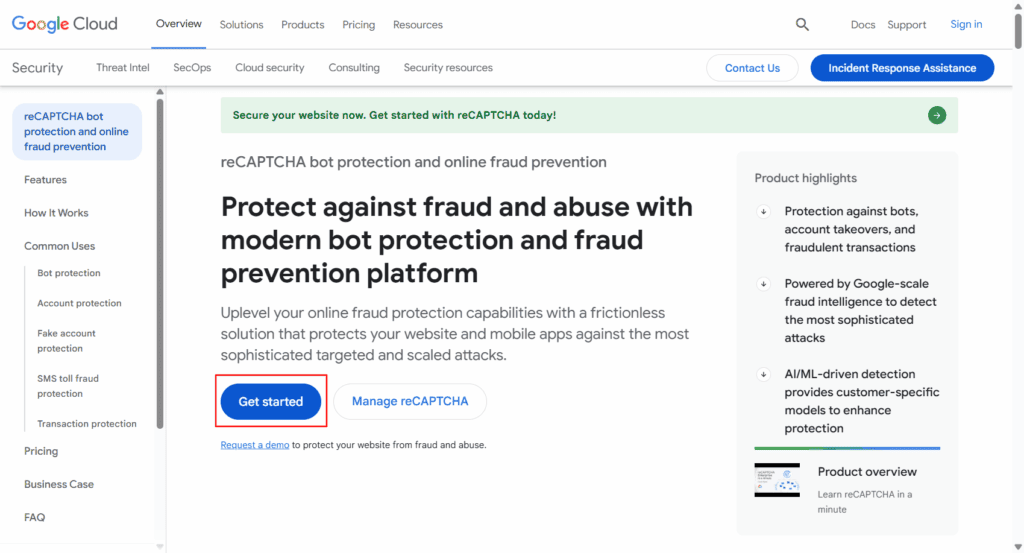
After accepting the terms of service and submitting the form, Google will generate two keys for you: a Site Key (public key) and a Secret Key (private key). Copy both keys — you'll need them in the next step.
Configuring reCAPTCHA in User Registration Settings
From your WordPress dashboard, go to User Registration & Membership → Settings → Registration & Login → Captcha.
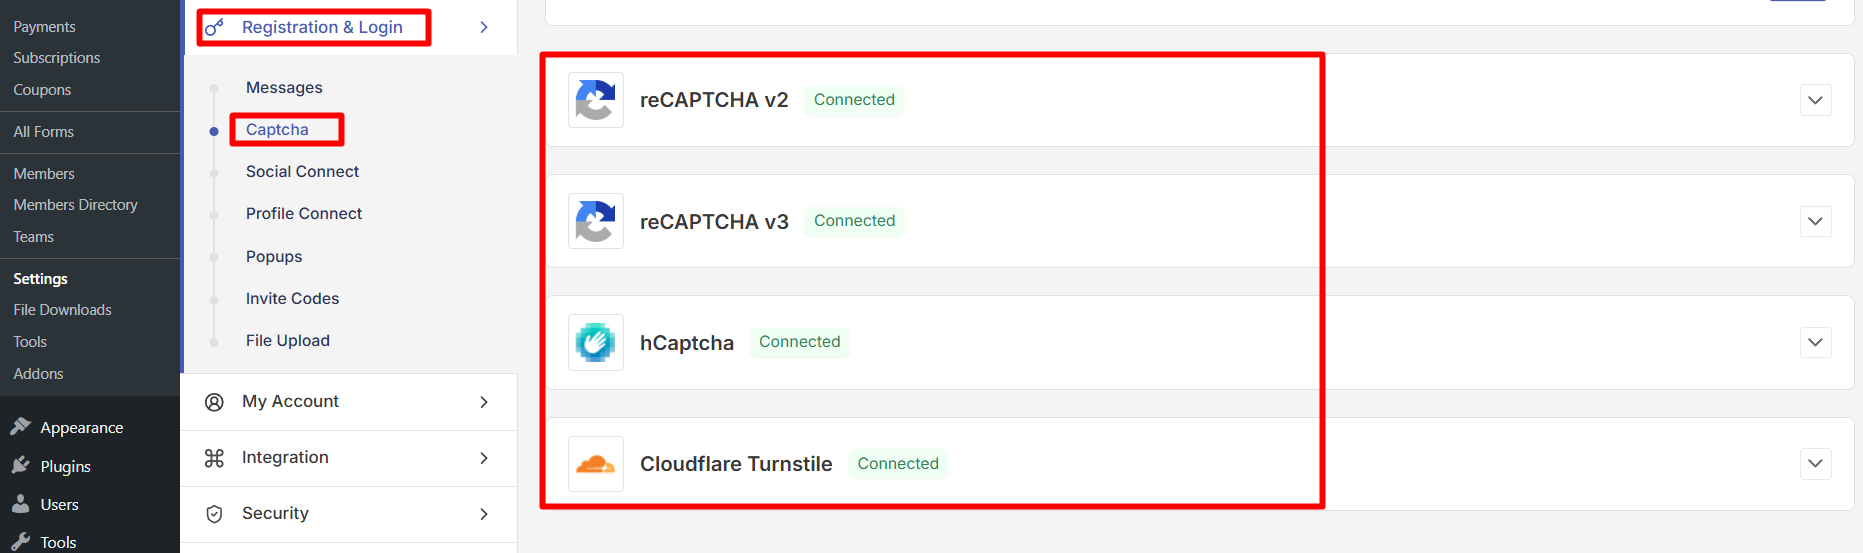
In the reCAPTCHA Version dropdown, select the version you registered in the Google Console (v2 or v3).
Paste your Site Key and Secret Key into the corresponding fields. If you're using reCAPTCHA v2 Invisible, make sure to check the Invisible reCAPTCHA v2 checkbox.
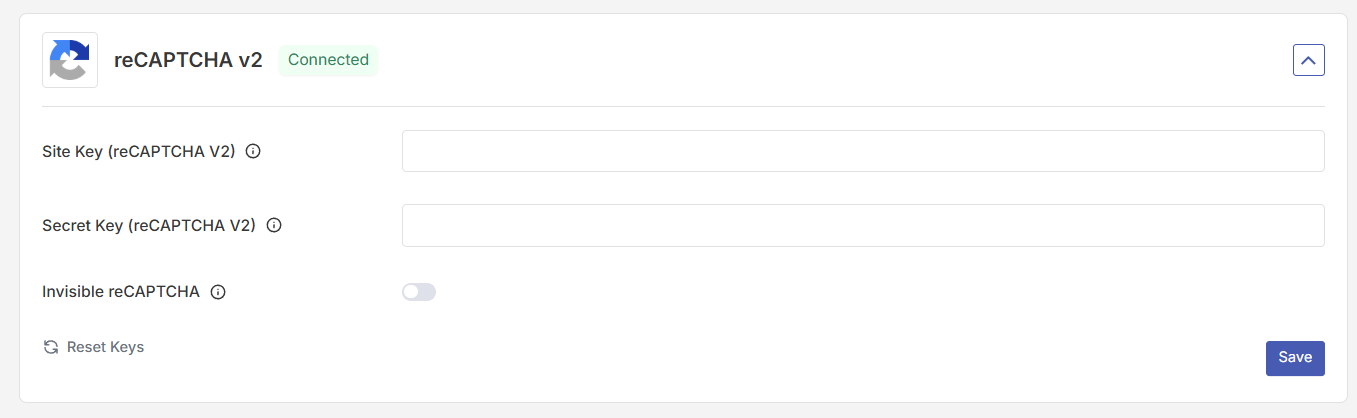
If you selected reCAPTCHA v3, you'll see an additional Threshold Score field. This score determines when to block requests — set it between 0.0 and 1.0. A lower threshold (like 0.3) blocks more aggressively but may block some real users. A higher threshold (like 0.7) is more permissive but may let some bots through. We recommend starting with 0.5 and adjusting based on your results.
Click Save Changes to save your reCAPTCHA configuration.
Enabling reCAPTCHA on Registration Forms
Now that you've configured reCAPTCHA globally, you need to enable it on individual registration forms.
Go to User Registration & Membership → All Forms and select the registration form you want to protect. In the form editor, click the Form Settings tab, then go to General.
Toggle on Enable CAPTCHA Support. A dropdown will appear — select the reCAPTCHA type you configured in the previous step.
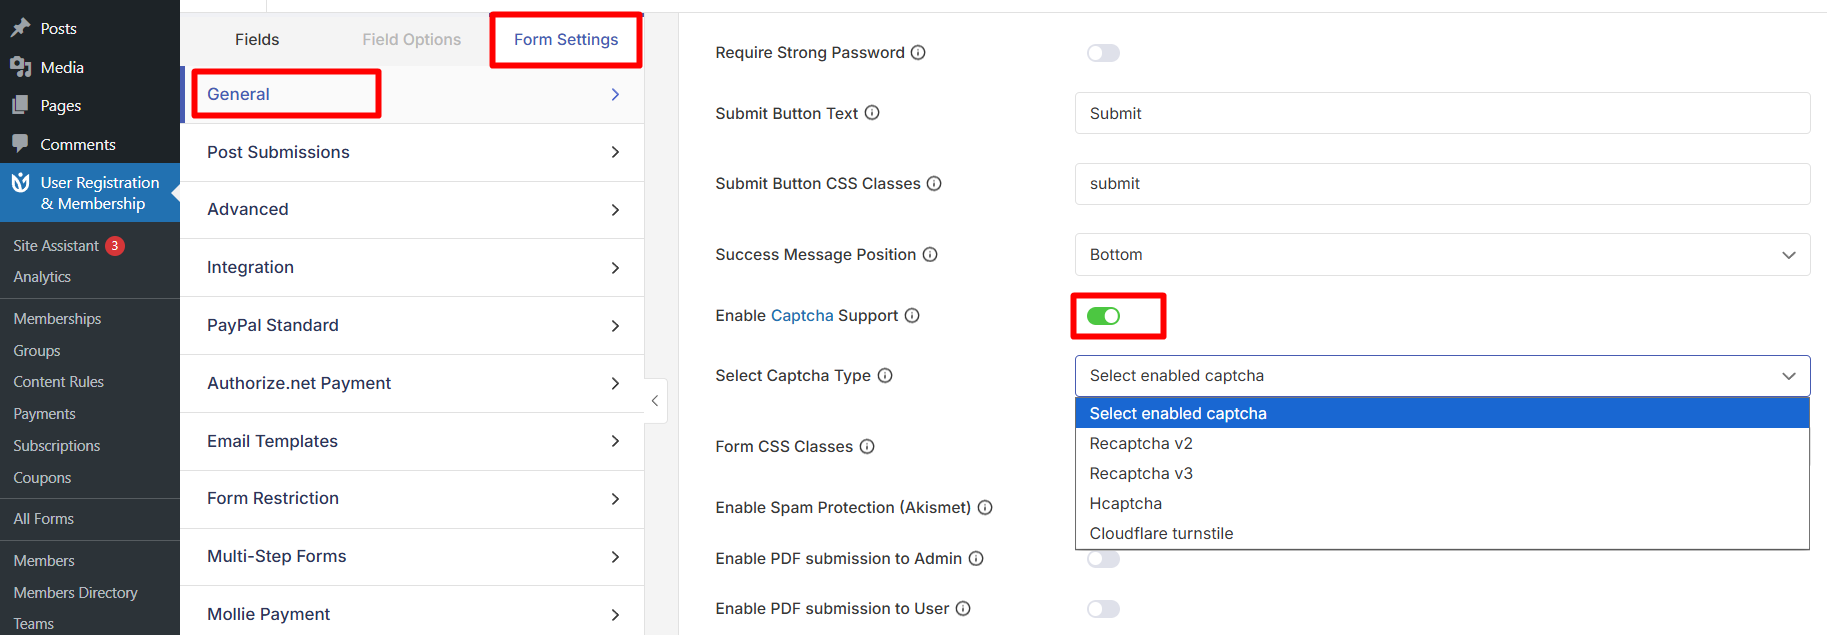
Click Update Form to save your changes. Your registration form now has reCAPTCHA protection enabled.
Enabling reCAPTCHA on Login Forms
To protect your login forms with reCAPTCHA, go to User Registration & Membership → All Forms → Login Forms.
Select the login form you want to protect and navigate to Form Settings → Advanced.
Check the Enable Captcha checkbox, then select your configured reCAPTCHA type from the dropdown menu.
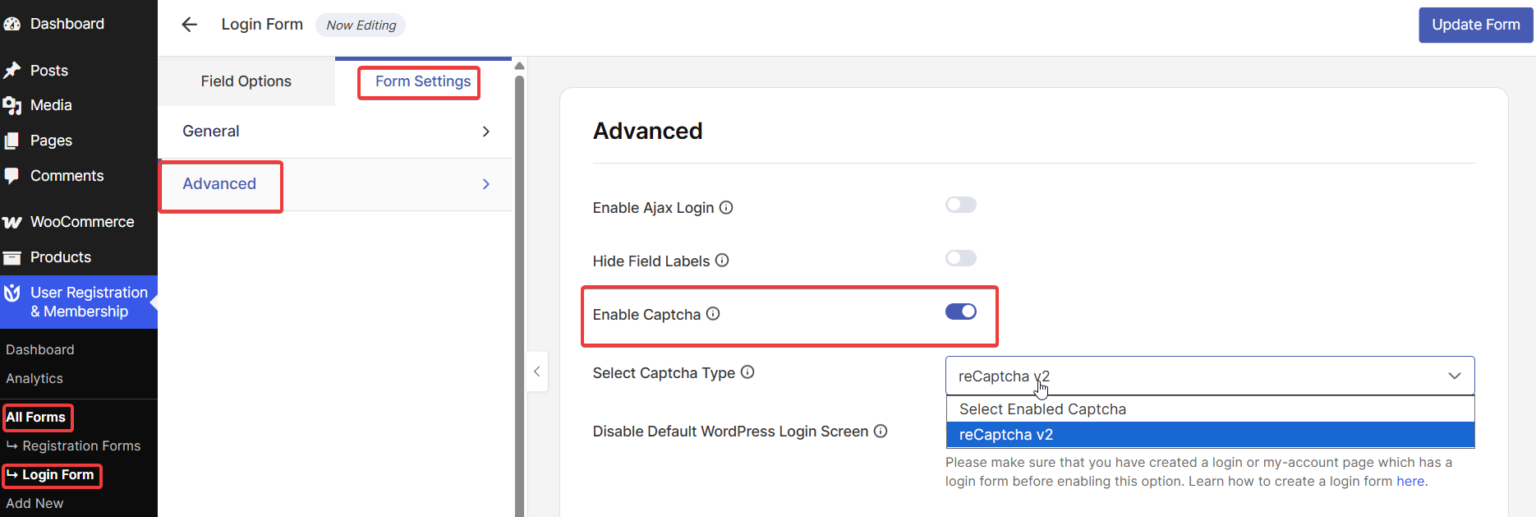
Click Save Changes to activate reCAPTCHA on your login form.
Customizing the reCAPTCHA Error Message
If a user fails the reCAPTCHA verification, they'll see an error message. You can customize this message to match your site's tone.
Go to User Registration & Membership → Settings → Registration & Login → Messages. Scroll down to find the reCAPTCHA error message field.
The default message is "Captcha code error, please try again." You can change this to any message you prefer, then click Save Changes.
Testing Your reCAPTCHA Integration
After enabling reCAPTCHA, test your forms to make sure everything works correctly.
For reCAPTCHA v2 Checkbox, you should see the "I'm not a robot" checkbox appear on your form. For reCAPTCHA v2 Invisible and v3, the protection runs in the background — you won't see any visible changes, but bots will be blocked automatically.
Try submitting a test registration to confirm that legitimate users can complete the form successfully. If you're using v3, monitor your Google reCAPTCHA dashboard to see the scores assigned to different submissions.
Frequently Asked Questions
Do I need to enable reCAPTCHA on every form individually?
Yes. After configuring reCAPTCHA in the global settings, you must enable it on each registration or login form where you want protection. This gives you flexibility to protect only the forms that need it.
What's the difference between reCAPTCHA v2 and v3?
reCAPTCHA v2 shows a checkbox or challenge to users, while v3 is completely invisible and assigns a risk score based on user behavior. v3 provides a smoother user experience but requires you to set an appropriate threshold score.
What threshold score should I use for reCAPTCHA v3?
Start with 0.5 as a balanced setting. If you're getting too many spam registrations, lower the threshold to 0.3 or 0.4 to block more aggressively. If legitimate users are being blocked, raise it to 0.6 or 0.7. Monitor your results and adjust accordingly.
Can I use reCAPTCHA with other spam protection methods?
Yes. User Registration & Membership supports multiple spam protection methods including reCAPTCHA, hCaptcha, Cloudflare Turnstile, honeypot protection, and Akismet. You can enable multiple methods for stronger protection.
That's it! Now you know how to integrate Google reCAPTCHA with your User Registration forms to protect against spam and bot attacks. Next, would you like to explore other spam protection options? Be sure to check out our guide on using hCaptcha and Cloudflare Turnstile for additional security layers.