
Cloudflare Turnstile Setup
Learn how to integrate Cloudflare Turnstile, a privacy-focused CAPTCHA alternative, to protect your WordPress registration and login forms from spam and bots.
Last updated on Jul 14, 2026
Would you like to protect your registration and login forms from spam and bot attacks? User Registration & Membership allows you to integrate Cloudflare Turnstile, a privacy-friendly CAPTCHA alternative that uses advanced algorithms and machine learning to distinguish humans from bots. This tutorial will show you how to set up Cloudflare Turnstile for your registration and login forms.
Before getting started, make sure you've installed and activated the User Registration & Membership plugin on your WordPress site.
Creating Your Cloudflare Turnstile Widget
To use Cloudflare Turnstile, you'll need to create a widget and obtain your API keys. Go to cloudflare and log in to your Cloudflare account. If you don't have an account yet, you can create one for free during this process.
Once you're logged in, navigate to the Turnstile menu from your Cloudflare dashboard. Here, you'll see an option to add a new widget. Click Add Widget to begin the setup process.
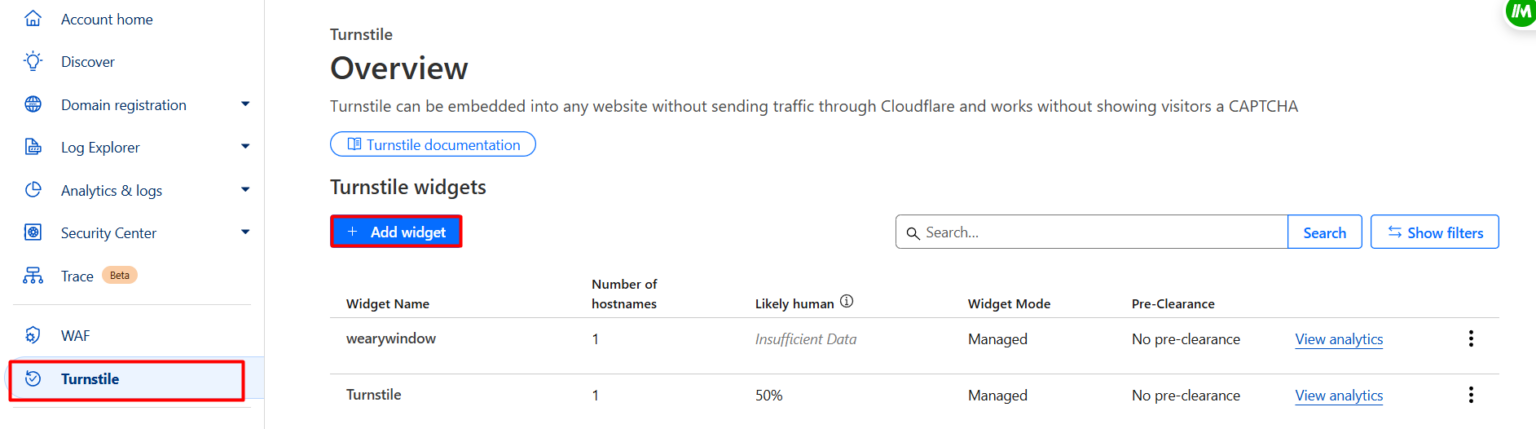
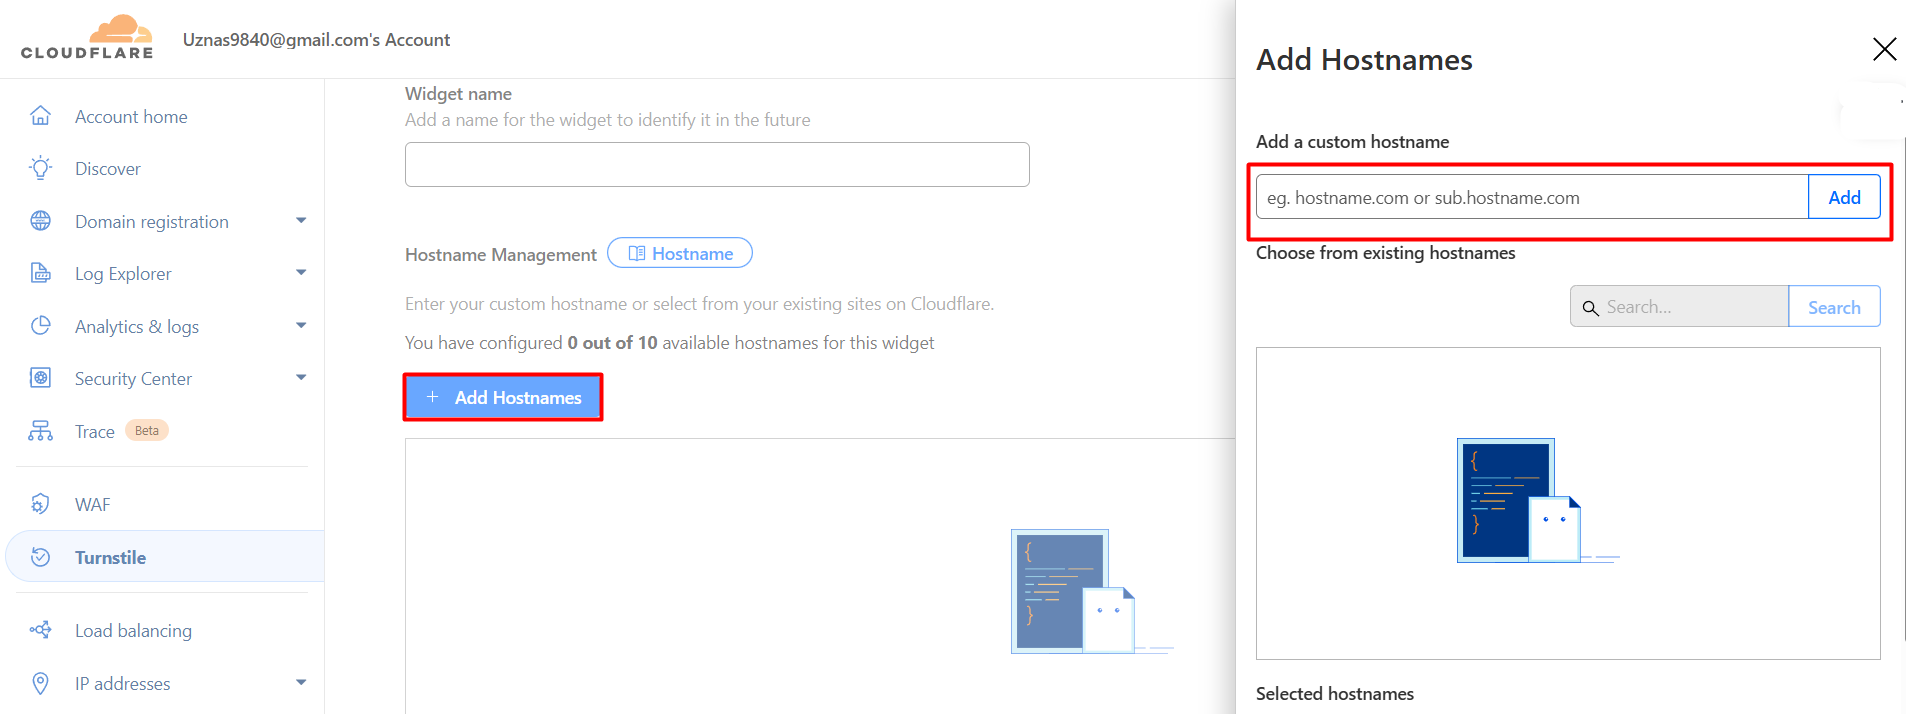
In the widget creation screen, enter a widget name to help you identify this integration later. This name is for your reference only and won't be visible to your site visitors. Then, enter your domain hostname where the CAPTCHA will be deployed. Once you've filled in these details, click Create to generate your widget.
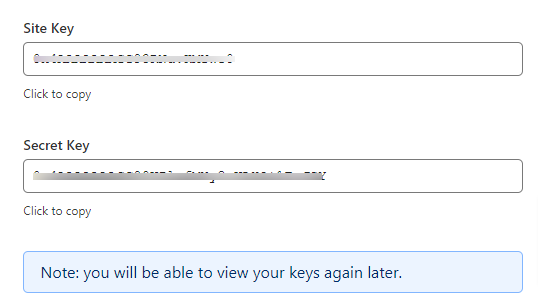
After creating the widget, Cloudflare will display your Site Key and Secret Key. Copy both of these keys — you'll need them in the next step to connect Cloudflare Turnstile with your WordPress site.
Configuring Cloudflare Turnstile in WordPress
From your WordPress dashboard, go to User Registration & Membership → Settings → Registration & Login → Captcha. This is where you'll configure your CAPTCHA settings for all registration and login forms.
In the Captcha settings page, paste the Site Key and Secret Key you copied from Cloudflare into the corresponding fields. Once you've entered both keys, click Save to store your configuration.
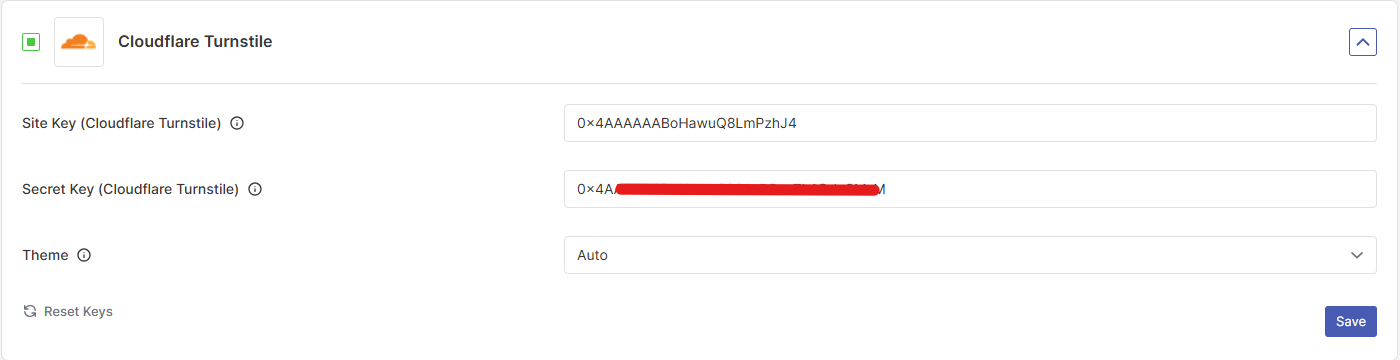
You can test your Cloudflare Turnstile configuration directly within the settings page to verify that your keys are valid and working correctly before enabling it on your forms.
Enabling Cloudflare Turnstile on Registration Forms
Now that you've configured Cloudflare Turnstile globally, you need to enable it on your individual registration forms. Go to User Registration & Membership → All Forms and select the registration form you want to protect.
Navigate to Form Settings → General for that form. Here, you'll find the CAPTCHA options. Enable the CAPTCHA support toggle, then select Cloudflare Turnstile from the dropdown menu of available CAPTCHA types.
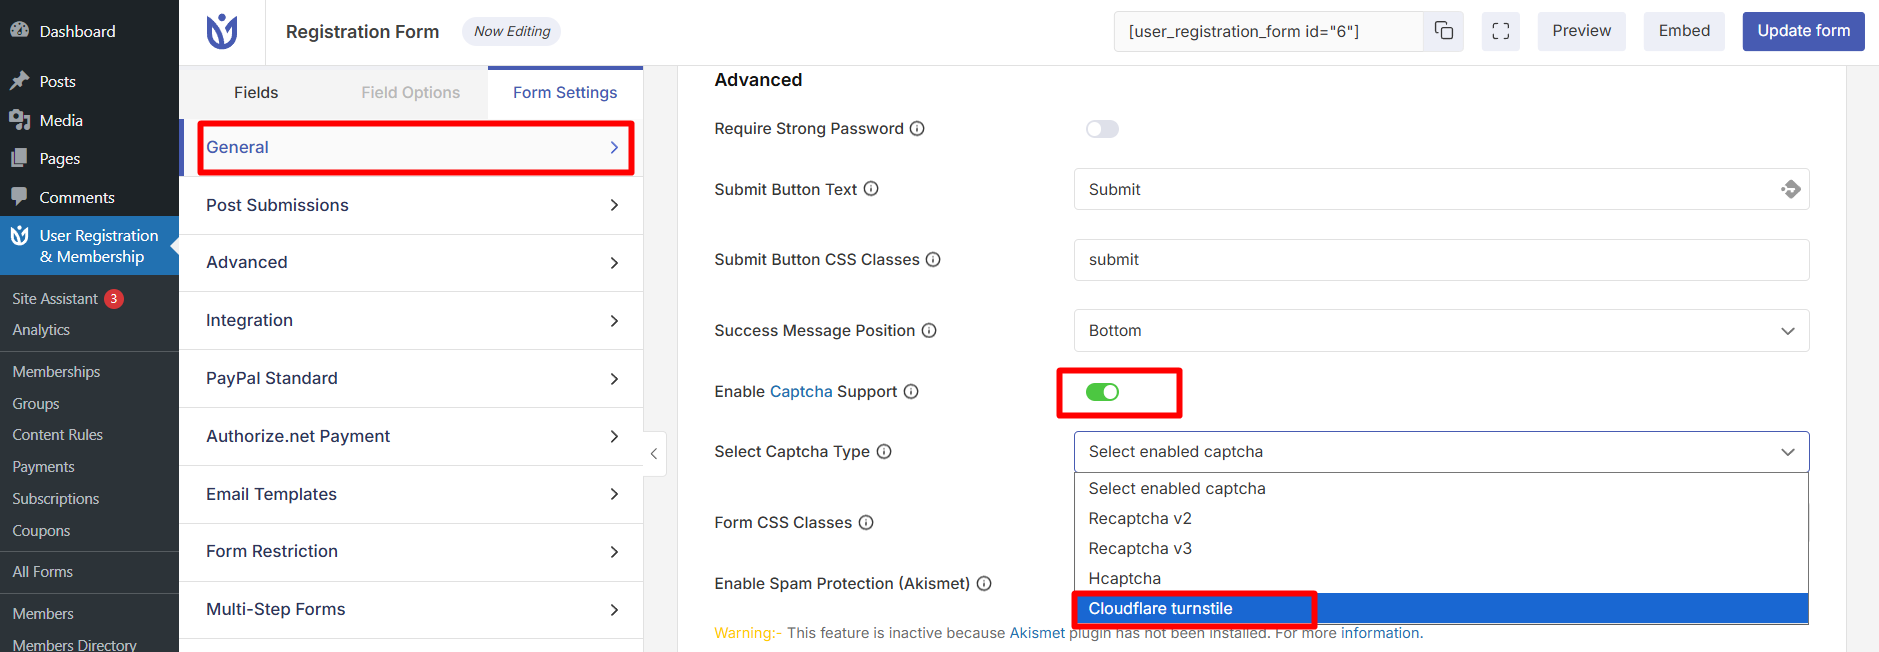
Click Update Form to save your changes. Your registration form will now display Cloudflare Turnstile verification to protect against automated bot submissions.
Enabling Cloudflare Turnstile on Login Forms
To protect your login forms with Cloudflare Turnstile, go to User Registration & Membership → All Forms → Login Forms. Select the login form you want to secure, then navigate to Form Settings → Advanced.
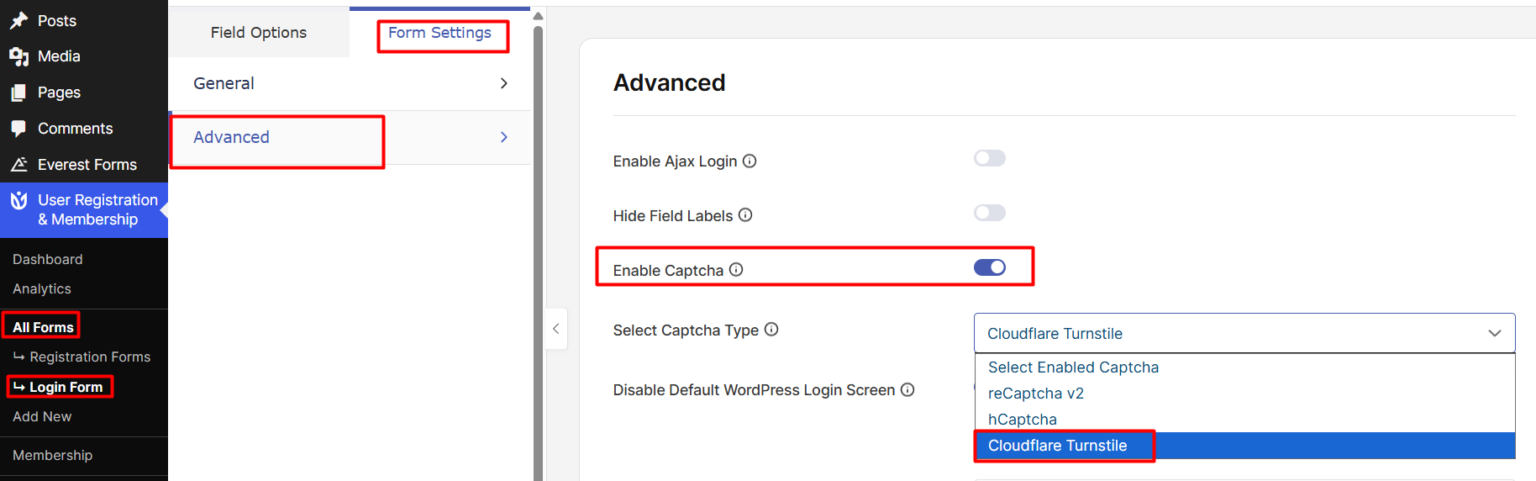
In the Advanced settings, check the Enable Captcha checkbox. Then, select Cloudflare Turnstile from the dropdown menu. Click Save Changes to apply the CAPTCHA protection to your login form.
That's it! Now you know how to set up Cloudflare Turnstile CAPTCHA for your registration and login forms. Next, would you like to explore other security features? Be sure to check out our guide on setting up two-factor authentication for additional login security.