
Registration Form Builder Overview
A drag-and-drop tool for creating professional WordPress registration forms without coding, featuring an intuitive interface and organized field categories.
Last updated on Jul 15, 2026
Would you like to create professional registration forms without writing any code? User Registration & Membership provides a powerful drag-and-drop form builder with an intuitive interface that makes form creation fast and easy. This guide will walk you through the form builder's key features and show you how to work efficiently using both mouse and keyboard controls.
Before Getting Started
Before you begin building forms, make sure you've installed and activated the User Registration & Membership plugin on your WordPress site.
Accessing the Form Builder
To open the form builder, go to User Registration & Membership → All Forms from your WordPress dashboard. From here, you can either create a new form or edit an existing one.
Understanding the Form Builder Interface
The form builder features a clean, modern design with three main areas:
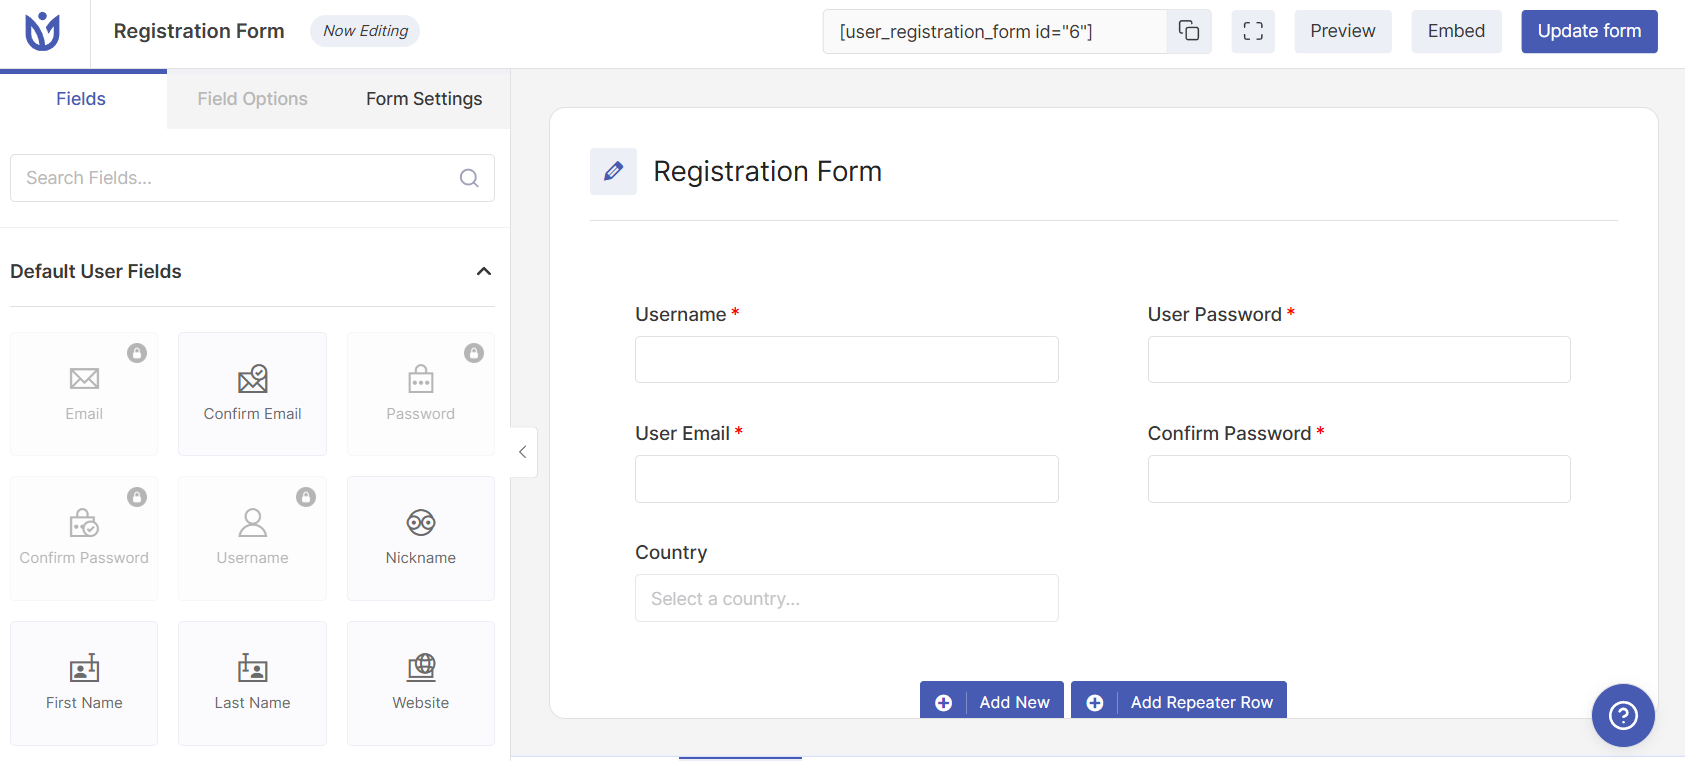
Left panel: Contains all available form fields organized into categories
Center canvas: Your working area where you build and arrange the form
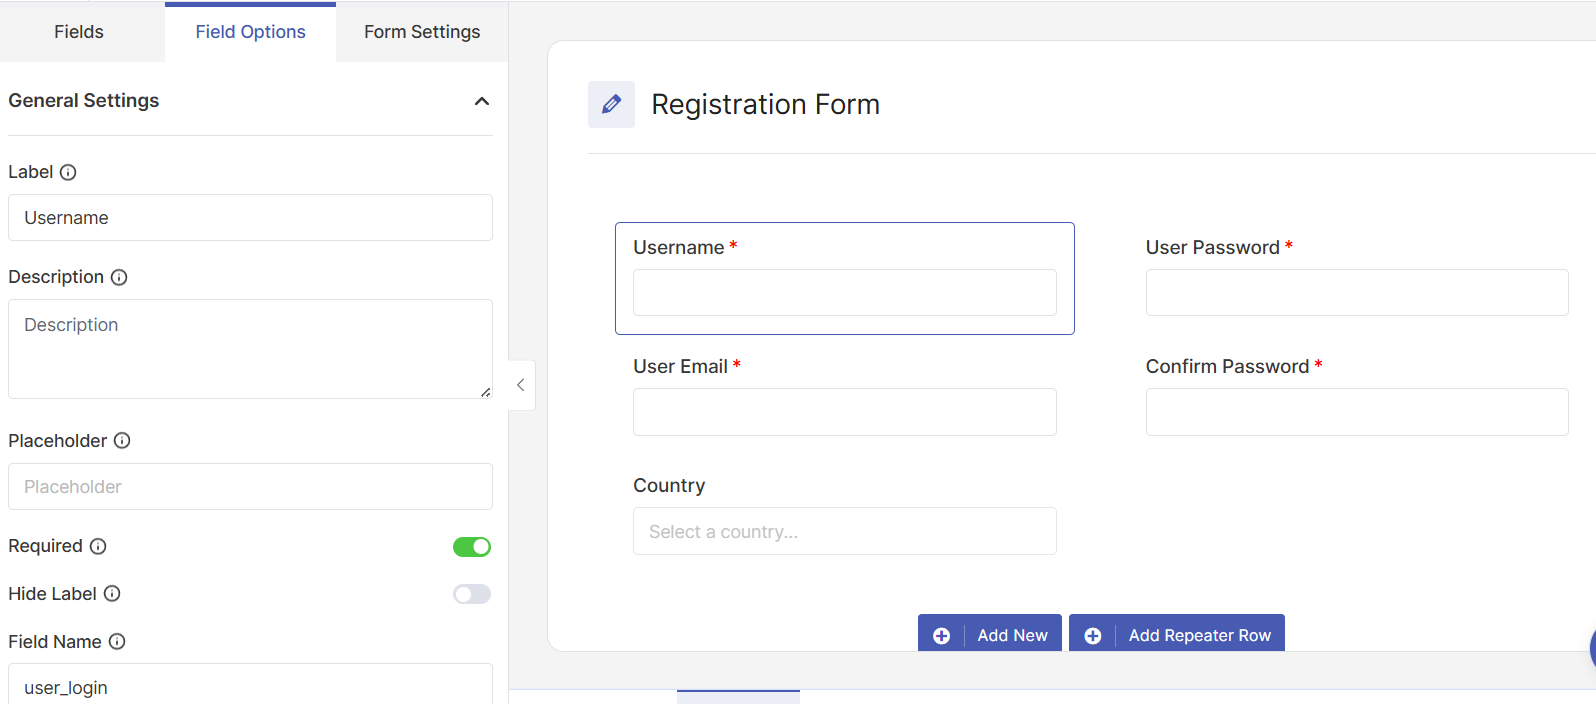
Left panel after clicking on fields: Field options and form settings for customization
Building Your Form
To add fields to your form, simply drag them from the left panel and drop them onto the canvas. The form builder includes two main field categories:
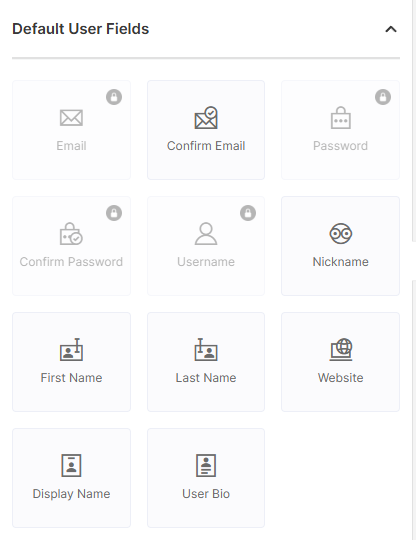
Default User Fields: Standard registration fields like Username, Email, Password, First Name, and Last Name
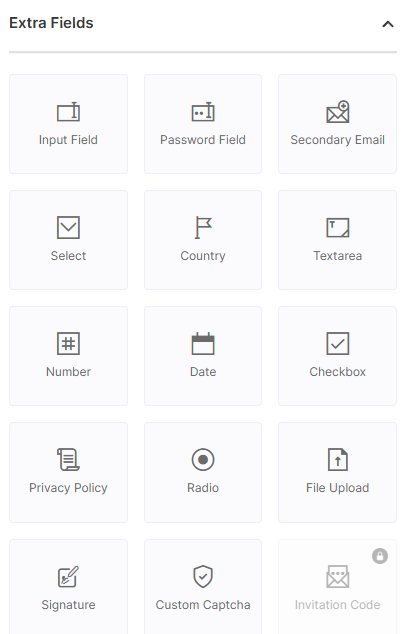
Extra Fields: Additional field types including text areas, dropdowns, checkboxes, date pickers, and more
Once you've added a field, click on it to access customization options in the right panel. Here you can modify the field label, add descriptions, set validation rules, and configure advanced settings.
Searching for Fields
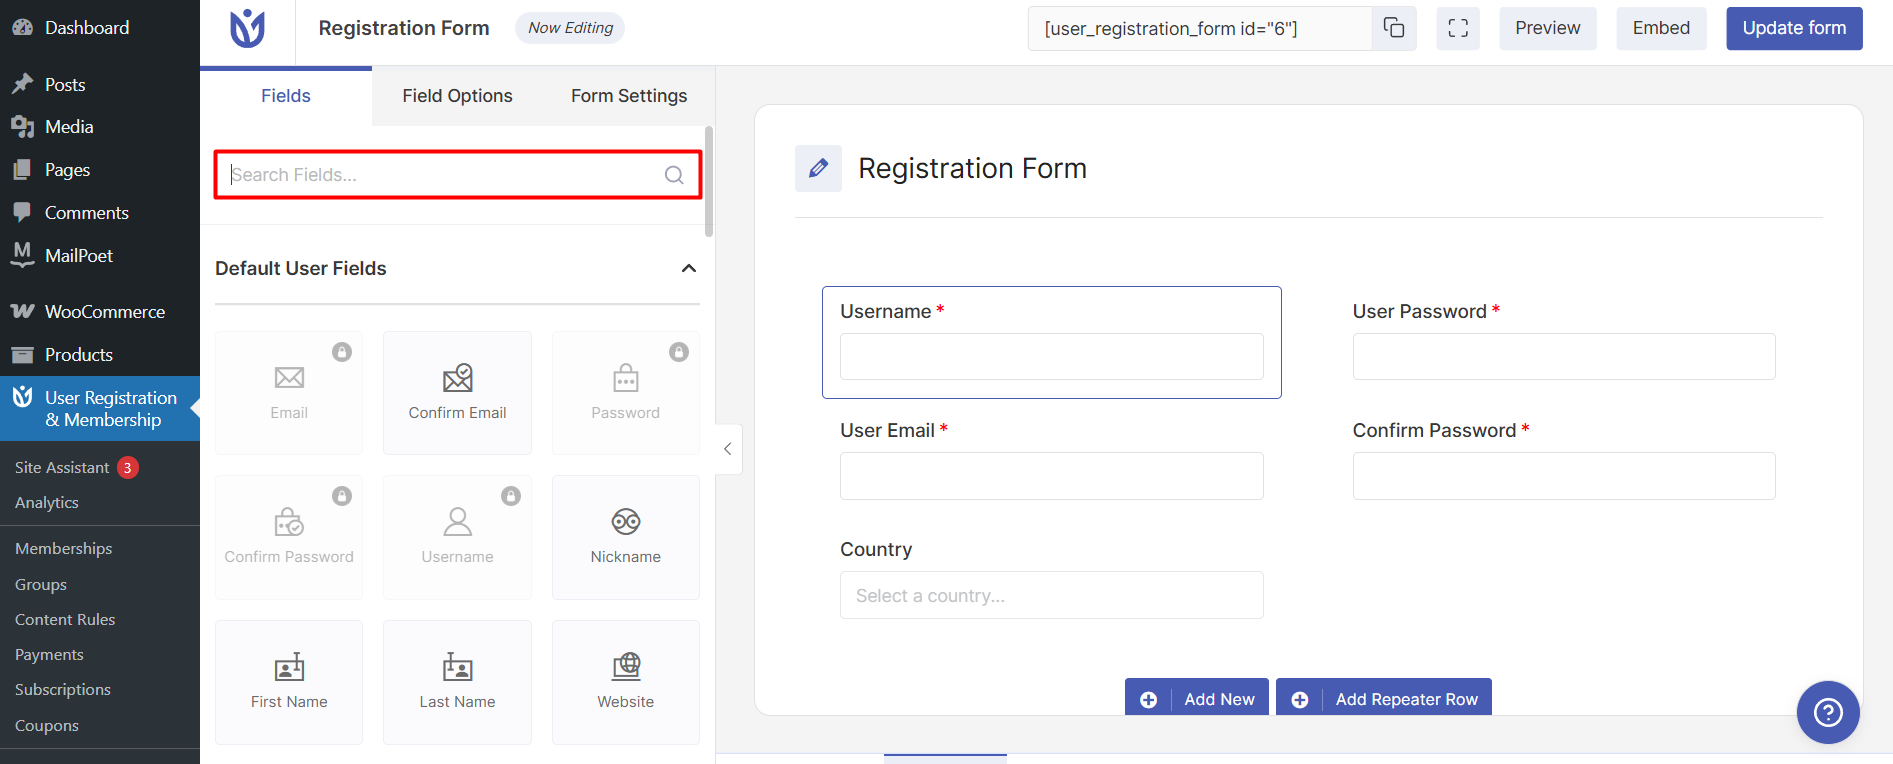
When working with many field types, use the search bar at the top of the left panel to quickly locate specific fields by name. This saves time compared to manually browsing through all available options.
Previewing Your Form
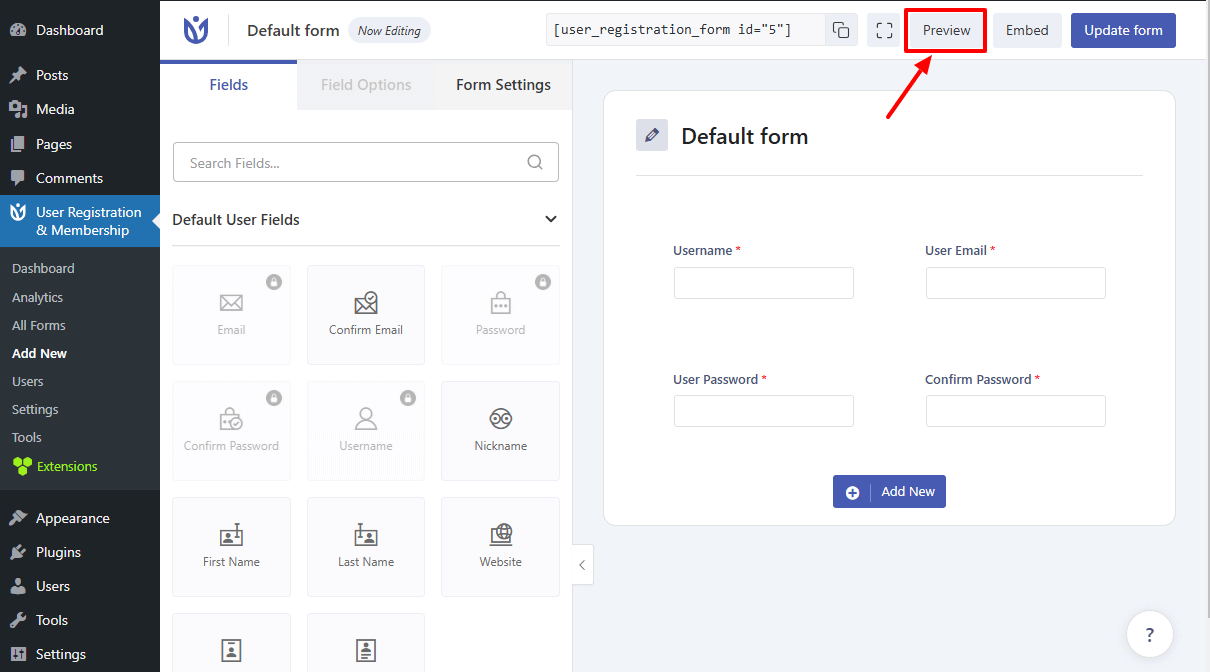
The form builder includes a powerful preview system that lets you see exactly how your form will appear to visitors before publishing. Click the Preview button to open the preview interface.
Device Preview Options
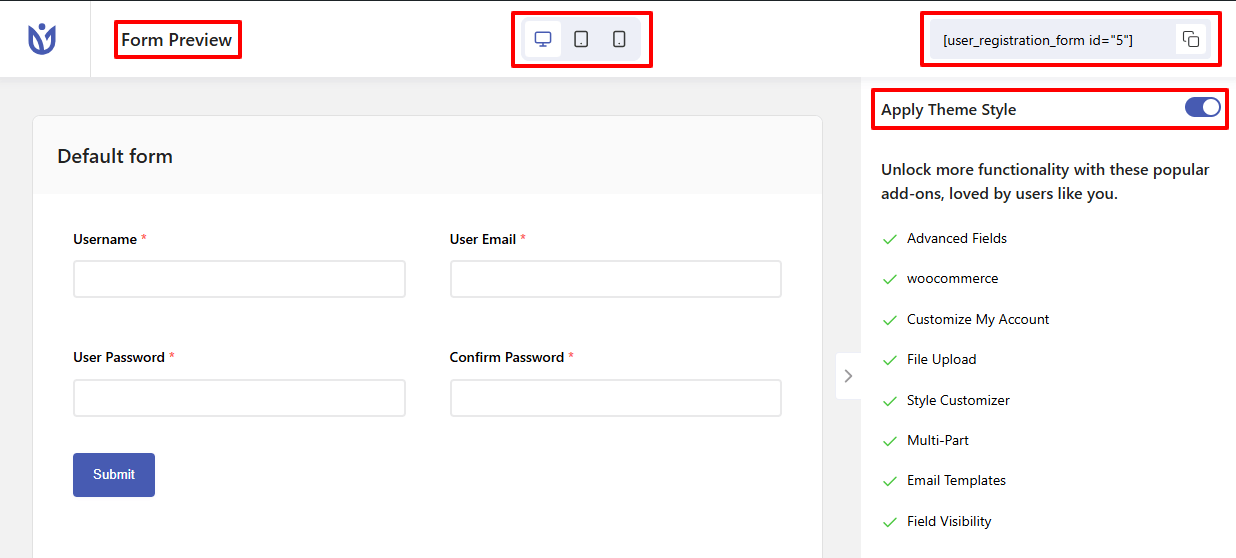
The preview interface includes device toggles that let you view your form on different screen sizes. Switch between desktop, tablet, and mobile views to ensure your form looks great on all devices.
Theme Style Control
By default, forms inherit styling from your WordPress theme. However, you can toggle the Theme Style option in the preview interface to switch between theme styles and plugin styles. When theme styling is disabled, forms use the plugin's built-in design instead.
Quick Shortcode Access
The preview sidebar displays your form's shortcode with a quick copy button. Use this shortcode to embed your form on any page or post.
Working with Keyboard Shortcuts
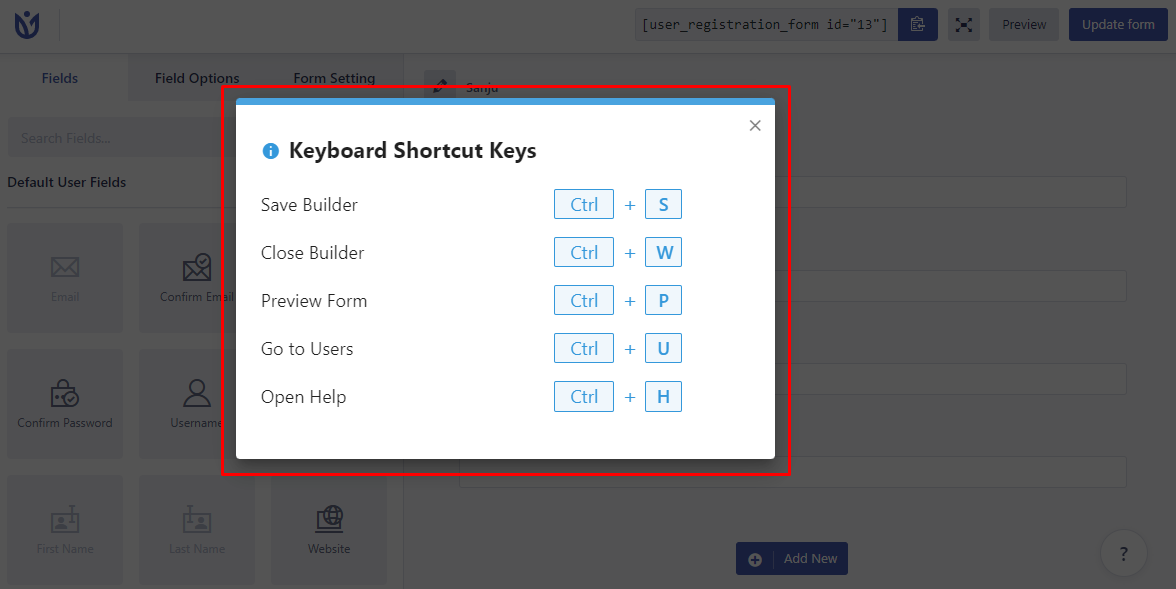
The form builder supports keyboard shortcuts to speed up your workflow. Press Ctrl + H at any time to view the complete list of available shortcuts.
Enabling Keyboard-Friendly Forms
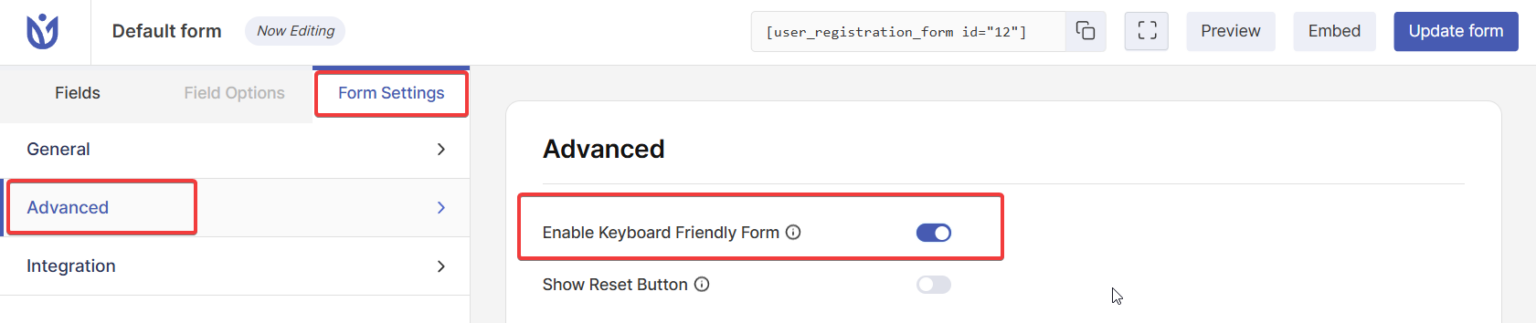
To make your forms accessible via keyboard navigation, go to Form Settings → Advanced and enable the keyboard-friendly form option. When enabled, visitors can use the Tab key to move through form fields in the correct order.
The Users table accessed via Ctrl + U will initially show only users registered through the specific form you're editing.
Controlling Tab Navigation Order
When building two-column forms, the Tab key navigation follows the order you added fields to the form, not their visual layout. To ensure proper Tab flow:
Use exactly two fields per row for left-to-right Tab navigation
Add fields in the top-to-bottom order you want them to appear on mobile devices
Preview your form on mobile to verify fields appear in logical sequence
Forms with more than two fields per row will cause Tab navigation to complete the first column before moving to the next. On mobile devices, two-column forms automatically collapse into a single column following your field addition order.
Saving and Publishing Your Form
Once you've finished building your form, click the Update Form button to save your changes. You can then embed the form on your site using the shortcode or by adding the User Registration block to any page.
That's it! Now you know how to use the Registration Form Builder to create professional forms with an intuitive interface and efficient keyboard controls. Next, would you like to learn about customizing individual form fields? Be sure to check out our guide on form field types and configuration for all the details.