
Post Submission
ProEnable front-end post and page submissions through custom forms, allowing users to contribute content without WordPress admin access.
Last updated on Jul 15, 2026
Would you like to let users submit posts or pages directly from your website's front end? User Registration & Membership allows you to create custom forms that enable visitors to submit content without accessing the WordPress admin area. This tutorial will show you how to set up a Post Submission form step by step.
Prerequisites
Before getting started, make sure you've installed and activated the User Registration & Membership plugin on your WordPress site. Then, make sure you've purchased and activated the Post Submission add-on, which is available with the Premium Plan or higher.
Understanding Post Submission Forms
Post Submission forms allow your users to create WordPress posts or pages through a custom registration form on your site's front end. When users submit the form, their content is automatically converted into a WordPress post or page with the status you define (draft, pending review, private, or published).
This feature is useful for:
Guest blogging platforms where contributors submit articles
Community sites where members share content
Job boards where employers post listings
Event calendars where users submit events
Portfolio sites where clients submit projects
Installing the Post Submission Add-on
To install the Post Submission add-on, go to User Registration & Membership → Extensions. Search for 'Post Submission' and click Install, then click Activate after installation completes.
Alternatively, if you've purchased User Registration Premium, download the Post Submission add-on zip file from your WPEverest account page. Then, go to Plugins → Add New → Upload Plugin, choose the downloaded file, and click Install Now. Click Activate after the upload completes.
Creating Your Post Submission Form
Adding Required Fields
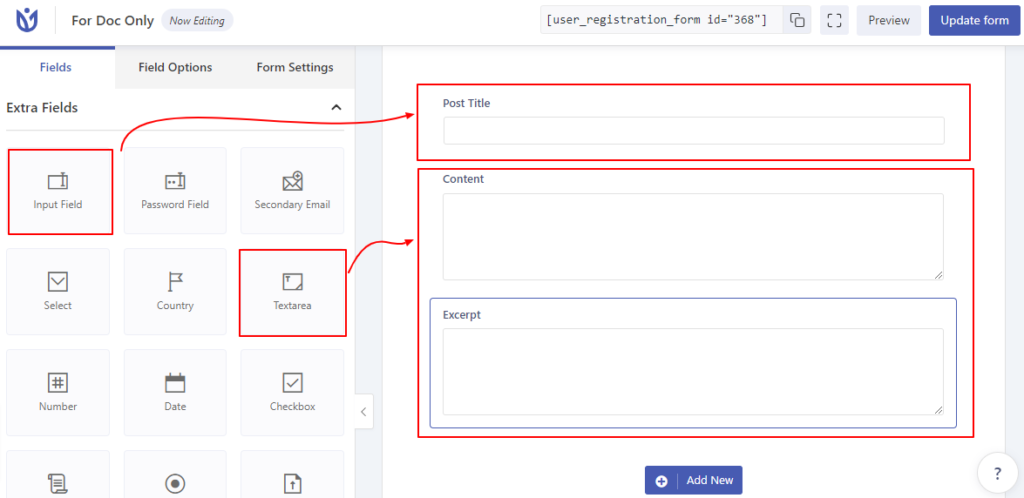
Go to User Registration & Membership → Add New to create a new form. You'll need to add these essential fields to your form:
Post Title — Add an Input field from the Extra Fields section. This will capture the title of the post.
Post Content — Add a Textarea field from the Extra Fields section. This is where users will write the main content of their post.
Post Excerpt — Add another Textarea field. This will capture a short summary of the post.
Featured Image — Add a File Upload field from the Premium Fields section. This allows users to upload an image for their post.
The File Upload add-on is required to enable featured image functionality. If you don't have this add-on, users won't be able to upload featured images.
Configuring Post Submission Settings
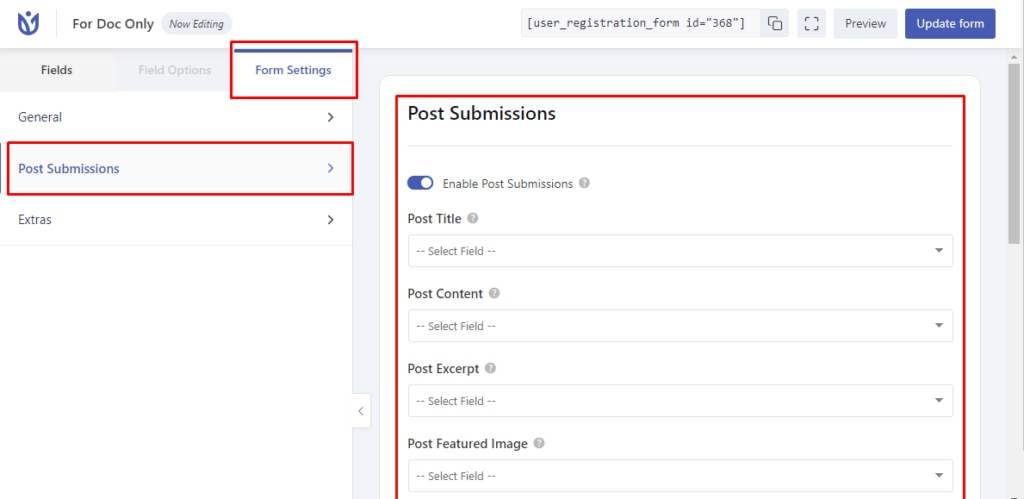
Once you've added the required fields to your form, go to Form Settings → Post Submission to connect your form fields to WordPress post fields.
Enabling Post Submission
Toggle the Post Submission option to enable this feature for your form.
Mapping Form Fields
Use the drop-down selectors to map your form fields to Post Submission fields:
Post Title — Select the Input field you created for the post title
Post Content — Select the Textarea field for the main content
Post Excerpt — Select the Textarea field for the excerpt
Featured Image — Select the File Upload field for the image
Configuring Post Type
Choose whether submissions should create Posts or Pages from the Post Type dropdown. Posts appear in your blog feed and can be organized by categories and tags. Pages are standalone content that don't appear in your blog feed.

Setting Post Status
Select the default status for submitted content:
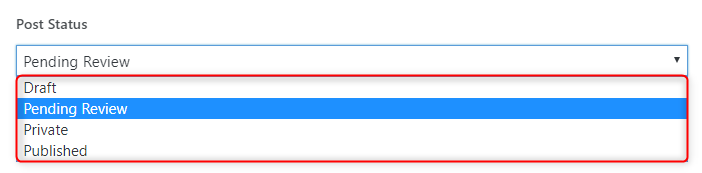
Draft — Posts are saved but not visible to the public. You can review and publish them later.
Pending Review — Posts are submitted for review. You'll see them in the WordPress admin area under Posts → Pending.
Private — Posts are published but only visible to administrators and editors.
Published — Posts are immediately published and visible to all visitors.
For most sites, we recommend using Pending Review or Draft to review content before it goes live.
Assigning Post Author
Choose who should be listed as the author of submitted posts:
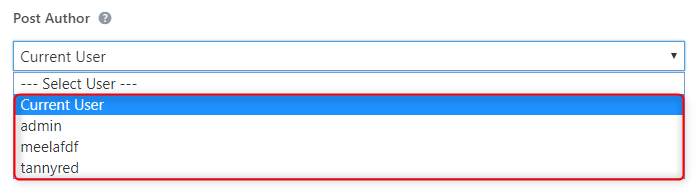
Specific User — Select a specific WordPress user from the dropdown. All submitted posts will be attributed to this user.
Current User — The logged-in user who submits the form will be listed as the author. If the user is already registered, they can be automatically assigned as the Post Author.
Configuring Categories
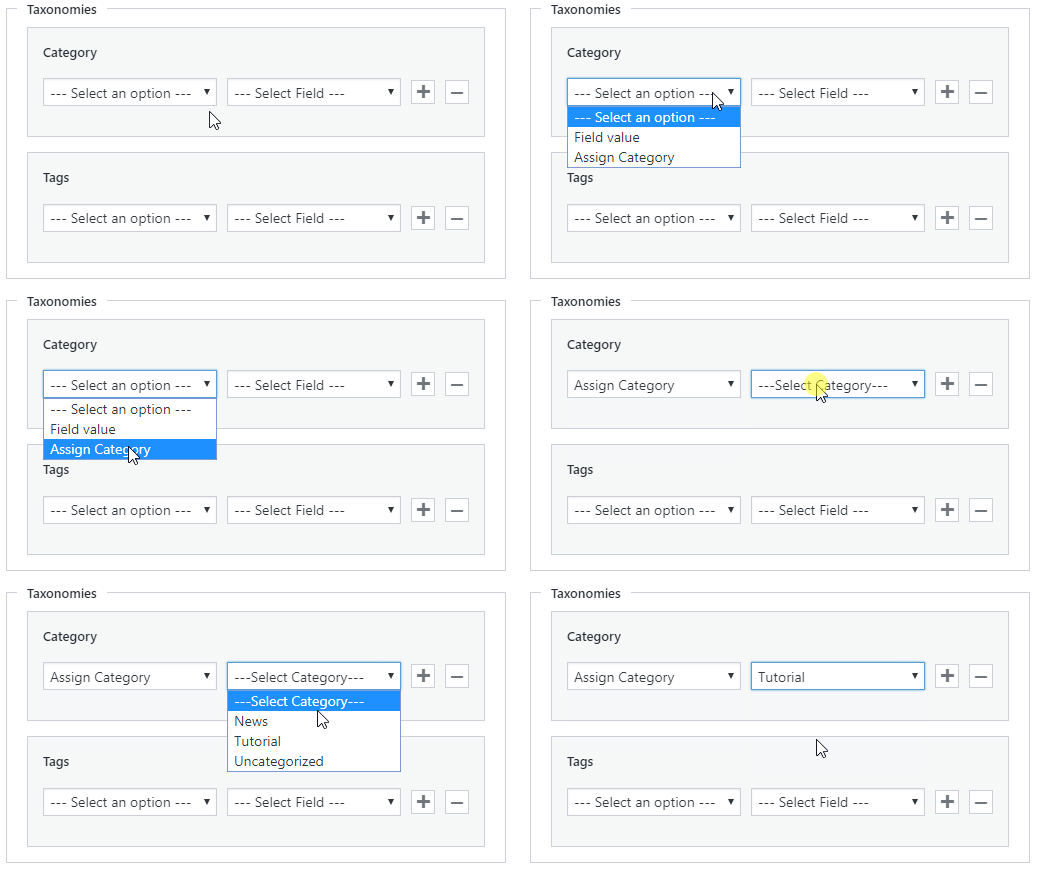
You have two options for assigning categories to submitted posts:
Field Value — Allow users to select categories through the form. Add a Multiple Fields, Checkbox, or Drop-down field to your form, then select it here. Users will choose categories when they submit the form.
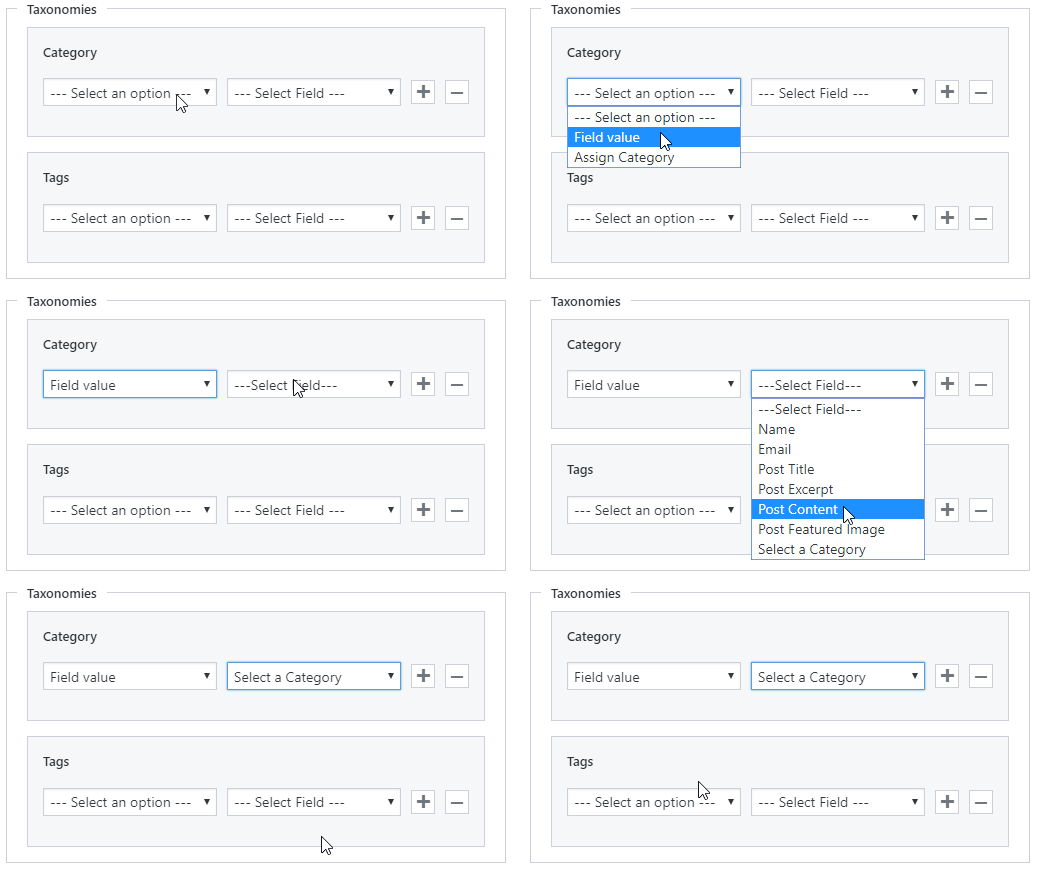
Assign Category — You assign predetermined categories that will be automatically applied to all submissions. This is useful when all posts should belong to specific categories.
Configuring Tags
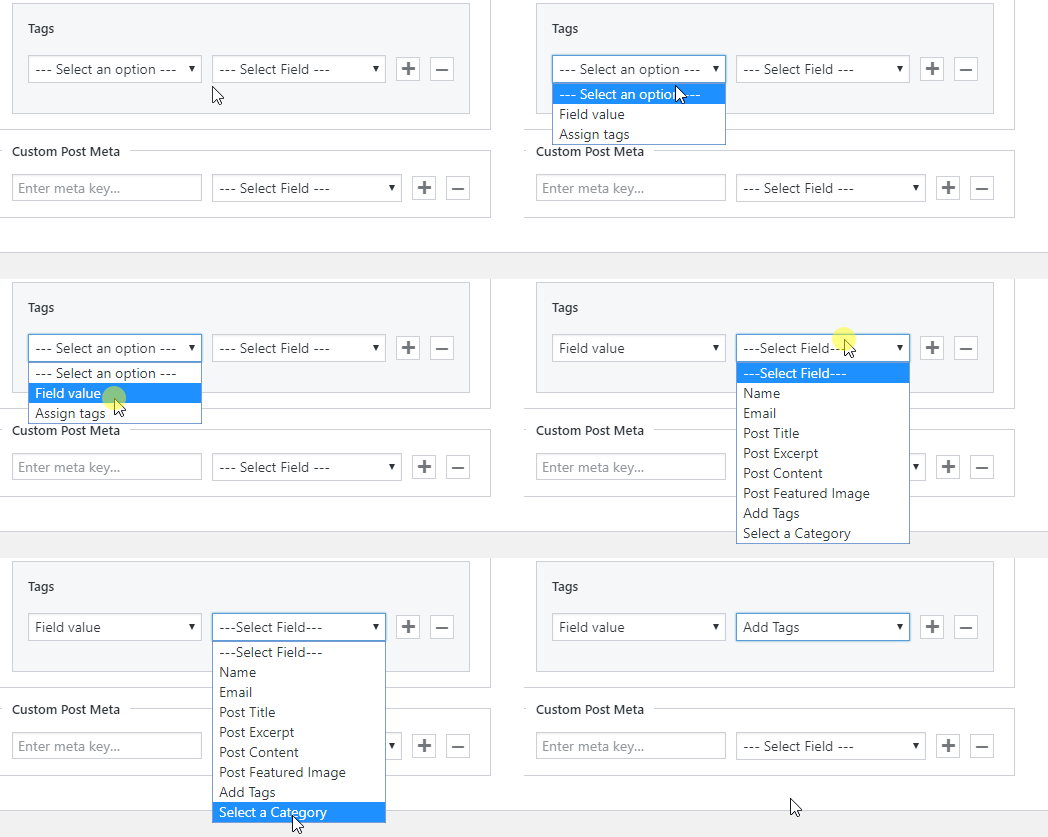
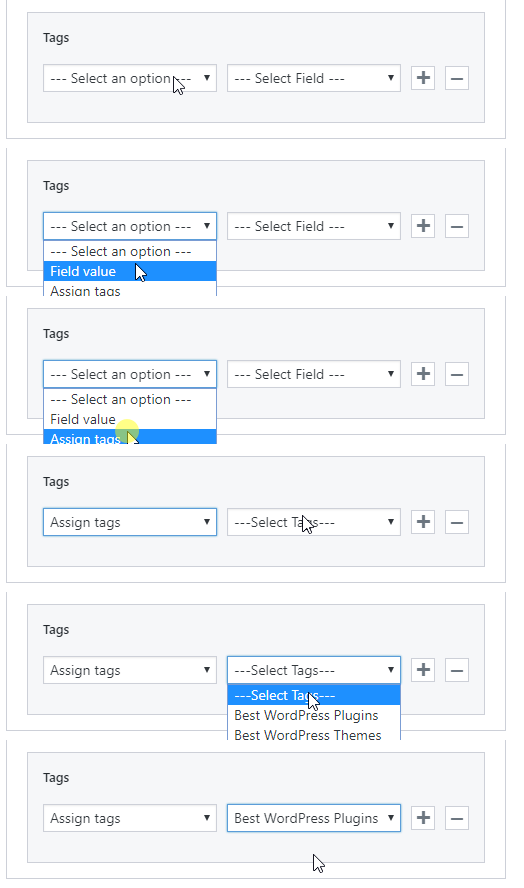
Similar to categories, you have two options:
Field Value — Allow users to select tags through the form. Add a Checkbox field to your form, then select it here.
Assign Tags — You assign predetermined tags that will be automatically applied to all submissions.
Adding Custom Post Meta
If you need to collect additional data beyond the standard post fields (like custom fields for specific post types), use the Custom Post Meta option. This allows you to store extra information that isn't supported by the default form fields.

For example, if you're creating a job board, you might want to collect salary range, location, or job type. Add these as custom fields in your form, then map them in the Custom Post Meta section.
Testing Your Form
Before making your form live, test it thoroughly:
Add the form to a test page using the form shortcode or User Registration block
Submit a test entry with sample content
Check that the post appears in WordPress with the correct status
Verify that all fields (title, content, excerpt, featured image) are populated correctly
Confirm that categories and tags are assigned as expected
Check that the correct author is assigned
Publishing Your Form
Once you've tested your form and confirmed everything works correctly, add it to your live site. Copy the form shortcode from the top of the form builder and paste it into any page or post where you want the submission form to appear.