
Multi-Step Form
ProBreak long registration forms into manageable steps with multi-step functionality, featuring customizable progress indicators to guide users through signup.
Last updated on Jul 17, 2026
Would you like to break long registration forms into smaller, easier steps? User Registration & Membership allows you to create multi-step forms that guide users through the signup process one section at a time. This tutorial will show you how to create and configure multi-step registration forms.
Before getting started, make sure you've installed and activated the User Registration & Membership plugin on your WordPress site.
Enabling Multi-Step Forms
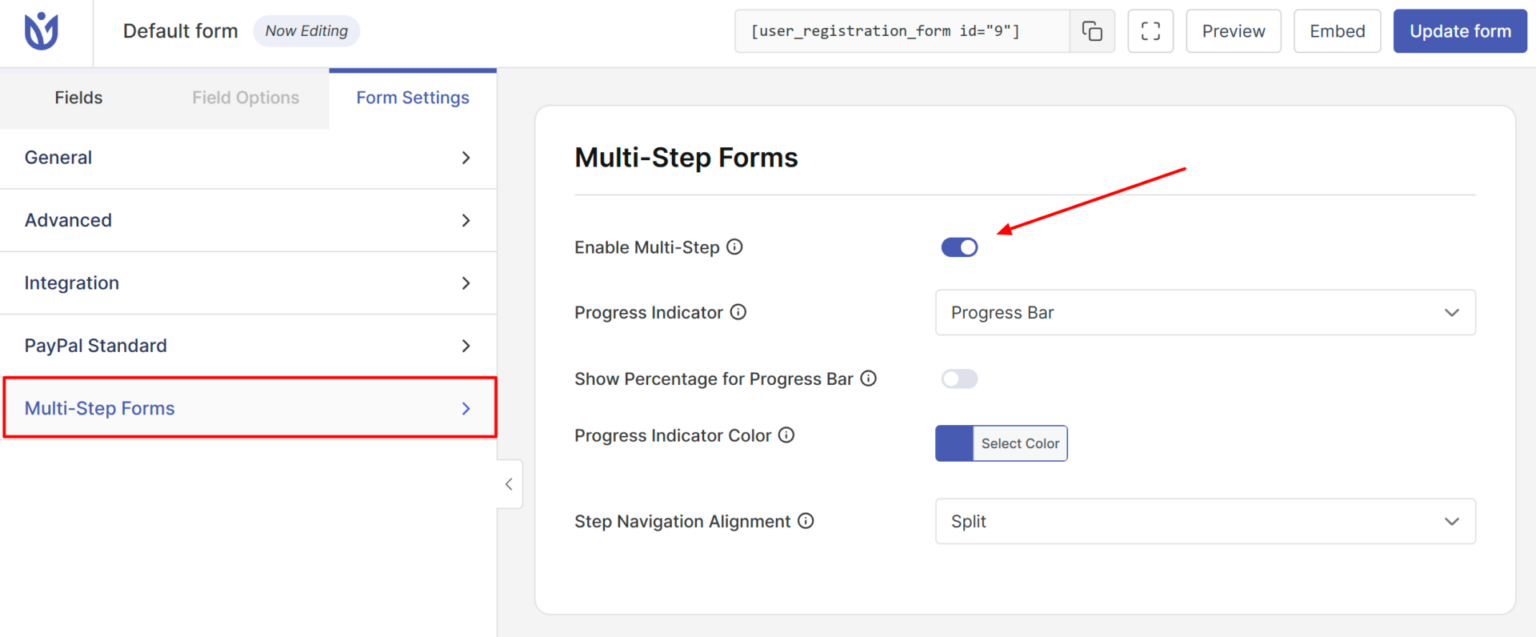
To enable multi-step functionality, navigate to User Registration & Membership → Add New or edit an existing form. Once you're in the form builder, click the Form Settings tab at the top of the screen.
Here, you'll see the Enable Multi-Step Forms toggle. Turn this on to activate multi-step functionality for your registration form.
Configuring Progress Indicators
Once multi-step forms are enabled, you can customize how users see their progress through the form. User Registration & Membership offers three progress indicator styles:
Progress Bar — A horizontal bar that fills as users complete steps
Circle Bar — A circular progress indicator
Arrow Steps — Step-by-step arrows showing form progression
Select your preferred style from the Progress Indicator dropdown. If you choose Progress Bar, you can also enable Show Percentage for Progress Bar to display real-time completion percentages alongside the bar.
Next, customize the Progress Indicator Color by clicking the color circle and selecting a color that matches your site's branding. You can also set the Step Navigation Alignment to control where the Next and Previous buttons appear: Left, Right, Center, or Split.
Adding Steps to Your Form
With multi-step forms enabled, you can now break your registration form into multiple parts. In the form builder, click the + icon at the bottom of the form to add a new step.
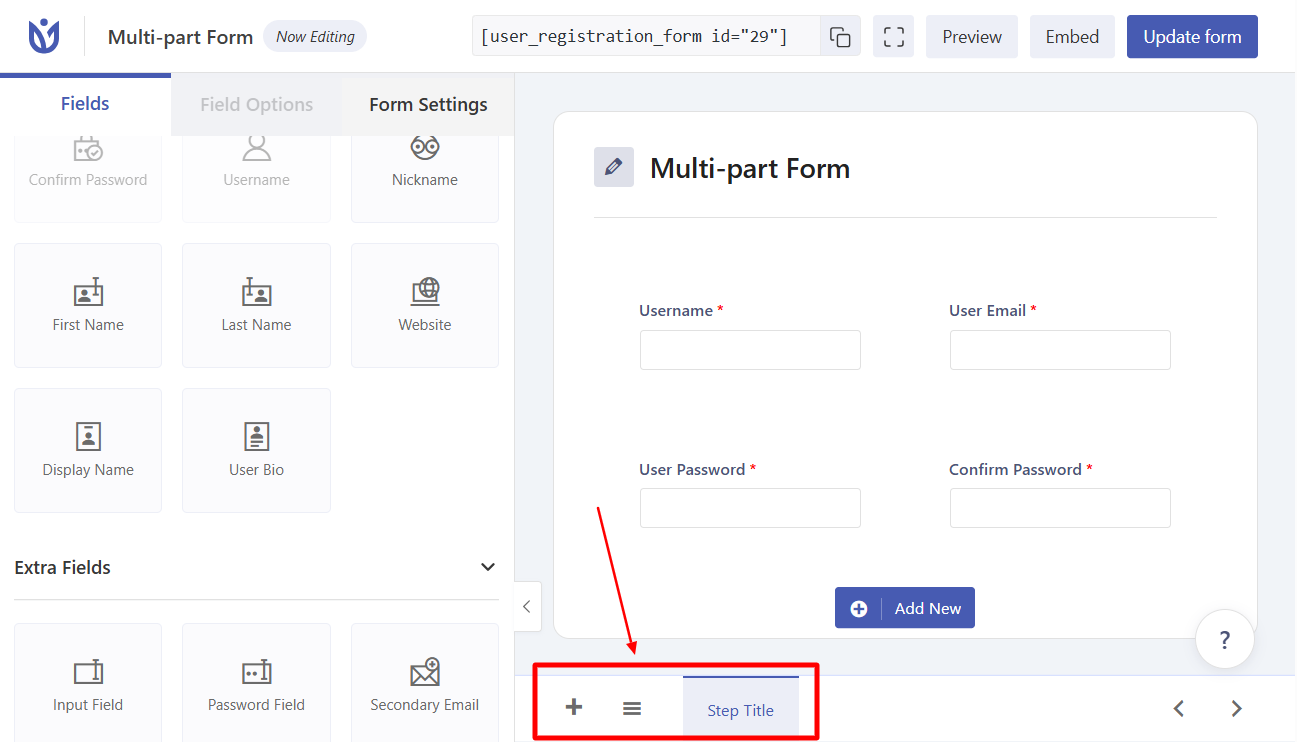
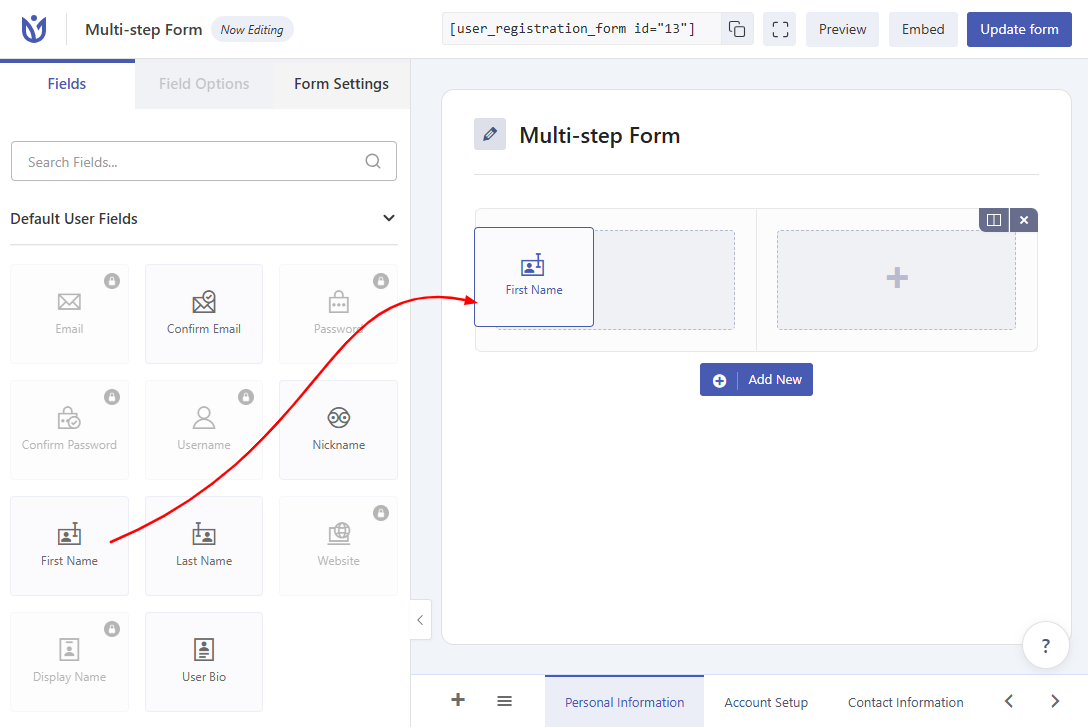
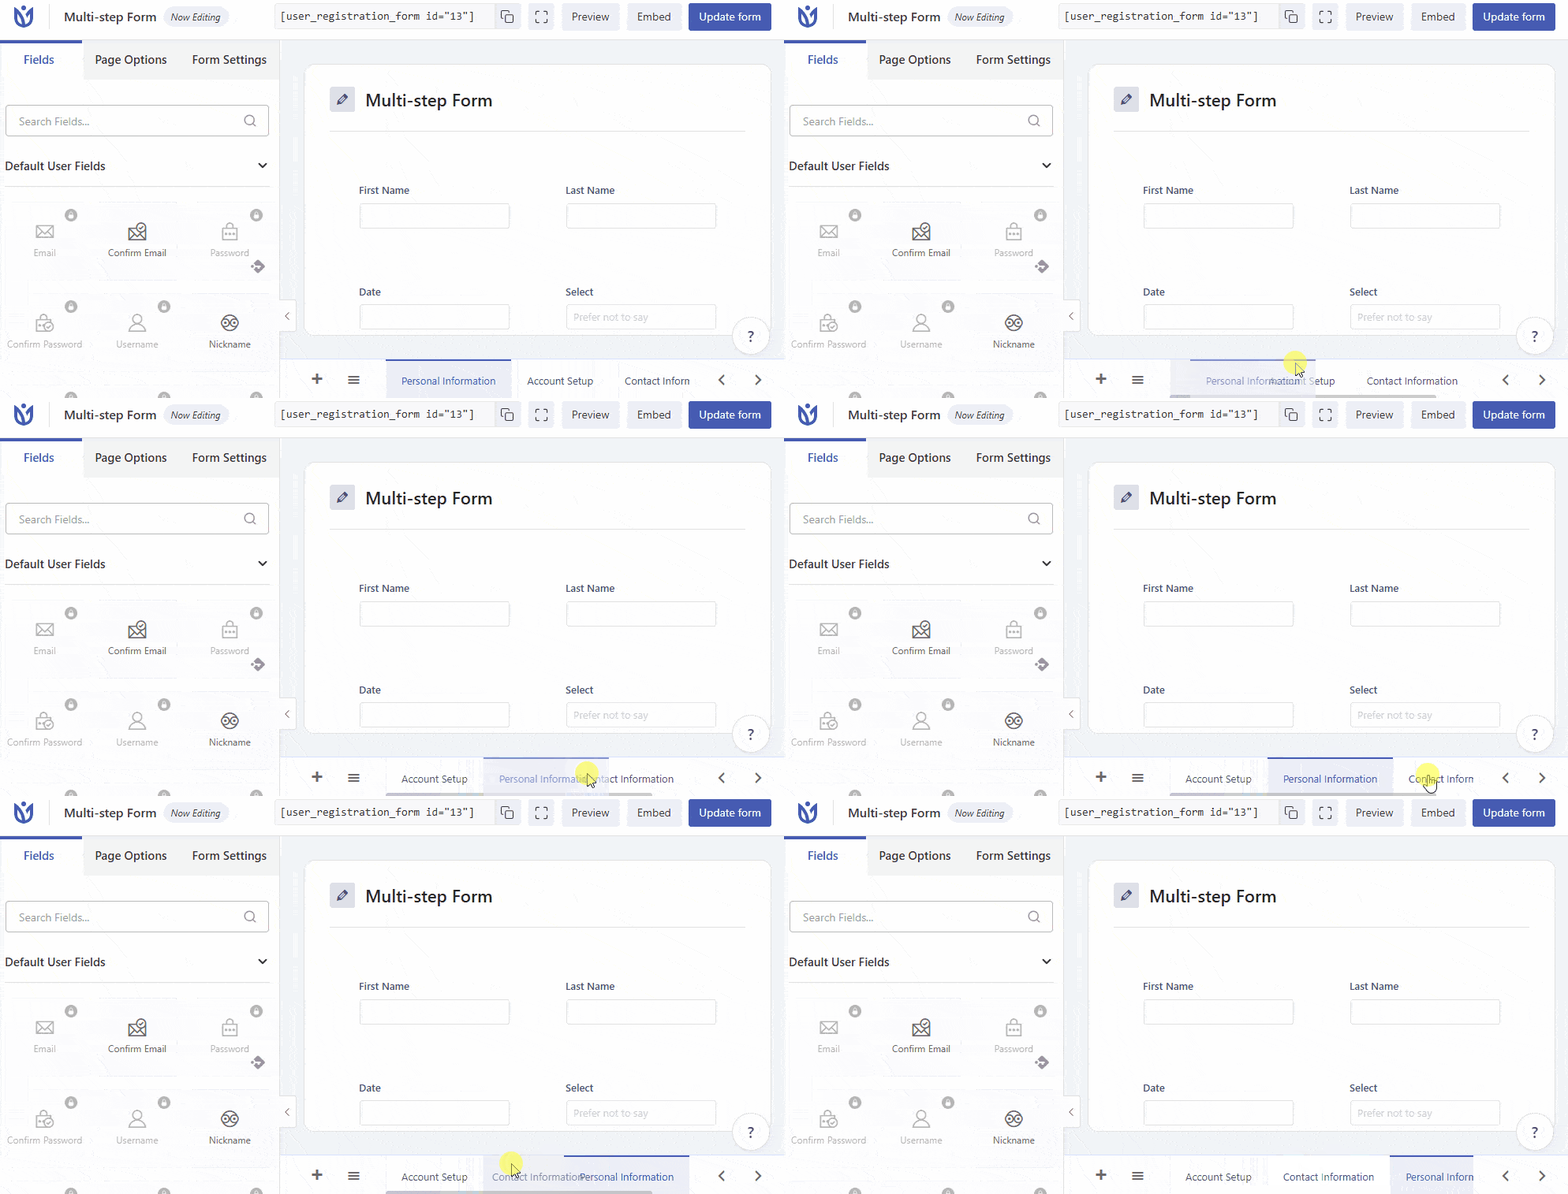
Each step you add becomes a separate page in your registration form. Click the Step Title to modify the name and access Page Options for that step. You can drag and drop form fields into each step just like you would with a single-page form.
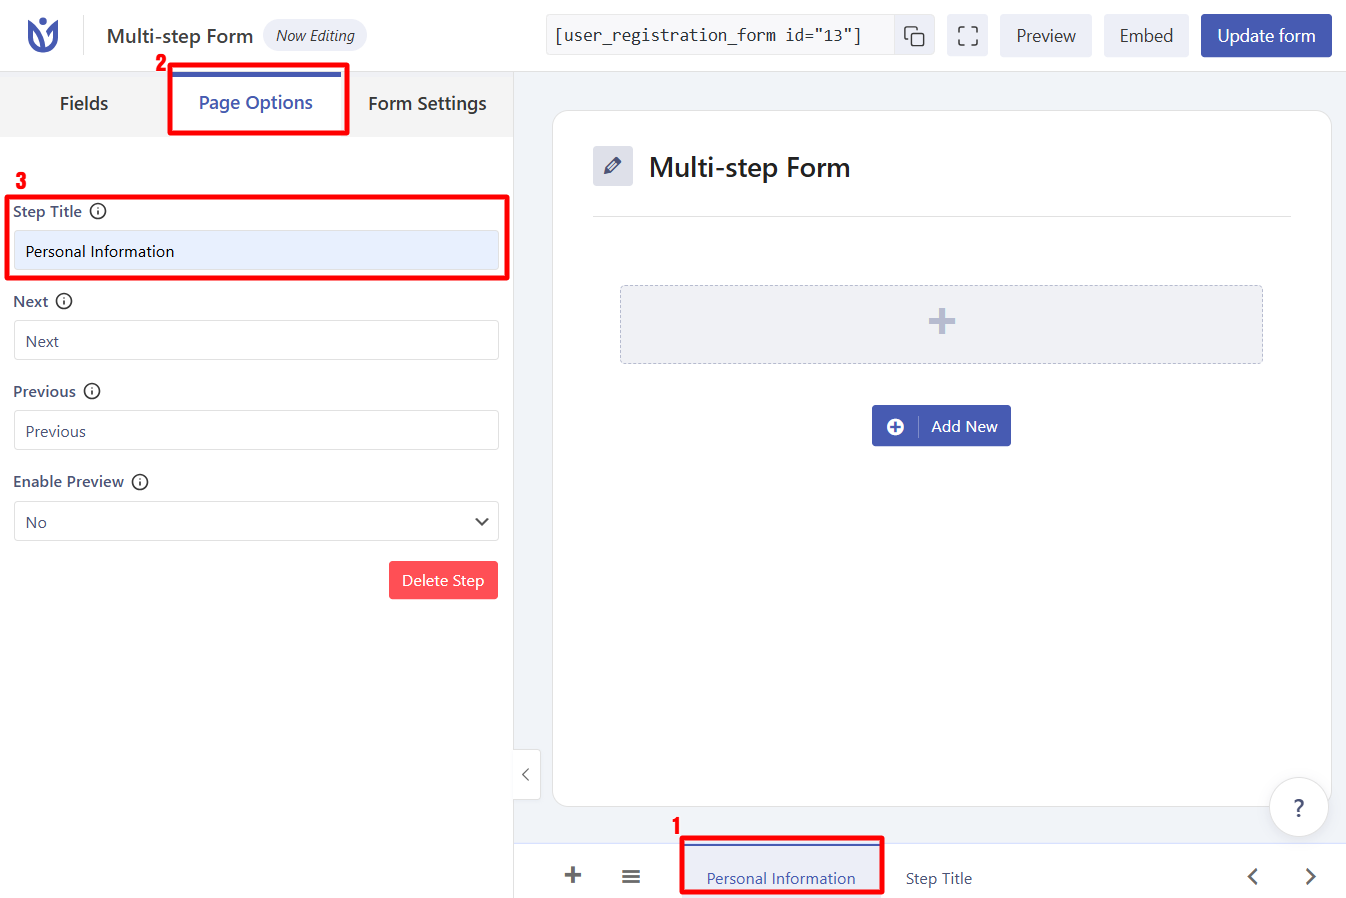
To rearrange steps, simply drag and drop the step sections into your preferred order. This gives you complete control over the registration flow.
Enabling Preview for Previous Steps
User Registration & Membership allows users to preview data they entered in previous steps before submitting the form. This feature is available for all steps except the first one.
To enable preview on a step, select the step and find Enable Preview in the Page Options. Set this to Yes, then configure the Preview Message - this is the custom HTML message that appears above the preview.
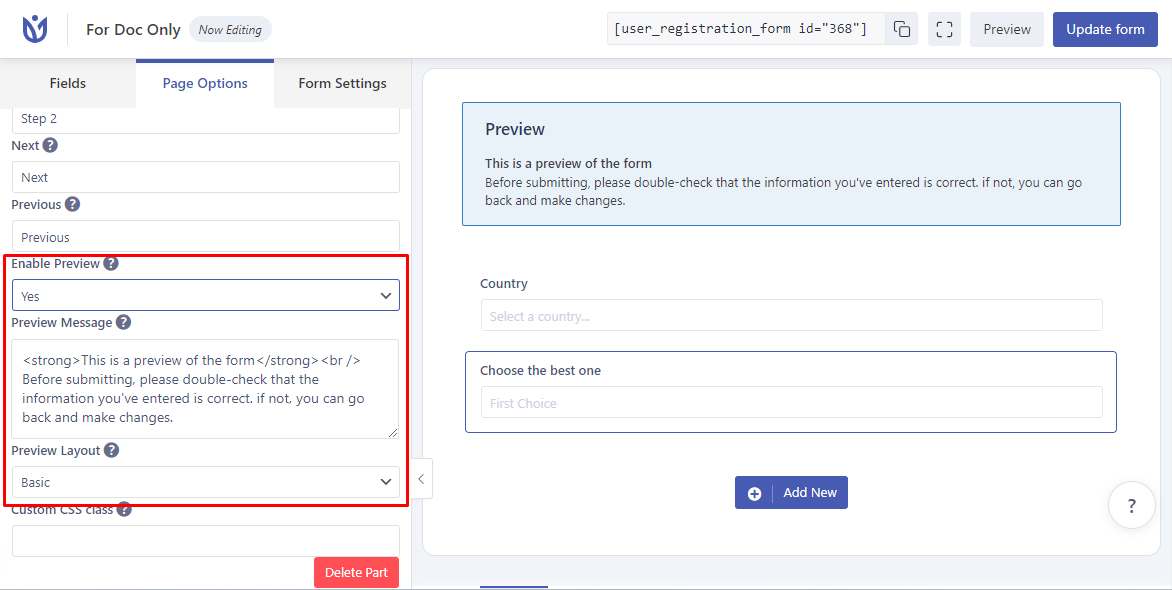
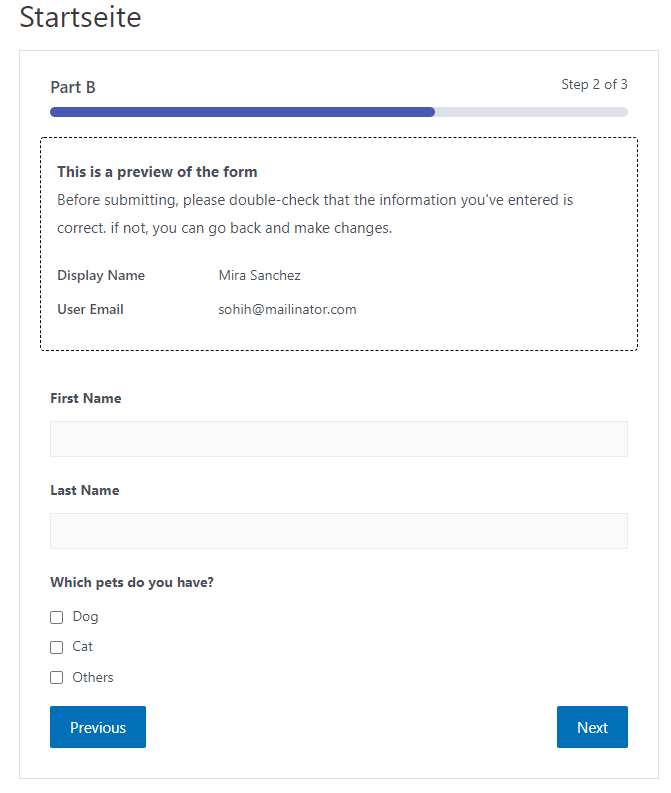
Choose your preferred Preview Layout from three options:
Basic Layout — Simple text display of previous entries
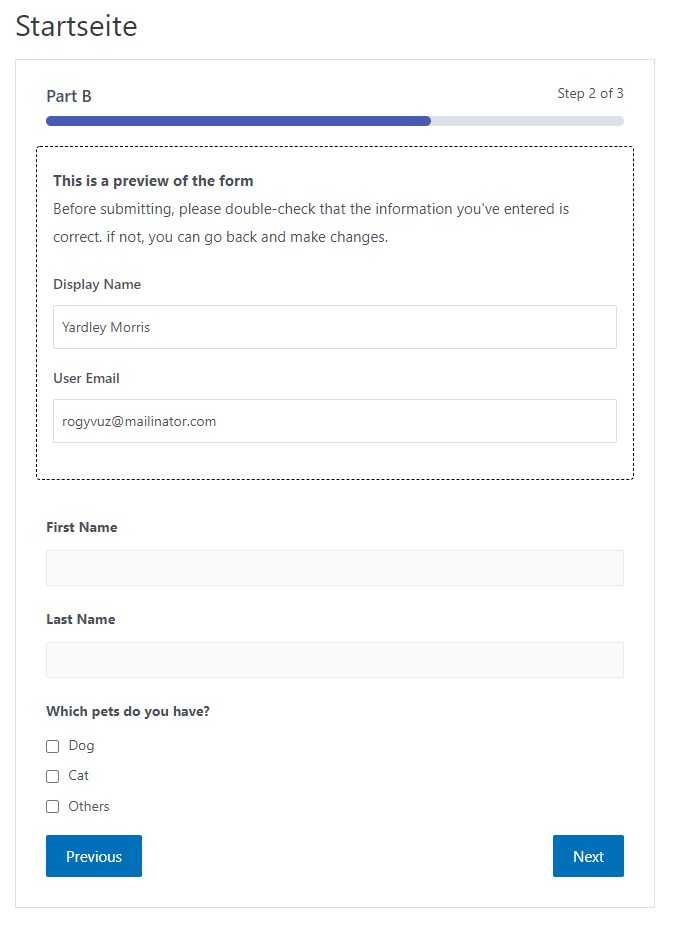
Table Layout — Organized table format
Column Layout — Multi-column display
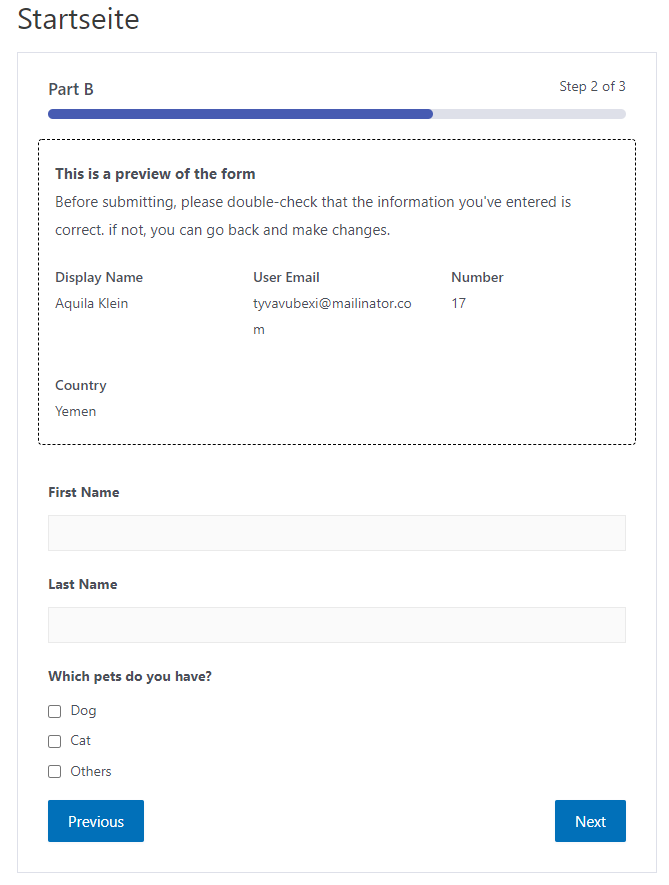
If you enable preview only on the last step, it will show all data from all previous steps. If you enable it on multiple steps, each step will show data from the steps before it.
Saving Your Multi-Step Form
Once you've configured all your steps, progress indicators, and preview settings, click Create Form or Update Form to save your changes. Your multi-step registration form is now ready to use.
That's it! Now you know how to create multi-step registration forms that guide users through the signup process step by step. Next, would you like to learn how to add conditional logic to your forms? Be sure to check out our guide on using conditional logic with registration forms.