
Creating Registration Form
Learn how to build custom WordPress registration forms using a drag-and-drop interface for basic user registration or membership-based access control.
Last updated on Jul 14, 2026
Would you like to create a custom registration form for your WordPress site? User Registration & Membership allows you to build registration forms with a drag-and-drop interface, whether you need basic user registration or membership-based access control. This tutorial will show you how to create registration forms for both scenarios.
Before Getting Started
Before getting started, make sure you've installed and activated the User Registration & Membership plugin on your WordPress site. You should have also completed the Setup Wizard, where you chose either Normal Registration or Membership Registration.
Understanding Your Registration Type
The Setup Wizard offers two registration types:
Membership Registration: Tiered access with subscriptions, payments, and content restriction
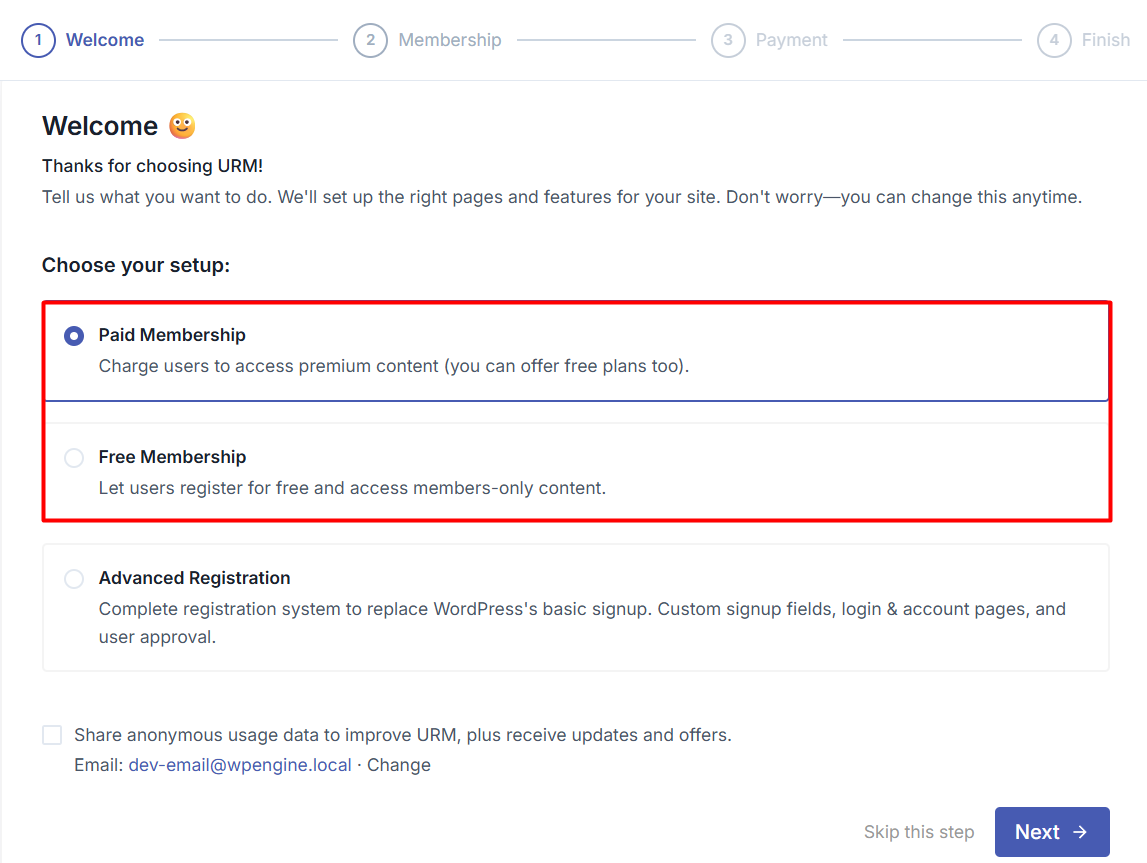
Normal Registration: Basic user registration for granting site access without membership tiers
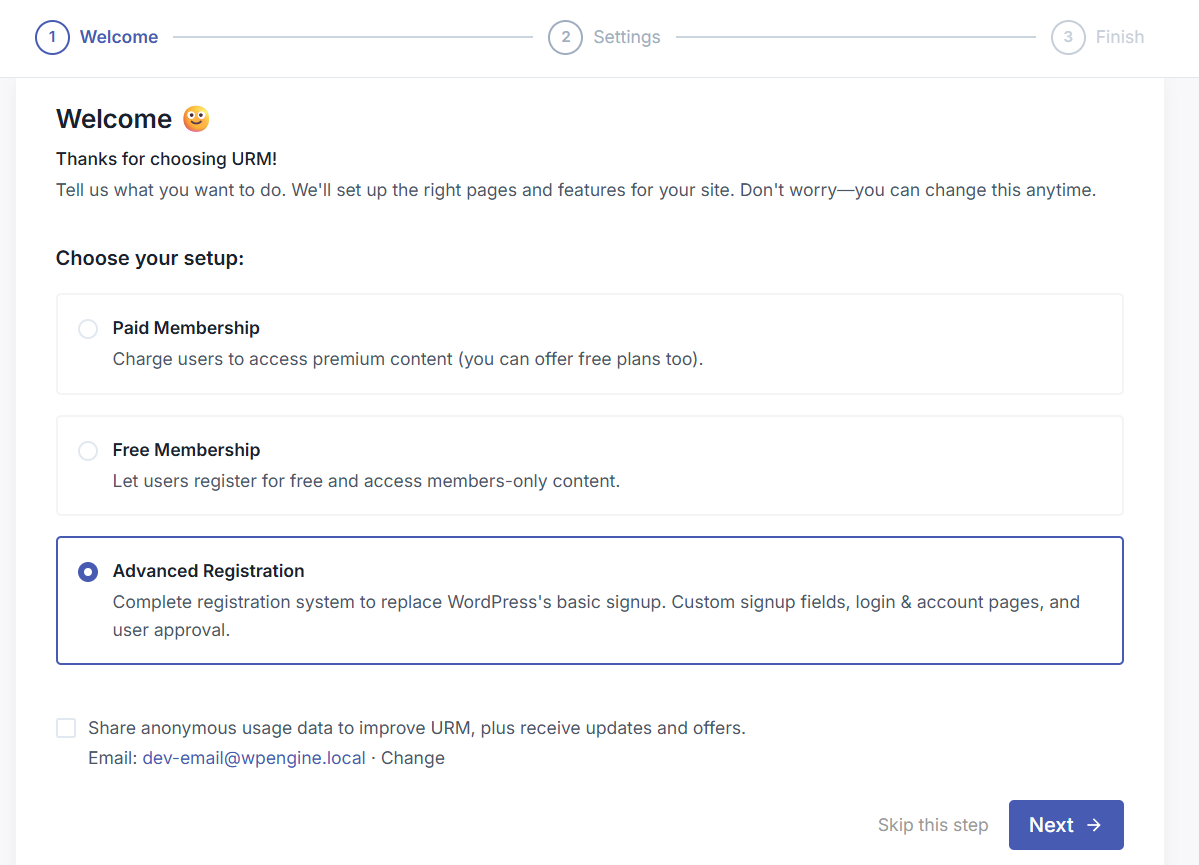
Your choice determines which fields and features are available in your registration forms.
Creating a Registration Form for User Registration
If you selected Normal Registration during setup, follow these steps to create a custom registration form.
Accessing the Form Builder
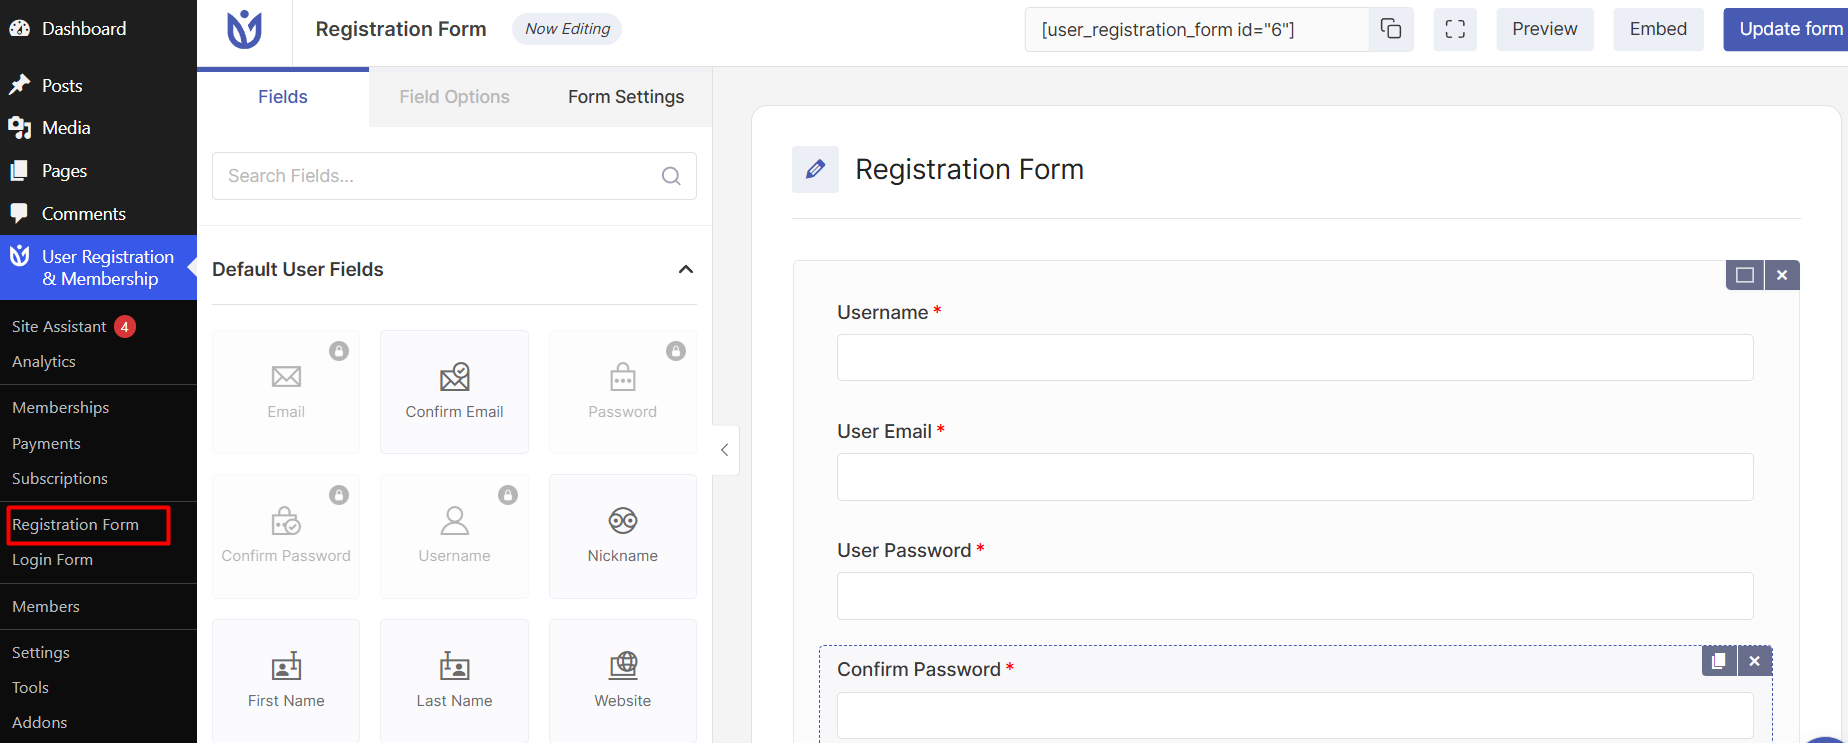
To edit your registration form, go to User Registration & Membership > Registration Form (All Forms > Registration Form if you have multiple membership enabled). Click on the Default Form to open the form builder. The form builder has three main areas: the Fields panel on the left, the form canvas in the center, and the settings tabs at the top.
Adding Form Fields
The form builder displays available fields in the left sidebar. User Email and User Password are included by default as required fields.
To add a field, drag it from the sidebar and drop it into the form area on the right. Fields are organized into Default User Fields and Extra Fields categories.
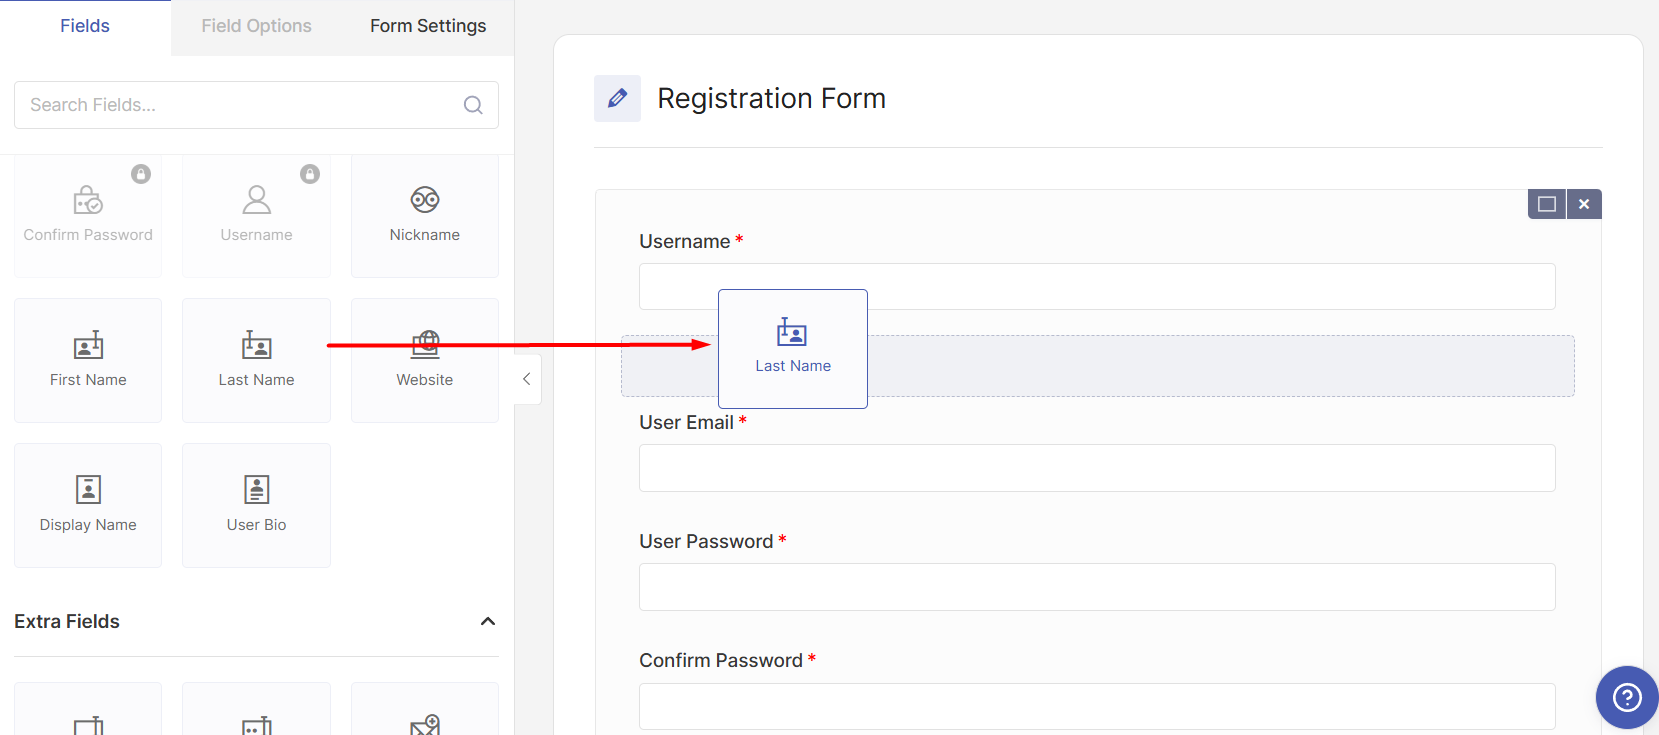
Default User Fields include Email, Username, Website, First Name, Last Name, Display Name, and User Bio. Extra Fields include Country, Textarea, Date, Checkbox, and other specialized field types.
Customizing Field Settings
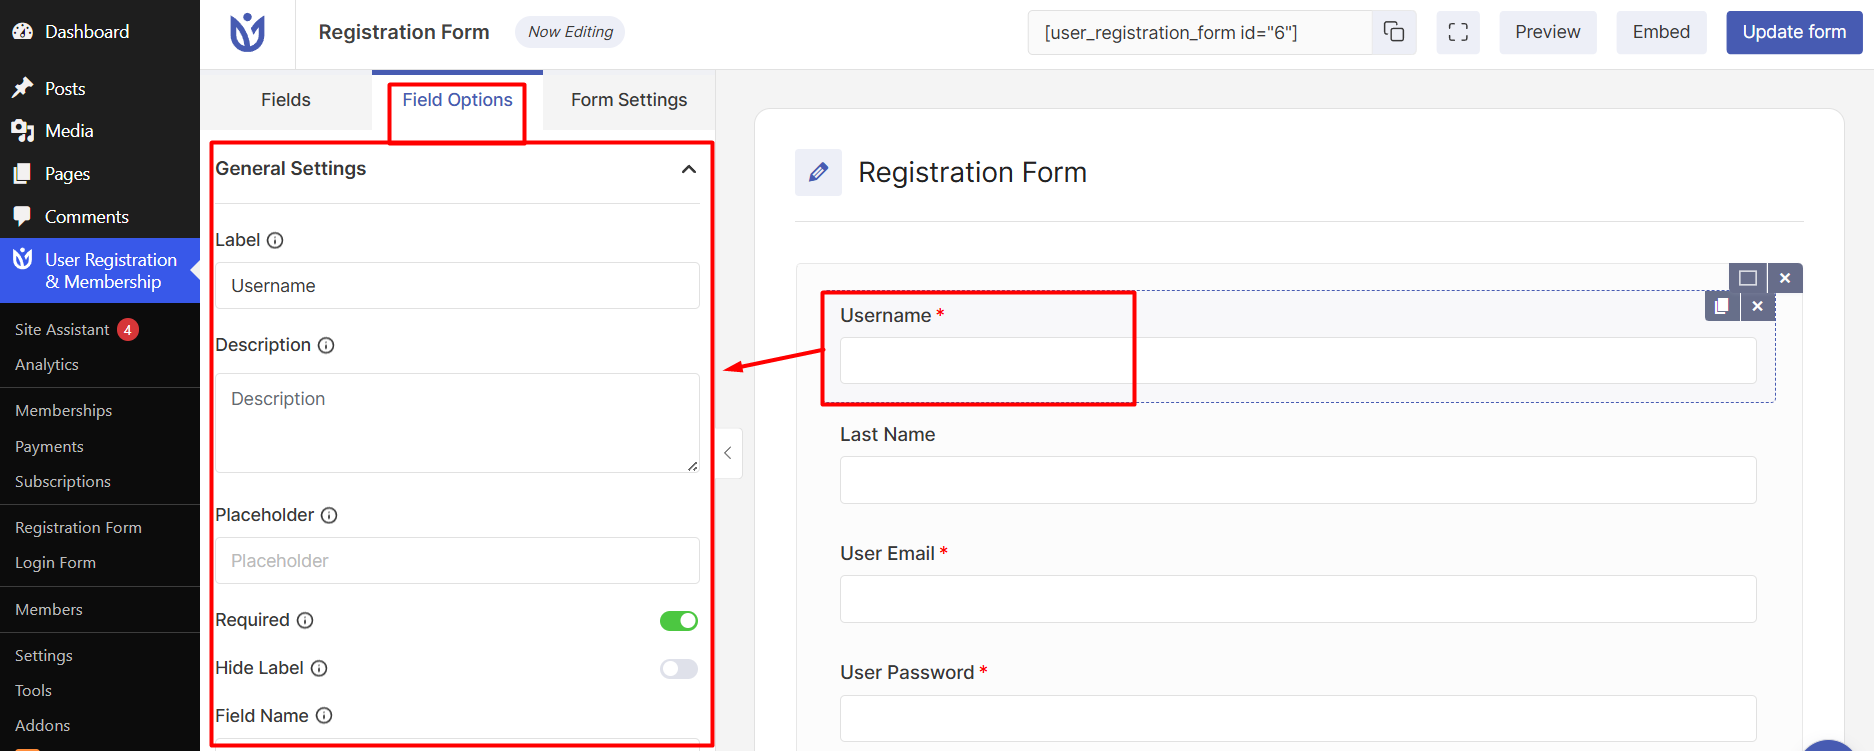
Click on any field to modify its settings in the left sidebar. You can customize the label, placeholder text, help text, and required toggle.
The Field Options tab provides General Settings and Advanced Settings. General Settings control the field label, placeholder, and description. Advanced Settings allow custom CSS classes and other technical configurations.
Configuring Form Settings
Once you've added all required fields, click the Form Settings tab to configure how the form behaves.
In the General section, configure User Approval and Login Option. Choose from Auto Approval with Manual Login, Auto Approval with Auto Login, Admin Approval, or Auto Approval After Email Confirmation.
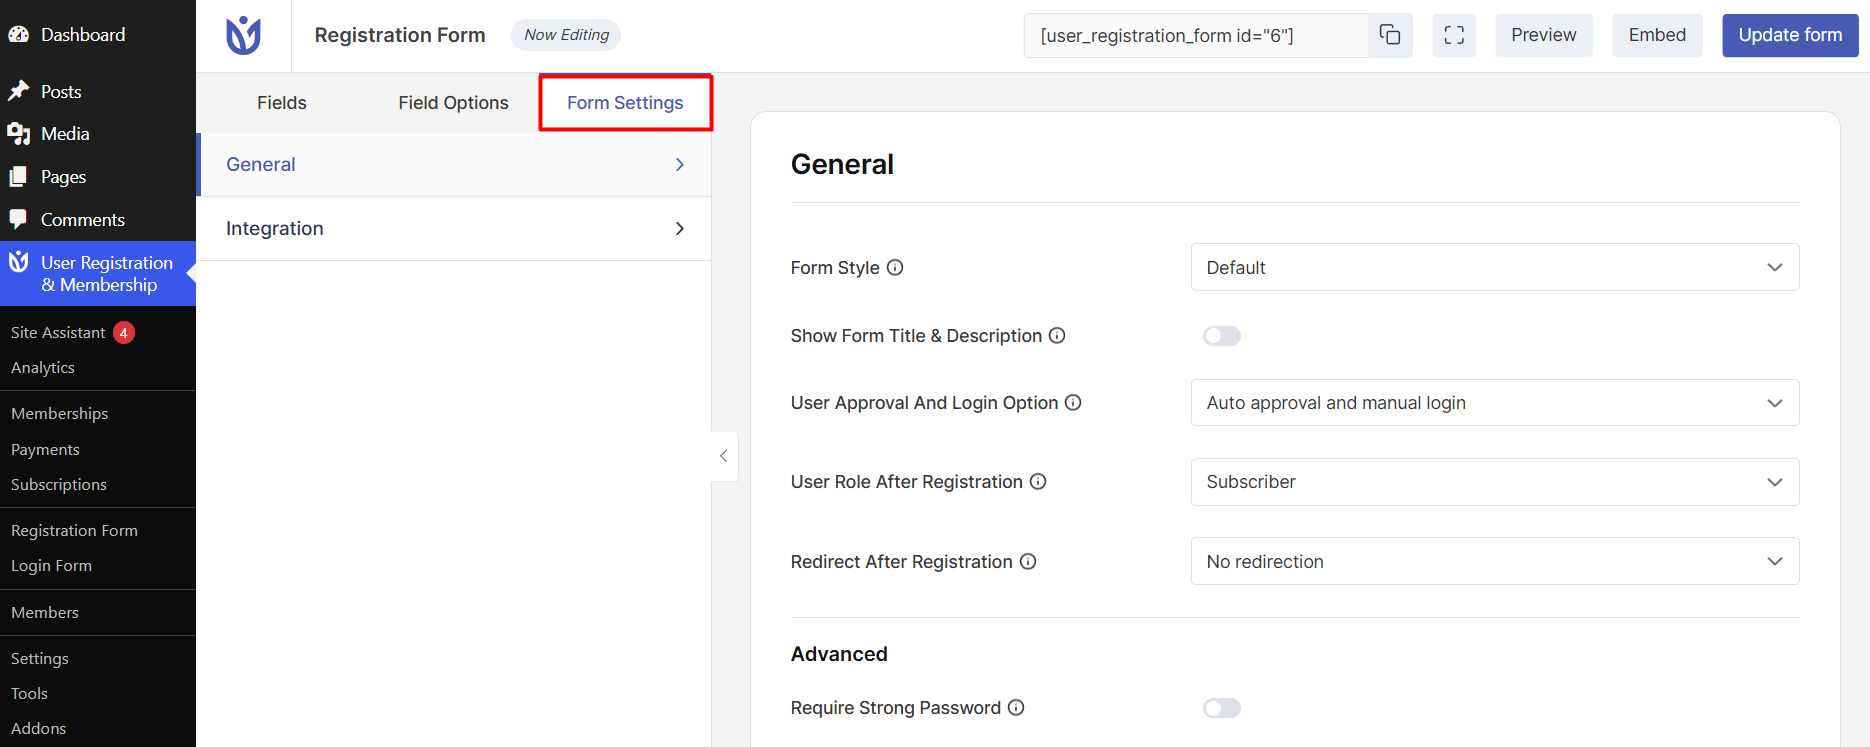
Set the Default User Role to assign new users a WordPress role automatically. Subscriber is recommended for most websites.
Enable Strong Password if you want to require users to create secure passwords. You can set the minimum password strength level.
Publishing Your Form
Click Update Form or Create Form to save your registration form. The form shortcode appears at the top of the form builder.
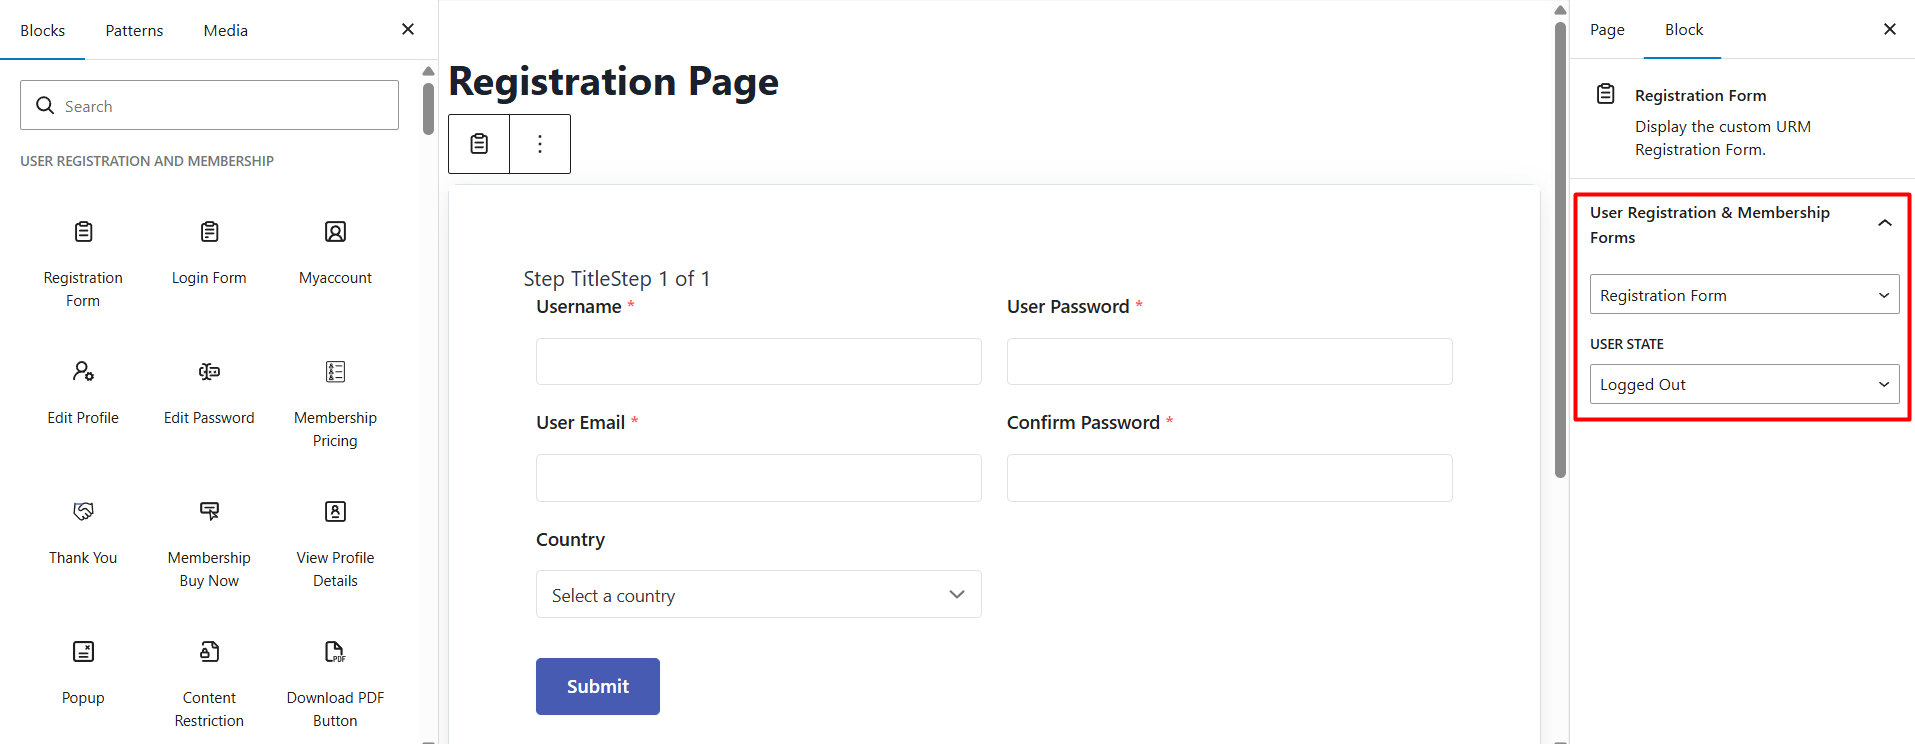
To add the form to a page, copy the shortcode and paste it into any page or post using a Shortcode block. Alternatively, use the User Registration block in the Gutenberg editor and select your form from the dropdown.
Creating a Registration Form for Membership Registration
If you selected Membership Registration during setup, your registration forms include membership plan selection and payment processing.
Creating Membership Plans First
Before creating a membership registration form, you need at least one membership plan. Go to User Registration & Membership > Memberships and click Create new Membership.
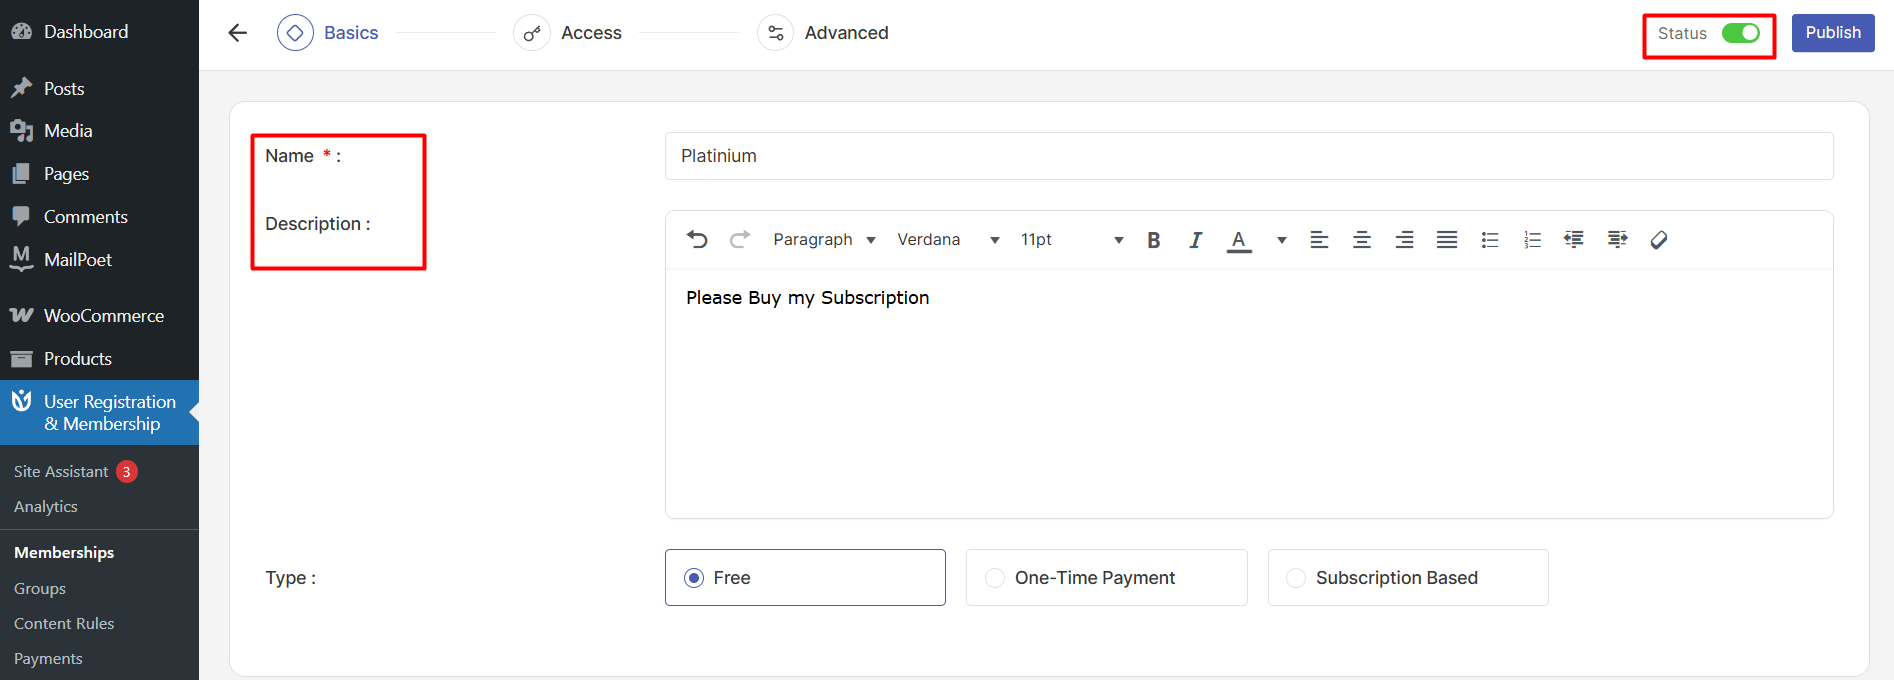
Configure the plan name, description, membership type (Free, Paid, or Subscription Based), and price. Set the membership status to Enable.
For paid or subscription memberships, configure your payment gateway settings at User Registration & Membership > Settings > Payment. Enable PayPal, Stripe, or Bank Transfer and enter your payment credentials.
Building the Membership Registration Form
Go to User Registration & Membership > Registration Forms and click Add New. Choose a template or start from scratch.
The form builder works the same way as normal registration, but you'll need to add the Membership field from the form builder sidebar.
Adding the Membership Field
Drag the Membership field from the left sidebar into your form. This field allows users to select a membership plan during registration.
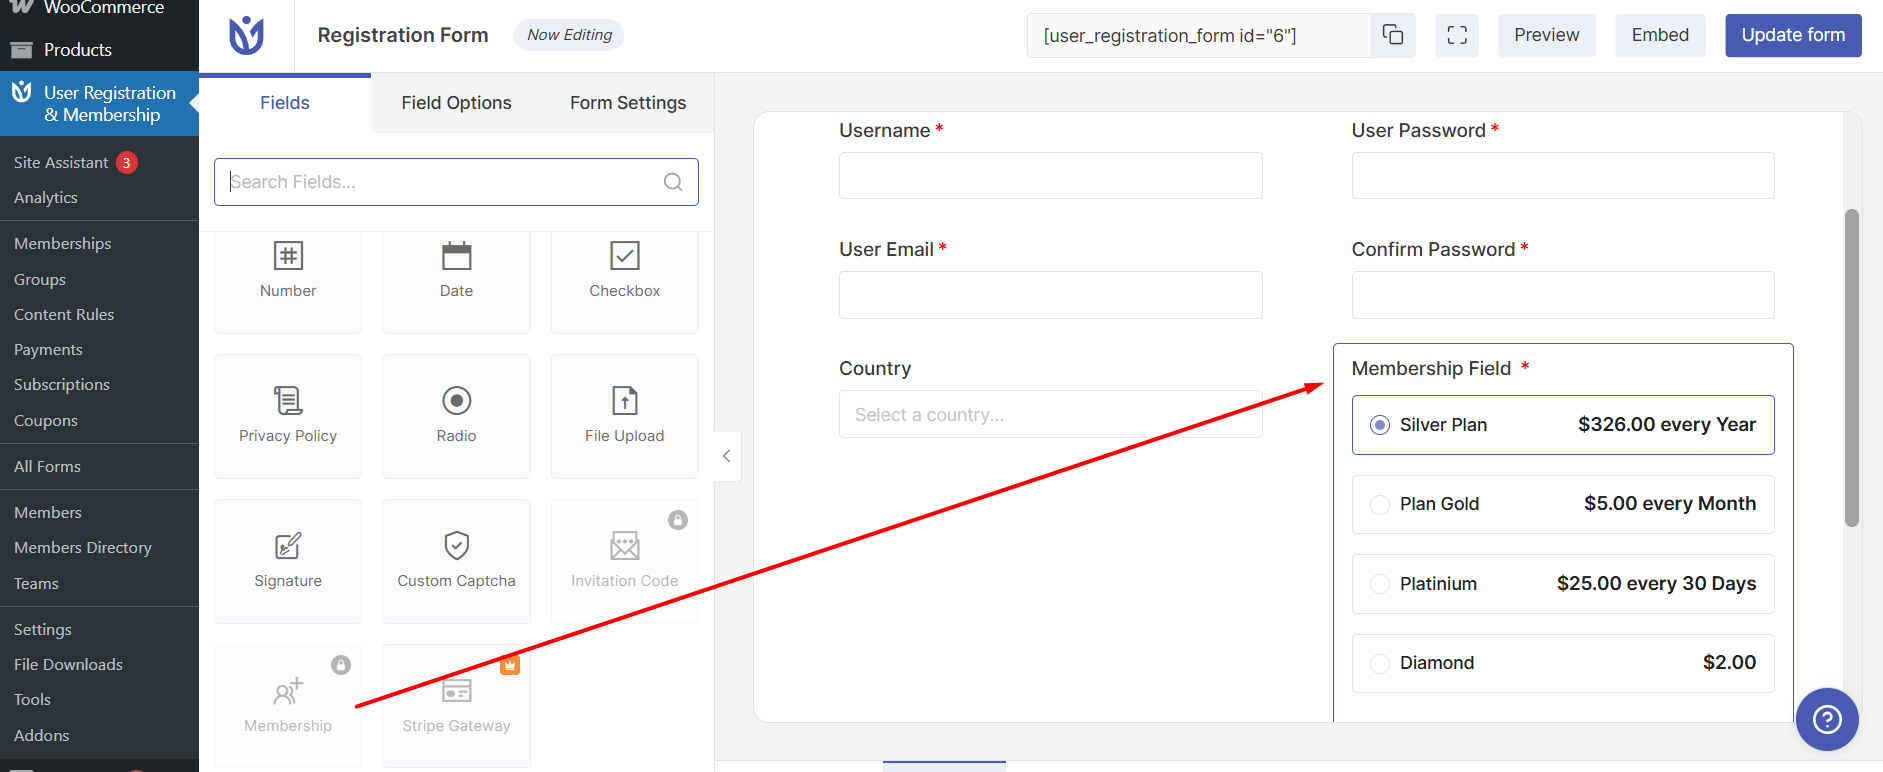
Click on the Membership field to configure its settings. In Field Options > Advanced Settings, you can choose whether to show all active memberships or only memberships from a specific group.
If you've created Membership Groups, select the group from the dropdown. Otherwise, choose to show all active memberships.
Adding Payment Fields
For paid memberships, the payment gateway selection appears automatically after the membership field. Users will see enabled payment options like PayPal, Stripe, or Bank Transfer.
If you want to offer coupon codes, drag the Coupon field from the form builder sidebar. Users can enter discount codes to reduce the membership price.
Configuring Membership Form Settings
Click the Form Settings tab to configure membership-specific options.
In the General section, set the Default User Role. This role is assigned to users after they complete registration and payment.
Configure the User Approval and Login Option.
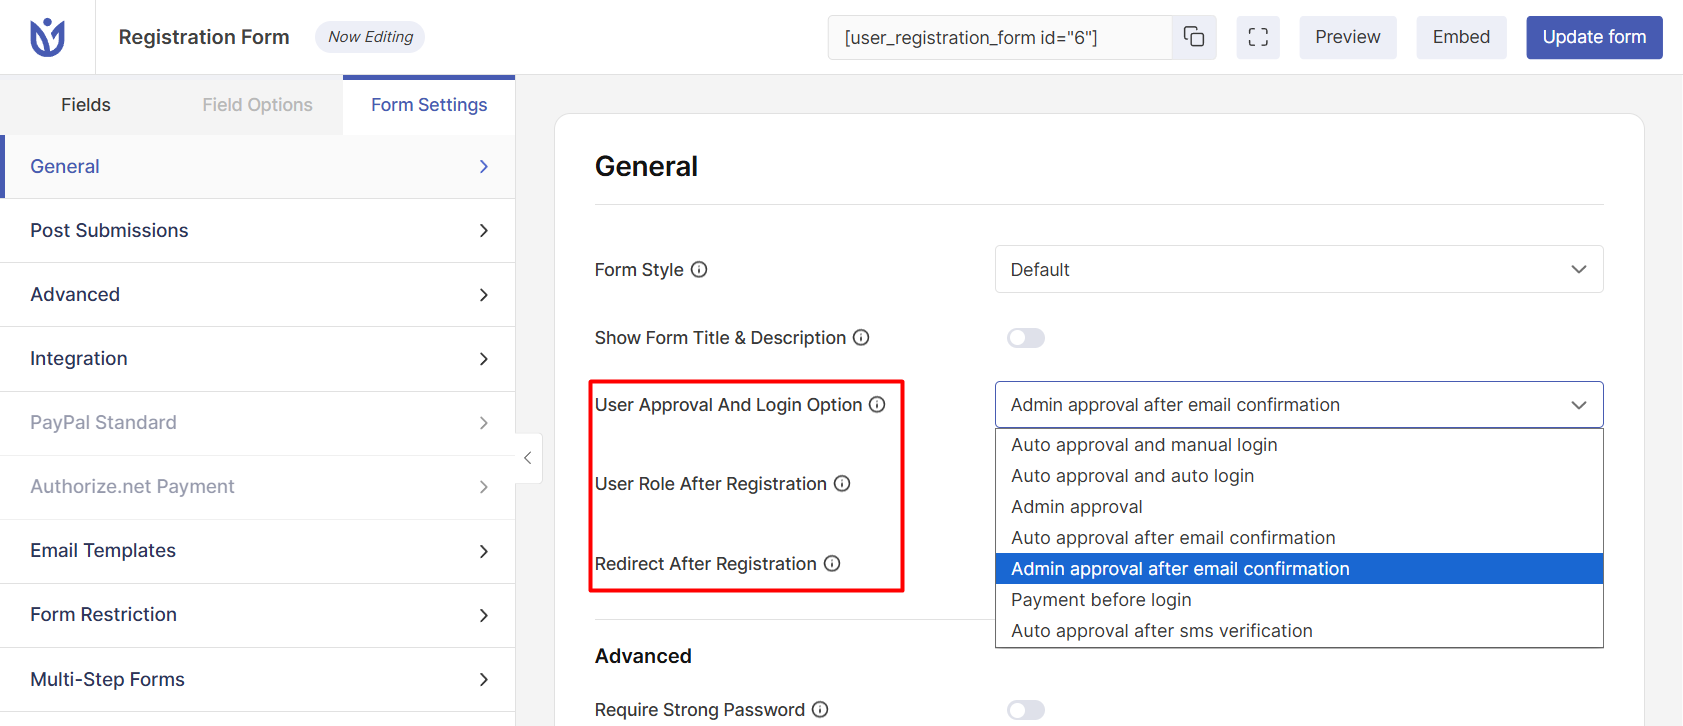
For membership forms, Auto Approval with Manual Login is common, as users need to complete payment before accessing member content.
Adding Your Form to Other Pages
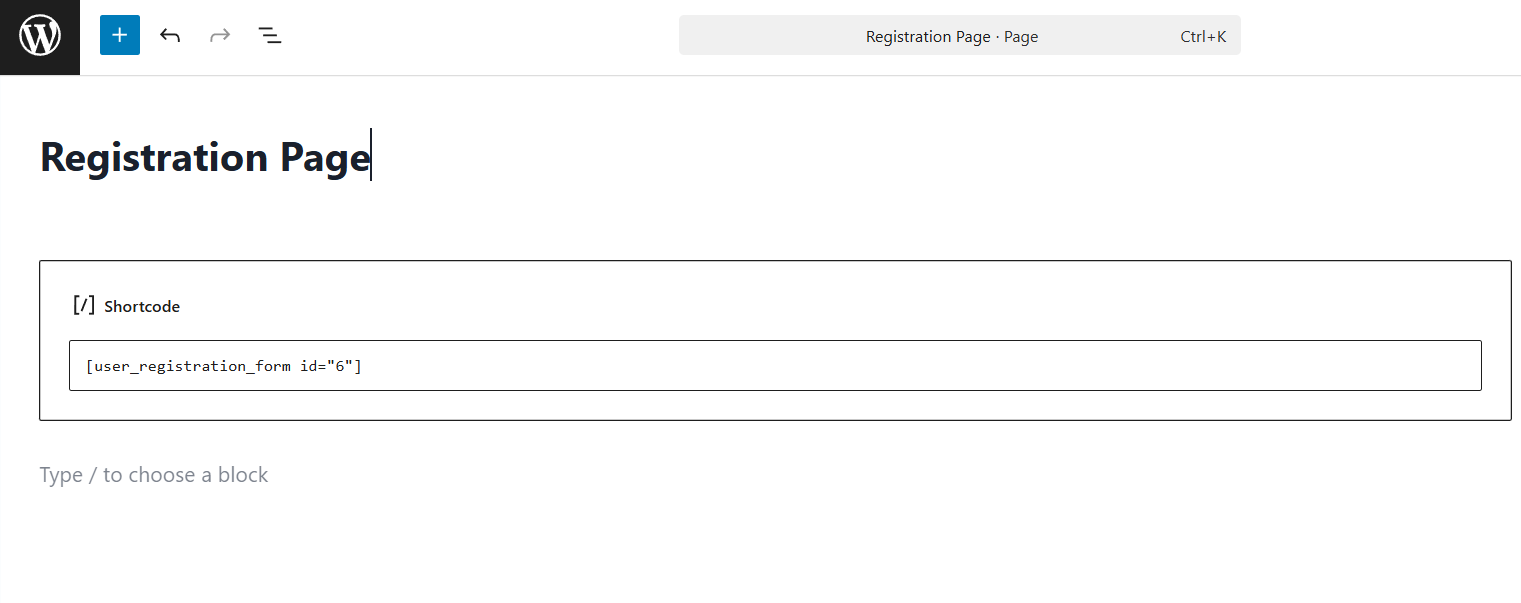
If you want to add your registration form to additional pages, you have two options. You can use the User Registration block in the WordPress block editor, or you can use a shortcode.
To use the block method, create or edit a page, click the plus icon to add a block, search for User Registration, and select the User Registration block.
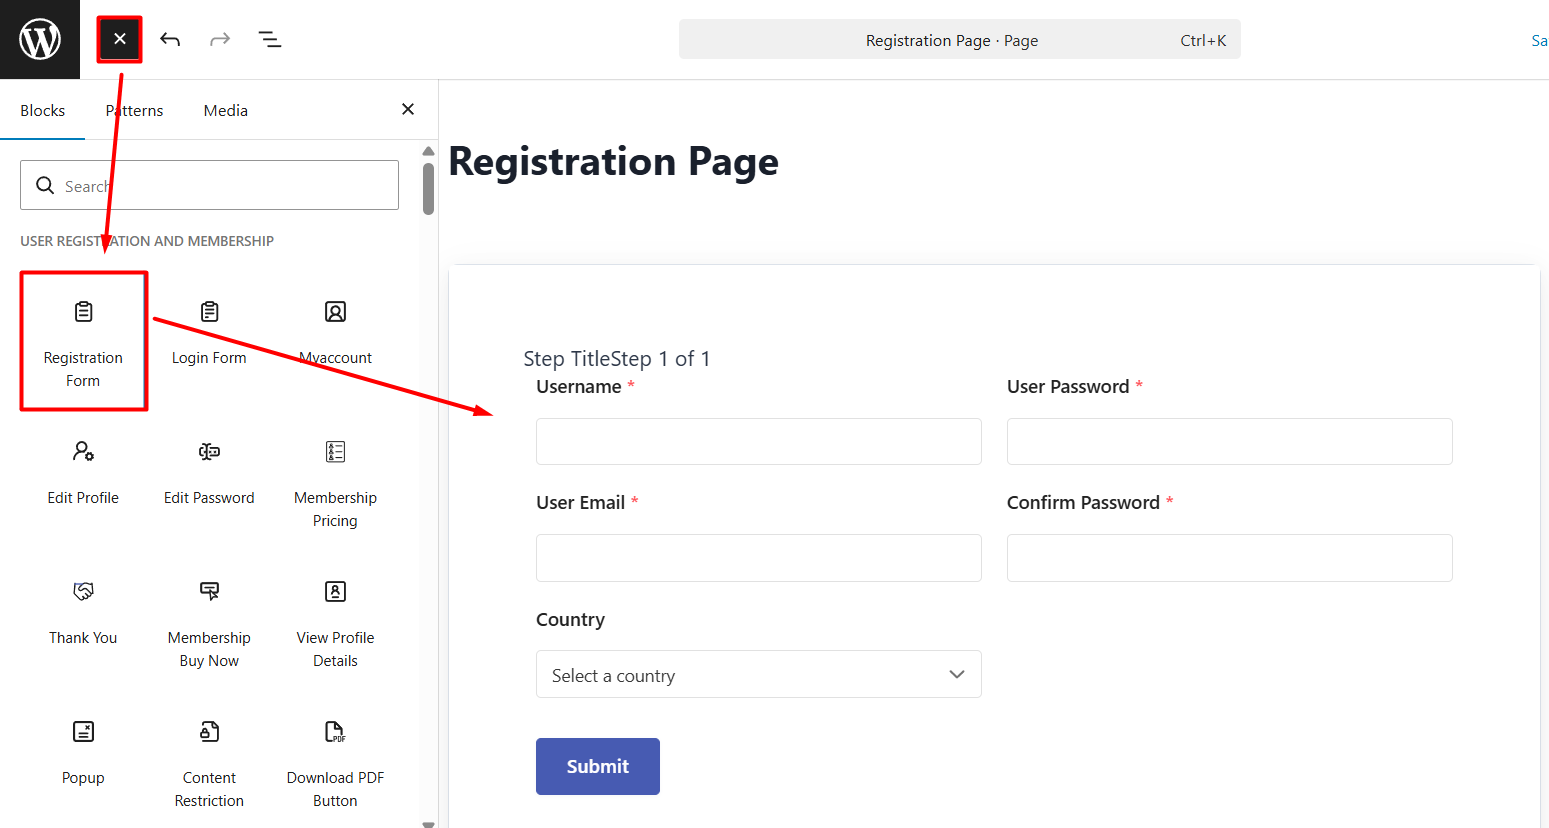
Then choose your form from the dropdown menu.
To use the shortcode method, copy the shortcode displayed at the top of the form builder. It will look like this: [user_registration_form id="123"].
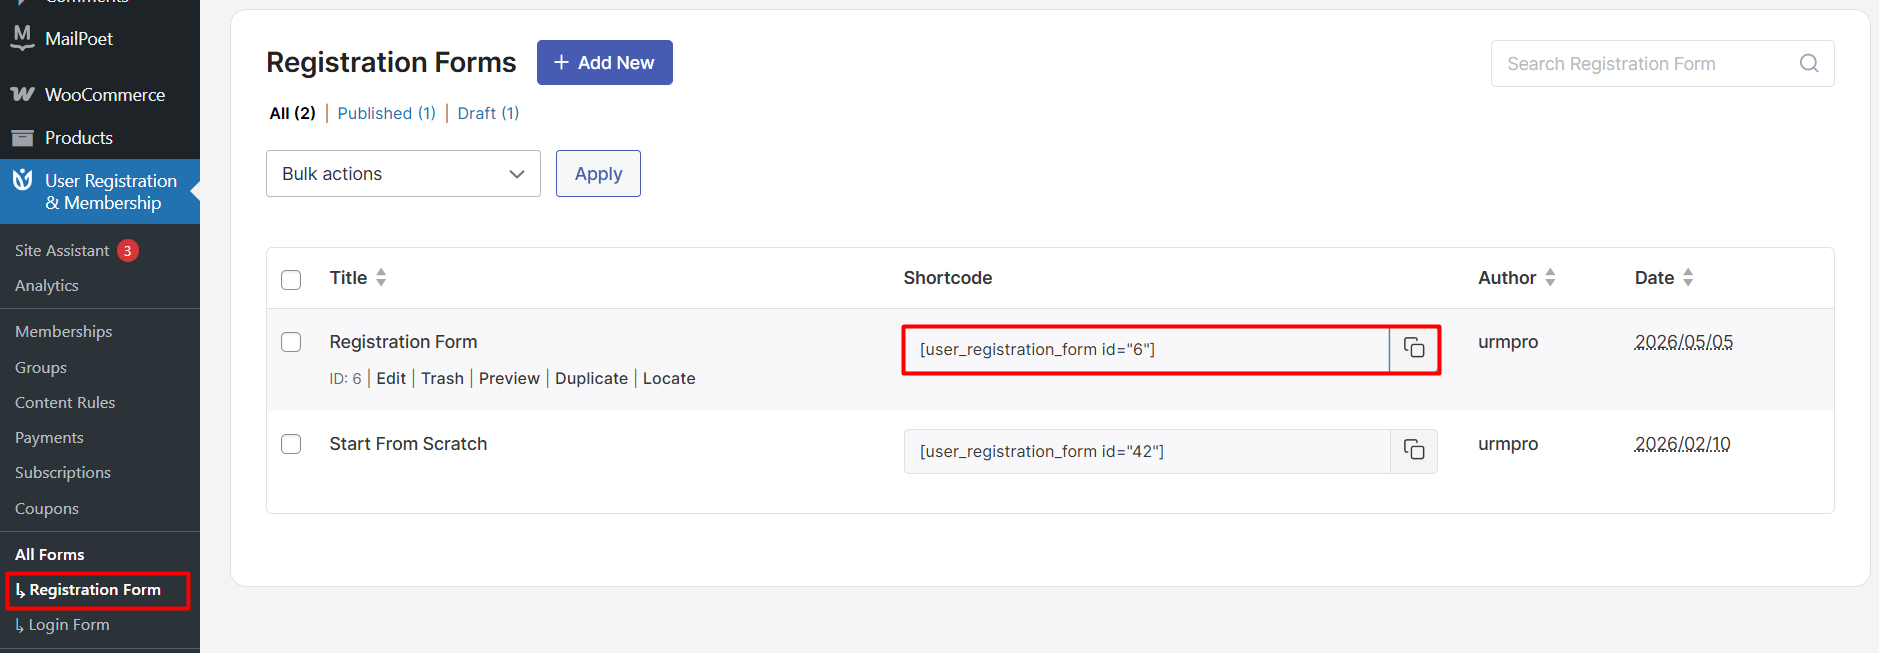
Paste this shortcode into any page or post using a Shortcode block.
Testing Your Registration Form
Before making your form live, test it in an incognito browser window to ensure all fields work correctly.
For membership forms, use test mode in your payment gateway settings to process test transactions without real charges.
Verify that users receive confirmation emails, are assigned the correct role, and can access their My Account page after registration.
Frequently Asked Questions
Can I create multiple registration forms?
Yes. The Multiple Registration addon allows you to create unlimited registration forms with different fields, approval settings, and user roles. Each form has a unique shortcode.
What's the difference between Normal Registration and Membership Registration?
Normal Registration provides basic user account creation without payment or tiered access. Membership Registration includes membership plans, payment processing, content restriction, and subscription management.
Can I change from Normal Registration to Membership Registration later?
Yes. If you initially chose Normal Registration, you can enable the Membership addon from User Registration & Membership > Addons. This adds membership functionality to your site.
How do I add a registration form to my navigation menu?
Go to Appearance > Menus in your WordPress dashboard. Add a Custom Link with the URL of your registration page. Provide link text like Register or Sign Up, then save the menu.
Next Steps
That's it! Now you know how to create registration forms for both normal registration and membership registration. Next, would you like to customize your form's appearance or configure email notifications? Be sure to check out our guide on customizing registration email templates for all the details.