
Conversational Form
ProTransform standard registration forms into engaging, step-by-step conversational experiences that guide users through signup one question at a time.
Last updated on Jul 15, 2026
Want to create a more engaging registration experience that feels like a conversation rather than a traditional form? User Registration & Membership allows you to transform your standard registration forms into conversational, one-question-at-a-time layouts that guide users through the signup process step by step. This tutorial will show you how to set up and customize conversational forms for your WordPress site.
Before getting started, make sure you've installed and activated the User Registration & Membership Pro plugin on your WordPress site. Then, make sure you've installed and activated the Conversational Forms addon, which is available with Plus or Professional plans.
Activating the Conversational Forms Addon
To use conversational forms, you'll first need to enable the addon from your WordPress dashboard.
Navigate to User Registration & Membership → Addons in your WordPress dashboard. Here, you'll see a list of available addons organized by category.
Locate the Conversational Forms addon in the list and toggle the switch to Activate. Once activated, the conversational form features will be available in your form settings.
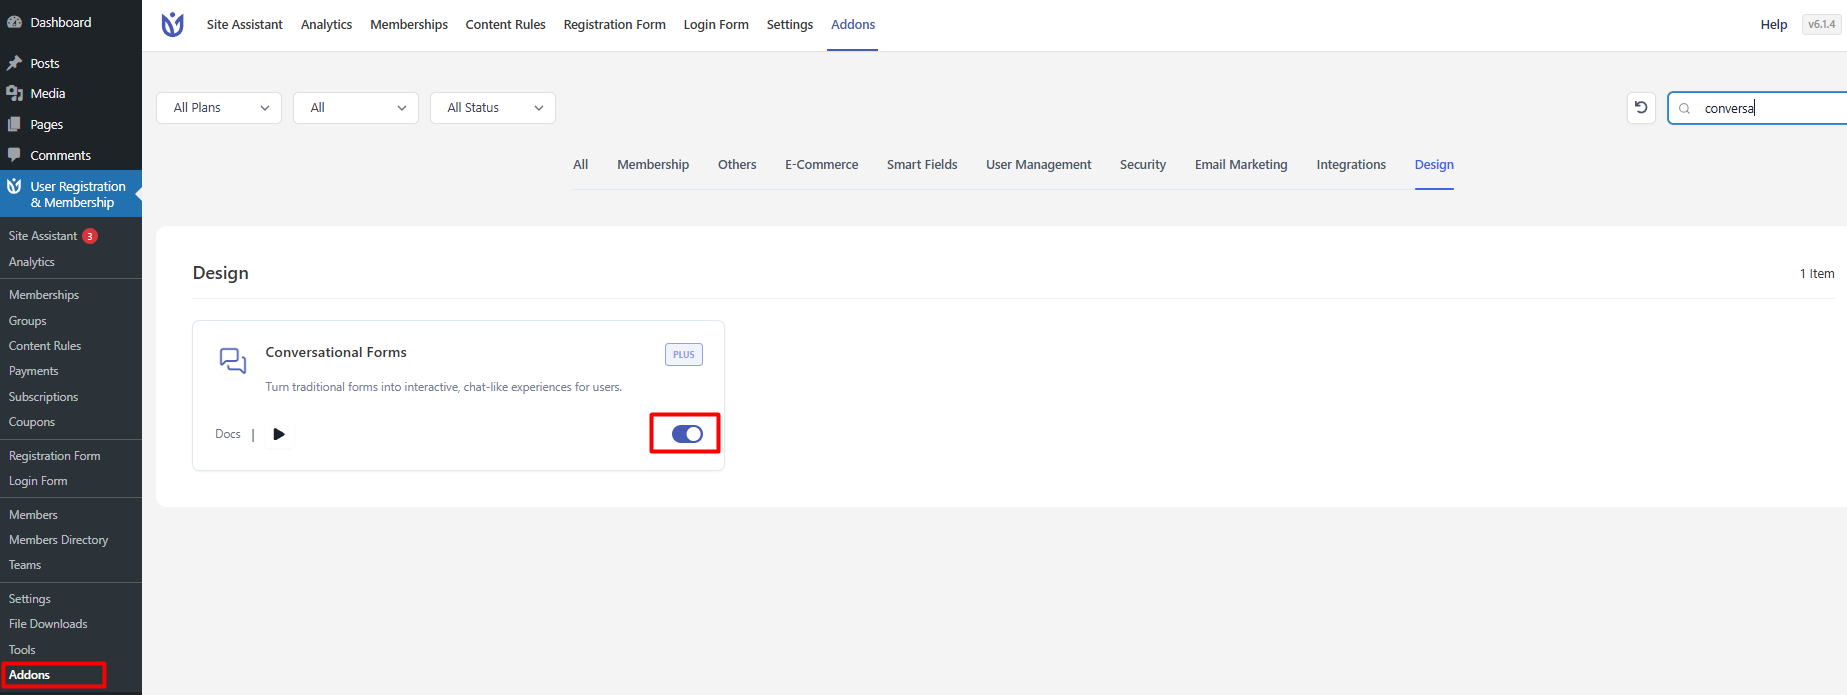
The Conversational Forms addon is only available for Plus and Professional plans, not basic plans.
Creating Your Registration Form
Once the addon is activated, you can create a new registration form or convert an existing one to conversational format.
Go to User Registration & Membership → Registration Form (Or click on All Forms > Registration Form if you have multiple registration addon enabled.
Add the form fields you need using the drag-and-drop form builder. User Email and User Password fields are included by default, and you can add any additional fields required for your registration process.
Enabling Conversational Form Mode
After building your form, you'll configure it to display in conversational format.
Navigate to Form Settings → Conversational Forms for your registration form. Here, you'll find all the options to enable and customize the conversational experience.
Click the toggle to Enable Conversational Form. This activates the conversational layout for your registration form.
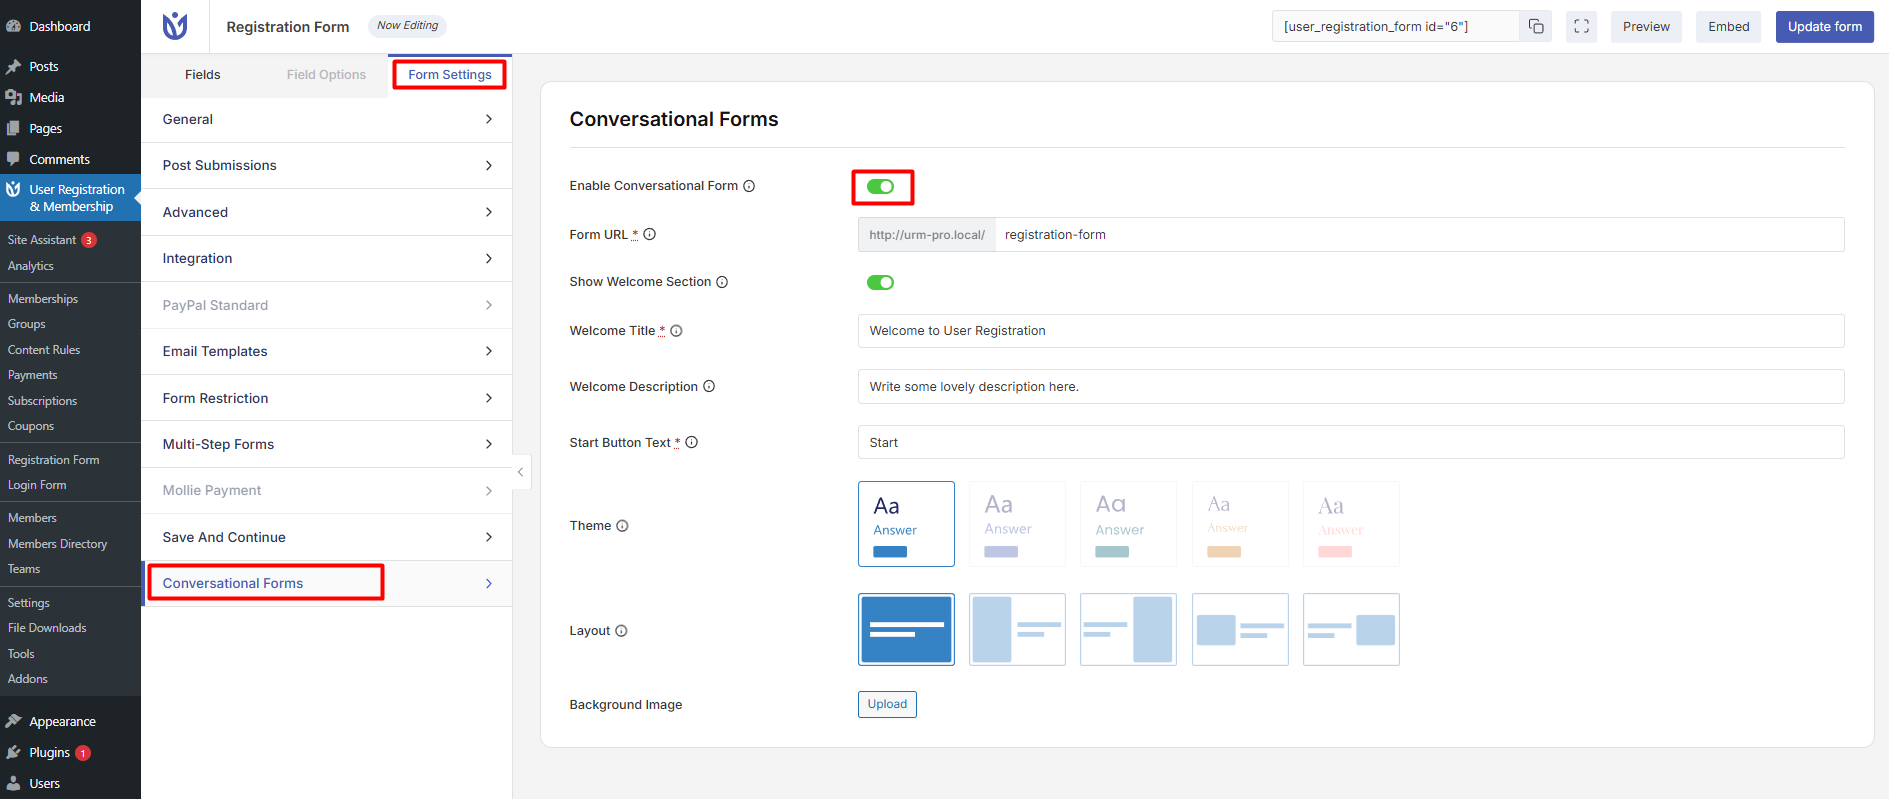
Form URL: Enter the page’s slug where you want to show the form. For example, sample-page/. Make sure you add the ‘/’ at last.
Show Welcome Section: Enable this option to show the welcome section which has the following options.
Welcome Title: Enter the title for the form to show on the Welcome Section
Welcome Description: Enter the description for the form.
Start Button Text: Enter the label of the start button on the Welcome Section.
Theme: You can choose the color options from the available theme options.
Layout: Choose how you want to show the form on the desired page.
Background Image: You can upload any image to appear on the background of the conversational form.
Saving and Testing Your Form
Once you've configured all the conversational form settings, click Update Form to save your changes.
Visit the URL you configured in the Form URL field to view your conversational form in action. The form will display one question at a time, guiding users through the registration process in a conversational format.
Test the entire registration flow to ensure all fields work correctly and the user experience feels smooth and intuitive.