
PDF Invoices
ProGenerate professional PDF invoices automatically for membership payments with customizable templates and branding options.
Last updated on Jul 14, 2026
Would you like to provide professional billing documents to your members automatically? User Registration & Membership allows you to generate PDF invoices for every completed membership payment. This tutorial will show you how to set up and customize PDF invoices for your membership site.
Before getting started, make sure you've installed and activated the User Registration & Membership plugin. The PDF Invoice feature requires a Personal plan or higher.
Activating the PDF Invoice Add-on
To begin using PDF invoices, you'll need to activate the add-on first.
Navigate to User Registration & Membership → Addons in your WordPress dashboard. Here, you'll see all available add-ons organized by category. Locate the Invoice Add-on under the E-Commerce category and toggle the switch to activate it.
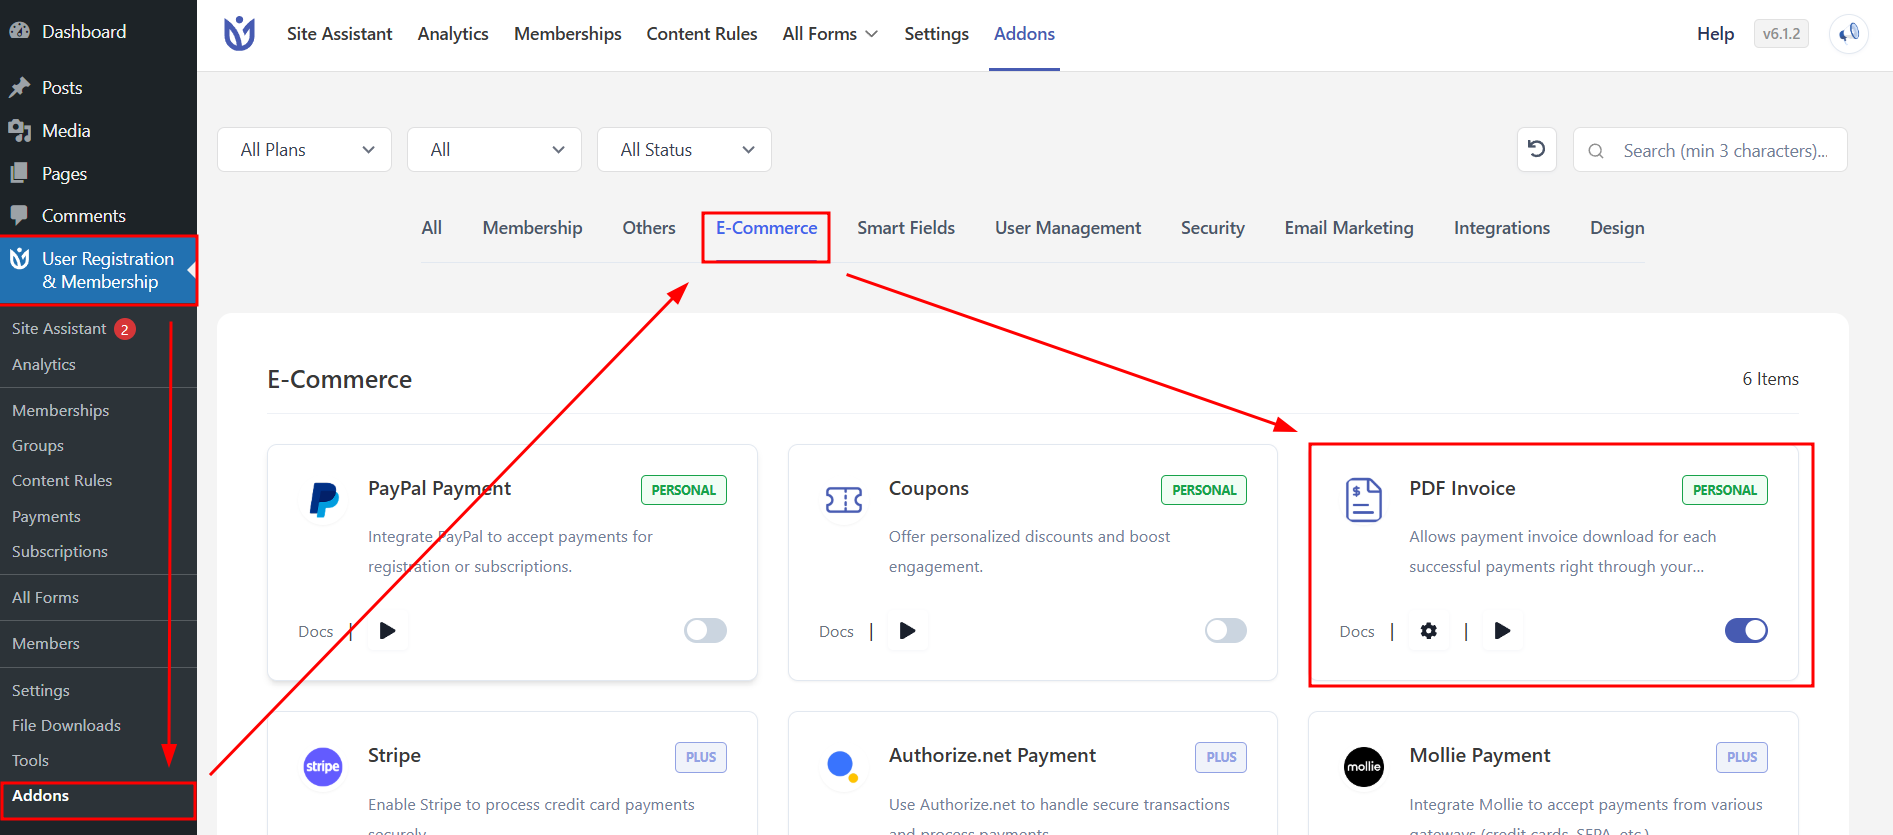
Once activated, the PDF Invoice add-on will automatically generate downloadable PDF invoices for all completed payments going forward.
Configuring Invoice Settings
After activating the add-on, you can customize how your invoices appear.
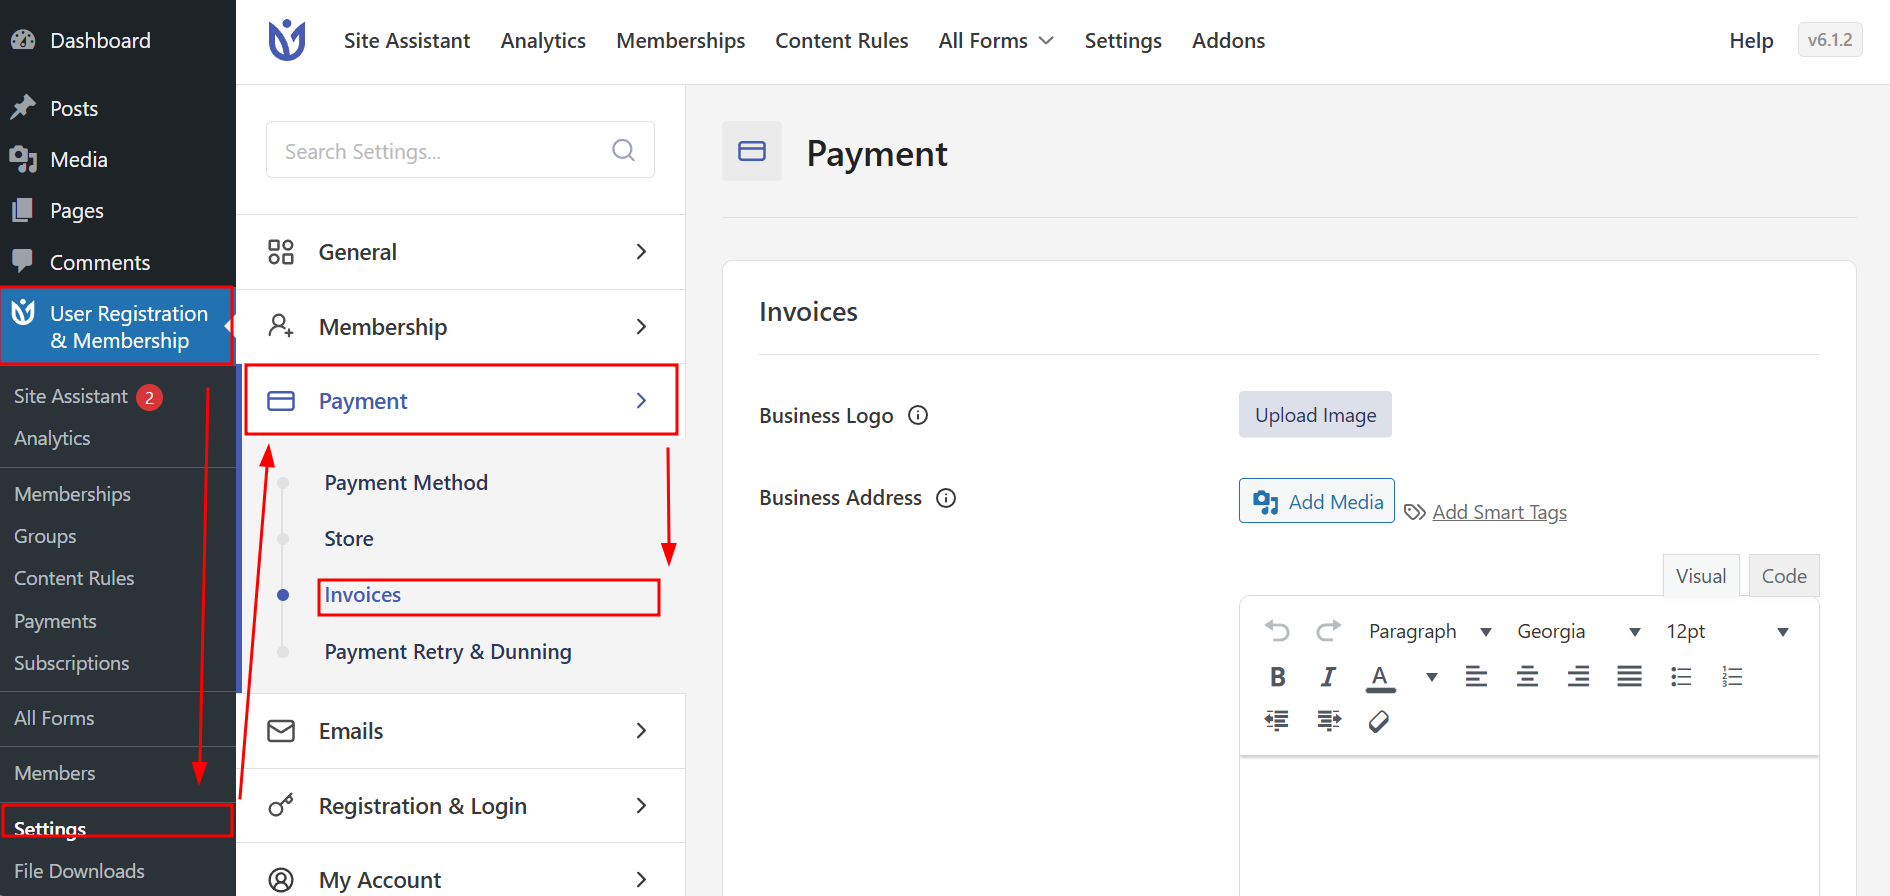
Go to User Registration → Settings → Payment → Invoices to access the invoice configuration options. Here, you'll find several customization settings that control the appearance and content of your invoices.
Entering Business Address
Enter your billing address including company name, street, city, postal code, and country. This information appears on every invoice as the seller details.
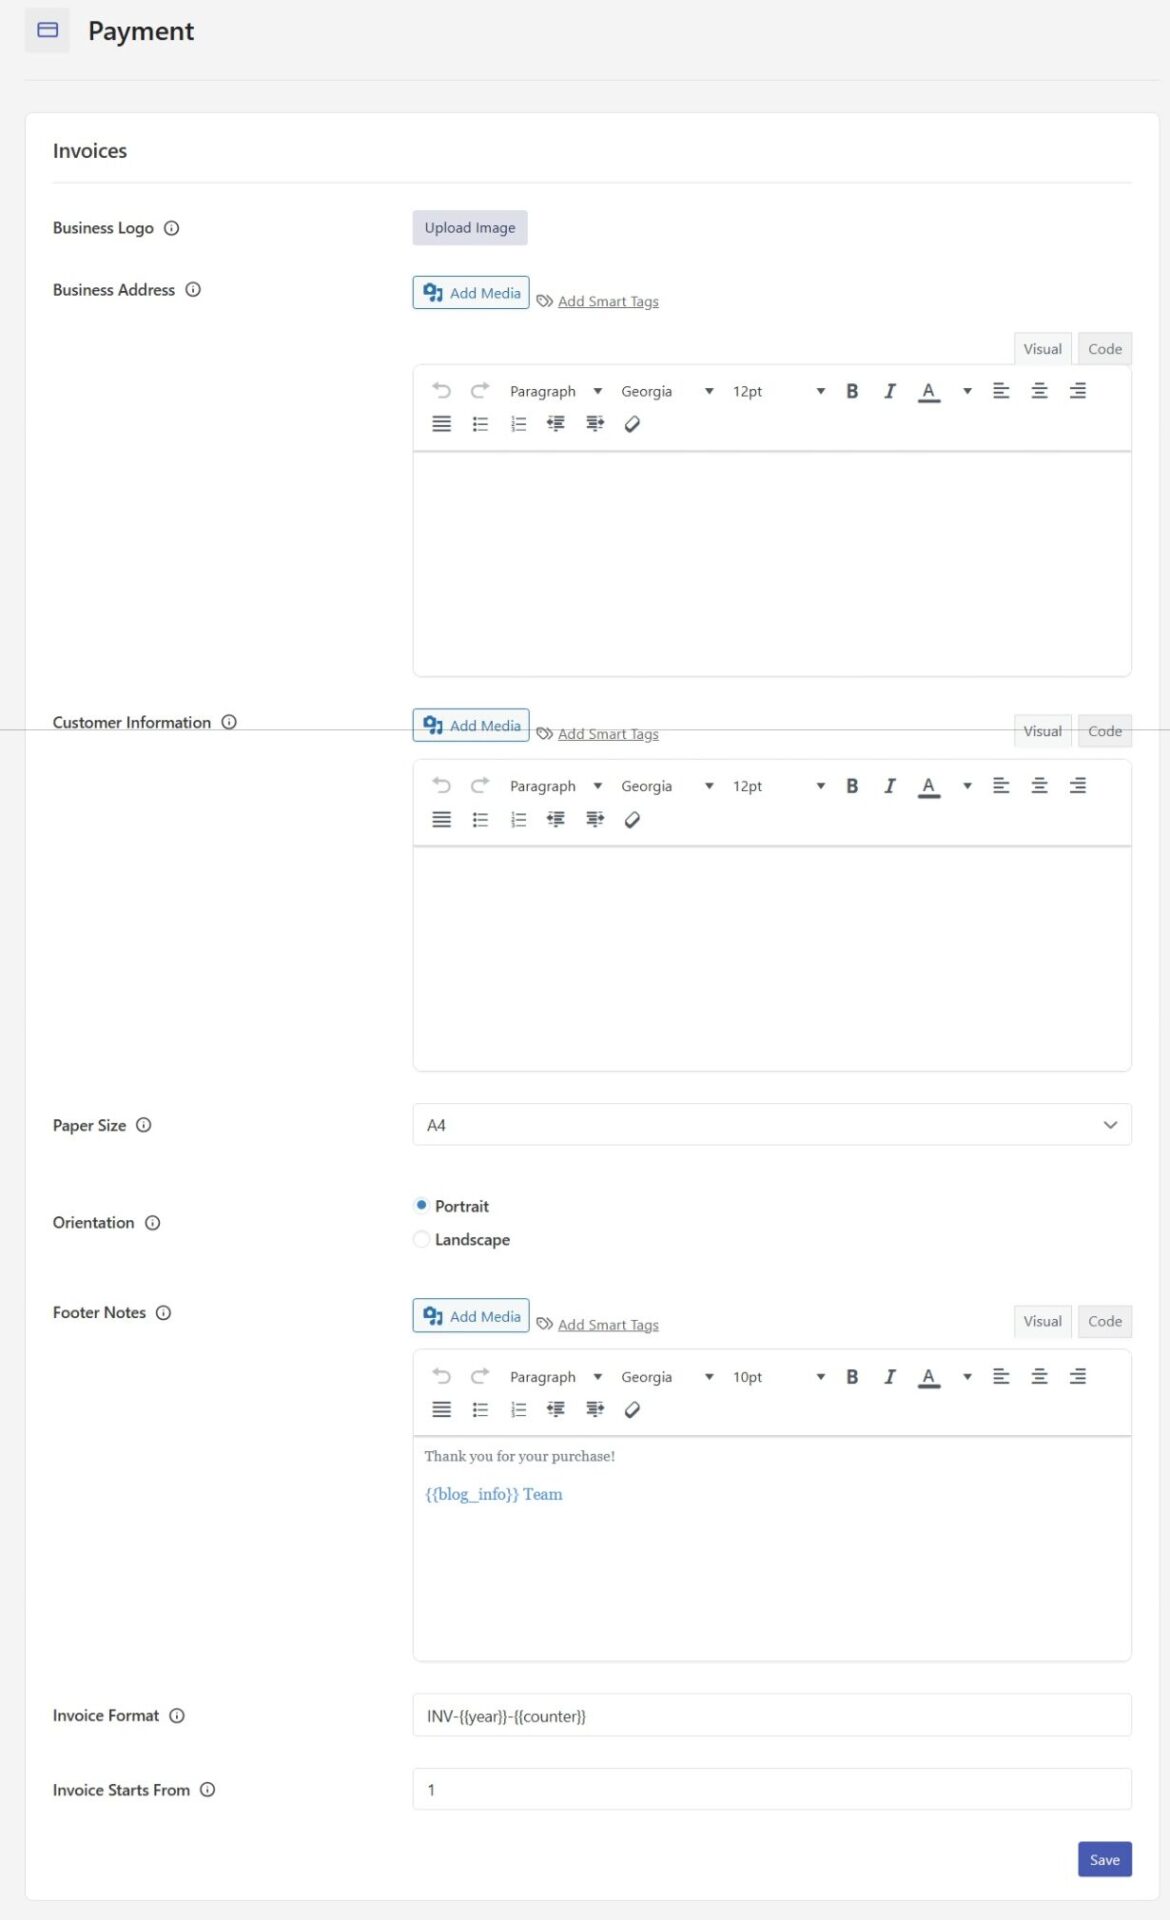
Fill in the following fields:
Business Logo
Business Name
Business Address Line 1
Business Address Line 2 (optional)
Business City
Business State
Business Postal Code
Business Email
Business Phone
Defining Customer Information Layout
Use the editor to define how customer details appear on the invoice. You can customize the layout using the visual editor and insert dynamic values using smart tags. Click Add Smart Tags to insert placeholders like customer name, billing address, and email that will be automatically filled with each member's information.
Selecting Page Size and Orientation
Choose the paper size for your invoices from the Page Size dropdown. Available options include A4, A5, Letter, Legal, Tabloid, and Executive. Then select the Orientation — either Portrait or Landscape — based on your layout preference.
Customizing Invoice Format
Define your invoice numbering format using text and dynamic values. For example, you might use INV-{{year}}-{{counter}} to create invoice numbers like INV-2025-001, INV-2025-002, and so on.
The format supports the following placeholders:
{{year}} — Current year
{{id}} — Invoice ID
{{counter}} — Sequential counter
Set the Invoice Starts From number to define where the counter begins. For example, entering 1 will start your invoice numbering at 001.
Adding Footer Notes
Add custom messages, contact information, tax notes, or disclaimers at the bottom of invoices using the Footer Notes field. This text appears on every invoice and can include payment terms, return policies, or other important information.
Click Save Changes to apply your invoice settings.
Preview of Generated Invoice
Once the Invoice Add-on is enabled and configured, the system automatically generates a PDF invoice for each completed payment.
Below is an example of how a generated invoice looks.
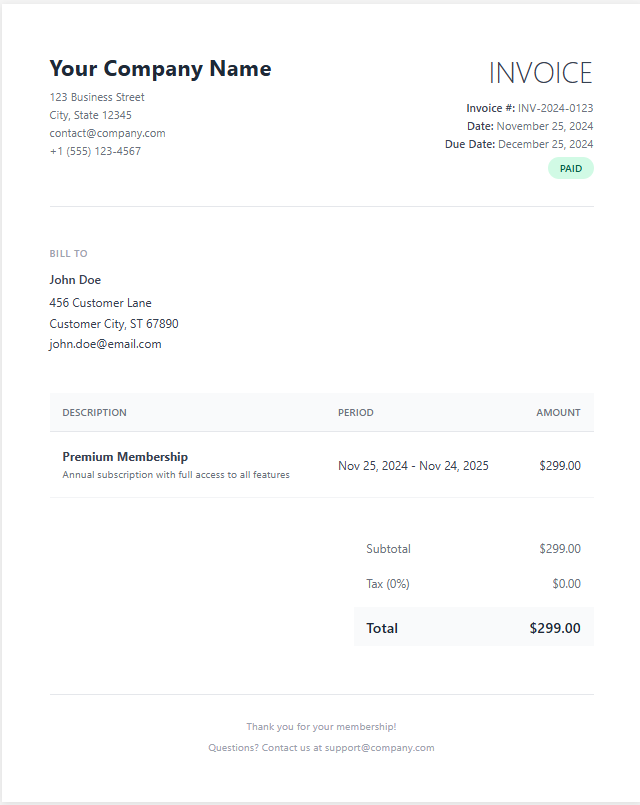
The layout and content of the invoice depend on the settings you configure in:
User Registration → Settings → Payments → Invoices
Any changes made to the business details, customer information, or footer notes will automatically appear in newly generated invoices.
How Members Download Invoices
Once invoice generation is enabled, members can access their invoices from their account dashboard.
Members log in to their account and navigate to My Account → Payment Details. In the payment history table, each completed payment includes a Download button under the Action column. Clicking this button downloads the PDF invoice for that specific transaction.
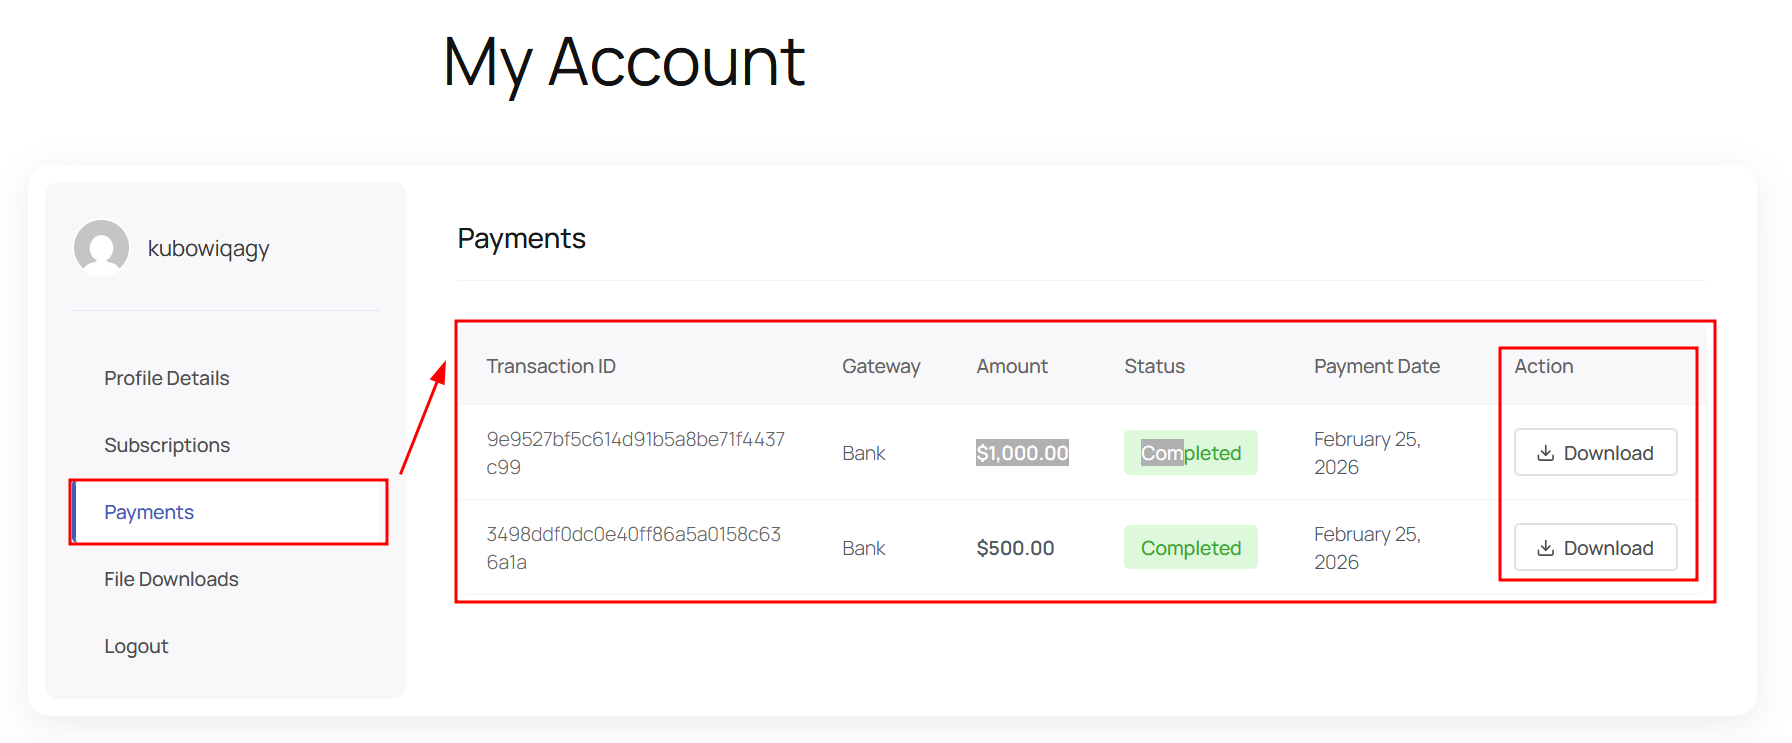
Members can download and print their invoices whenever needed without contacting support.
Important Notes About Invoice Generation
Keep in mind that invoices are automatically generated for each completed payment. Changes to invoice settings only apply to newly generated invoices - existing invoices will not be updated retroactively.
The invoice format you define determines how invoice numbers appear. Make sure to choose a format that works for your accounting system before processing your first payment.