
PayPal Payment
Configure PayPal as a payment gateway to accept one-time or recurring payments for user registrations and membership subscriptions on your WordPress site.
Last updated on Jul 29, 2026
Would you like to accept payments through PayPal when users register on your site or purchase memberships? User Registration & Membership allows you to integrate PayPal as a payment gateway for both registration forms and membership plans. This tutorial will show you how to set up and configure PayPal payments for both use cases.
Understanding PayPal in User Registration & Membership
PayPal can be used for both Registration Forms and Membership Plans, but the setup requirements are different.
PayPal for Registration Forms
If you want to collect payments during user registration:
The PayPal Add-on must be installed and activated.
The PayPal Add-on is a Premium feature and is available starting with the Personal plan.
Configure your PayPal API credentials in the PayPal Settings.
Enable PayPal on your registration form.
PayPal for Membership Plans
If you want to accept payments for Membership Plans:
You do not need to install or activate the PayPal Add-on.
PayPal support is built directly into the Membership feature.
Simply configure your PayPal API credentials in the Payment Settings, and they will be used for your membership plans.
Both Registration Forms and Membership Plans share the same PayPal settings. You only need to configure your PayPal API credentials once, and the same configuration will be used for both features.
Getting Your PayPal API Credentials
To connect PayPal with User Registration & Membership, you'll need your PayPal API credentials. Here's how to get them:
Log in to your PayPal business account
Navigate to your PayPal Dashboard
Go to the Developer section to access your API keys
Copy your Client ID and Client Secret — you'll need these for the plugin configuration
Keep these credentials secure. You'll enter them in the next step.
Configuring Global PayPal Settings
Before you can use PayPal on forms or memberships, you need to configure the global PayPal settings. These settings apply across your entire site unless you override them at the form level.
From your WordPress dashboard, go to User Registration & Membership → Settings → Payments
Click on the PayPal dropdown to expand the PayPal settings section
Select your Currency from the dropdown (default is USD)
Choose your Mode — select Sandbox for testing or Production for live payments
Enter your PayPal Email Address — this is the business email that will receive payments
Set your Cancel URL — the page users see if they cancel the payment at PayPal
Set your Return URL — the page users see after completing payment successfully
Enter your Client ID from PayPal
Enter your Client Secret from PayPal
Click Save to save your global PayPal settings
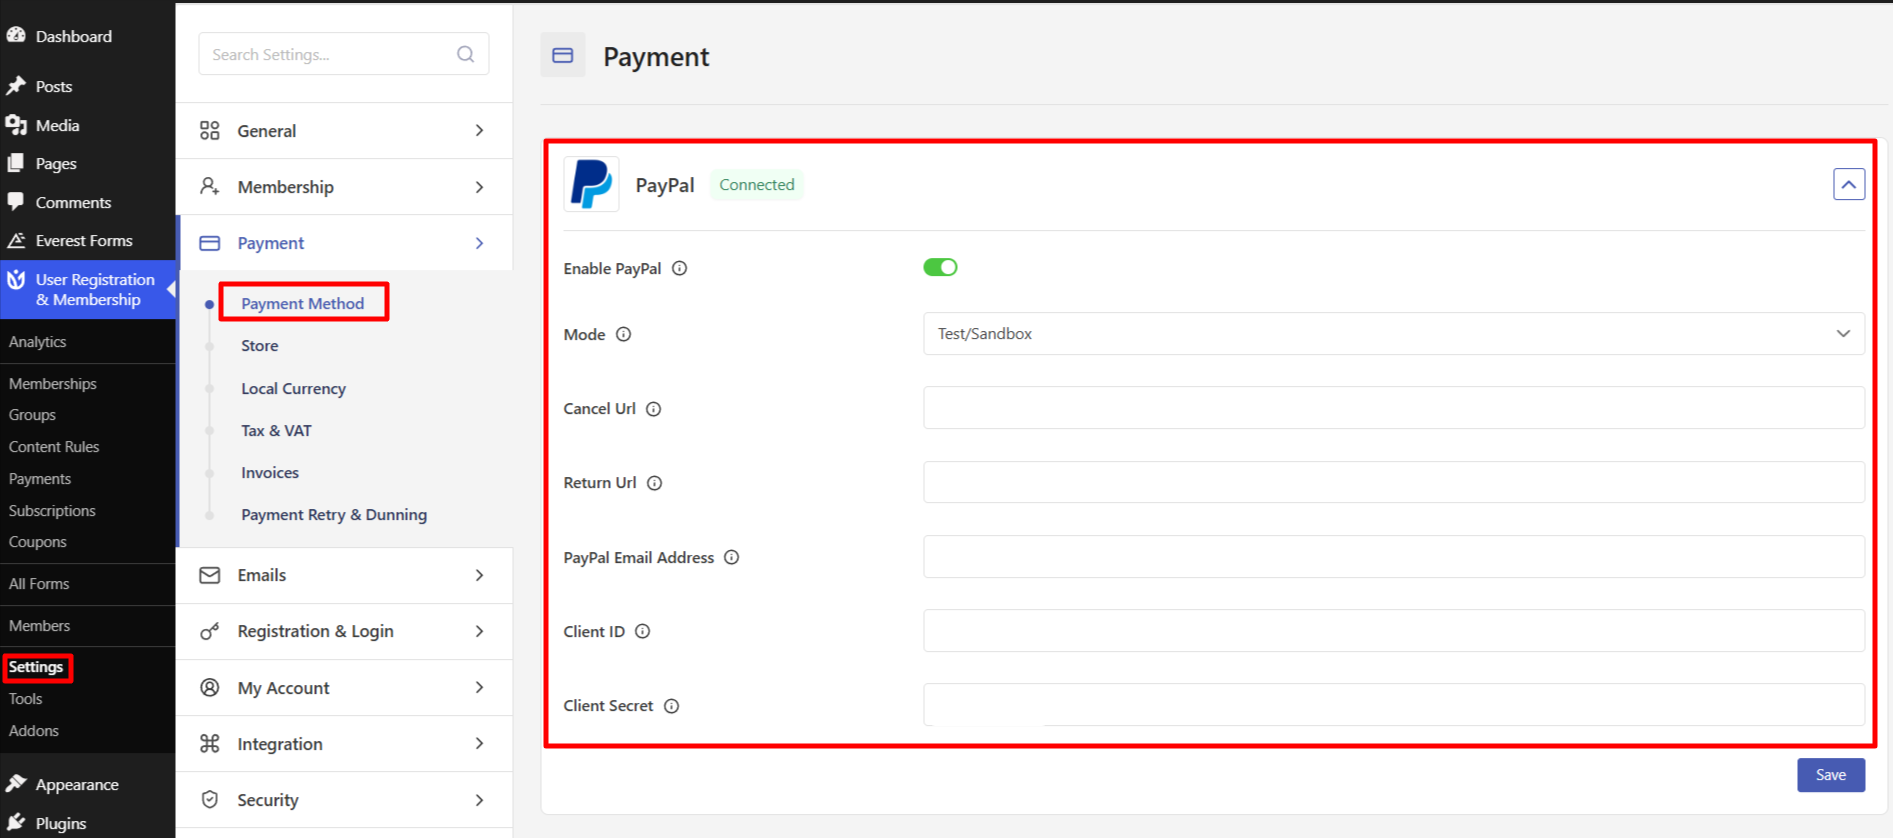
Always test your PayPal integration in Sandbox mode before switching to Production mode for live payments.
Using PayPal with Registration Forms
To accept payments through registration forms, you need to install the PayPal Payment addon and add payment fields to your forms.
Installing the PayPal Payment Addon
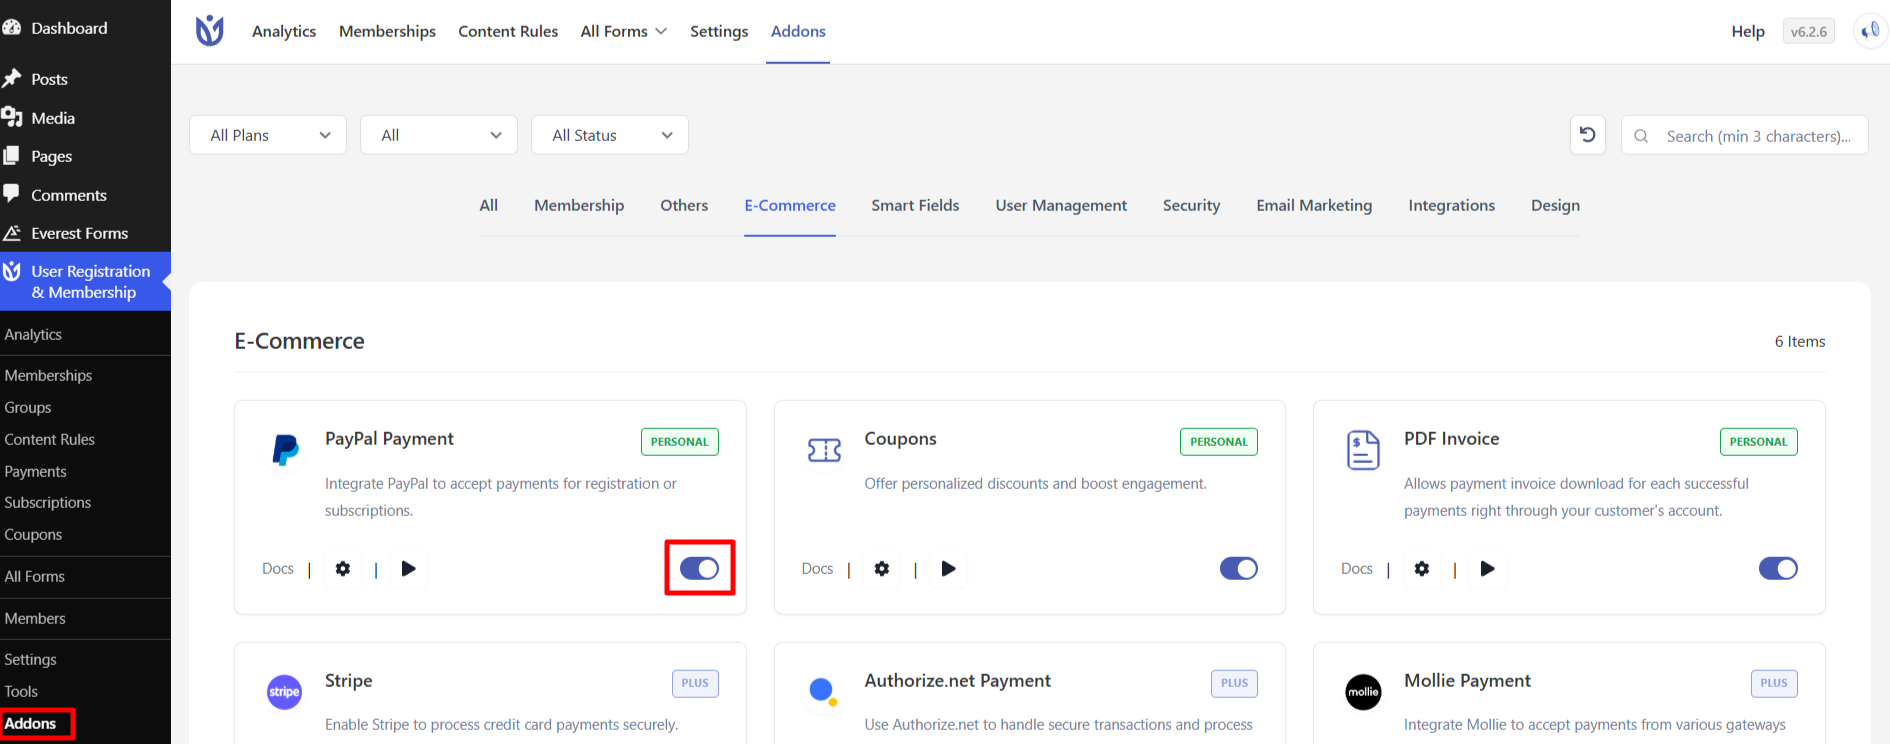
Go to User Registration & Membership → Addons
Find the PayPal Payment addon in the E-Commerce category
Toggle the switch to activate the addon
Adding Payment Fields to Your Form
To accept PayPal payments through a registration form, you need to add payment fields to your form:
Go to User Registration & Membership → All Forms
Click Add New to create a new form or click Edit on an existing form
In the form builder, scroll down to the Payment Fields section in the left sidebar
Drag and drop payment fields onto your form. Available payment fields include:
Single Item — A fixed-price item with one set amount
Multiple Choice — Let users choose from different pricing options
Quantity — Allow users to select how many of an item they want to purchase
Subscription Plan — Set up recurring payments with billing cycles
Total — Display the calculated total of all payment fields
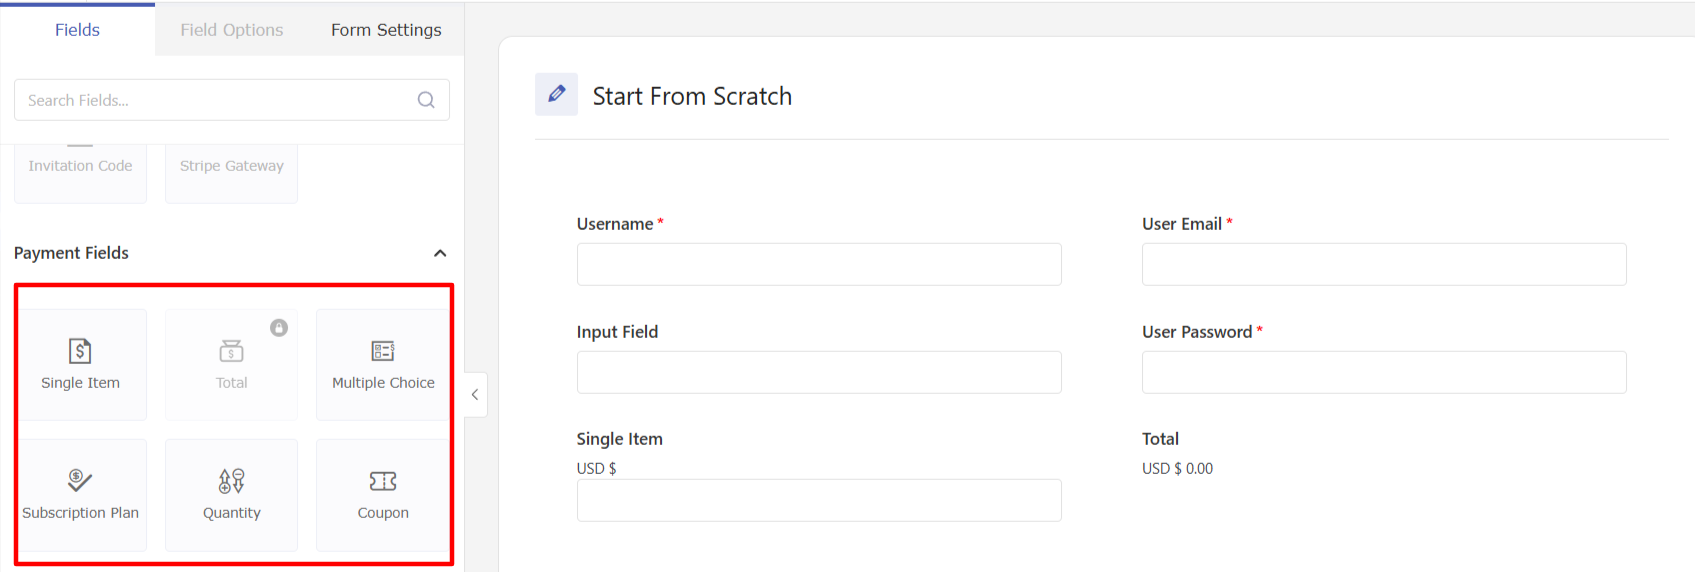
Click on each payment field to configure its settings in the Field Options panel
Payment fields cannot be used if a membership field is present in the form. When using membership fields, payment settings are configured at the membership level instead.
Configuring Payment Field Options
Each payment field type has specific configuration options:
Single Item Field:
Set the item name and price
Choose Item Type: Pre Defined (admin sets price), User Defined (user enters amount for donations), or Hidden (revealed at checkout)
Enable Selling Price to show both regular and discounted prices
Multiple Choice Field:
Add multiple pricing options with different amounts
Enable Selling Price for each option to show discounts
Quantity Field:
Map the quantity field to a Single Item or Multiple Choice field
The total will calculate automatically based on quantity selected
Subscription Plan Field:
Set plan names and recurring pricing
Define billing cycles (day, week, month, year)
Optionally enable trial periods and selling prices
Enabling PayPal on Your Registration Form
After adding payment fields, you need to enable PayPal payment for the form:
In the form builder, click on the Form Settings tab
Navigate to Form Settings → PayPal Standard
Toggle Enable PayPal Payment to activate PayPal for this form
Optionally, toggle Override Global Settings if you want to use different PayPal credentials for this specific form
If overriding, enter the form-specific PayPal Email, Client ID, and Client Secret
Click Update Form to save your changes
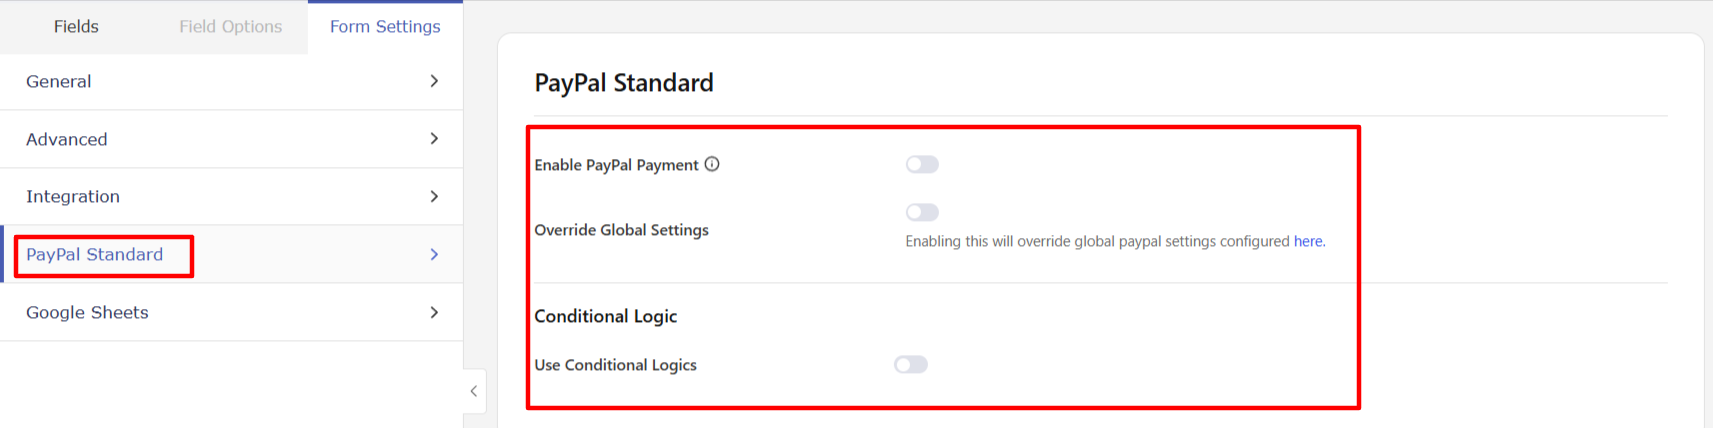
By default, forms inherit the global PayPal settings you configured earlier. Only override these settings if you need different PayPal accounts for different forms.
Using PayPal with Membership Plans
PayPal for membership plans handles subscription billing, renewals, and membership access automatically. When you create a paid or subscription-based membership, PayPal processes the payments and manages the billing cycles.
Creating a Membership Plan with PayPal
To create a membership plan that accepts PayPal payments:
Go to User Registration & Membership → Memberships
Click Create new Membership or Add New
Enter your Membership Name and Description
Set Membership Status to Enable
Choose your Membership Type:
Free — No payment required
Paid — One-time payment
Subscription Based — Recurring payments with billing cycles
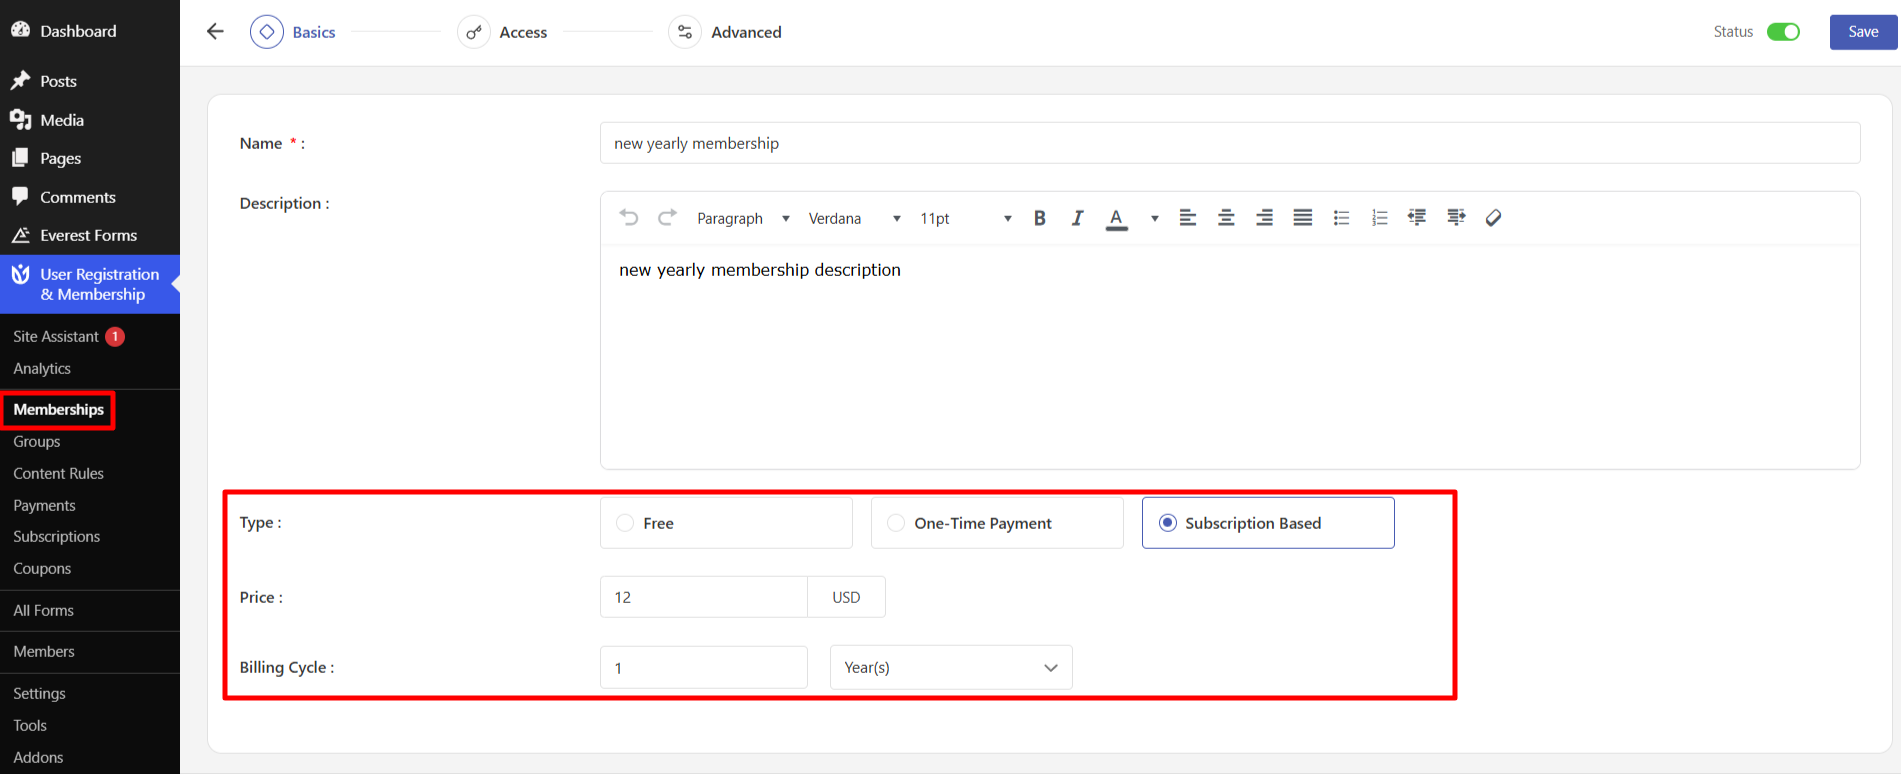
If you selected Paid or Subscription Based, enter the Amount
For Subscription Based, set the Duration for the billing cycle
Optionally enable Trial Period and set the trial duration
Click Create Membership or Publish to save your membership plan
PayPal must be configured in your global payment settings
Configuring PayPal for Membership Checkout
When users purchase a membership, they'll be redirected to PayPal to complete the payment. Here's how the process works:
User selects a membership plan on your site
User fills out the registration form
User selects PayPal as the payment gateway
User is redirected to PayPal to complete payment
After successful payment, user is redirected back to your site
Membership access is granted automatically
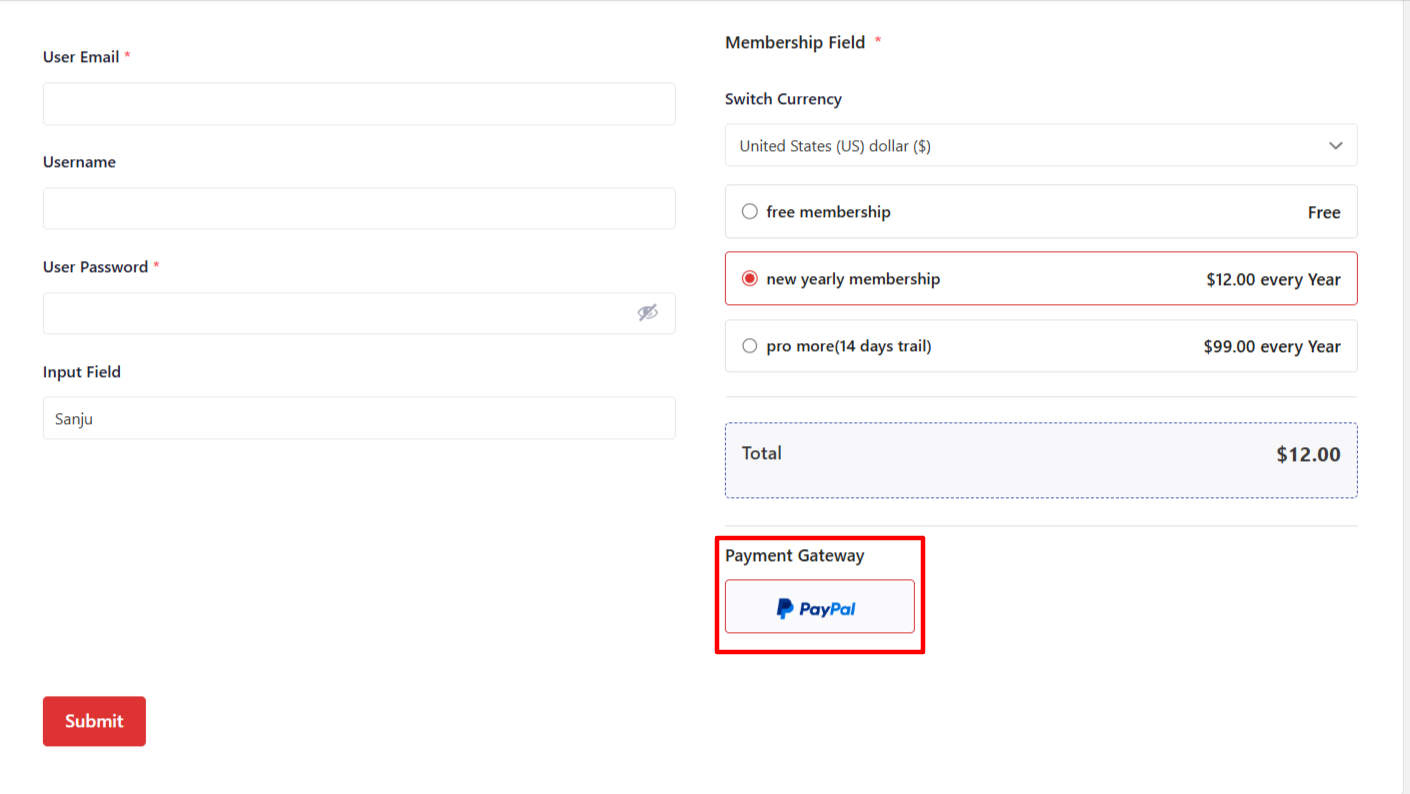
For subscription-based memberships, PayPal will automatically process recurring payments based on the billing cycle you configured.
Configure a Thank You Page (Optional)
If you'd like to redirect users to a Thank You page after they successfully register or purchase a membership, you can configure one easily.
Step 1: Create a Thank You Page
Create a new page and add the following shortcode:
[user_registration_membership_thank_you]
Publish the page.
Step 2: Set the Redirect
Go to User Registration & Membership → All Forms.
Edit your registration form.
Navigate to Settings → General.
Under Redirect After Registration, select the Thank You page you created.
Click Save.
Setting up a Thank You page is optional. If you used the setup wizard, it has already been created and configured automatically. You can customize it as needed or select it as the Redirect After Registration page for your form.
Testing Your PayPal Integration
Before accepting real payments, always test your PayPal integration in Sandbox mode:
Make sure Mode is set to Sandbox in your global PayPal settings
Use PayPal sandbox test credentials instead of your live credentials
Complete a test registration or membership purchase
Verify that you're redirected to PayPal's sandbox environment
Complete the test payment using sandbox test accounts
Verify that you're redirected back to your site after payment
Check that the payment appears in User Registration & Membership → Payments
For memberships, verify that the user has the correct membership status
Once testing is complete and everything works correctly, switch to Production mode and enter your live PayPal credentials.
Managing PayPal Payments
After users complete payments, you can track and manage all transactions from your WordPress dashboard:
Go to User Registration & Membership → Payments to view all payment records
Use the search bar to find specific payments by username or email
Filter payments by Module (Membership or Forms), Gateway (PayPal), or Payment Status
Click Edit on any payment to view full transaction details
Update payment status if needed (Pending, Completed, Failed, Refunded)
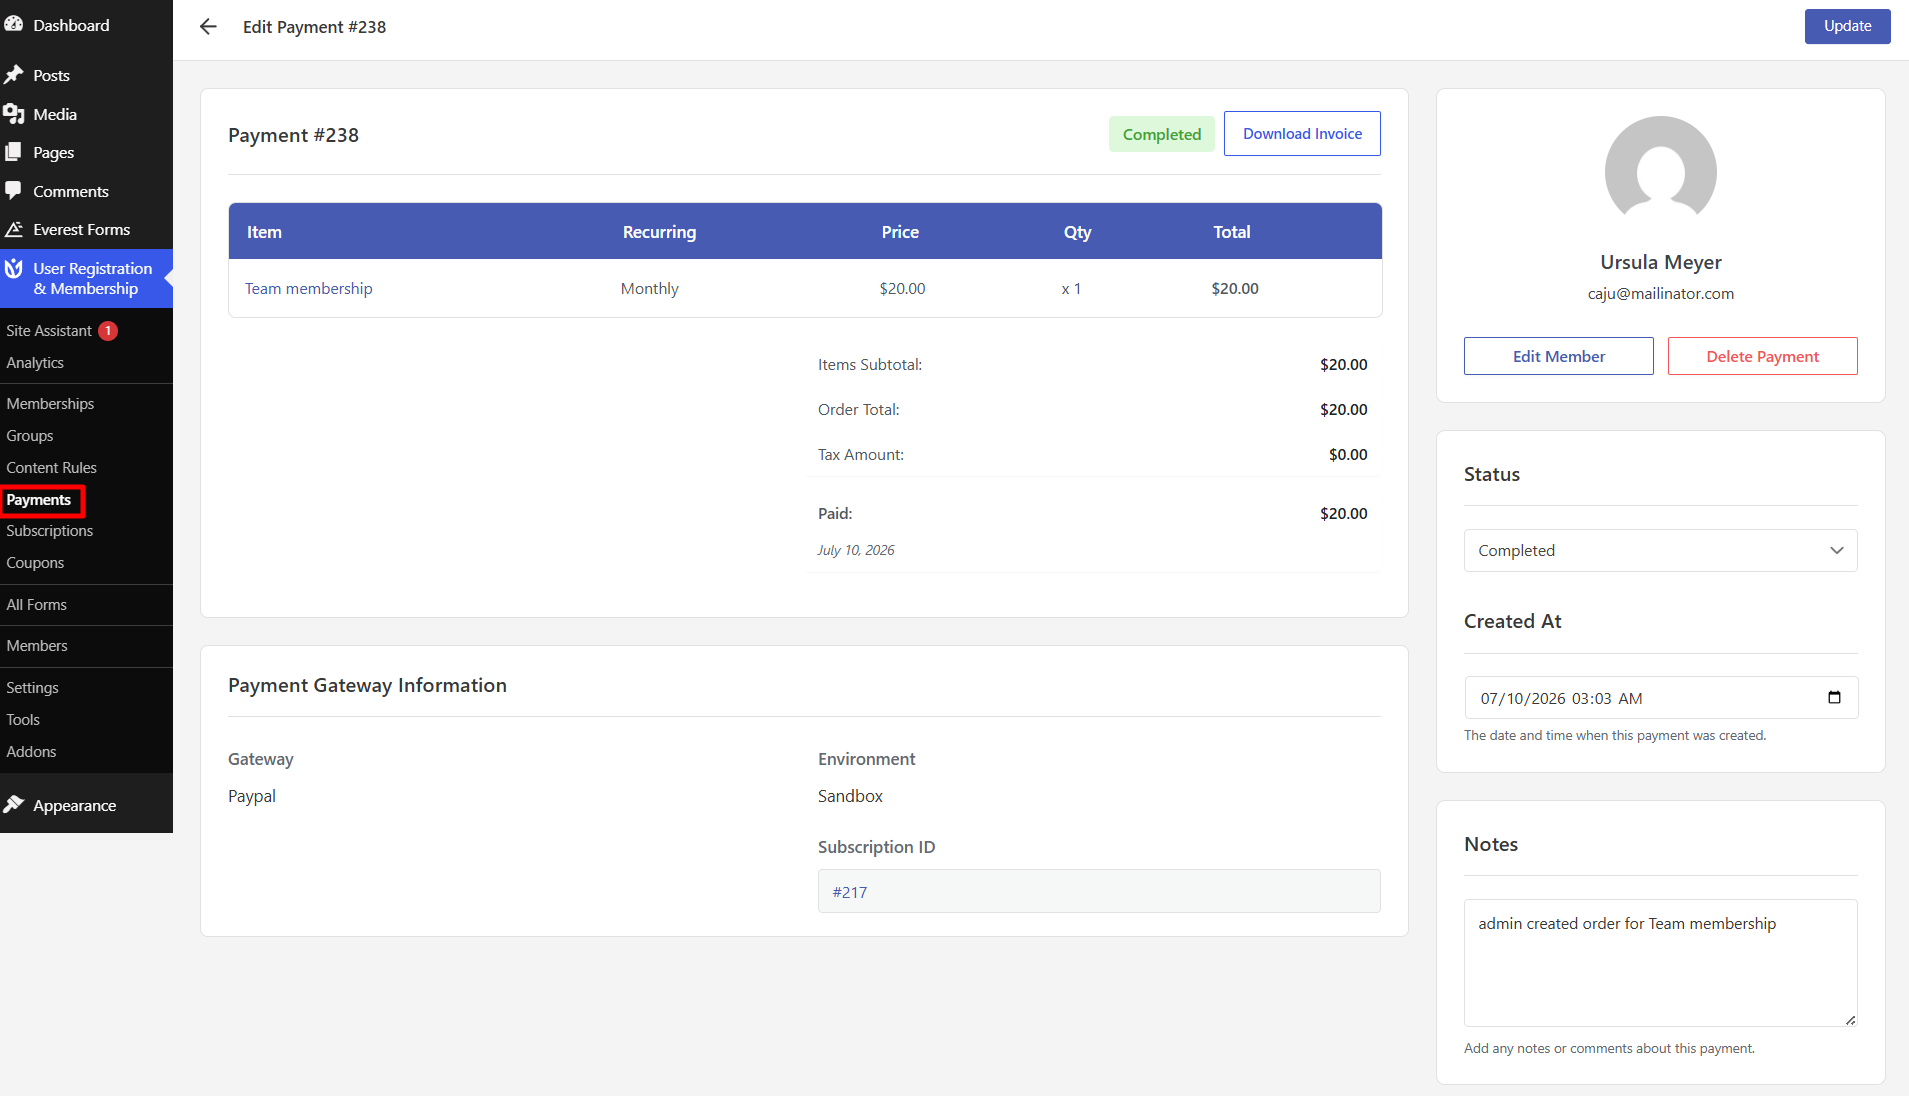
For subscription-based memberships, PayPal automatically processes recurring payments. You can view subscription status and payment history in the Payments dashboard.
Troubleshooting Common Issues
If you encounter issues with PayPal payments, check the following:
Payment amounts cannot be zero or negative — Verify that your payment fields have valid amounts set
PayPal email addresses are case-sensitive — Make sure your PayPal email is entered exactly as it appears in your PayPal account
Test mode requires sandbox PayPal account — You cannot use live credentials in Sandbox mode
IPN URL must be accessible to PayPal servers — Ensure your site is publicly accessible and not blocked by firewalls
Requires valid PayPal API credentials — Double-check that your Client ID and Client Secret are correct
Users must complete PayPal payment to finish registration — If users cancel at PayPal, their registration will not complete
Frequently Asked Questions
Can I use PayPal for both registration forms and memberships?
Yes, you can use PayPal for both. The same global PayPal settings apply to both use cases, but you configure them differently. For registration forms, you add payment fields and enable PayPal at the form level. For memberships, you enable PayPal when creating the membership plan.
What happens if a user cancels payment at PayPal?
If a user cancels payment at PayPal, they will be redirected to the Cancel URL you configured in your PayPal settings. Their registration or membership purchase will not complete.
How do recurring subscription payments work?
For subscription-based memberships, PayPal automatically processes recurring payments based on the billing cycle you set. Users are charged automatically at each renewal period without needing to manually pay again.
Can I offer trial periods with PayPal subscriptions?
Yes, when creating a subscription-based membership, you can enable Trial Period and set the trial duration. Users will have full access during the trial without being charged until the trial ends.
Do I need the PayPal Payment addon for membership plans?
No. The PayPal Payment addon is only required for registration forms with payment fields. Membership plans automatically use the global PayPal settings without requiring the addon.
Do I need the PayPal Payment addon for registration forms?
Yes. To accept payments through registration forms, you must install and activate the PayPal Payment addon. This addon adds payment fields to the form builder and enables PayPal processing for registration forms.
Next Steps
That's it! Now you know how to set up PayPal payments for both registration forms and membership plans. Next, would you like to learn how to track payments and manage subscriptions? Be sure to check out our guide on managing payment history for all the details.