
Mollie Payment
ProConfigure Mollie payment integration to accept credit card and iDEAL payments from European customers through your WordPress registration forms.
Last updated on Jul 15, 2026
Would you like to accept payments from European customers during user registration? User Registration & Membership allows you to integrate Mollie, a European payment service provider, to process credit card and iDEAL payments directly through your registration forms. This tutorial will show you how to configure Mollie as a payment gateway for your membership site.
Prerequisites
Before getting started, make sure you've installed and activated the User Registration & Membership Pro plugin (v5.2.3 or higher). Then, make sure you've activated the Mollie addon from User Registration & Membership → Addons. You'll also need an active Mollie account with your business information configured.
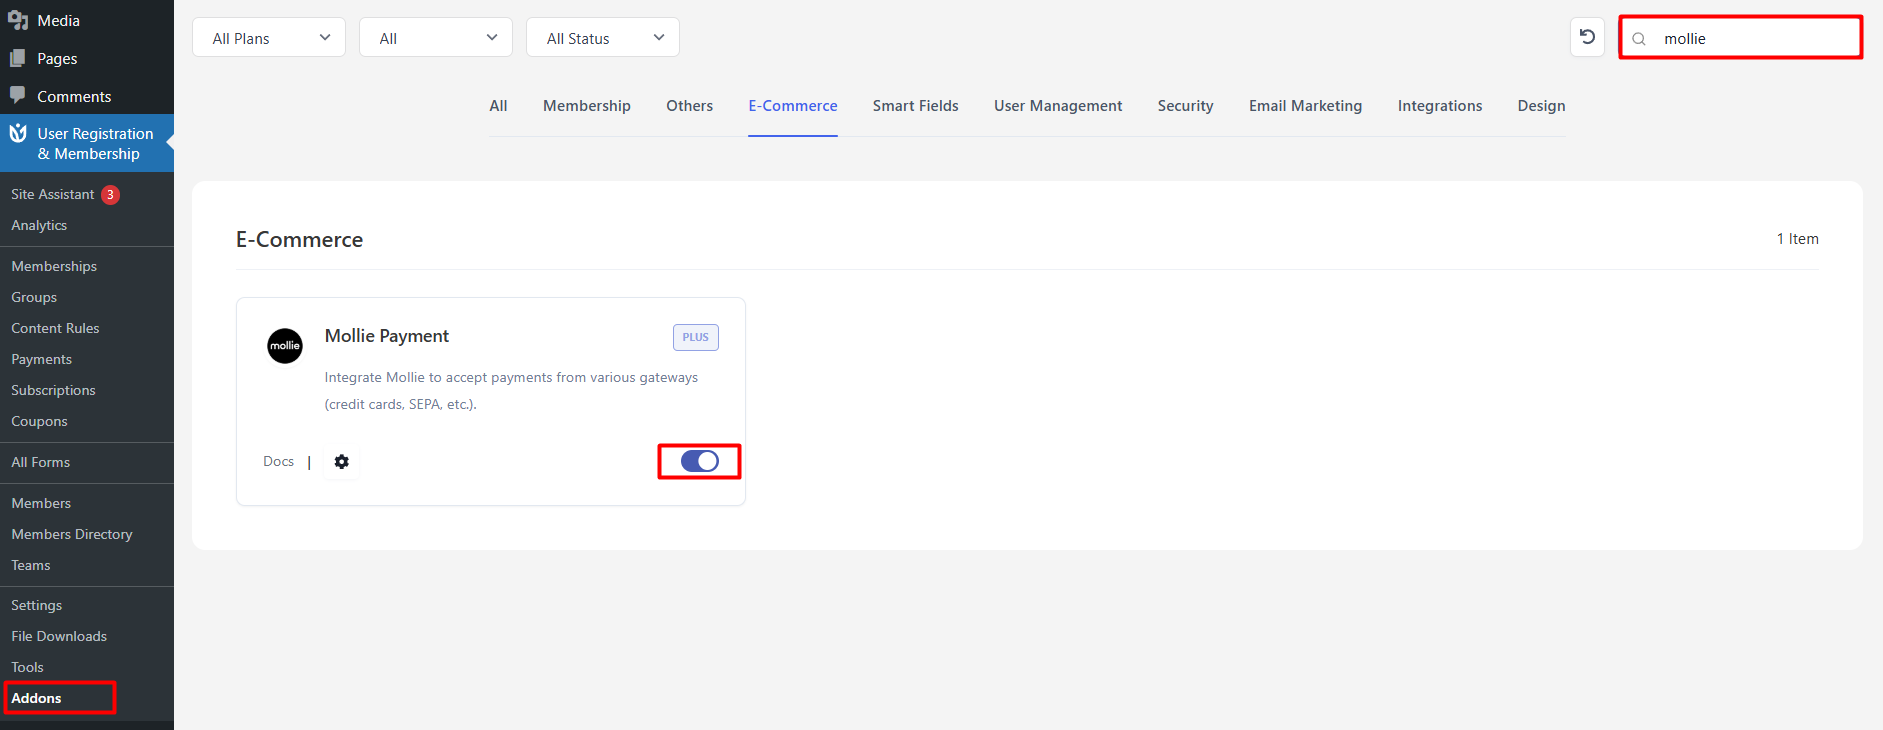
Obtaining Your Mollie API Keys
To connect Mollie with User Registration & Membership, you'll need two API keys from your Mollie account: a Test API Key for development and a Live API Key for production.
Go to the Mollie website and log in to your account. If you don't have an account yet, sign up and complete your business information setup.
Once logged in, navigate to More → Developers in the Mollie dashboard. Here, you'll see your API credentials.
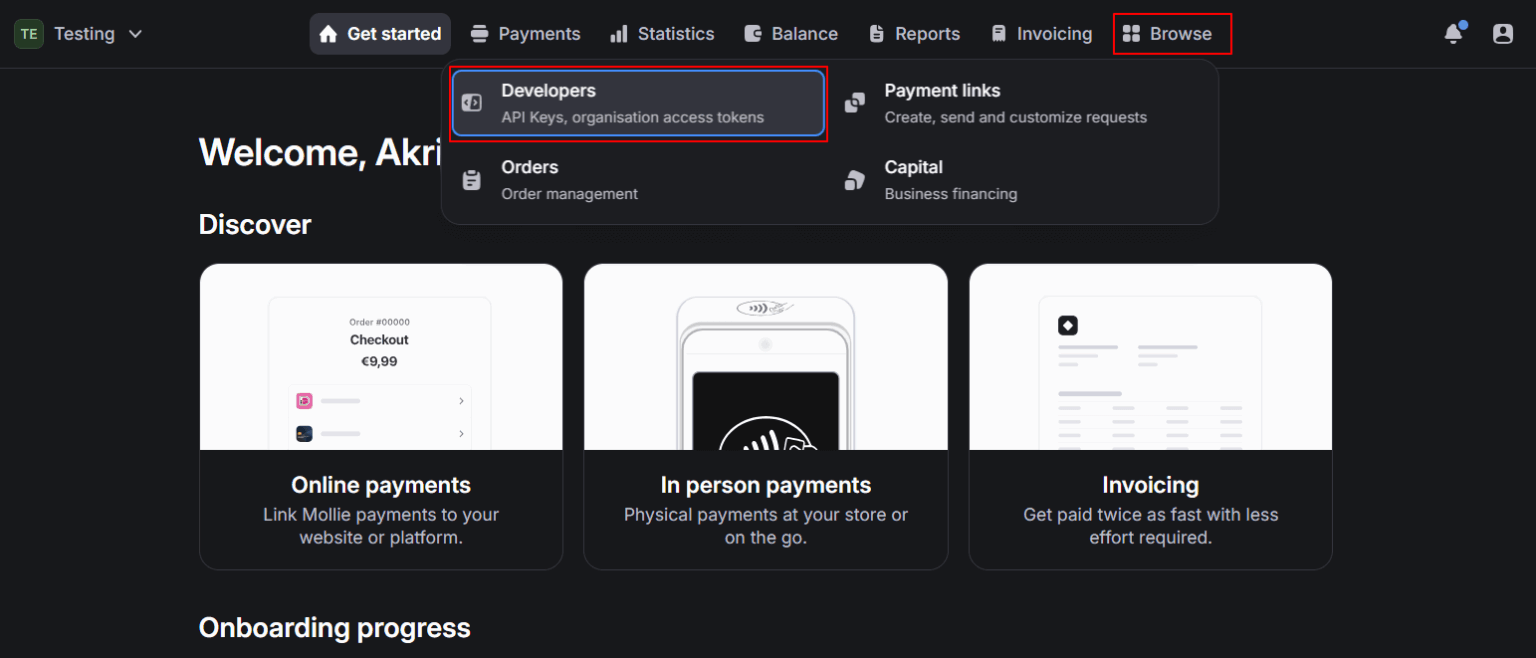
Click on API Credentials & Keys to view your keys. If you need to generate a new Transaction Key, click New Transaction Key and submit. Mollie will send a verification PIN to your email address — click Request Pin if needed, then verify your identity.
Copy both your Test API Key and Live API Key using the Copy to Clipboard button. You'll need these in the next step.
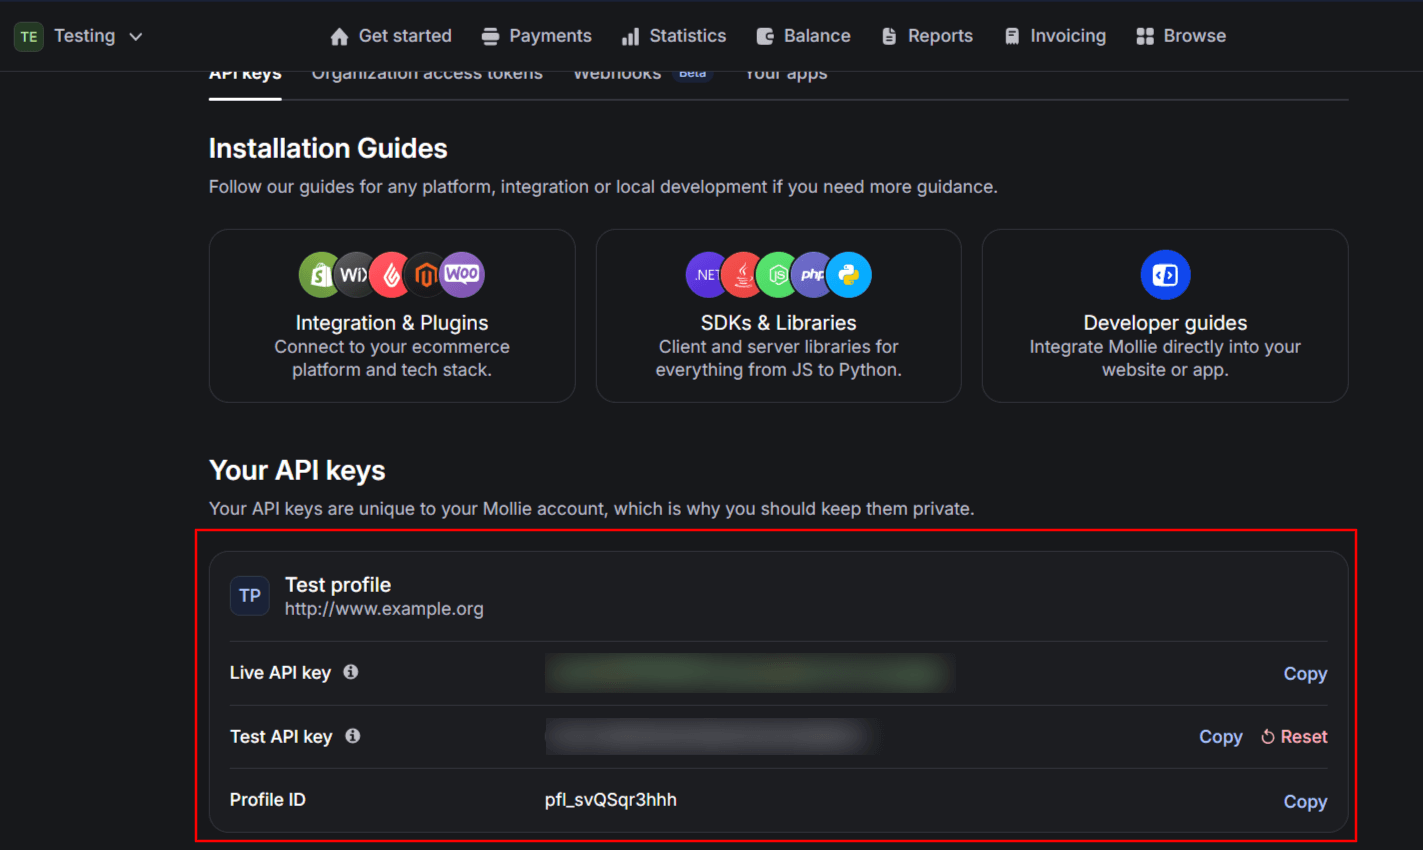
Configuring Mollie in User Registration & Membership
Now that you have your API keys, you'll configure Mollie in the plugin's global payment settings.
Navigate to User Registration & Membership → Settings → Payment → Payment Method in your WordPress dashboard. Click the Mollie dropdown to expand the Mollie settings section.
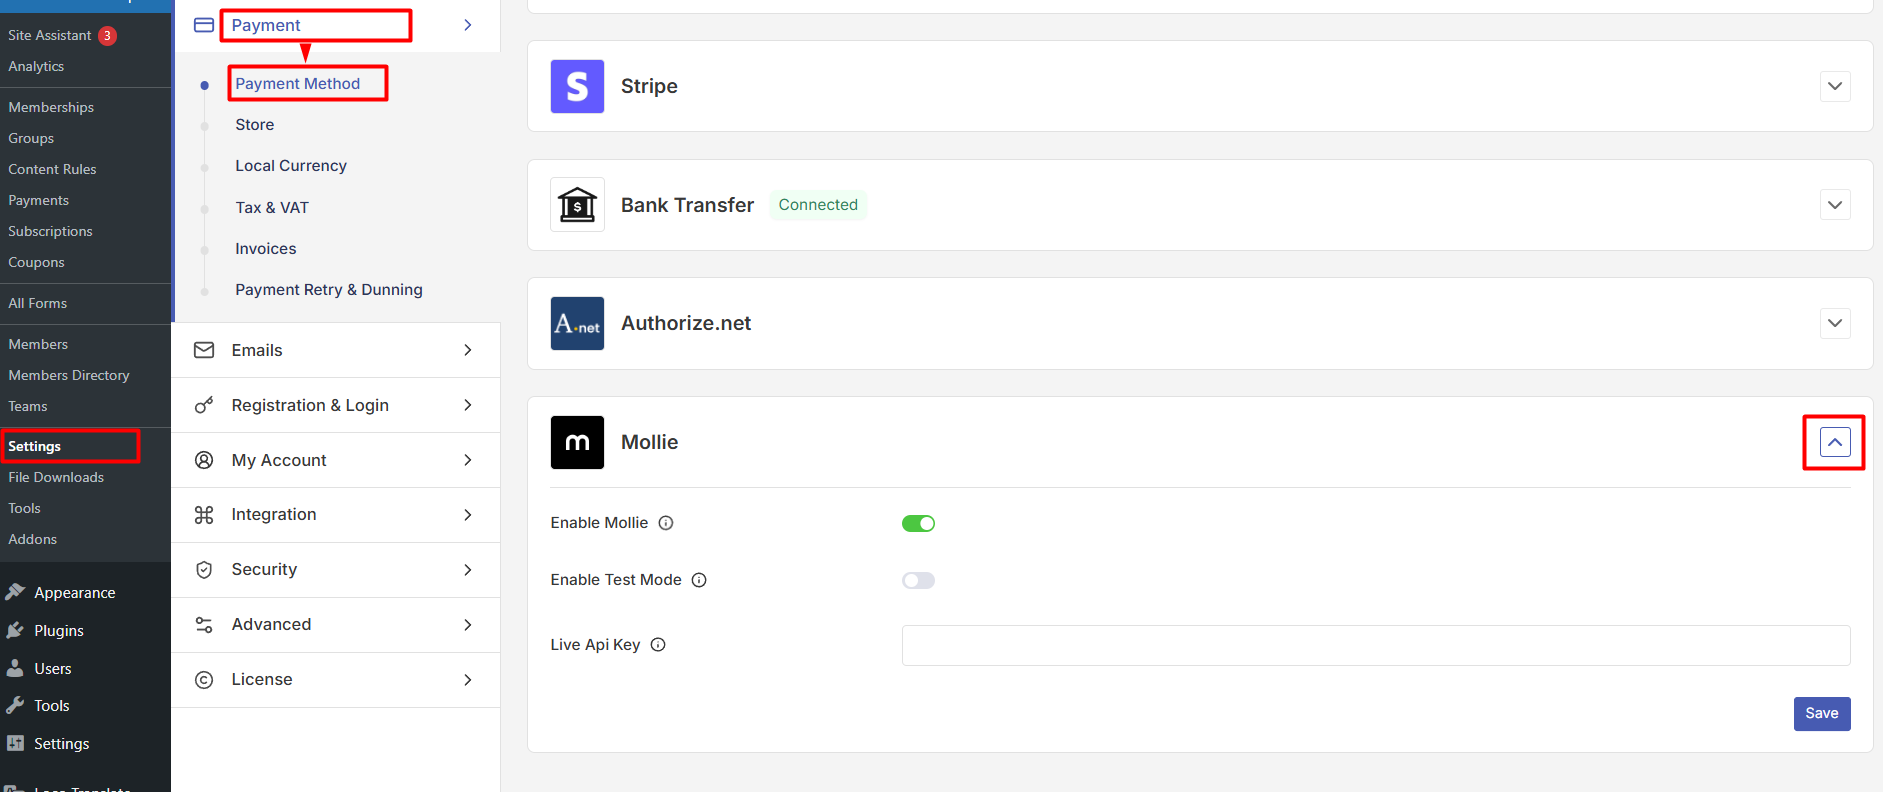
Toggle Enable Mollie Test Mode if you want to test payments before going live. When test mode is enabled, use your Test API Key. For production payments, disable test mode and use your Live API Key.
Paste your Test API Key into the Test API Key field and your Live API Key into the Live API Key field. Click Save to verify your credentials.
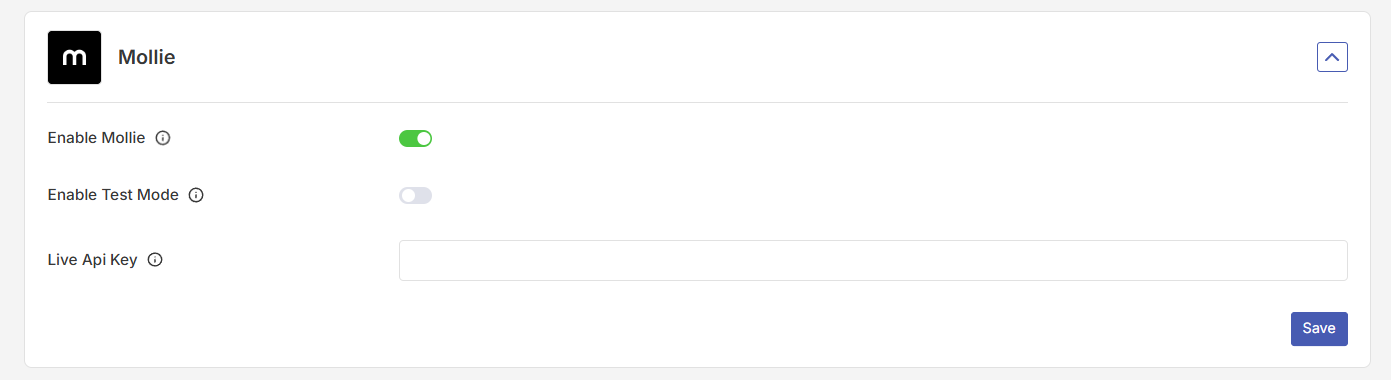
If your API keys are valid, you'll see a success message confirming the connection. If not, double-check that you've copied the correct keys from your Mollie dashboard.
Enabling Mollie on Registration Forms
Mollie is now configured globally, but you'll need to enable it on individual registration forms to start accepting payments.
Go to User Registration & Membership → All Forms and select the form where you want to add Mollie payment processing. Click Form Settings at the top of the form builder.
Navigate to the Mollie Payment tab and toggle the switch to enable Mollie for this form.
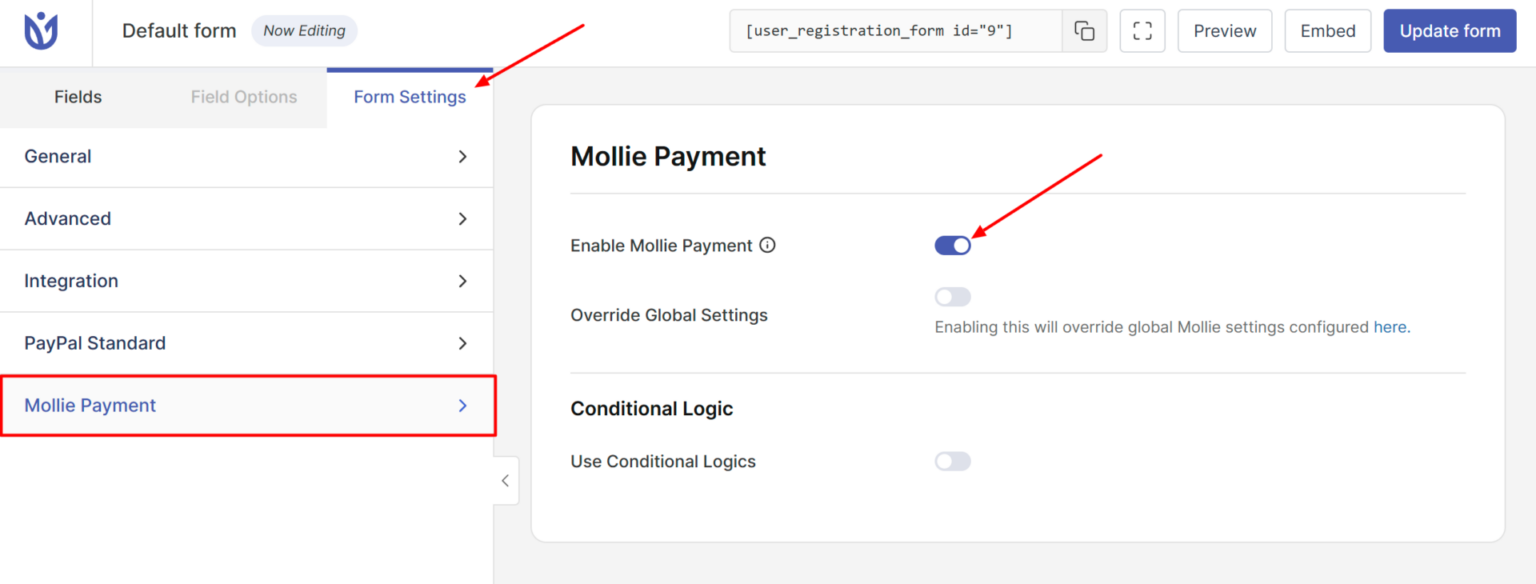
You must add a Payment Field to your form for Mollie payment processing to work. Without a payment field, users won't be able to complete transactions.
If you'd prefer to use different API keys for this specific form instead of the global settings, you can override them here by entering form-specific API keys. You can also set conditional payment rules to control when Mollie payment is required or available.
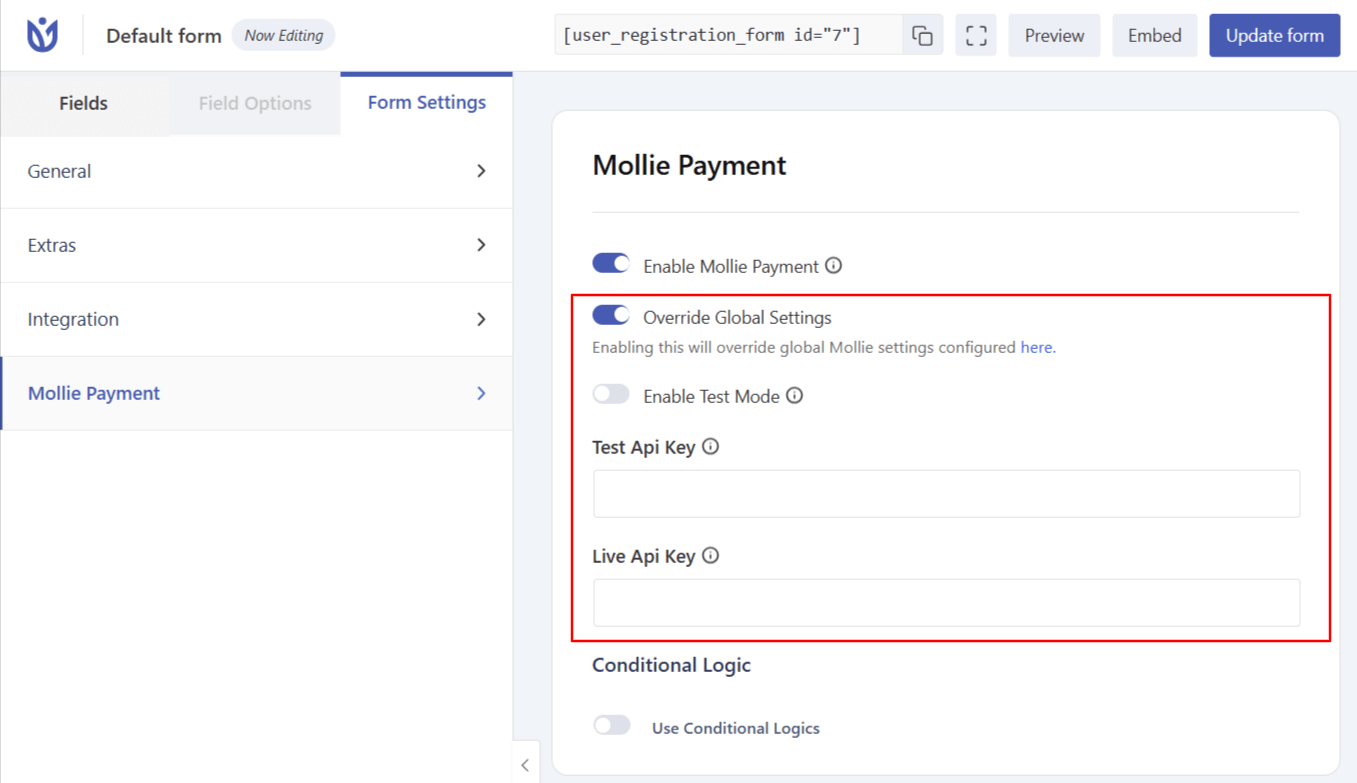
Click Update Form to save your changes.
Testing Your Mollie Integration
Before accepting real payments, test your Mollie integration using test mode.
Make sure Enable Mollie Test Mode is toggled on in your global Mollie settings. Visit your registration form on the frontend and complete a test registration with payment.
Mollie provides test card numbers and payment methods you can use during testing. Check your Mollie dashboard to confirm the test payment appears correctly.
Once testing is complete, disable test mode and switch to your Live API Key to start accepting real payments.