
Authorize.net
ProLearn how to integrate Authorize.net payment gateway with User Registration & Membership to accept credit card payments for memberships and registration fees.
Last updated on Jul 15, 2026
Would you like to accept credit card payments through Authorize.net when users register on your site? User Registration & Membership allows you to integrate Authorize.net as a payment gateway, enabling you to collect payments for memberships, subscriptions, or registration fees directly through your registration forms.
This tutorial will show you how to install, configure, and use the Authorize.net payment gateway with User Registration & Membership.
Before getting started, make sure you've installed and activated the User Registration & Membership plugin on your WordPress site. Then, make sure you've installed and activated the Authorize.net addon.
Installing the Authorize.net Addon
To accept payments through Authorize.net, you'll need to activate the Authorize.net addon from your WordPress dashboard.
Go to User Registration & Membership → Addons and search for "Authorize.net." Click the toggle to activate the addon.
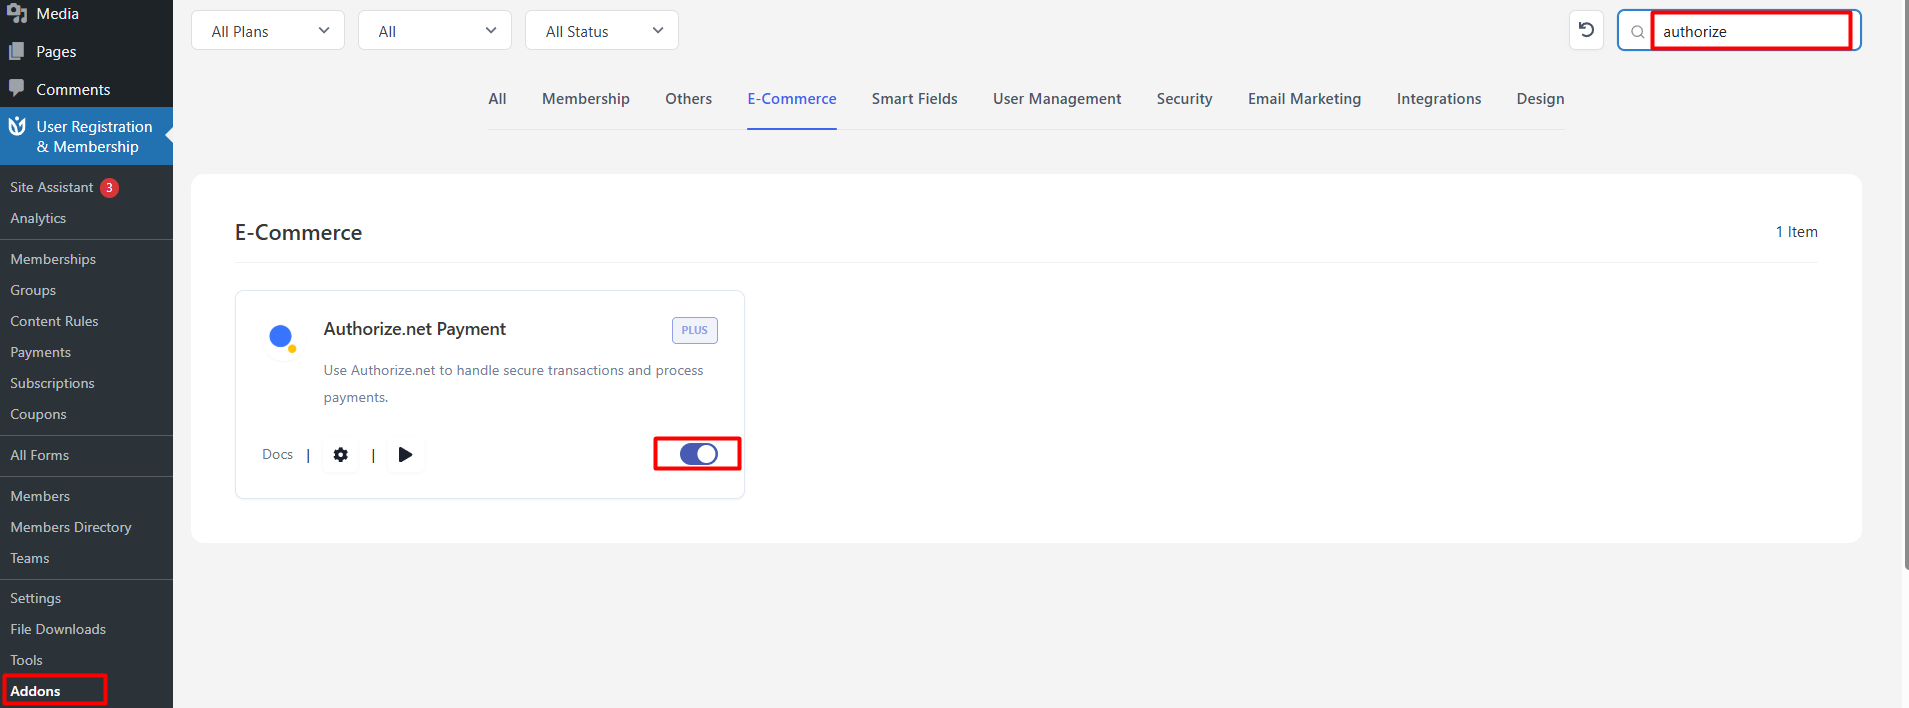
For complete addon installation instructions, see our addon installation guide: https://docs.wpuserregistration.com/getting-started/premium-plugin-and-license-activation/
Connecting Your Authorize.net Account
Once the addon is activated, you'll need to connect your Authorize.net account to User Registration & Membership.
Go to User Registration & Membership → Settings → Payment → Payment Method. Click the Authorize.net dropdown to expand the settings panel.
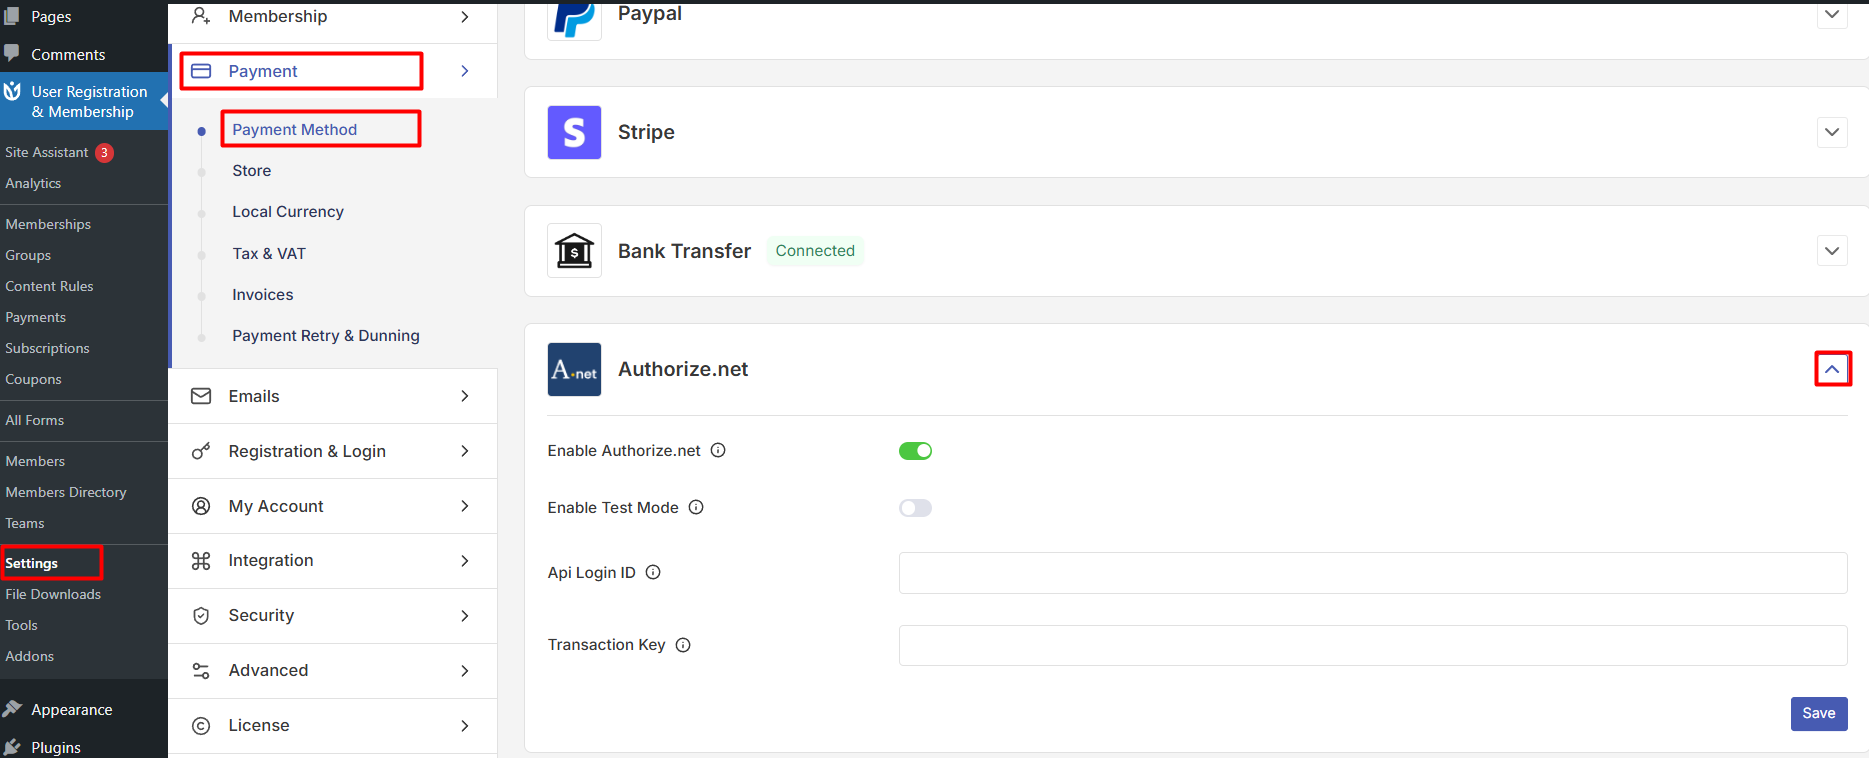
Here, you'll see fields for your Authorize.net API credentials. You'll need to enter your API Login ID and Transaction Key from your Authorize.net account.
Getting Your Authorize.net API Credentials
To get your API credentials, log in to your Authorize.net account.
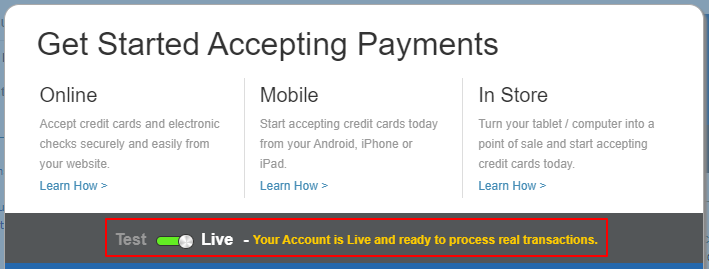
Navigate to Account → Settings → API Credentials & Keys.
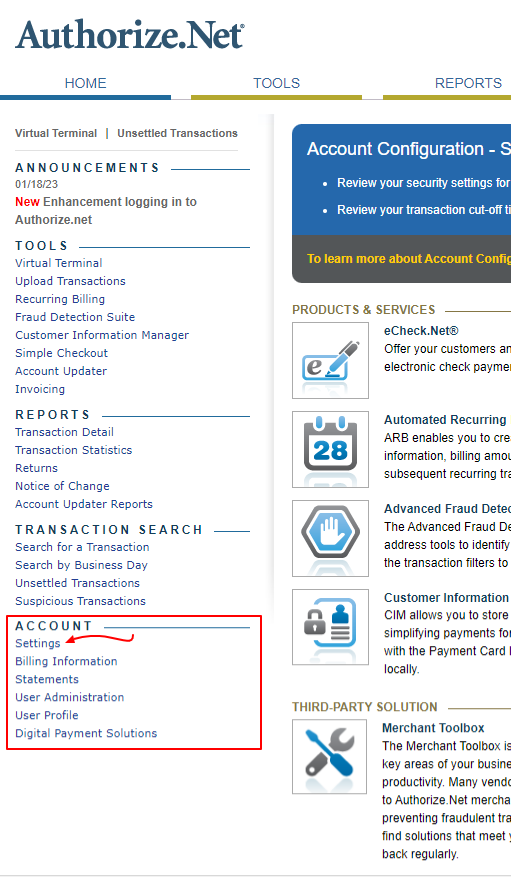
Navigate to Settings → API Credentials & Keys.
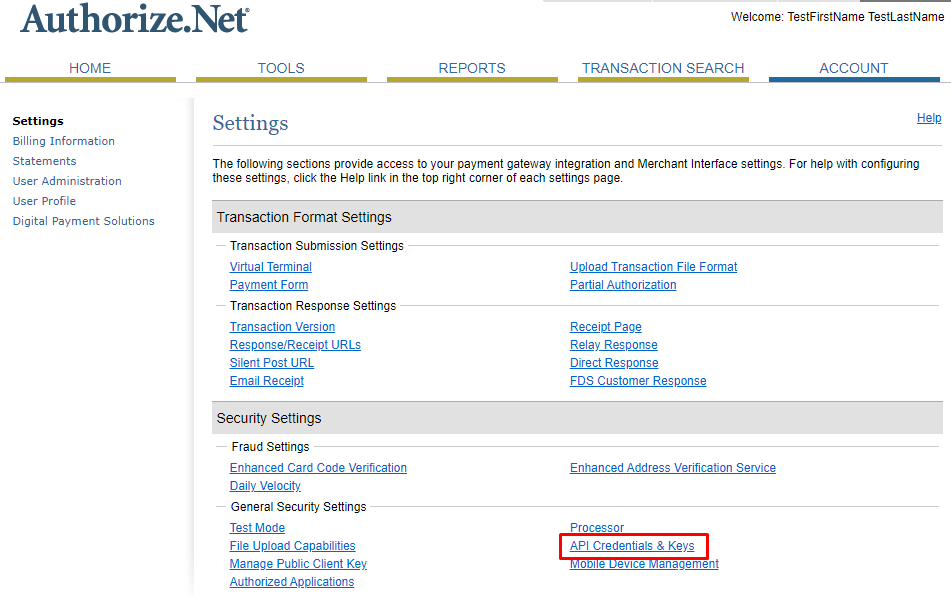
Copy your API Login ID and Transaction Key. If you don't have a Transaction Key yet, you can generate a new one from this page.
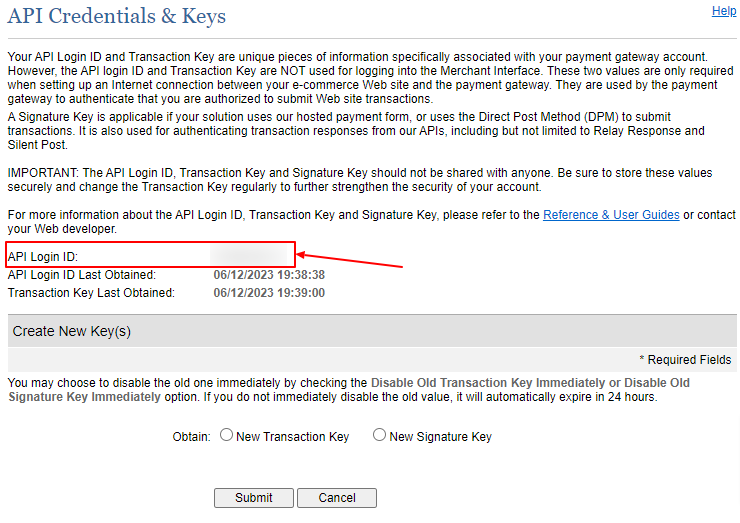
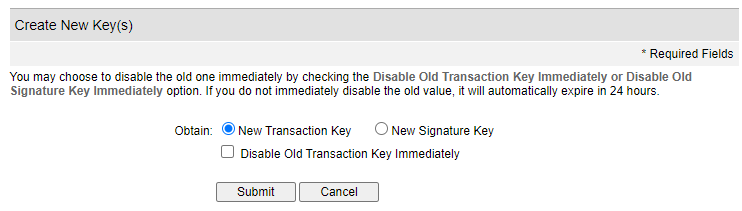
In this tutorial, we assume that you have to create a new transaction key. For this, you can click on the ‘New Transaction Key‘ option and click on Submit.
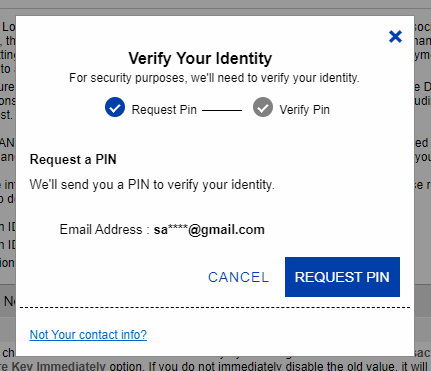
After clicking on the submit button, the app will require you to enter the verification key sent to your email. You can request this key by clicking on the ‘Request Pin’ button on the pop-up.
Store your API credentials securely. Never share them publicly or commit them to version control.
Configuring Authorize.net Settings
Back in your WordPress dashboard, paste your API Login ID and Transaction Key into the corresponding fields in User Registration & Membership → Settings → Payments → Authorize.net.
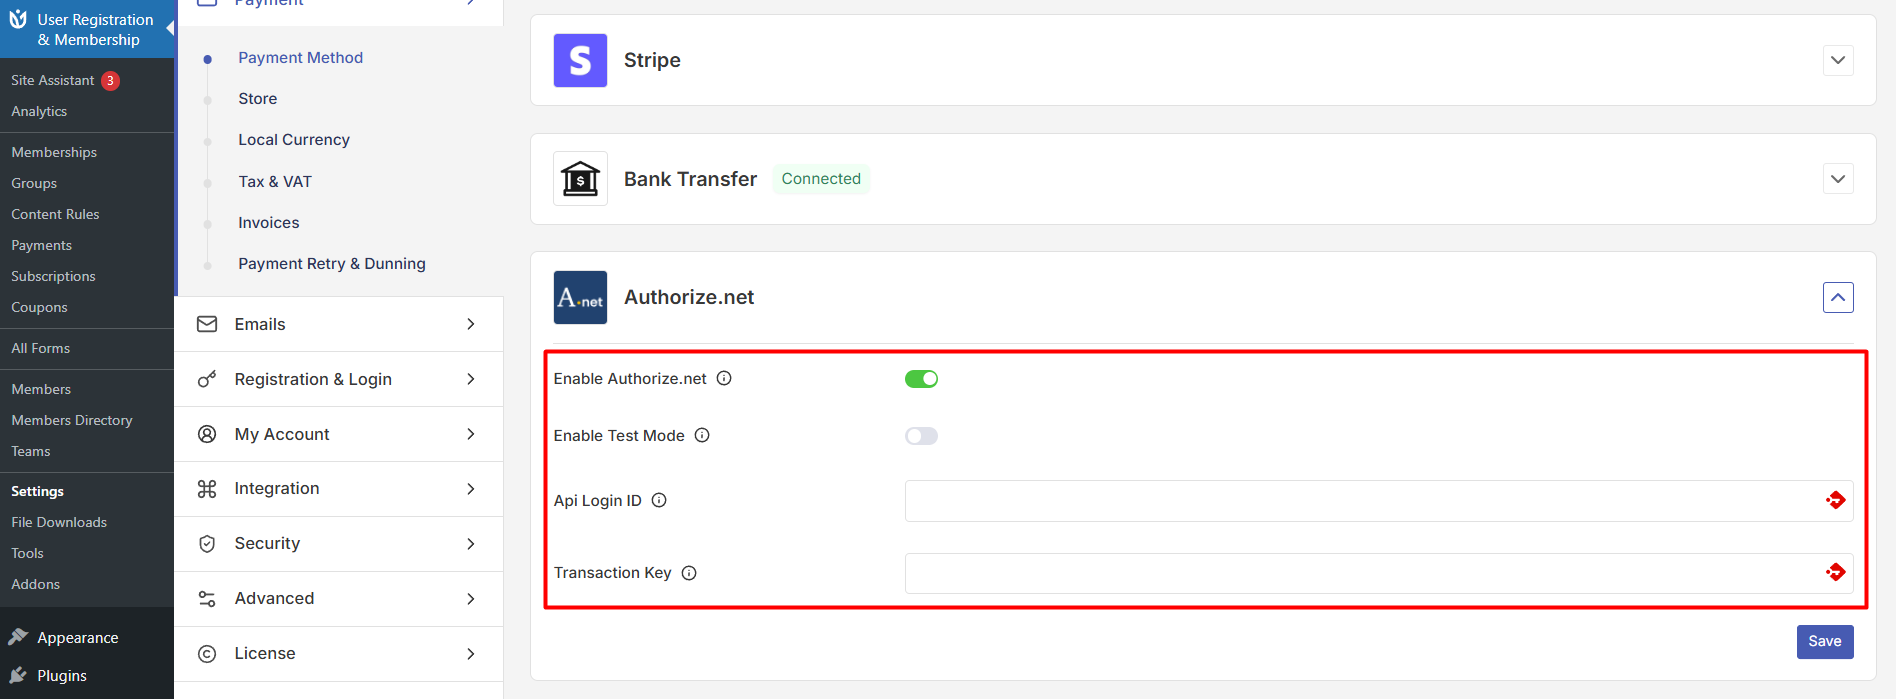
If you're testing your payment setup before going live, enable Test Mode. When Test Mode is enabled, no real charges will be processed. Be sure to disable Test Mode when you're ready to accept real payments.
Click Save Changes to save your Authorize.net settings.
Adding Authorize.net to a Registration Form
Once your Authorize.net account is connected, you can add payment fields to your registration forms.
Create or edit a registration form by going to User Registration & Membership → All Forms → Add New or selecting an existing form to edit.
In the form builder, locate the Payment Fields section in the left sidebar. Drag the Authorize.net Gateway field into your form.
Click on the Authorize.net Gateway field to configure its settings. You can set the payment amount, add a field label, and customize other options from the Field Options panel on the left.
Configuring Payment Amounts
To set how much users will pay, click on the payment field in your form. In the Field Options panel, enter the amount you want to charge.
For membership plans with different pricing tiers, you can add a Subscription Plan field or Multiple Choice field with pricing options. Users can then select their preferred plan during registration.
Click Update Form to save your changes.
Testing Your Authorize.net Integration
Before accepting real payments, we recommend testing your form by submitting a test entry.
Make sure Test Mode is enabled in User Registration & Membership → Settings → Payments → Authorize.net. Then, go to the page where your registration form is displayed and complete a test registration.
Enter test credit card information provided by Authorize.net for sandbox testing. Once the form is submitted, check your Authorize.net dashboard to verify the test transaction appears correctly.
When you're ready to accept real payments, go back to User Registration & Membership → Settings → Payments → Authorize.net and disable Test Mode. Click Save Changes.