
Member Management
Centralized dashboard for viewing, editing, and managing all users registered through User Registration forms, including member details, status control, and activity tracking.
Last updated on Jul 15, 2026
Would you like to view, edit, and manage all users who have registered through your User Registration forms? User Registration & Membership provides a dedicated Members area where you can control user access, track activity, and manage member details—all from a centralized dashboard.
This tutorial will show you how to access the Members area, view member details, edit user information, manage user status, and track member activity.
Prerequisites
Before getting started, make sure you've installed and activated the User Registration & Membership plugin on your WordPress site. You'll also need administrator access to manage members, and at least one user registered through a User Registration form.
Accessing the Members Area
To access the Members area, go to User Registration & Membership > Members from your WordPress dashboard. Here, you'll see a list of all users who have registered through User Registration forms.
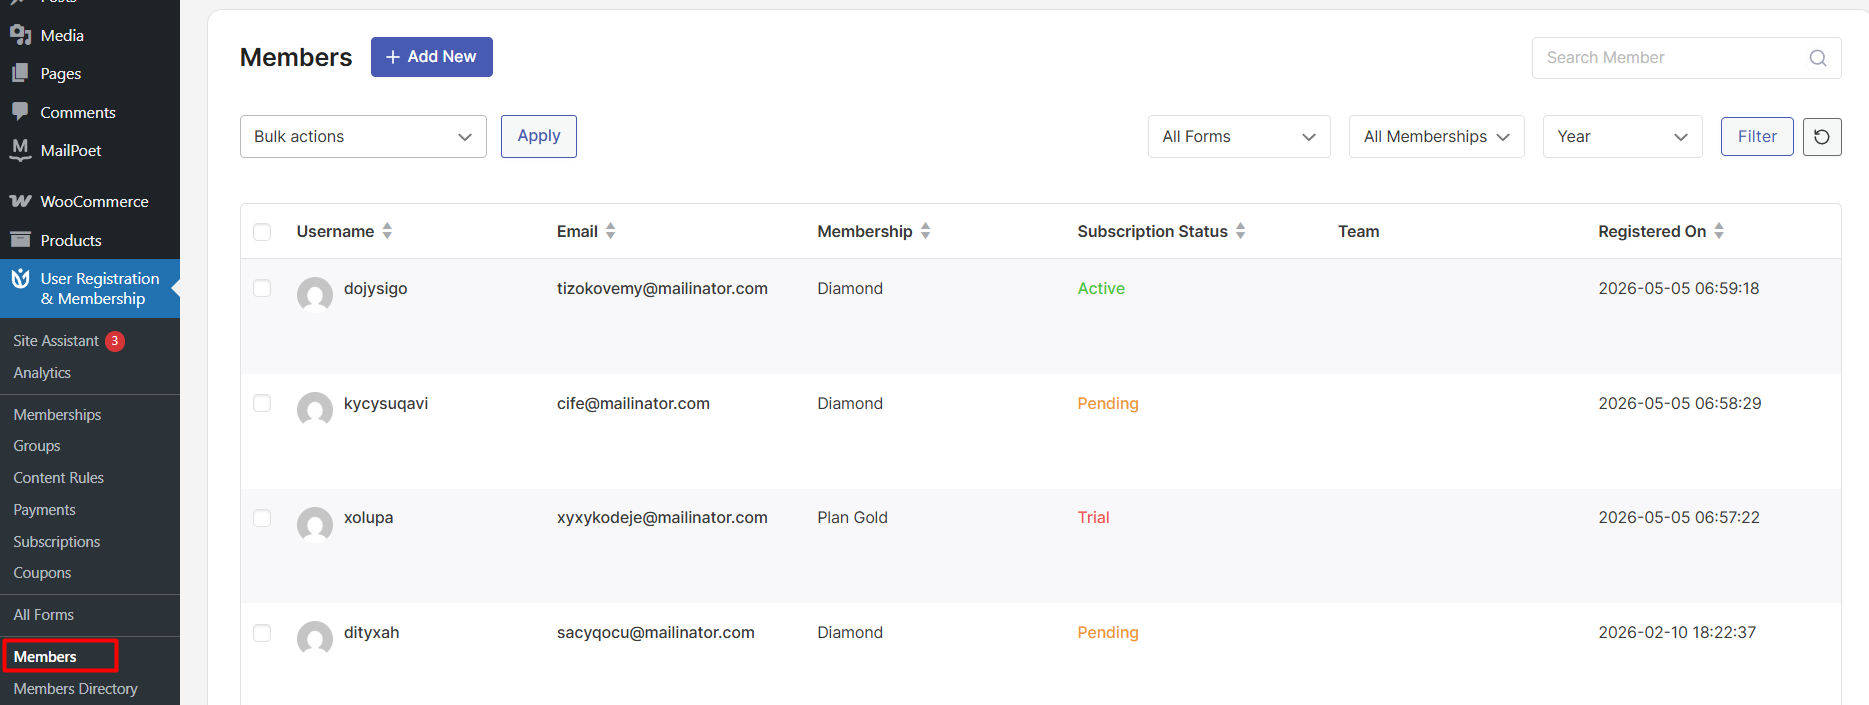
The Members table displays key information including member names, email addresses, registration dates, and current status. You can search for specific members, filter by membership plan or status, and perform bulk actions on multiple members at once.
Viewing Member Details
To view detailed information about a specific member, hover over the user record in the Members table and click on the Edit button.
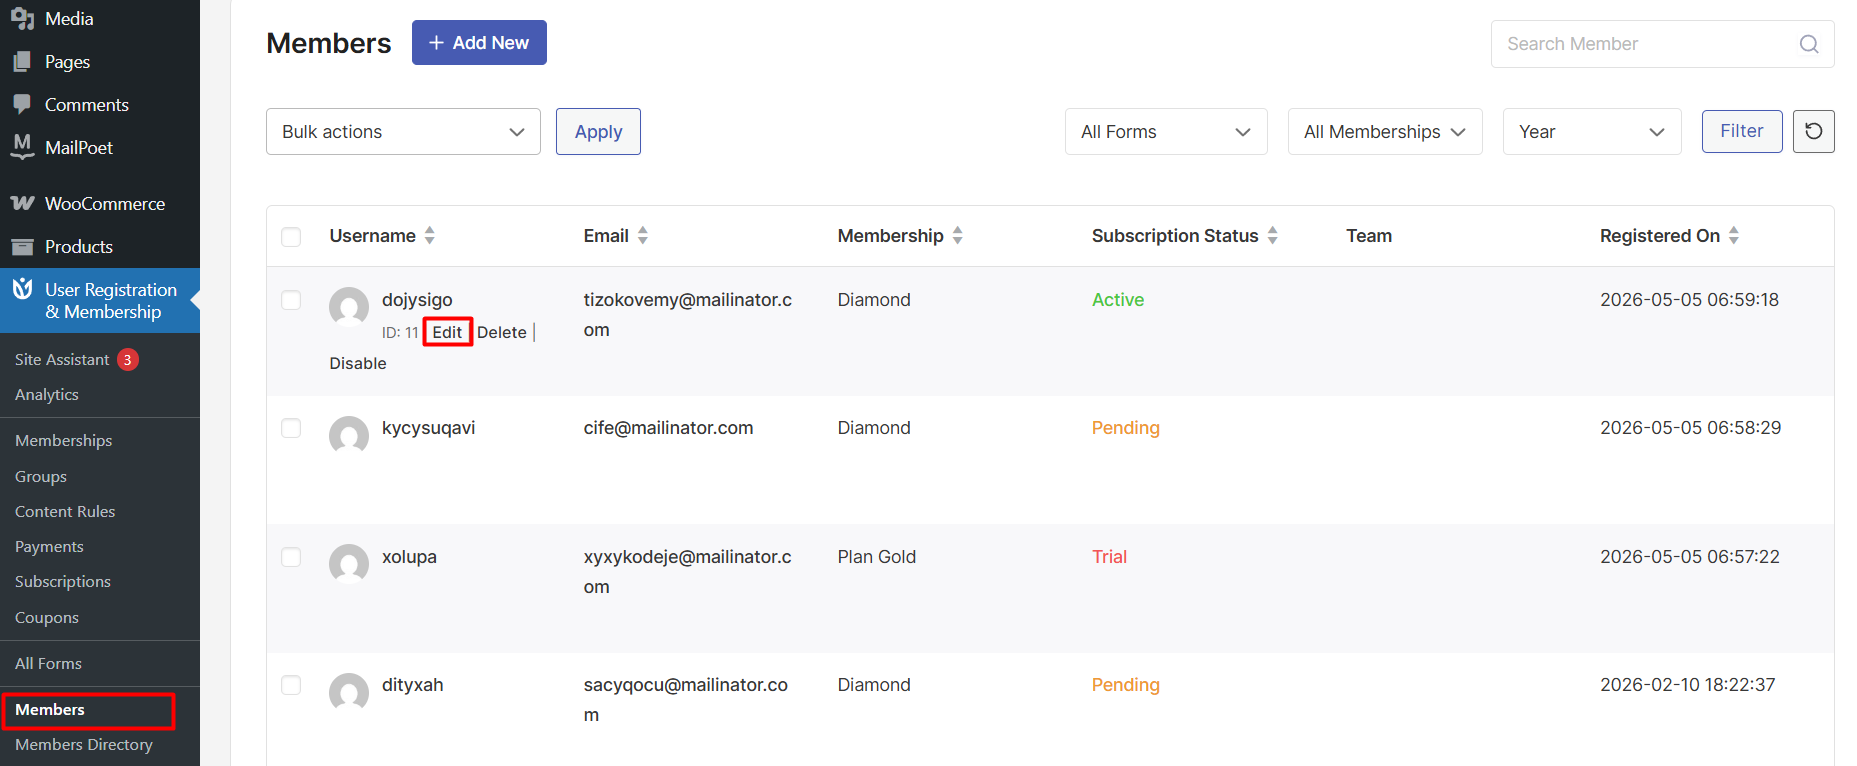
This opens the member details page, which displays:
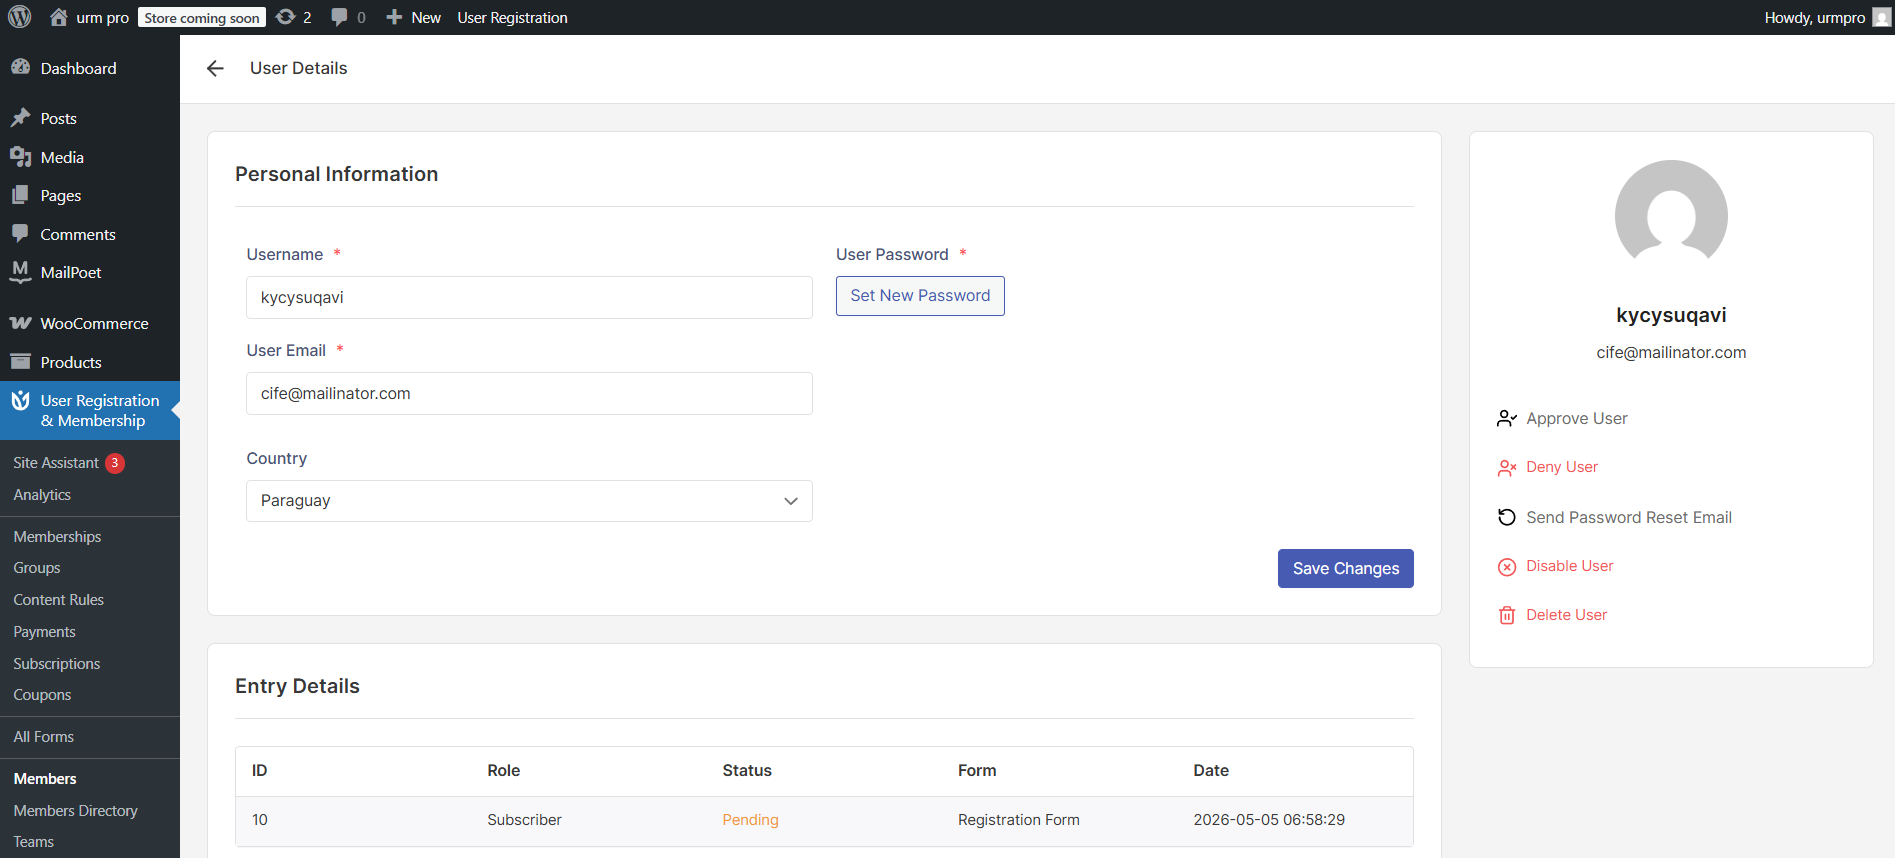
Personal information including name, email, username, and profile details
Registration source and date
Current user status and role
Membership plan details (if applicable)
Entry details showing all form field submissions
The Entry Details section shows exactly what information the user submitted during registration, making it easy to review their application or verify their details.
Editing Member Information
Once in edit mode, you can update user details including their name, email, username, and other profile information. If you need to reset their password, you can set a new password directly from this screen. Click Save Changes to save your changes.
Managing User Status
User Registration & Membership extends WordPress's basic user management with additional status controls that let you manage access without deleting accounts or losing user data.
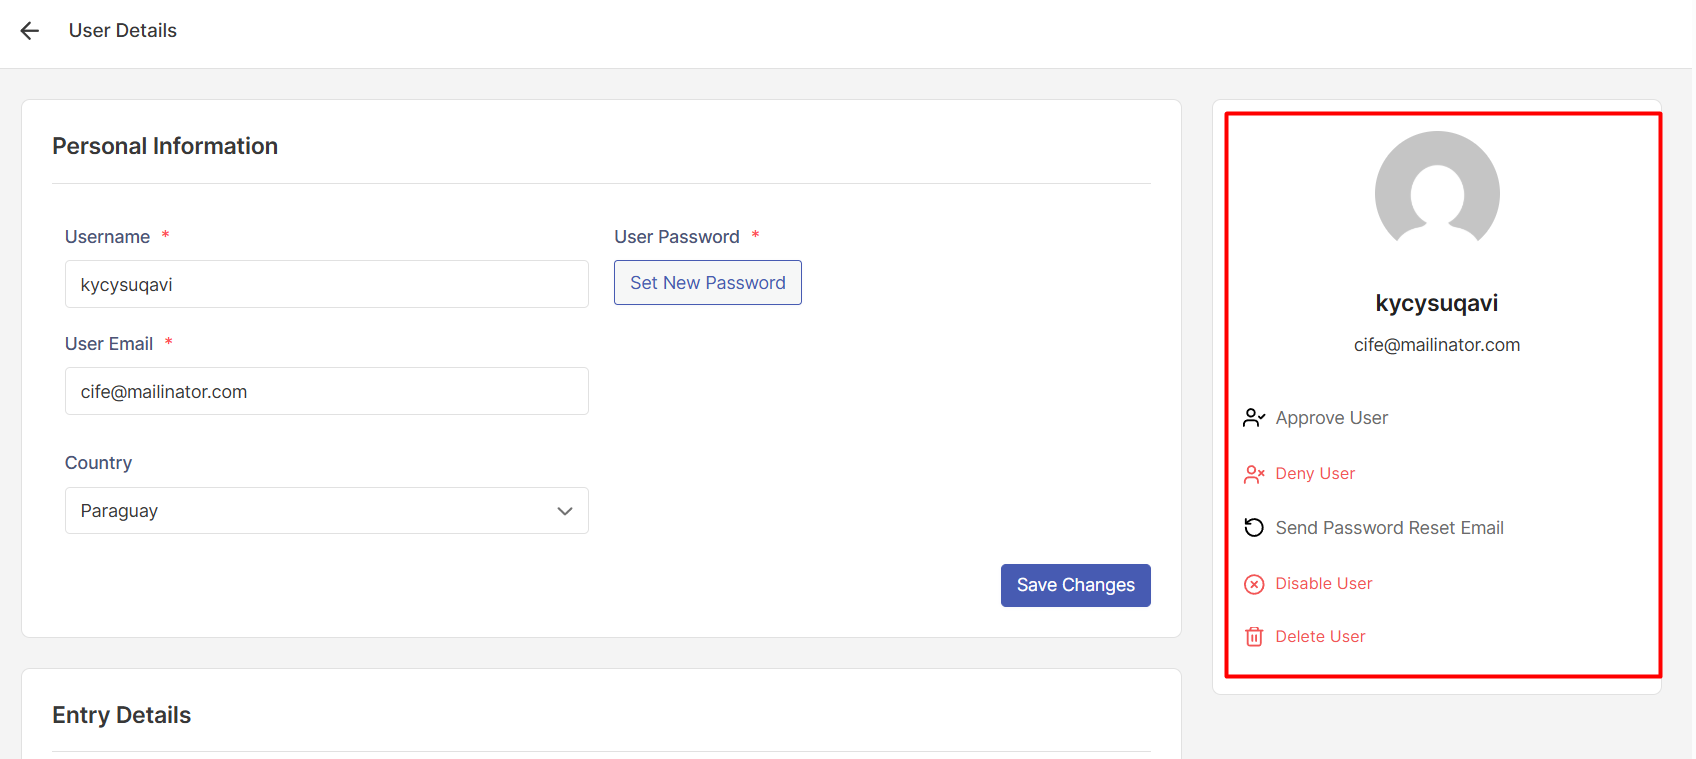
From the Members table or member details page, you can change a user's status to:
Approve User — Allows the user to access the site and use available features
Deny User — Restricts the user from accessing the site
Enable User — Activates the user account and restores access
Disable User — Temporarily disables or deactivates the user account and restricts access for a specified duration (days, weeks, months, or years)
Delete User — Permanently removes the user and all associated data from the site
To change a user's status, hover over their record in the Members table and select the desired action from the available options. For temporary restrictions, the Disable User option allows you to specify exactly how long the user should be restricted from accessing the site.
Tracking User Activity with User Journey
User Registration & Membership Pro includes a User Journey feature that tracks member activities across your website. To enable this feature, go to User Registration & Membership > Settings > Advanced > Others and turn on the Enable User Activity Tracker option.
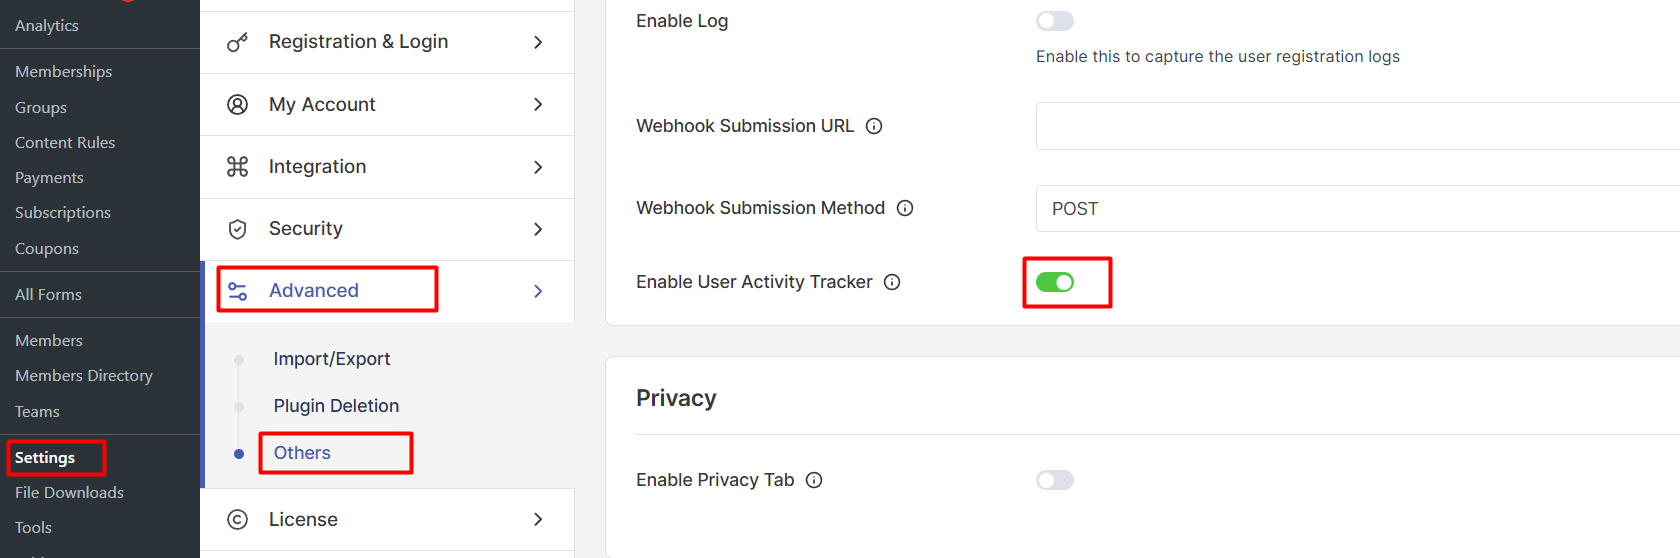
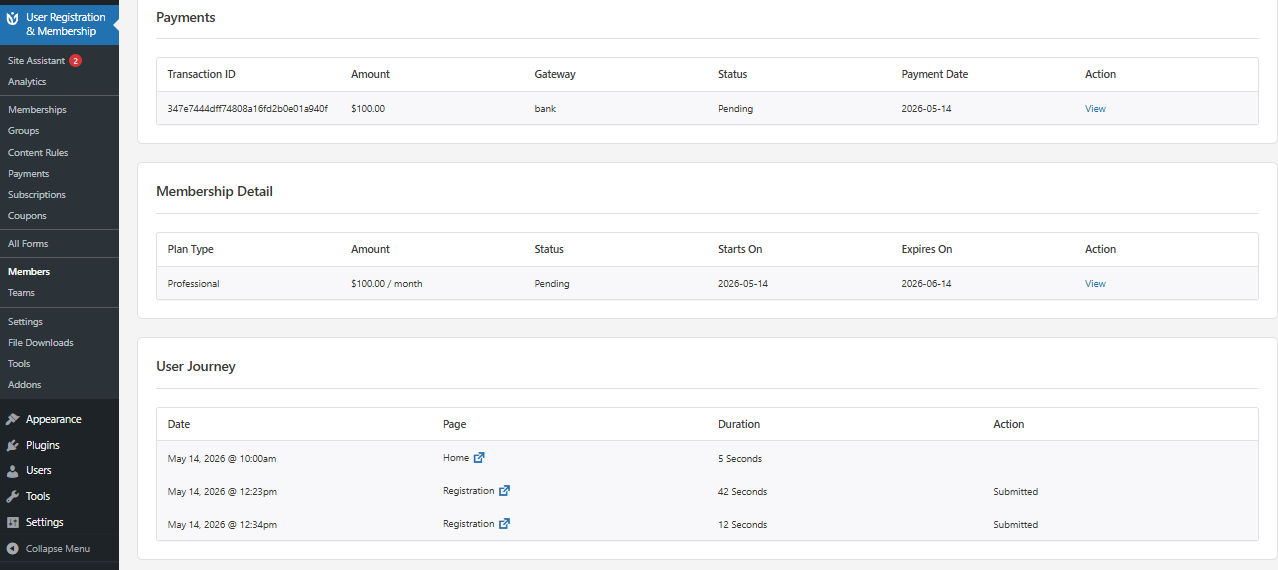
Once enabled, you can view the User Journey table inside the View User dashboard. This table shows:
Pages visited by the member
Time spent on each page
Form interactions and completion status
Navigation patterns before and after registration
The User Journey feature is only available with User Registration & Membership Pro. User Activity Tracker must be enabled in settings before User Journey data appears.
Searching and Filtering Members
The Members area includes powerful search and filtering tools to help you find specific users quickly:
Use the search bar to find members by username or email address
Filter by membership plan to see all members on a specific tier
Filter by user status to view approved, pending, or denied members
Sort by registration date, name, or other columns by clicking the column headers
These filters help you segment your member base and perform targeted actions on specific groups of users.
Performing Bulk Actions
To manage multiple members at once, select the checkboxes next to the user records you want to modify. Then, choose an action from the Bulk actions dropdown menu at the top of the table and click Apply.
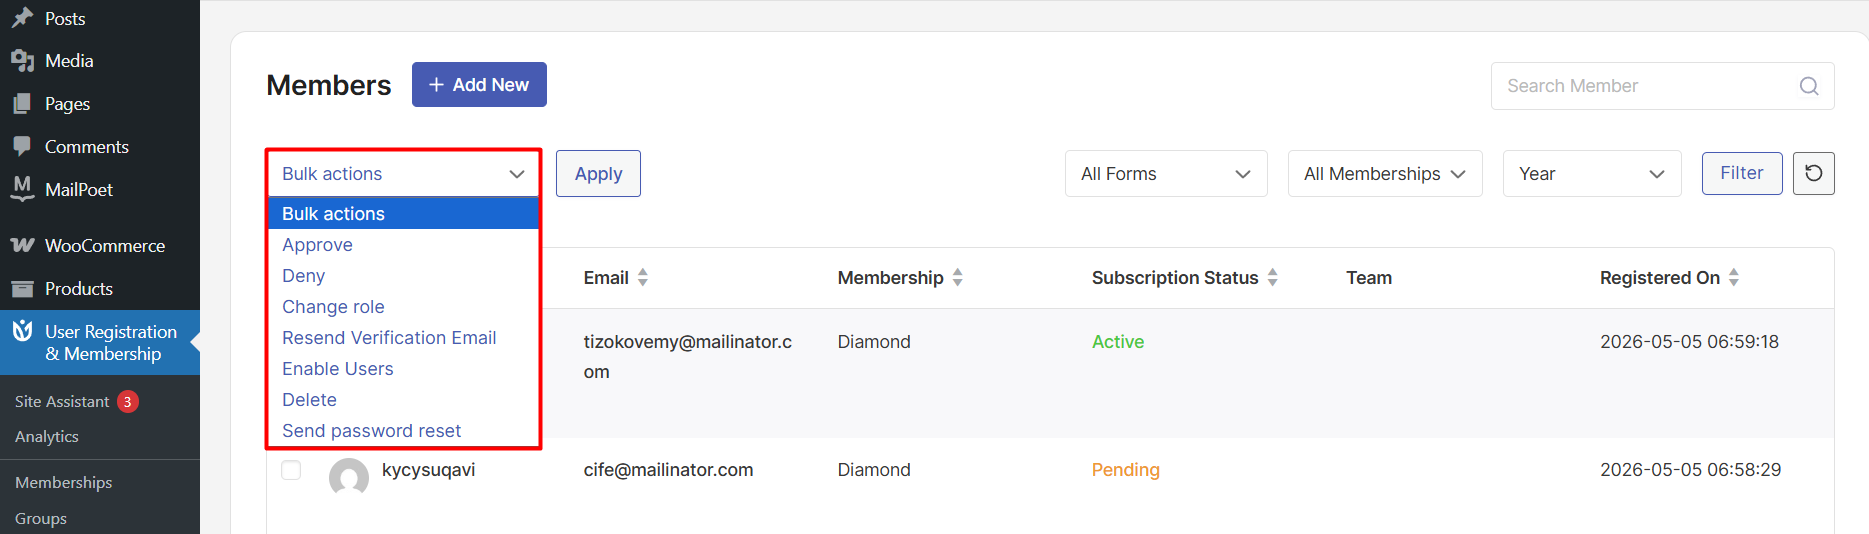
Bulk actions allow you to efficiently manage large numbers of members without having to edit each account individually.
That's it! Now you know how to manage members in User Registration & Membership. Next, would you like to learn how to create membership plans or set up content restrictions? Be sure to check out our guide on creating membership plans for all the details.