
Member Directory
ProCreate a searchable, customizable frontend directory to display registered user profiles with filtering and search capabilities using the Member Directory addon.
Last updated on Jul 15, 2026
Would you like to create a searchable directory of your registered users on your website? User Registration & Membership allows you to display user profiles in a customizable frontend directory with filtering, search, and profile viewing capabilities.
This tutorial will show you how to set up and configure a member directory on your WordPress site.
Prerequisites
Before getting started, make sure you've installed and activated the User Registration & Membership plugin on your WordPress site. Then, make sure you've installed and activated the Member Directory addon, which is available with Personal, Plus, Professional, and ThemeGrill Agency plans.
Enabling the Member Directory Addon
To create a member directory, you'll first need to enable the Member Directory addon.
From your WordPress dashboard, go to User Registration & Membership → Addons. Here, you'll see a list of available addons organized by category.
Locate Members Directory under the User Management section. Toggle the switch to activate the addon.
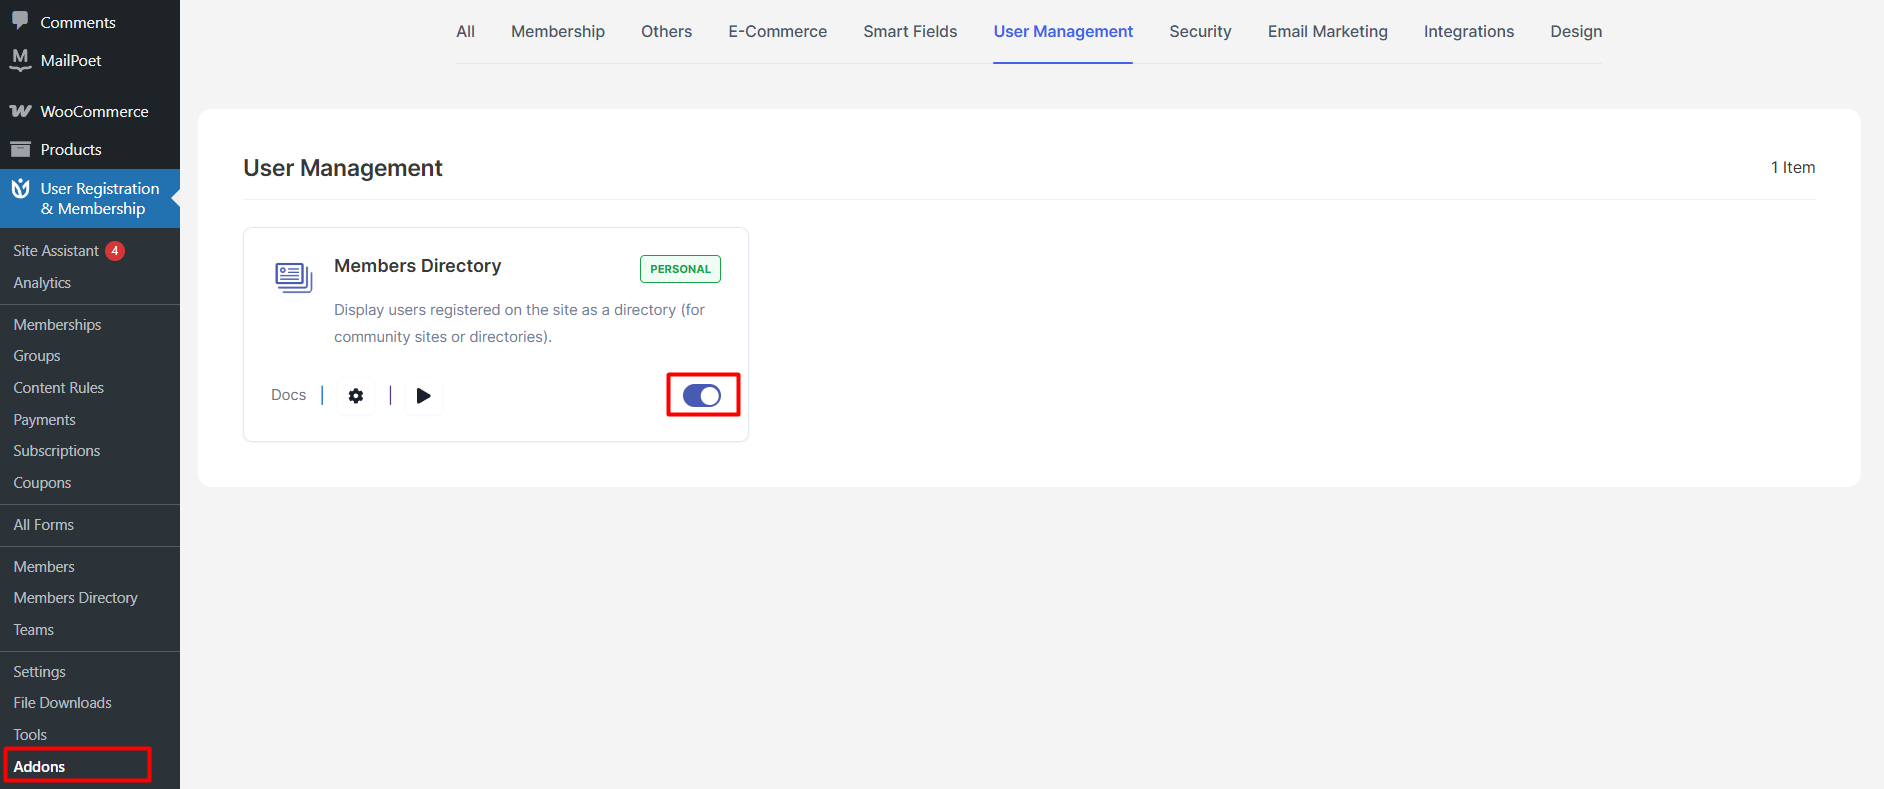
Once activated, you'll see a new Members Directory menu item in your User Registration & Membership section.
Creating Your First Member Directory
Now you're ready to create your first member directory listing.
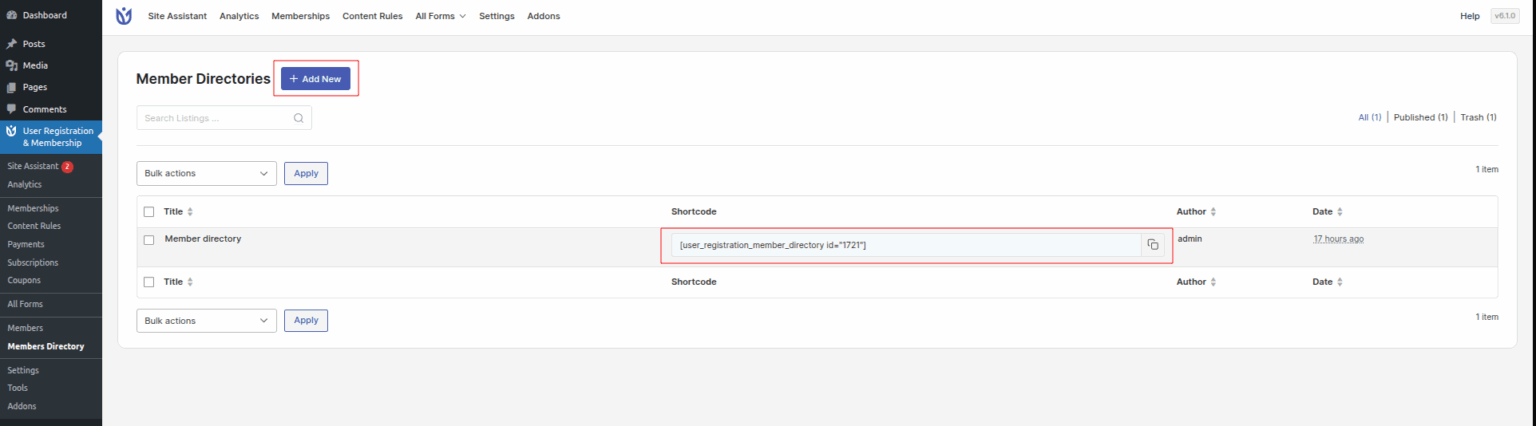
Go to User Registration & Membership → Members Directory and click the Add New button at the top of the page.
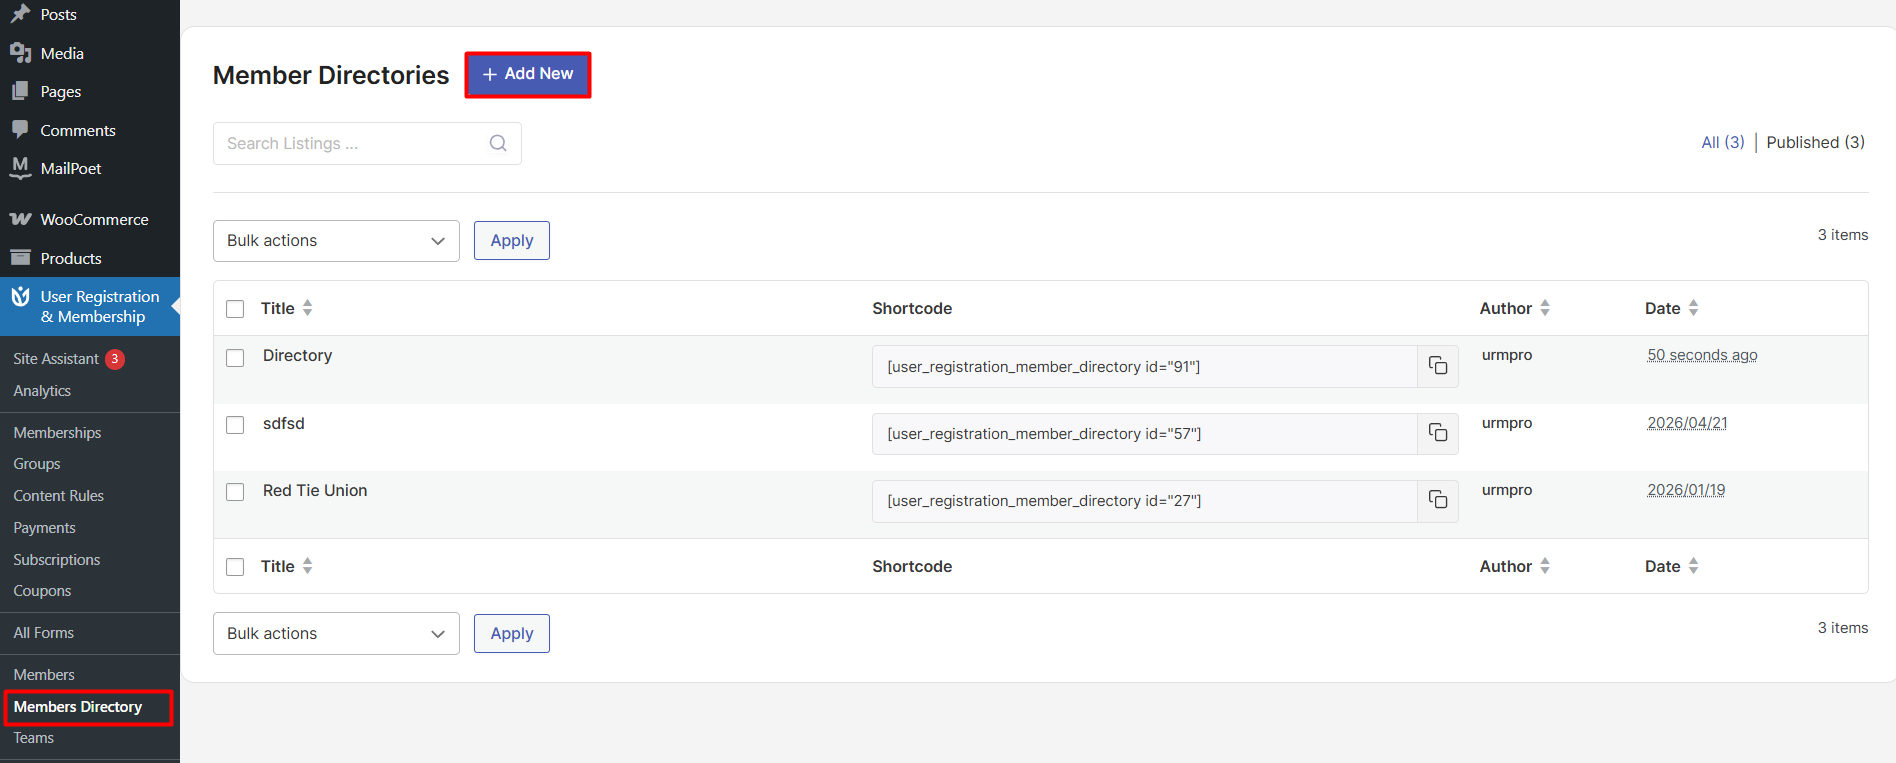
Enter a title for your directory. This title is for internal reference only — visitors won't see it on the frontend.
Configuring General Settings
The General tab controls the basic display and behavior of your member directory.
Choosing Which Users to Display
In the Show users based on dropdown, select which users should appear in your directory:
All Users — Displays all registered WordPress users
Memberships — Shows only users with specific membership levels
Forms — Displays only users who registered through specific User Registration forms
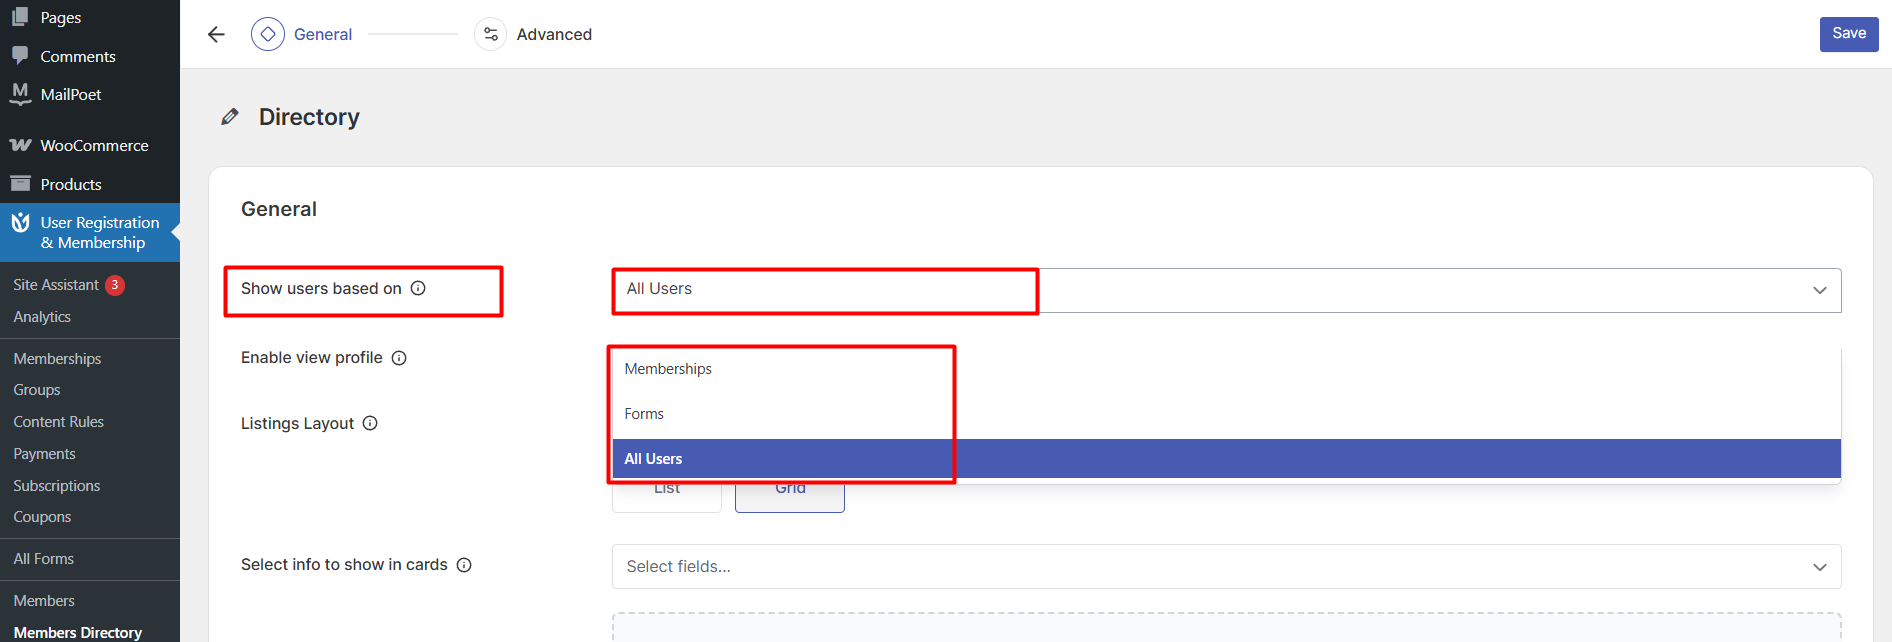
If you select Memberships or Forms, additional options will appear where you can choose which specific memberships or forms to include.
Enabling Profile Pages
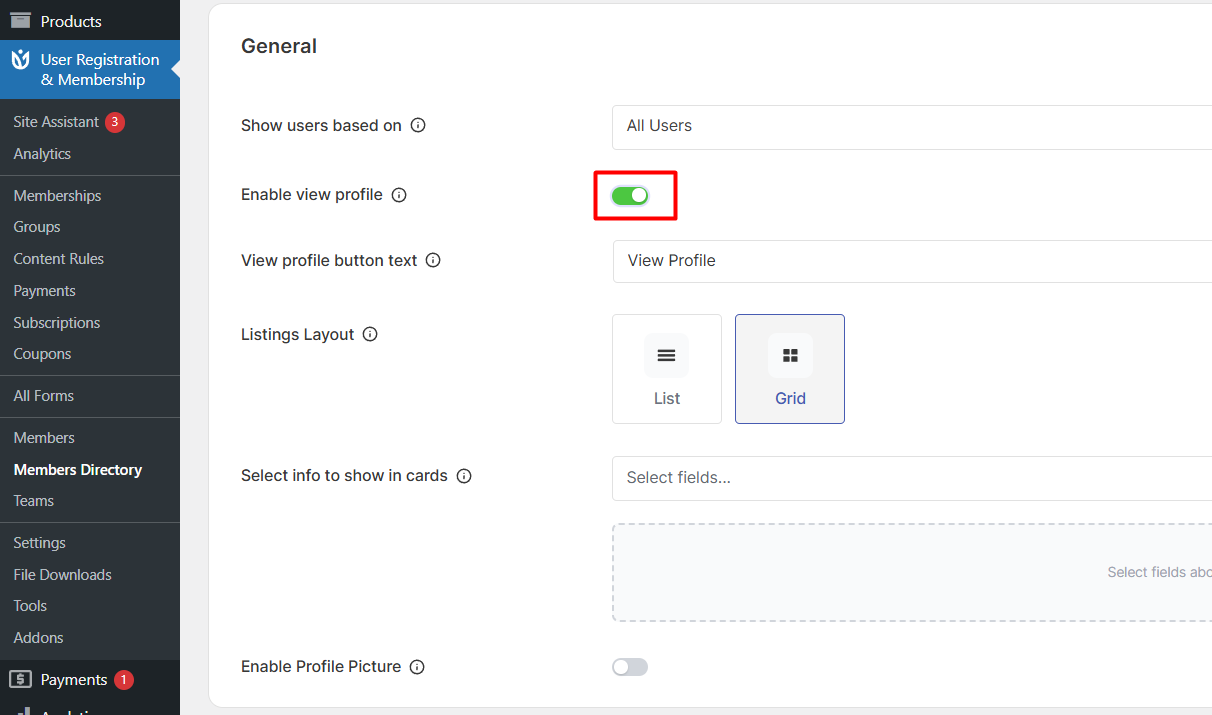
Toggle on Enable view profile if you want visitors to be able to click on user cards and view detailed profile pages. When enabled, you can customize the View profile button text (the default is "View Profile").
Selecting the Layout
Choose your Listings Layout:
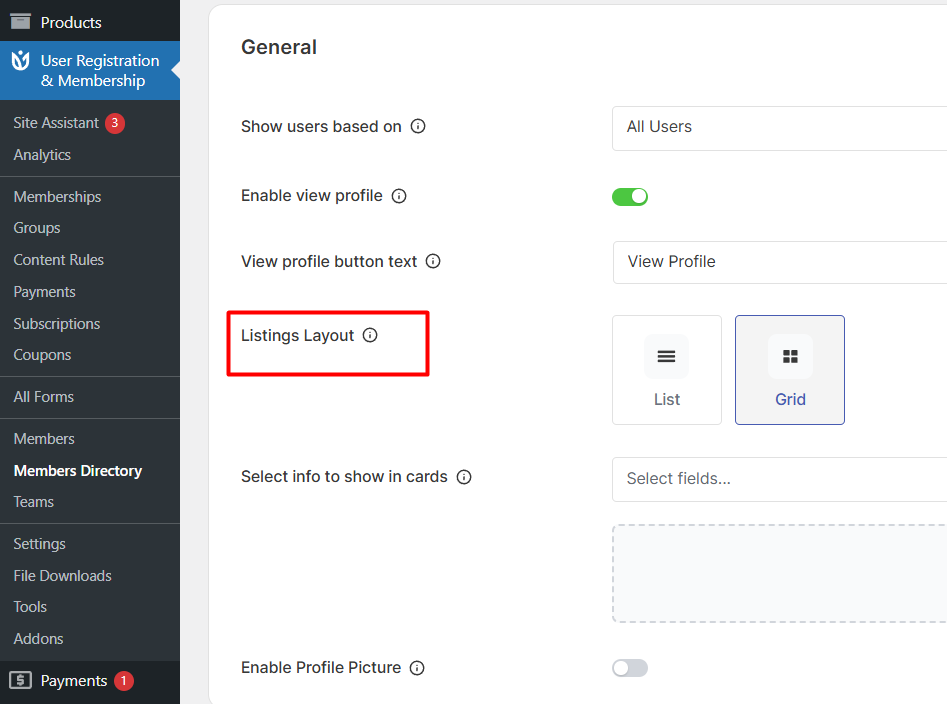
List — Displays users in a vertical list format
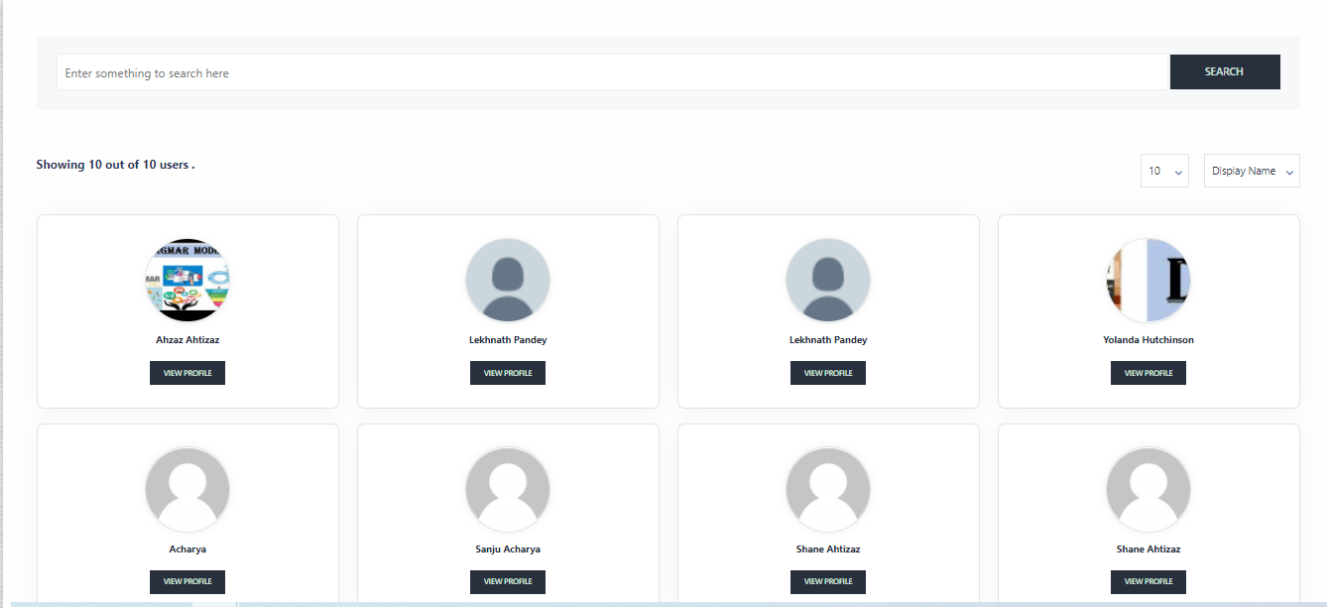
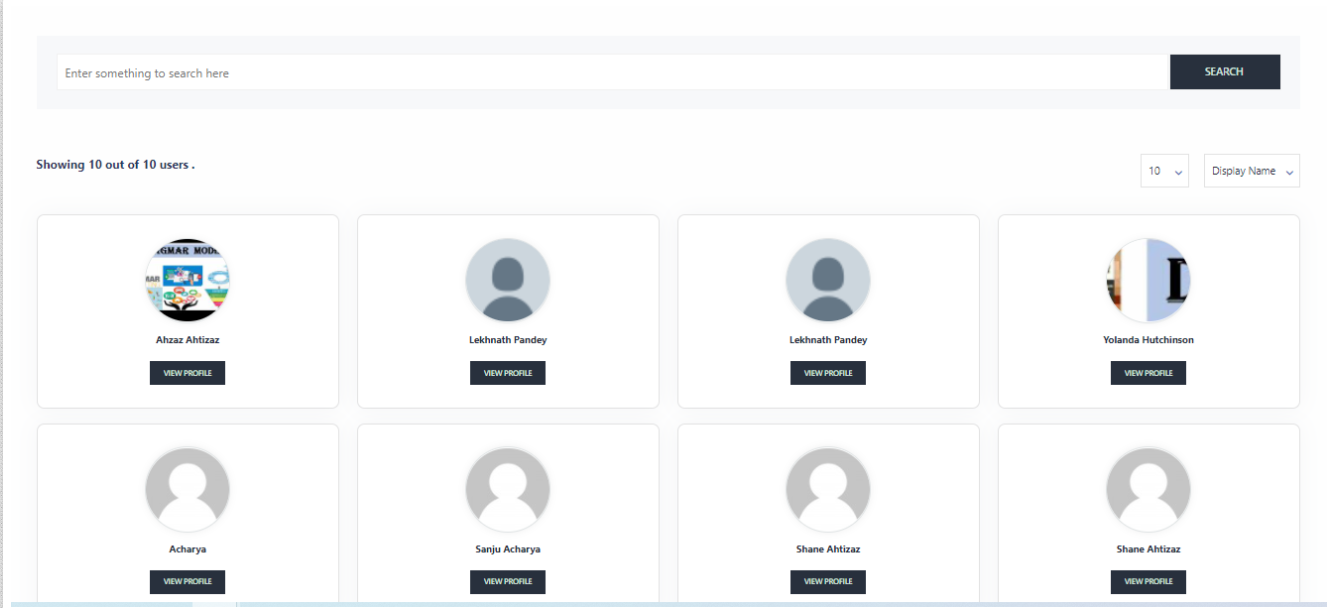
Grid — Shows users as cards in a grid layout
Choosing Which Information to Display
In the Select info to show in cards section, choose which user fields should appear on each user's directory card. You can select multiple fields like First Name, Last Name, Email, Bio, or any custom fields you've added to your registration forms.
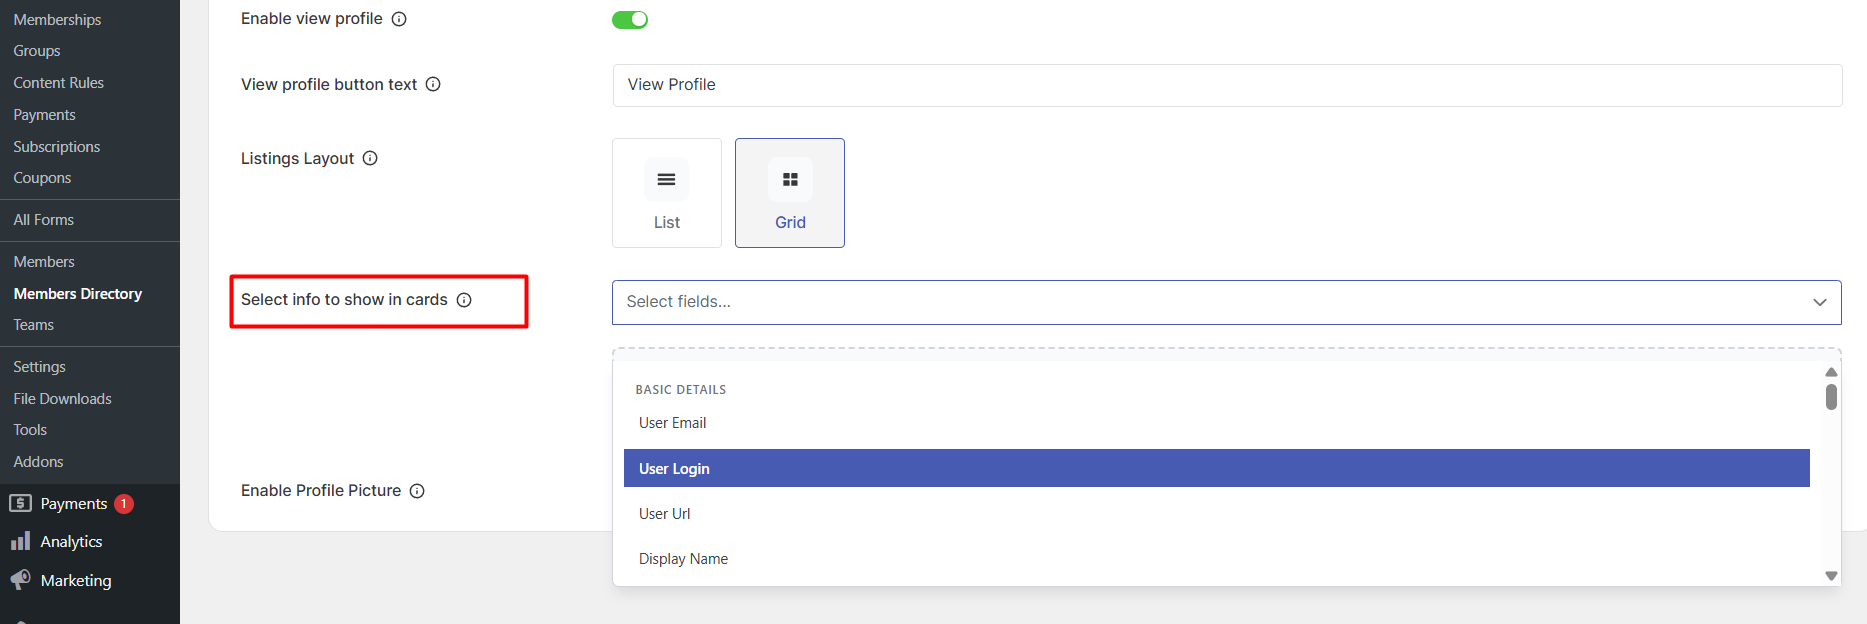
Toggle on Enable Profile Picture if you want user profile photos to appear in the directory cards.
Configuring Profile Page Settings
If you enabled profile viewing in the General tab, the Profile Page tab lets you control what information appears on individual user profile pages.
Click the Profile Page tab to access these settings.
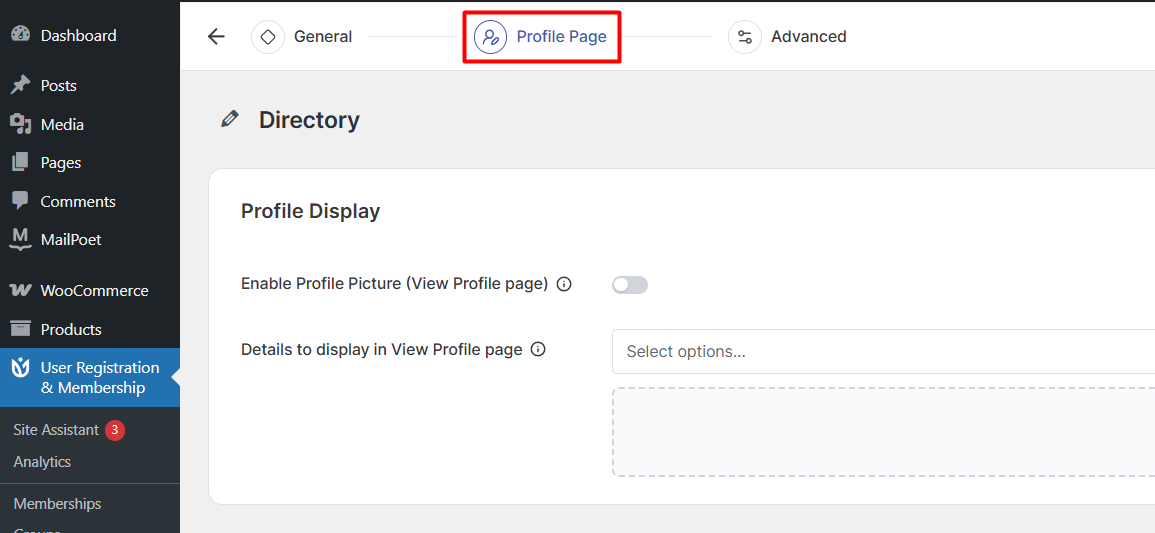
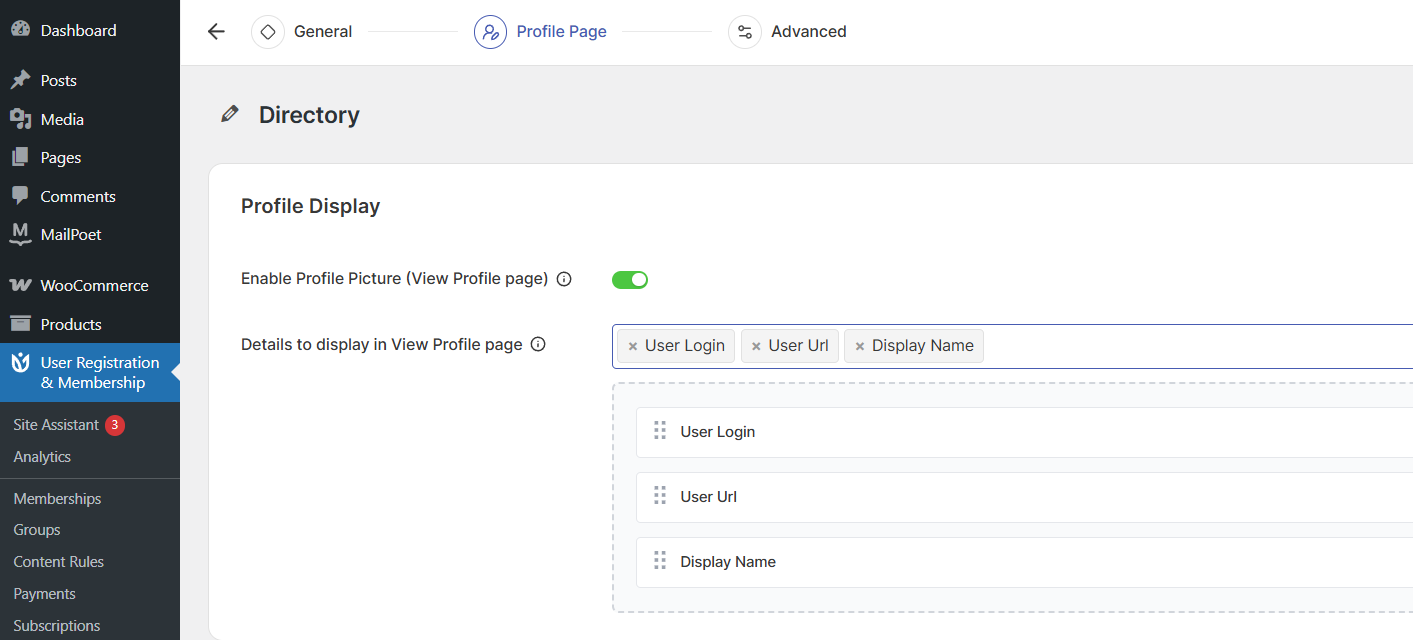
Here, you'll see a list of available user fields. Select which fields should appear on profile pages by checking the boxes next to each field.
You can reorder fields by dragging them up or down. To remove a field, click the × button next to it.
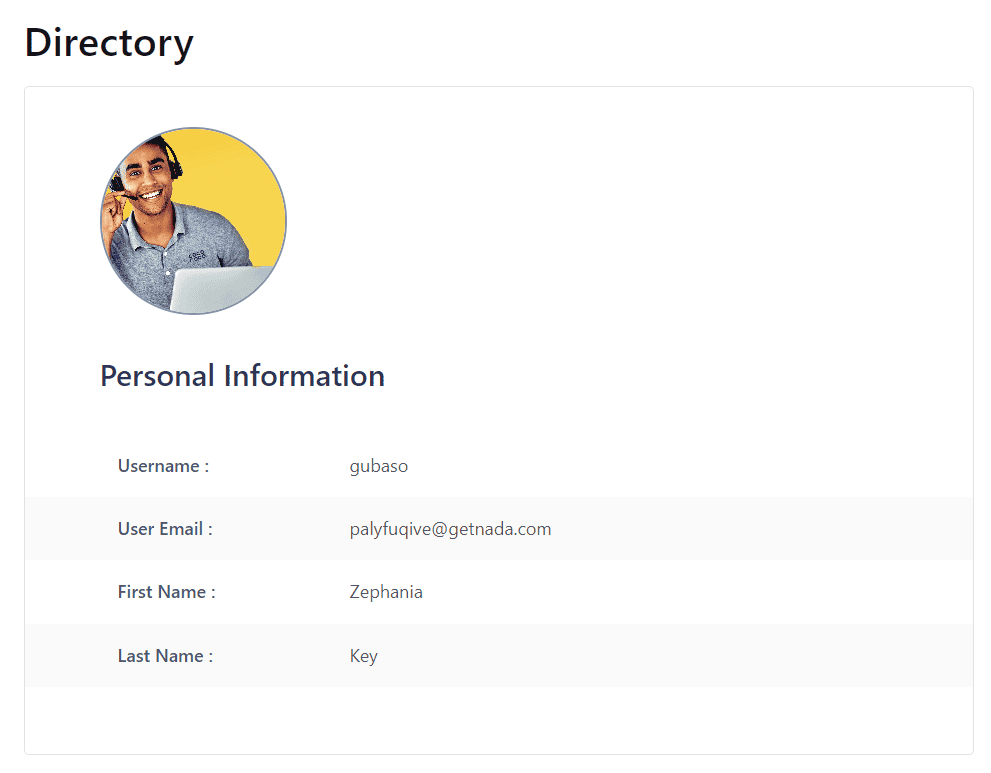
Now, you can view the profiles.
Configuring Advanced Settings
The Advanced tab provides powerful filtering, search, and pagination options for your directory.
Setting Up Sorting Options
Toggle on Display Sorter to add a sorting dropdown to your directory. This allows visitors to sort users by:
Latest registration date
First name
Last name
Display name
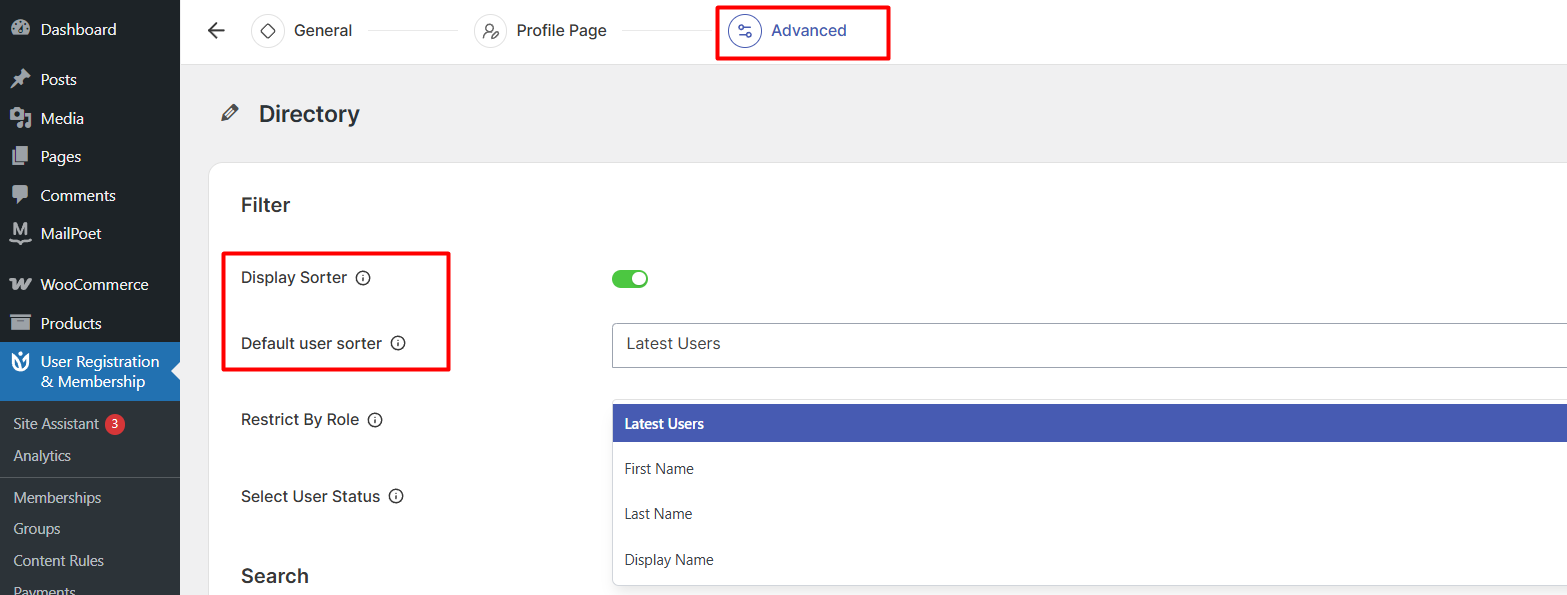
In the Default User Sorter dropdown, choose how users should be sorted when visitors first view the directory.
Restricting by Role or Status
Use Restrict By Role to hide specific user roles from the directory. For example, you might want to hide Administrators or Editors from public view.
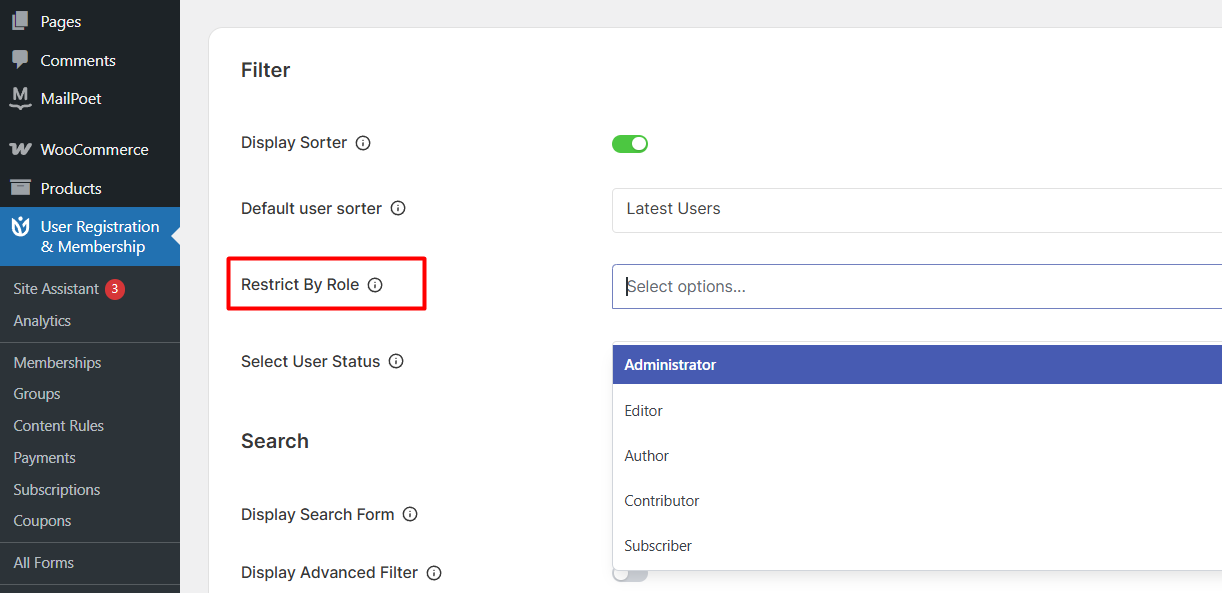
In Select User Status, choose which user approval statuses should be visible in the directory (Approved, Pending, Denied, or Awaiting Email Confirmation).
Enabling Search Functionality
Toggle on Display search form to add a search box above your directory.
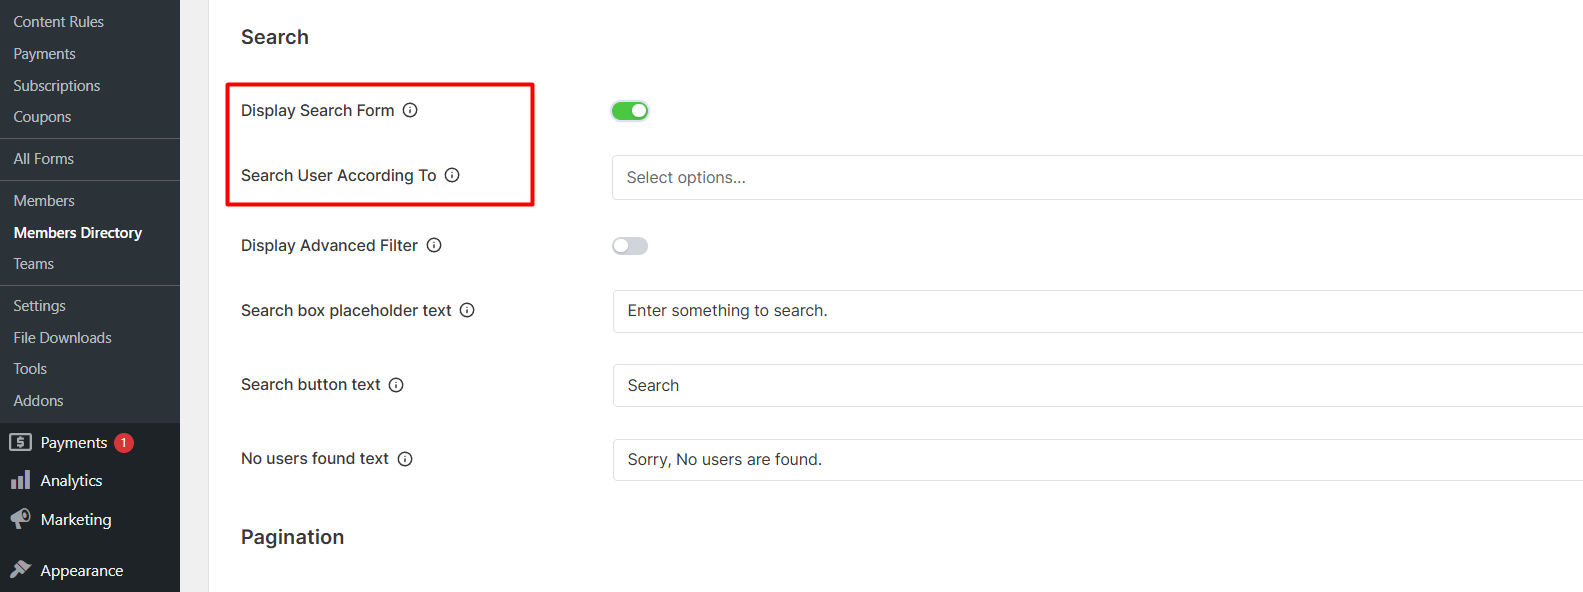
In Search User According To, select which fields visitors can search by. You can choose multiple fields like First Name, Last Name, Email, or custom fields.
Adding Advanced Filters
Toggle on Display Advanced Filter to enable advanced filtering options for visitors.
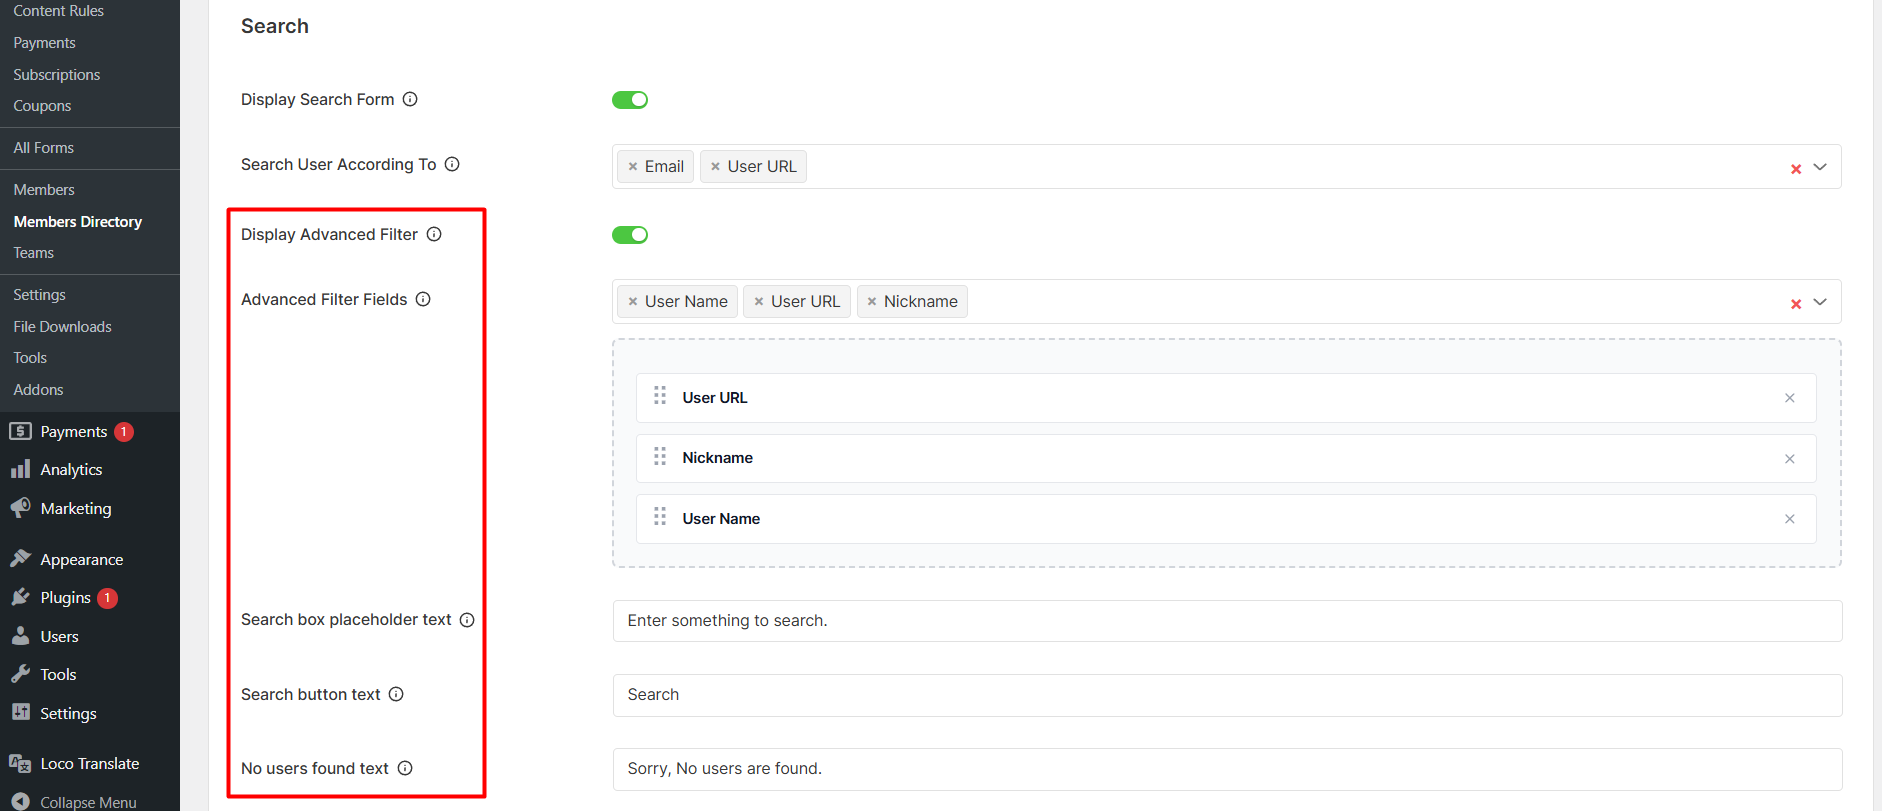
In the Advanced Filter section, select which form fields should be available as filters. You can add custom fields by selecting Other (Custom Field) and entering the field name as the Meta Key.
Advanced filters only work with meta fields, not standard user table fields.
Configuring Pagination
Toggle on Display Amount Filter to let visitors choose how many profiles to display per page (10, 20, 50, or 100).
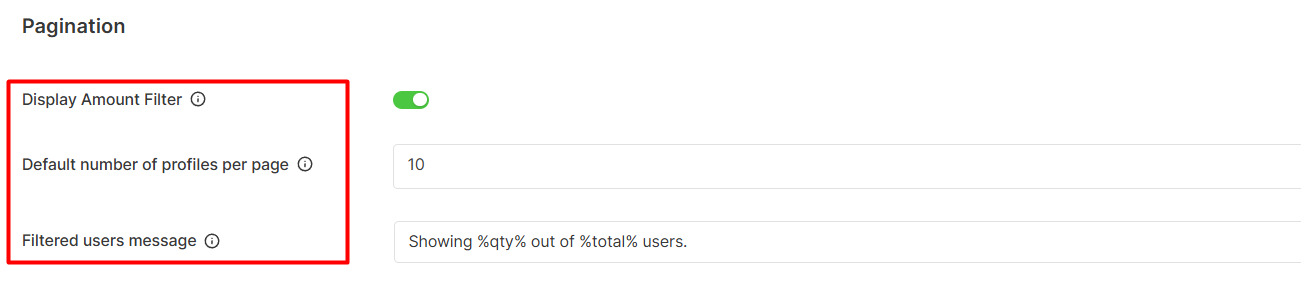
In Default number of profiles per page, set how many user profiles appear on each page when visitors first view the directory.
Publishing Your Member Directory
Once you've configured all your settings, click Save or Publish to save your directory configuration.
After saving, you'll see a shortcode at the top of the page that looks like this:
[user_registration_frontend_list id="123"]Copy this shortcode.
Adding the Directory to Your Website
Now you're ready to display your member directory on your website.
Using the Shortcode
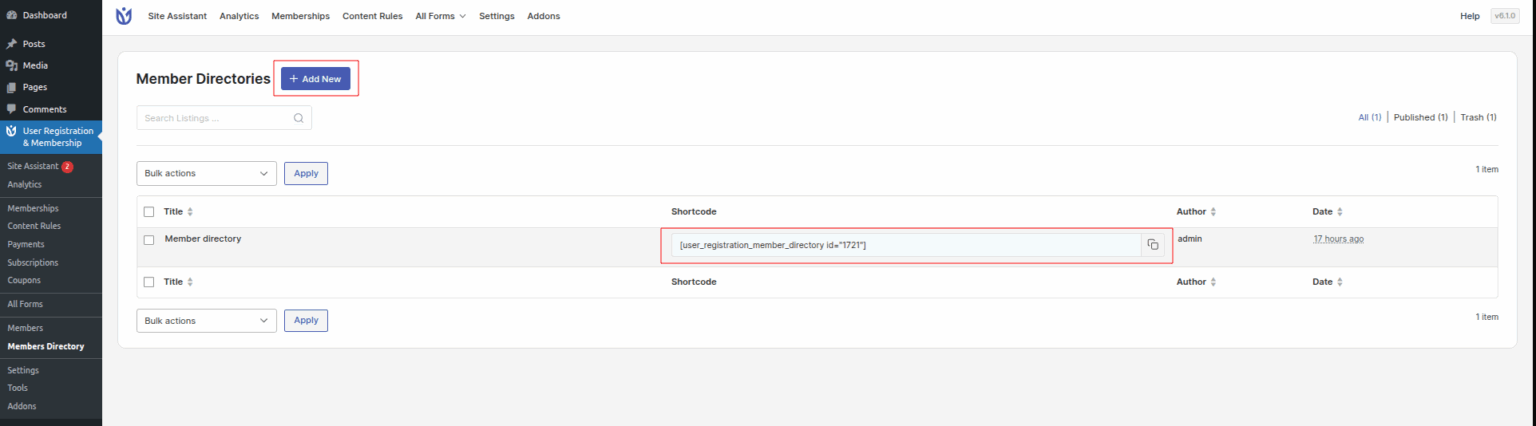
Create a new page or edit an existing one where you want the directory to appear. Add a Shortcode block to the page and paste your directory shortcode.
Click Update or Publish to make your directory live.
Using the Block Editor
Alternatively, you can use the User Registration Membership Directory block. In the block editor, click the + icon to add a new block, then search for "User Registration Frontend Listing."
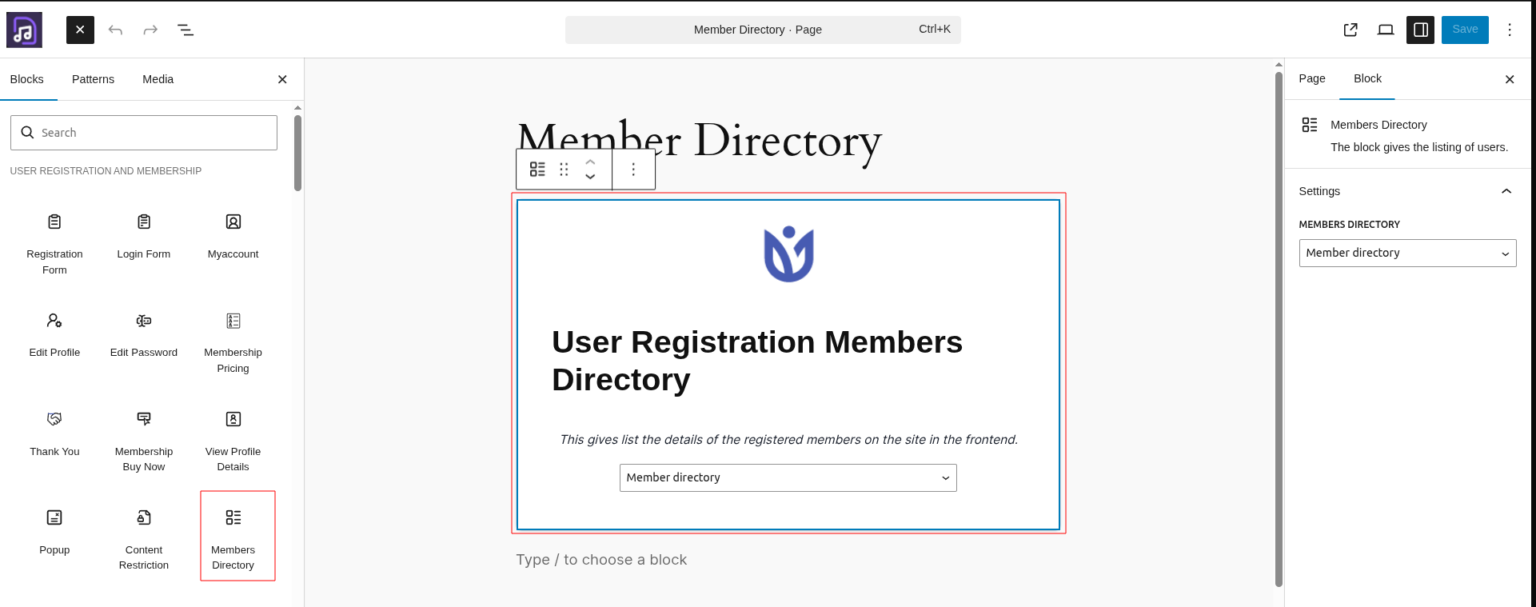
Select the block and choose your directory from the dropdown in the block settings.
Testing Your Member Directory
Visit the page where you added your directory to see it in action. You should see:
User cards or list items displaying the fields you selected
Profile pictures (if enabled)
Search functionality (if enabled)
Sorting options (if enabled)
Advanced filters (if enabled)
Pagination controls (if enabled)
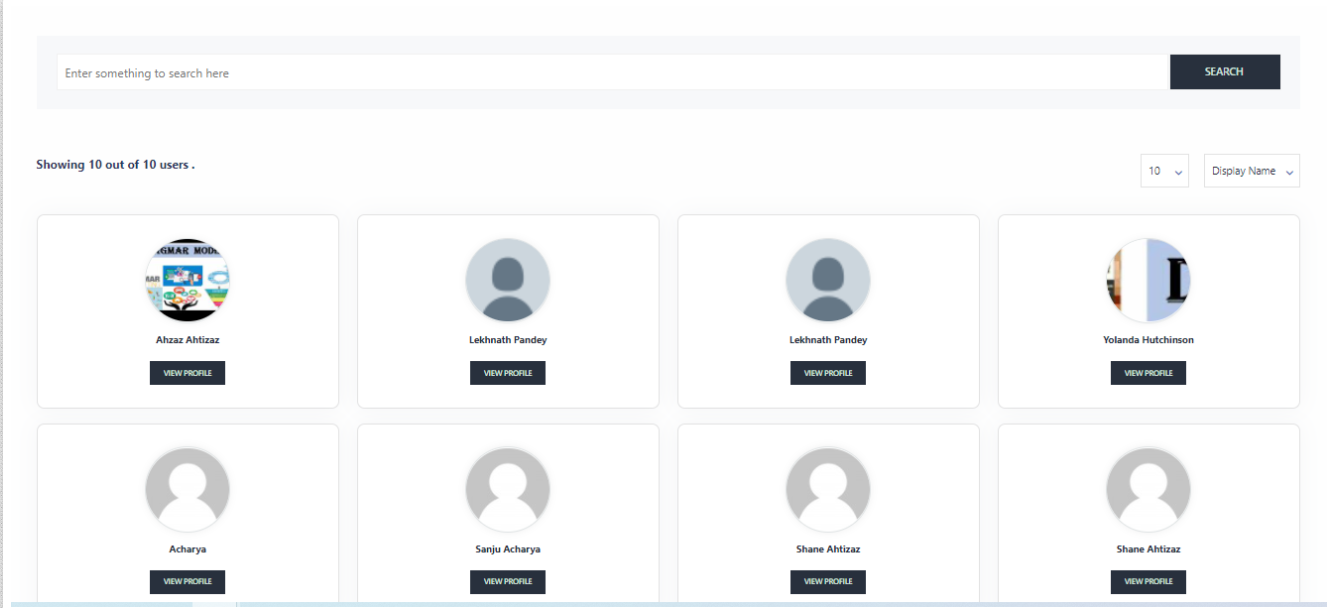
If you enabled profile viewing, click on a user card or the "View Profile" button to see the detailed profile page.