
Creating Membership Groups
Learn how to organize membership plans into logical groups using the User Registration & Membership plugin for improved management and user experience.
Last updated on Jul 17, 2026
Would you like to organize your membership plans into logical groups for easier management and better user experience?
User Registration & Membership allows you to bundle related membership plans together using Membership Groups. This guide will show you how to create and configure membership groups to organize your plans effectively.
Before getting started, make sure you've installed and activated the User Registration & Membership plugin on your WordPress site. Then, make sure you've created at least one membership plan that you want to add to a group.
Creating Your First Membership Group
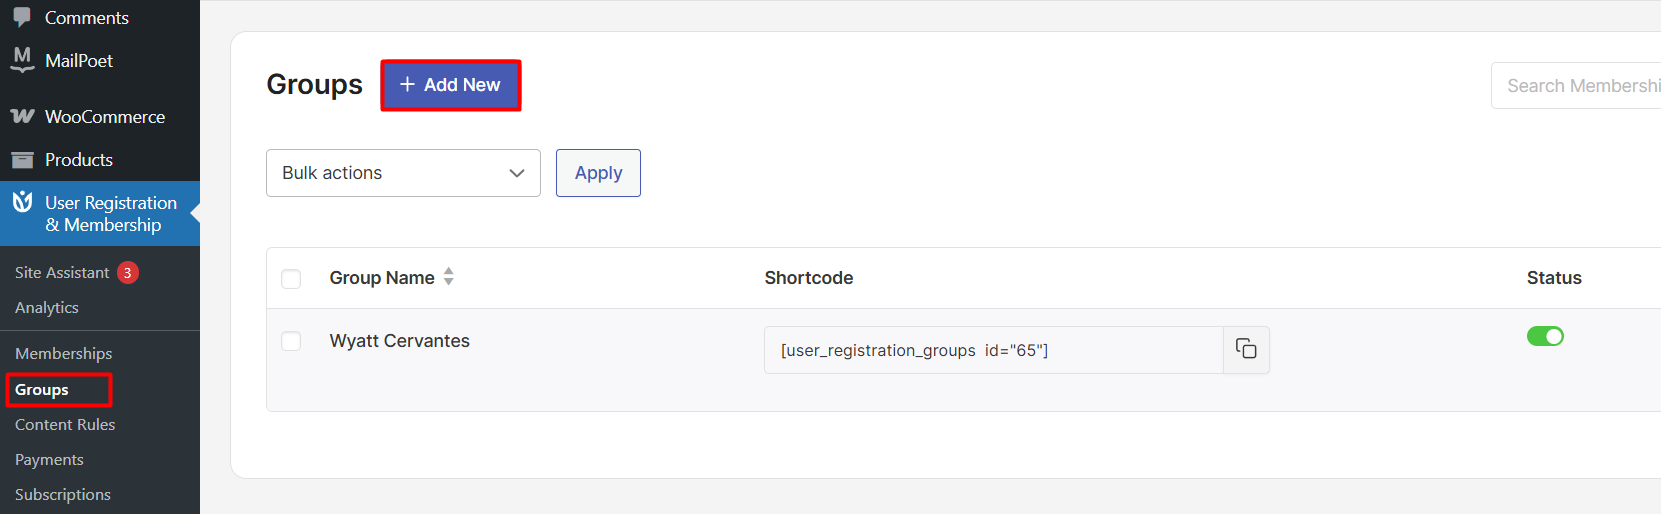
Go to the Groups page by User Registration & Membership > Group, and click the Add New button to create a new membership group. This will open the group creation interface where you can configure your group settings.
Configuring Basic Group Settings
In the group creation screen, you'll need to configure three essential settings:
Group Name: Enter a descriptive name for your membership group. For example, if you're bundling coding-related memberships, you might name it "Aspiring Coders" or "Developer Plans."
Group Description: Add a description that explains the purpose of this group and what memberships it includes. This helps you remember why you created the group and what it's meant to accomplish.
Select Memberships: From the dropdown menu, select which membership plans you want to include in this group. You can add multiple plans to a single group.
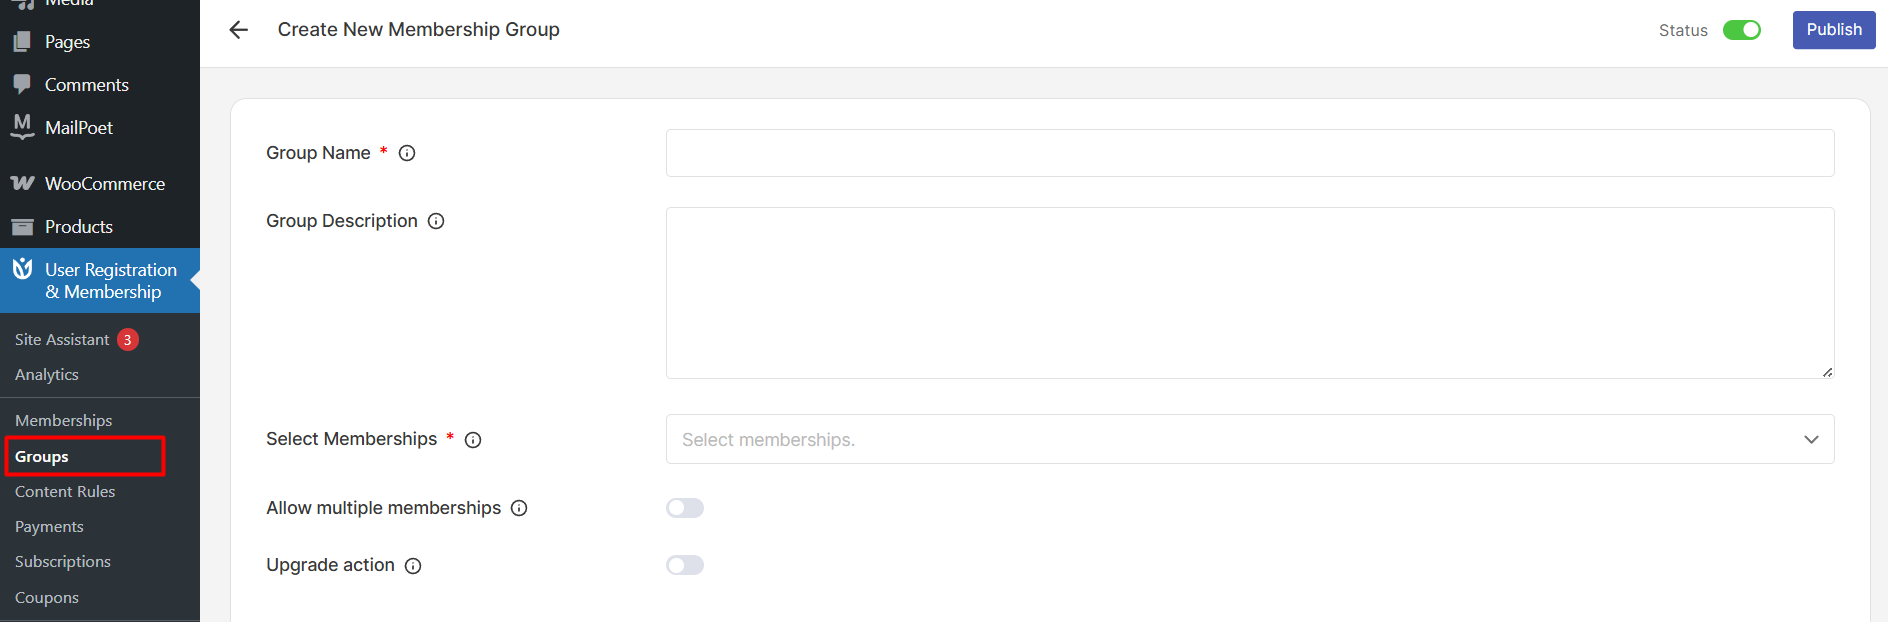
Once you've configured these settings, click Publish to create your membership group.
Displaying Membership Groups on Your Site
After creating your group, you can display it on your website in two ways:
Using a Shortcode: Go to User Registration & Memberships → Groups, locate your group in the list, and copy the shortcode from the Shortcode column. The shortcode format is [user_registration_groups id="X"] where X is your group ID.
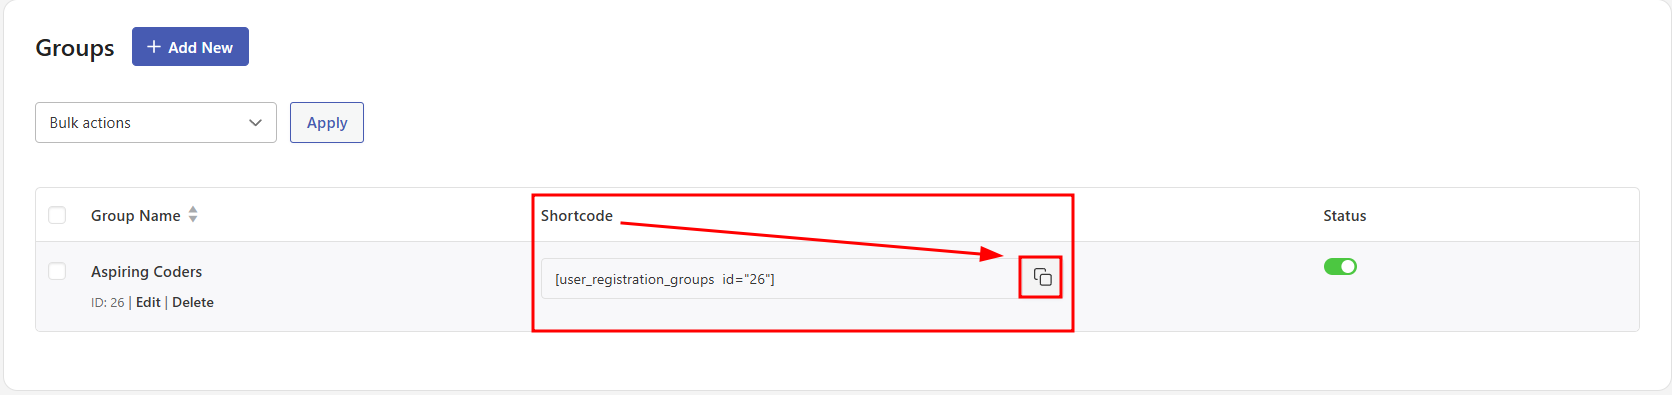
Paste this shortcode into any page or post where you want the group to appear.
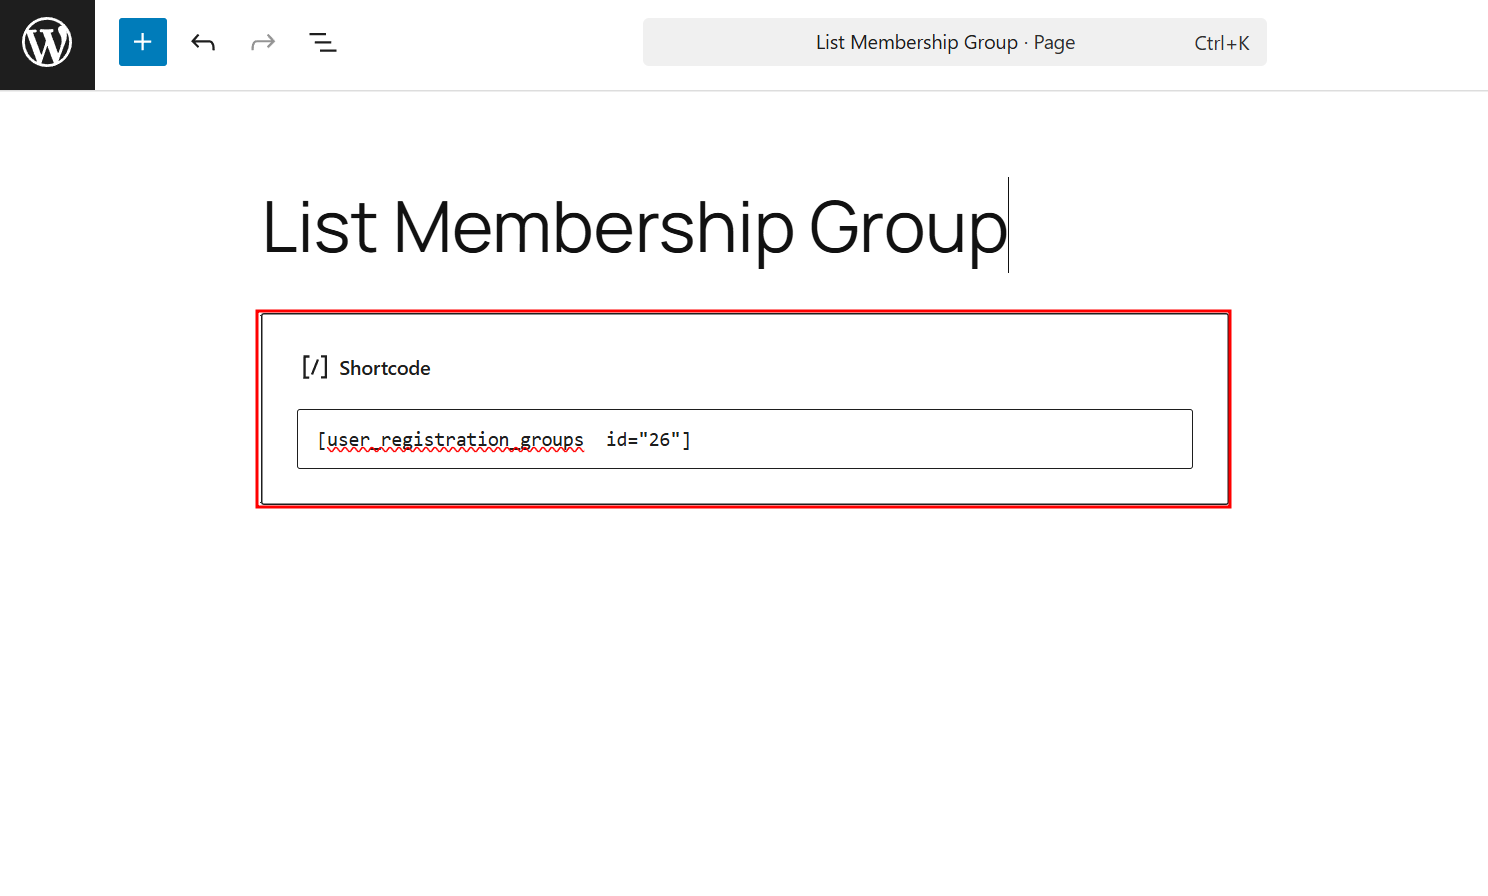
Using the Membership Pricing Block: In the WordPress block editor, add the Membership Pricing block to your page.
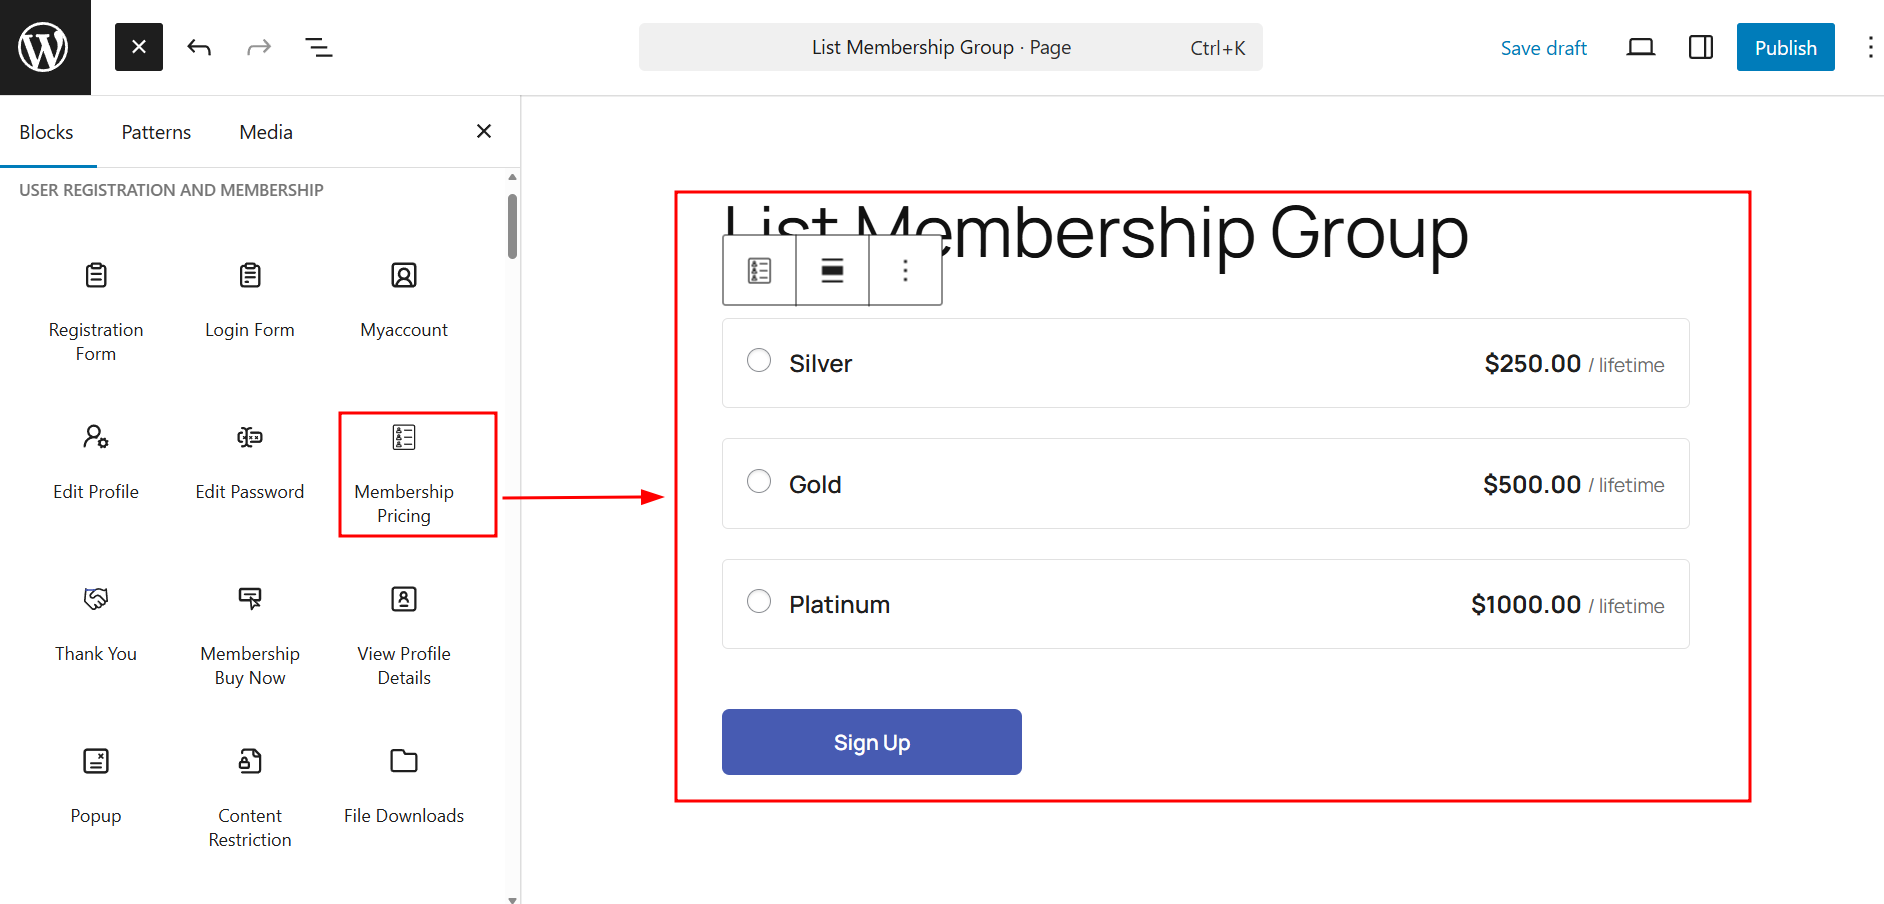
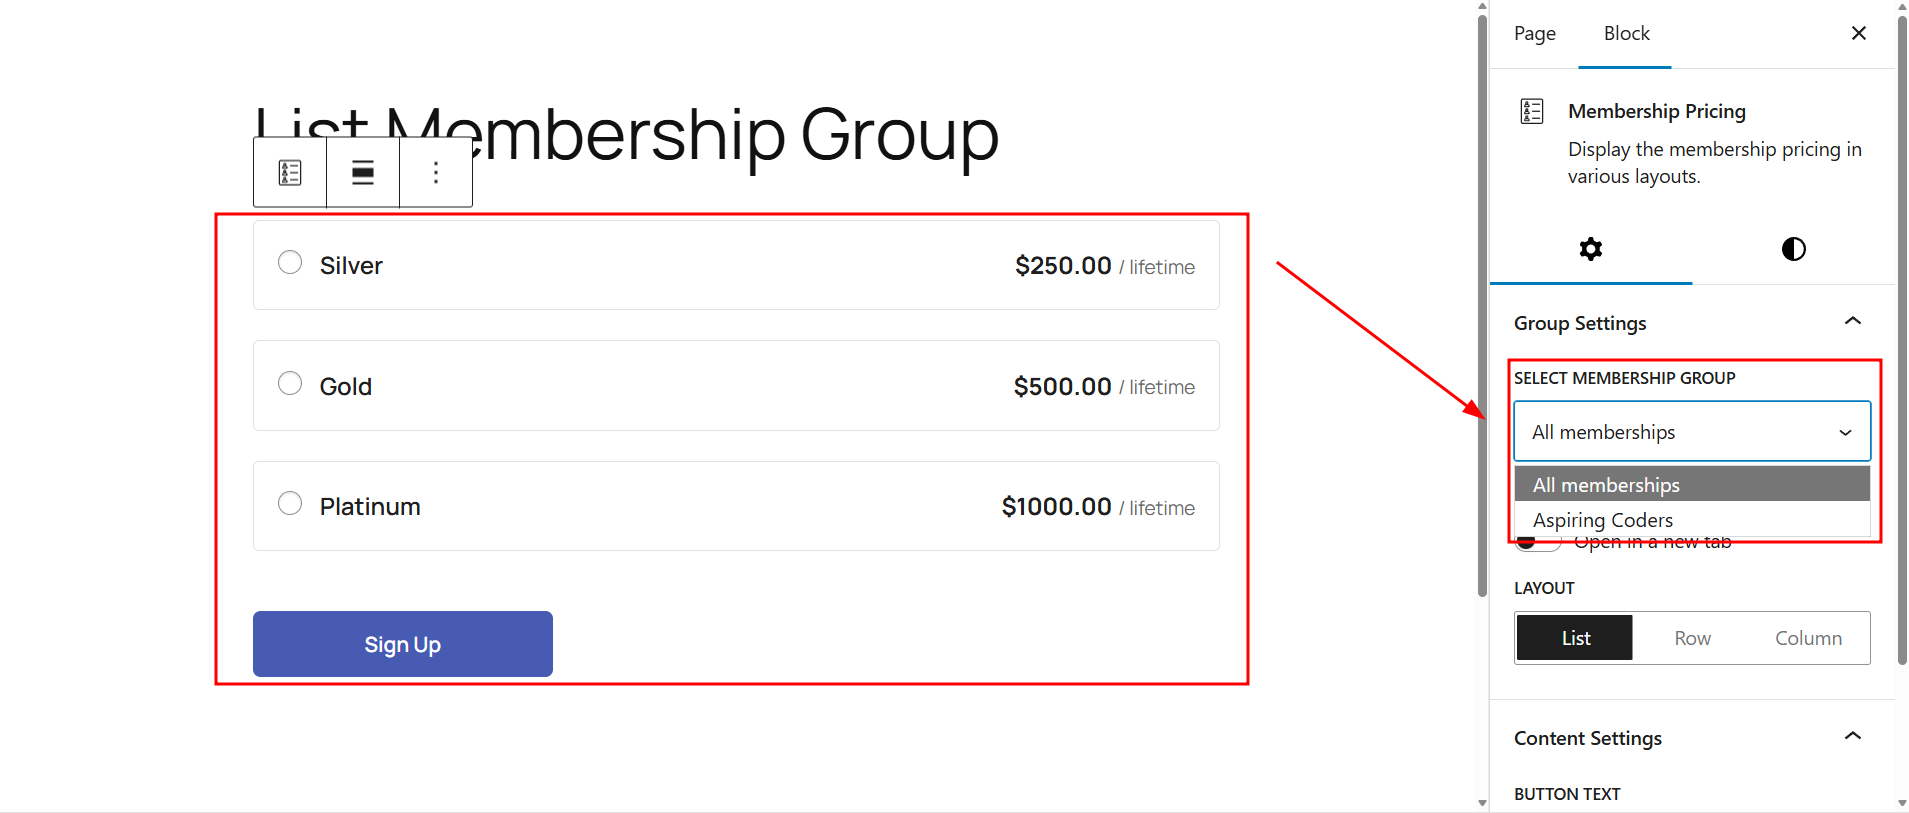
In the block settings, you can choose to display specific membership groups instead of all memberships.
Advanced Group Features (Plus/Professional Plans)
If you have a Plus or Professional license, you can access two advanced features that change how membership groups function:
Allow Multiple Memberships
Enable the Allow Multiple Memberships toggle to let users purchase more than one plan from the group simultaneously.
Users cannot select multiple memberships during registration—they must register first, purchase their first membership, then log in to purchase additional plans from the group.
Upgrade Action
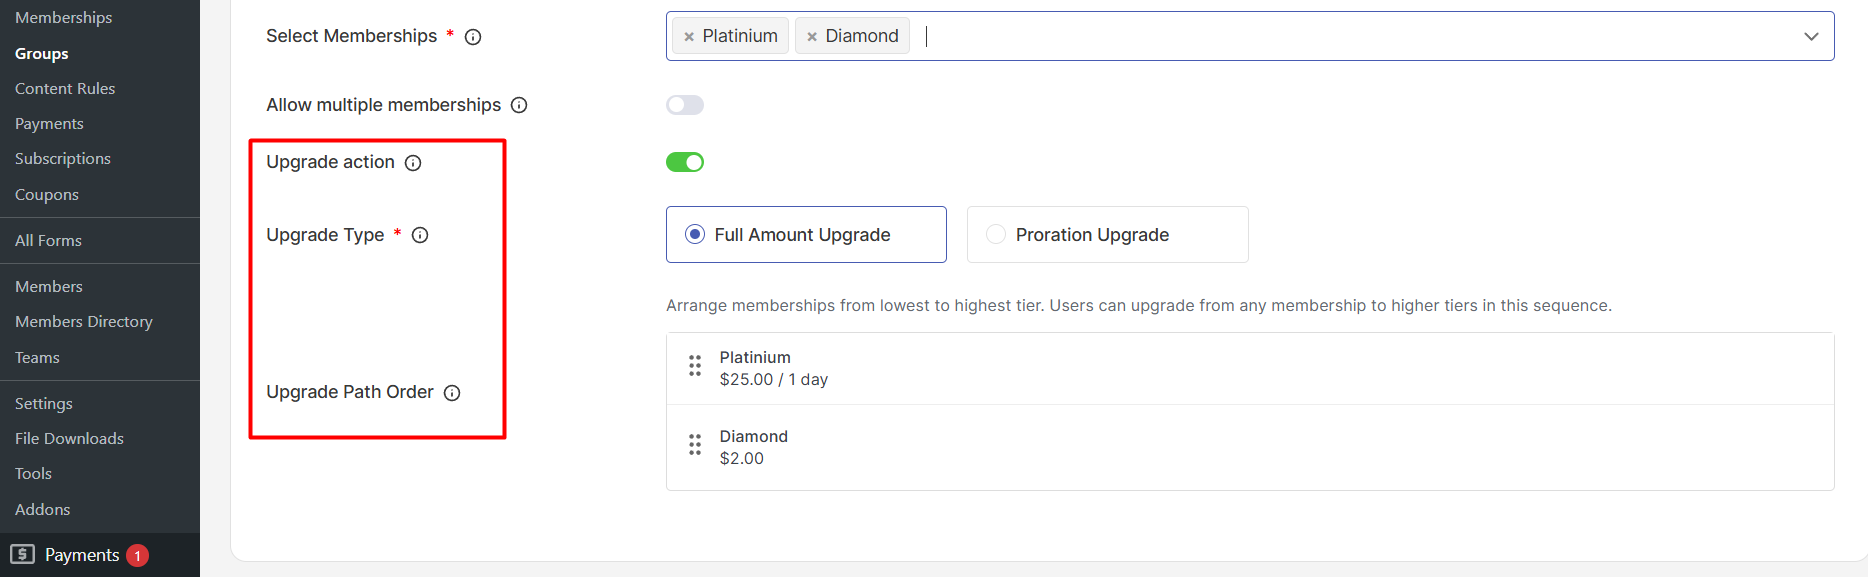
Enable the Upgrade Action toggle to allow users to upgrade from one plan to another within the group. When you enable this feature, you'll need to configure two additional settings:
Upgrade Type: Choose between Full Amount Upgrade (users pay the full price difference between plans) or Proration Upgrade (users pay only the difference based on remaining time in their current subscription).
Upgrade Path Order: Define the sequential order users can upgrade through plans by arranging them from top to bottom. For example, you might set up Silver → Gold → Platinum. Users can only upgrade to the next plan in the sequence while their current membership is active.
You cannot enable Allow Multiple Memberships and Upgrade Action simultaneously within a single group—these features conflict with each other.