
Creating a Recurring Subscription Membership Plan
Learn how to set up automated recurring subscription plans or paid membership plan with payment gateways, trial periods, and membership upgrades using User Registration & Membership Pro.
Last updated on Jul 15, 2026
Want to charge members on a recurring basis for premium content? User Registration & Membership lets you create subscription plans with automatic billing. This tutorial shows you how to set up a subscription membership plan with payment gateways, trial periods, and upgrade options.
Before getting started, make sure you have installed and activated the User Registration & Membership Pro plugin on your WordPress site. You will also need a payment gateway account such as PayPal or Stripe to process recurring payments.
Creating Your Subscription Membership Plan
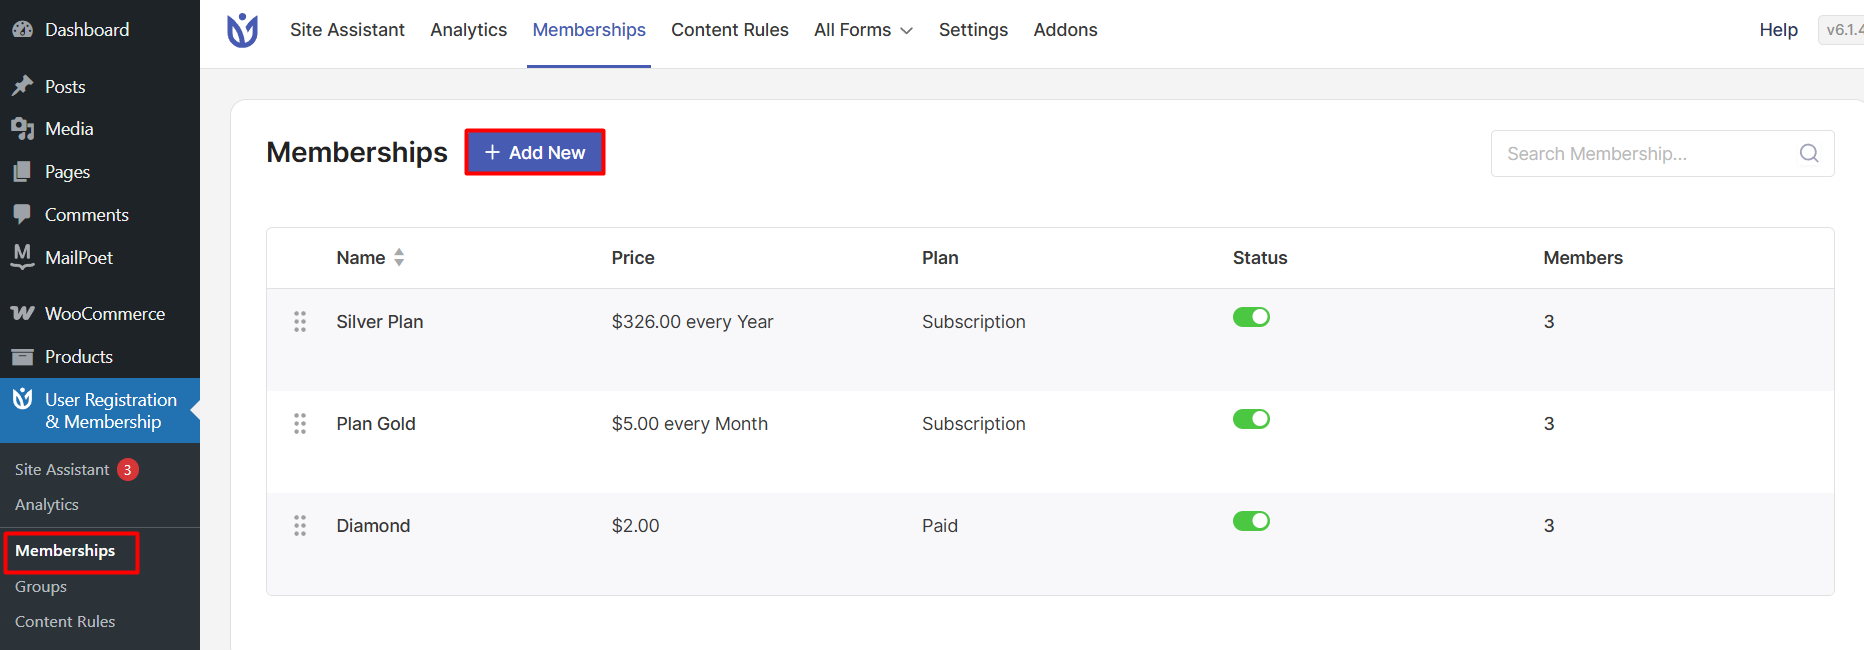
To create a new subscription membership plan, go to User Registration & Membership > Memberships. Here, you will see a list of all your existing membership plans.
Click the Create new Membership button in the top-right corner. This will open the membership creation screen where you can configure all the details for your subscription plan.
Configuring Basic Membership Details
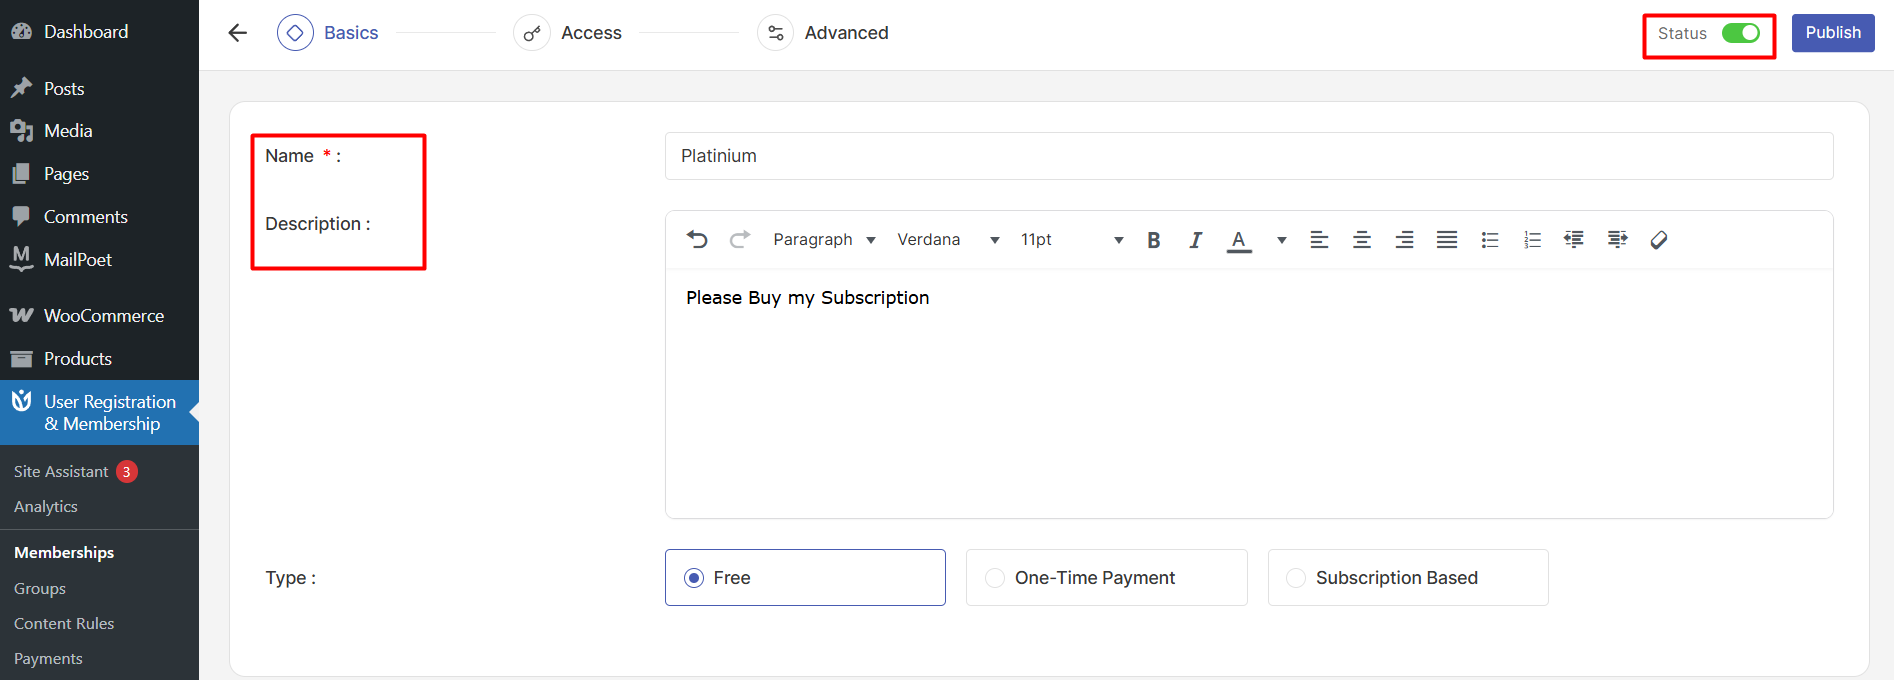
In the Basics tab, start by entering a Membership Name that clearly describes your plan. This name will be visible to users when they choose a membership tier.
Add a Membership Description to explain what members get with this plan. Include details about the features, content access, or benefits they will receive.
Set the Membership Status to Enable so the plan is active and available to users. You can disable it later if you need to pause new signups.
Setting Up Subscription Pricing
Under Membership Type, select Subscription-Based. This enables recurring billing for the membership plan.
Enter the regular payment amount in the Price field. This is what members will be charged for each billing cycle.
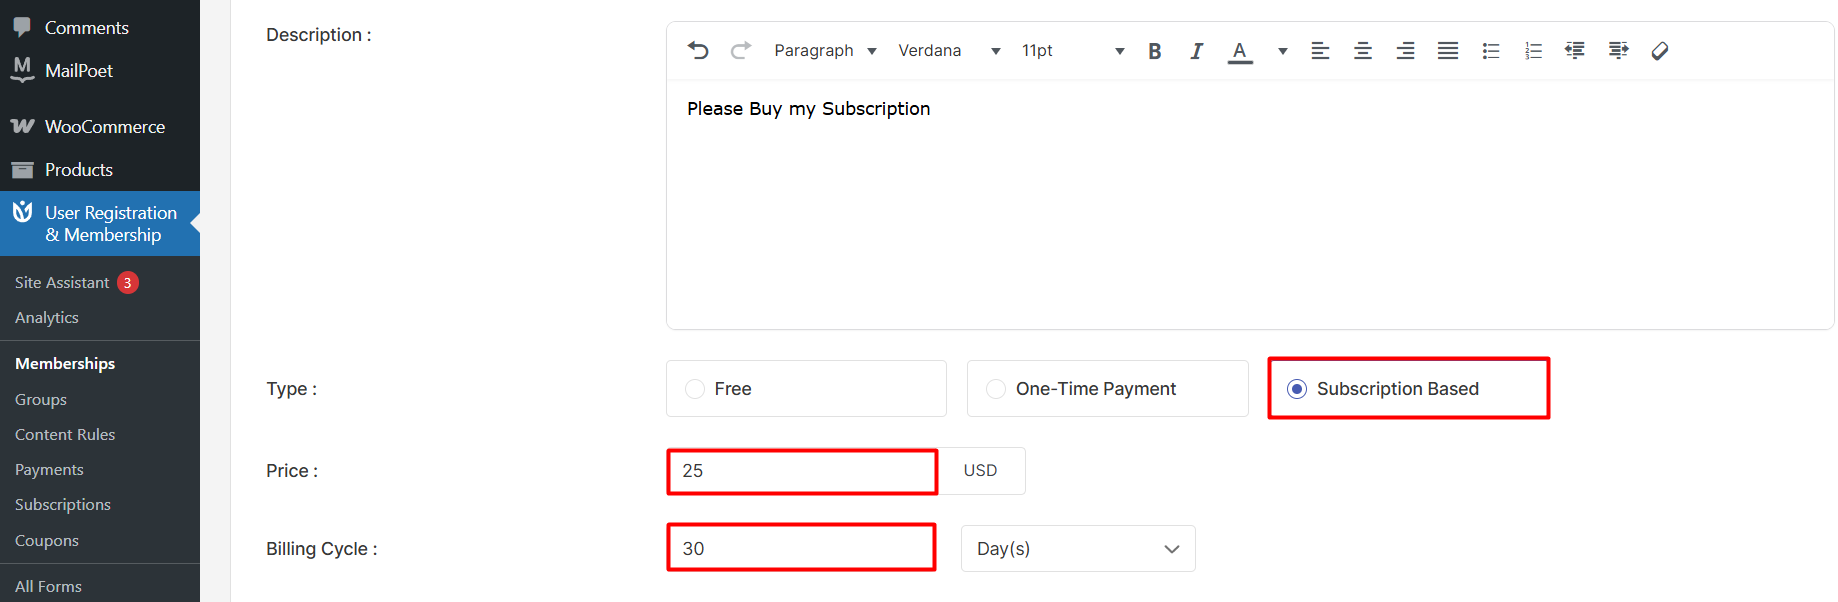
Set the Billing Cycle to define how often members are charged. You can choose from daily, weekly, monthly, yearly, or custom intervals. For example, selecting monthly means members will be billed every month.
Select One-Time Payment if you only want a single payment for your membership plan.
Managing User Access
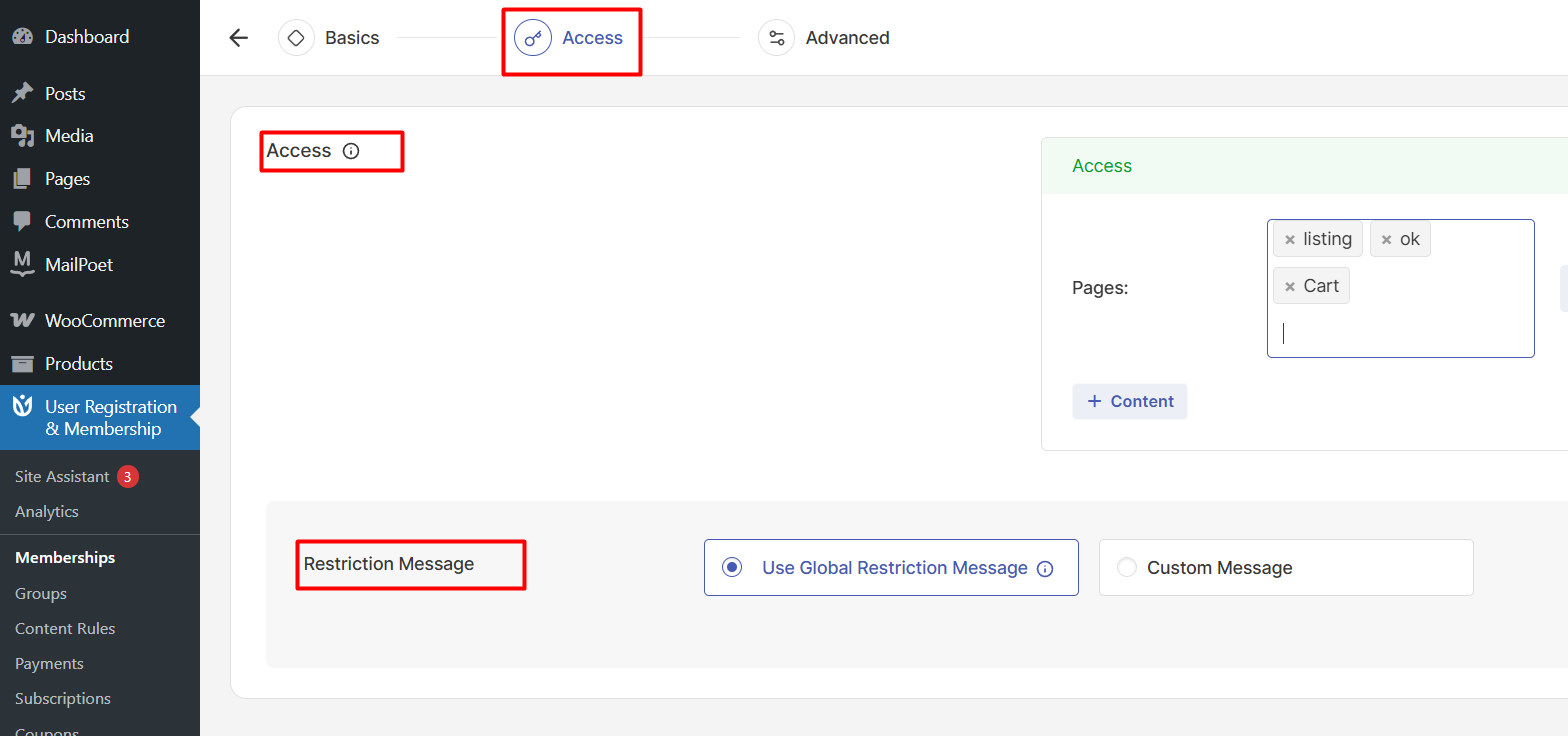
Click on the Access tab, and manage your access control for the membership.
Click on +Content on the Access tab and select the page, posts, other types, or the whole site to be restricted. If you choose pages, or posts, further select specific pages that you want to provide access to this membership owners.
For more specific restrictions, you can do so from the Content Rules page.
You can also set the restriction message shown to non members, either global or custom message for that specific plan.
Assigning User Roles
In the Advanced tab, select the Membership Role from the dropdown. This is the WordPress user role that will be assigned to members when they subscribe to this plan.
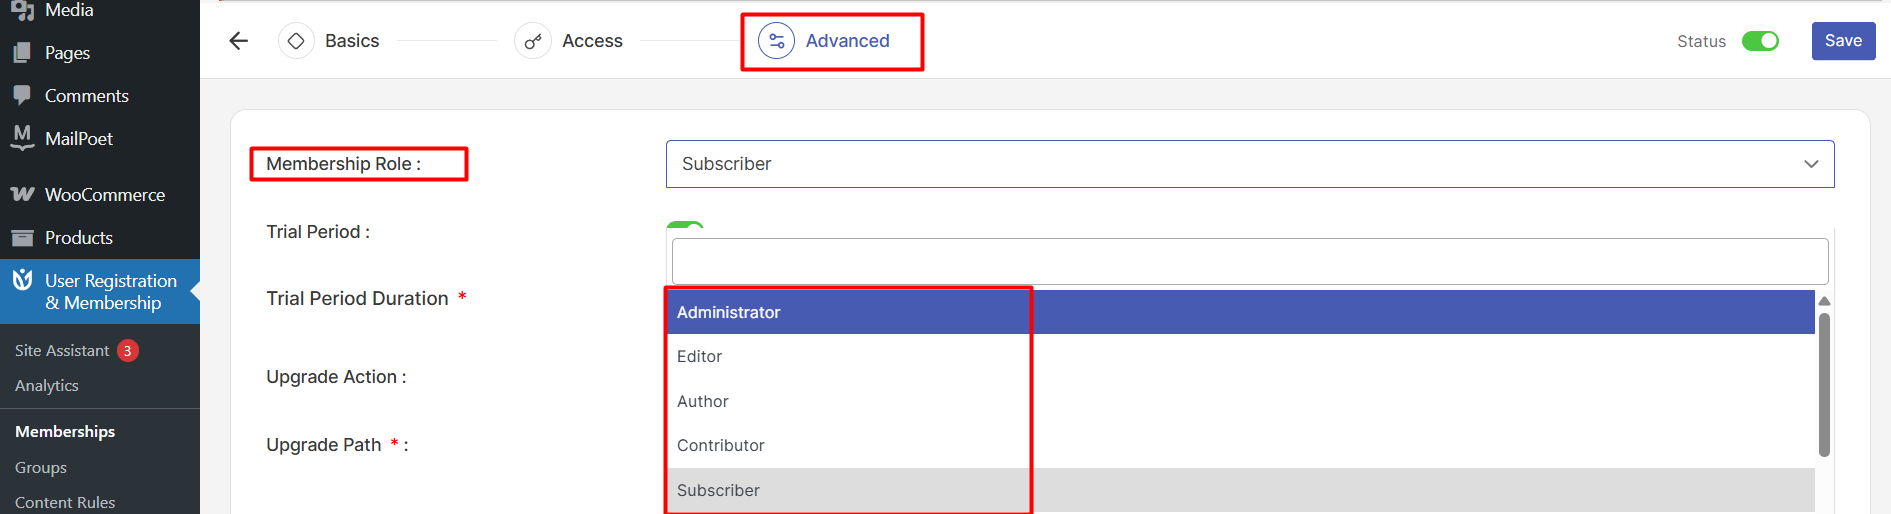
The role determines what permissions members have on your site beyond the content restrictions you set up.
Adding a Trial Period
If you want to offer a trial period, toggle on the Trial Period option in the Advanced tab. This allows users to subscribe without payment for an allocated trial duration.
Set the Trial Duration to specify how long the trial lasts. You can configure this in days, weeks, months, or years.
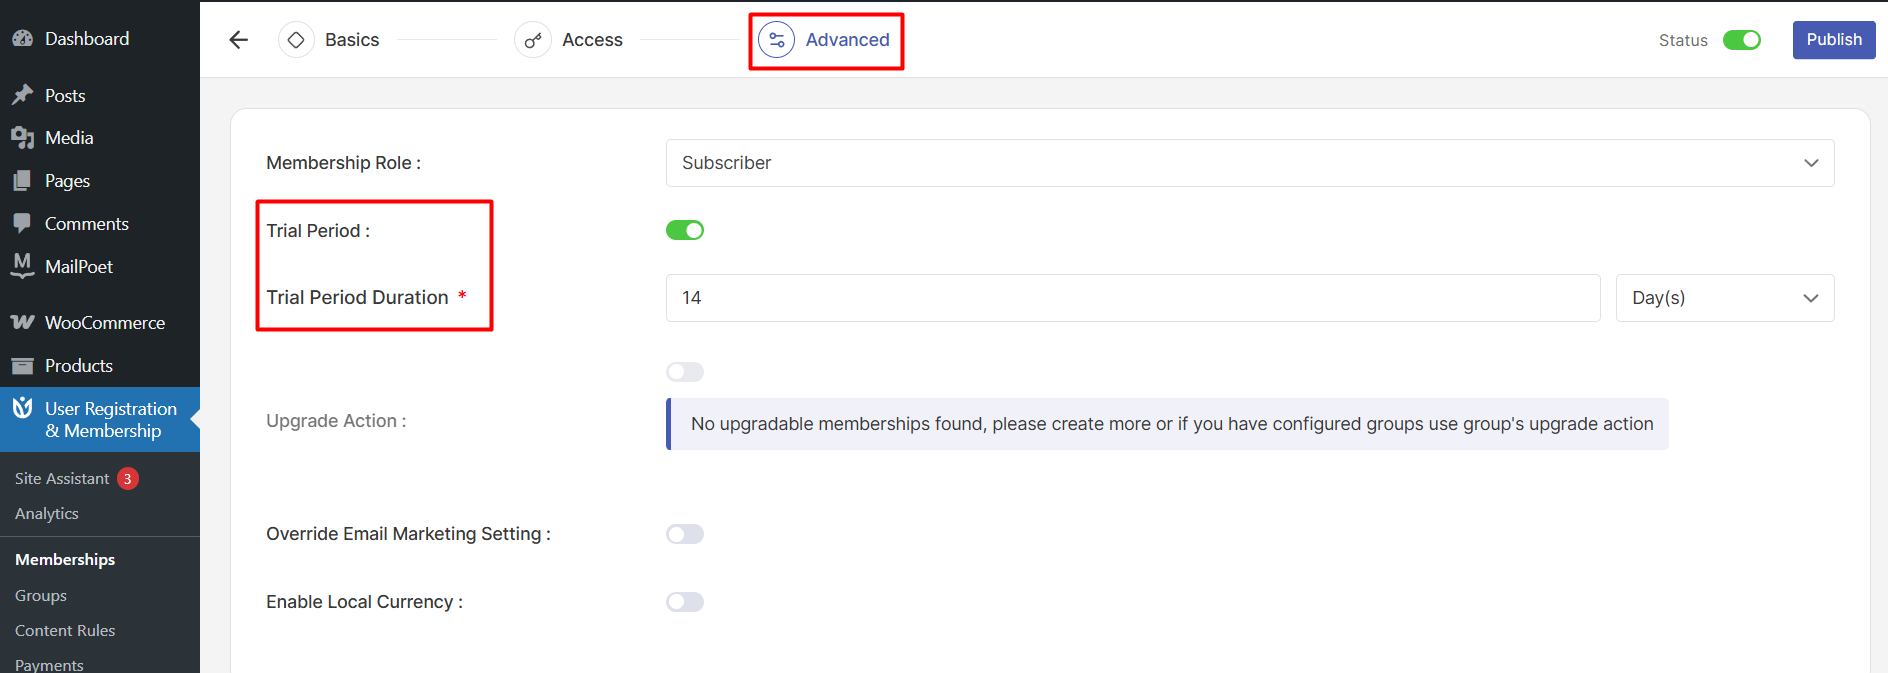
During the trial period, members have full access to the membership benefits. Once the trial ends, they will be automatically charged according to your billing cycle.
Then, click on Publish. We'll have to get back once, we setup the payment options.
Configuring Payment Gateways
Before enabling payment gateways on your membership plan, you need to configure them in the global settings. Go to User Registration & Membership > Settings > Payments.
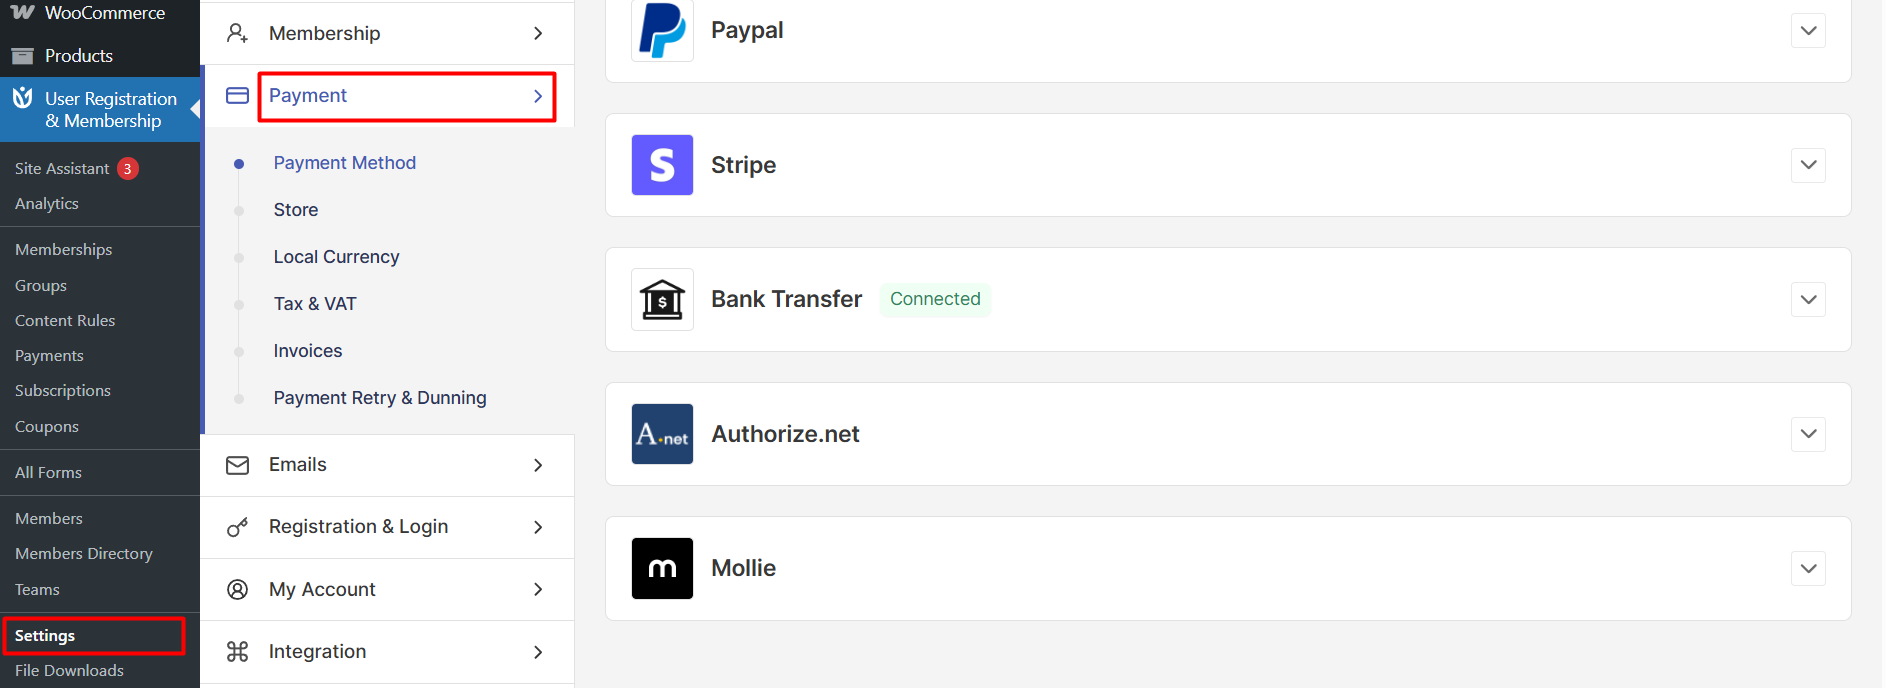
Setting Up Stripe
Click the Stripe dropdown menu. Enter your Publishable Key and Secret Key if you want to test payments first. Toggle Enable Test Mode to on.
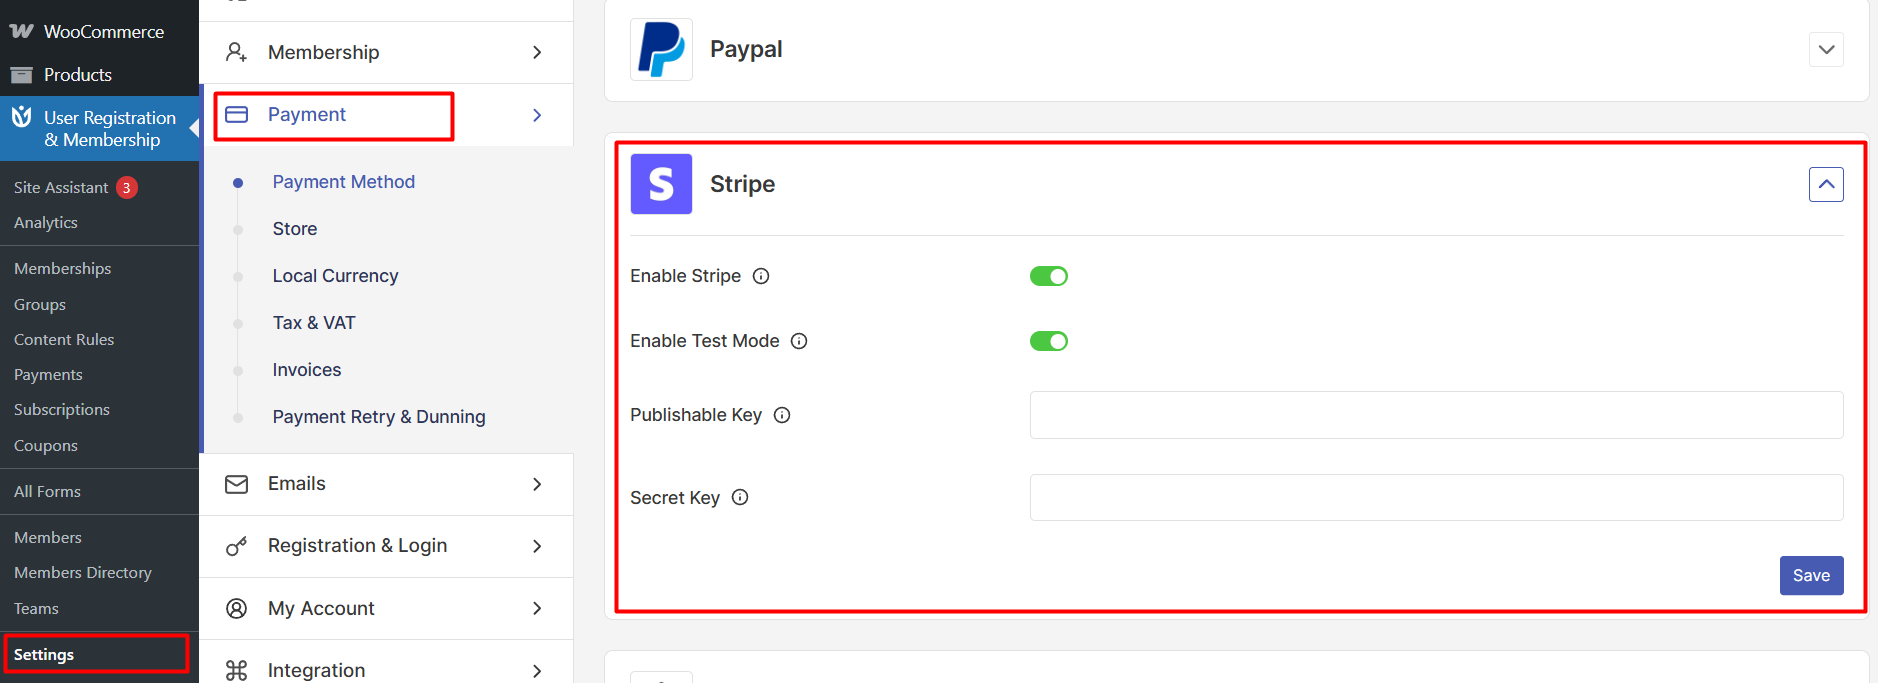
When you are ready to accept real payments, enter your Live Publishable Key and Live Secret Key, then toggle Enable Test Mode to off.
For Stripe subscriptions to work properly, you must set up webhooks. Log into your Stripe Dashboard, search for Developers, and click Webhooks. Click Add Destination, select the invoice events, and enter your webhook URL in this format: yoursite.com/wp-json/user-registration/stripe-webhook. Click Add Endpoint to save.
Setting Up PayPal
Click the PayPal dropdown menu. Select Mode as either Sandbox for testing or Production for live payments.
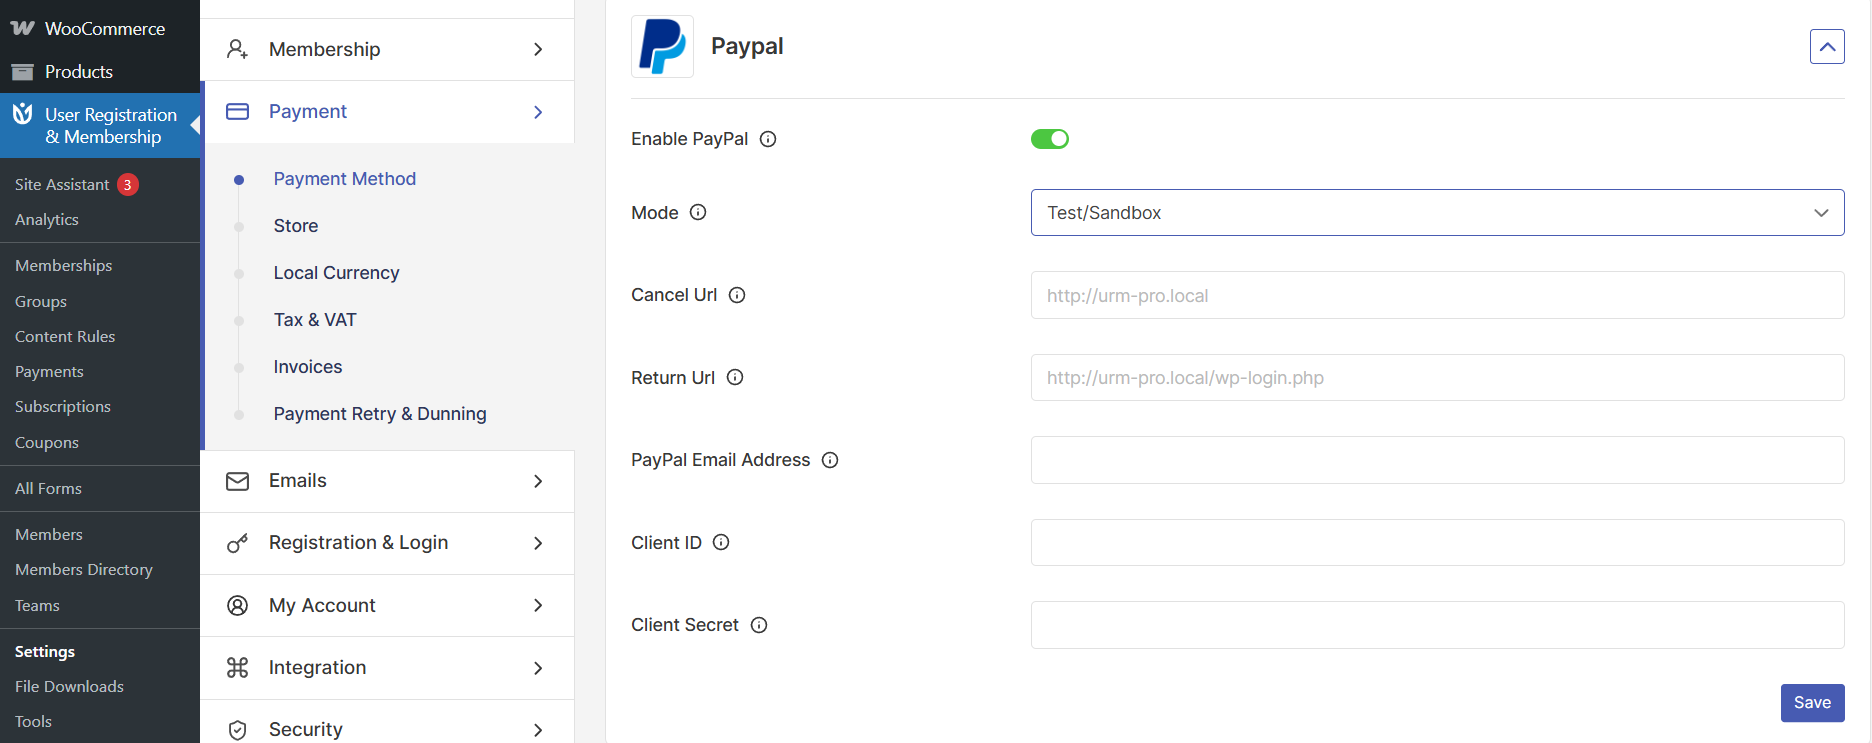
Enter your PayPal Email address that will receive payments. Add a Cancel URL where users are redirected if they cancel payment, and a Return URL where they go after successful payment.
Enter your Client ID and Client Secret from your PayPal Developer Dashboard. Click Save Changes.
Enabling Payment Gateways on Your Membership
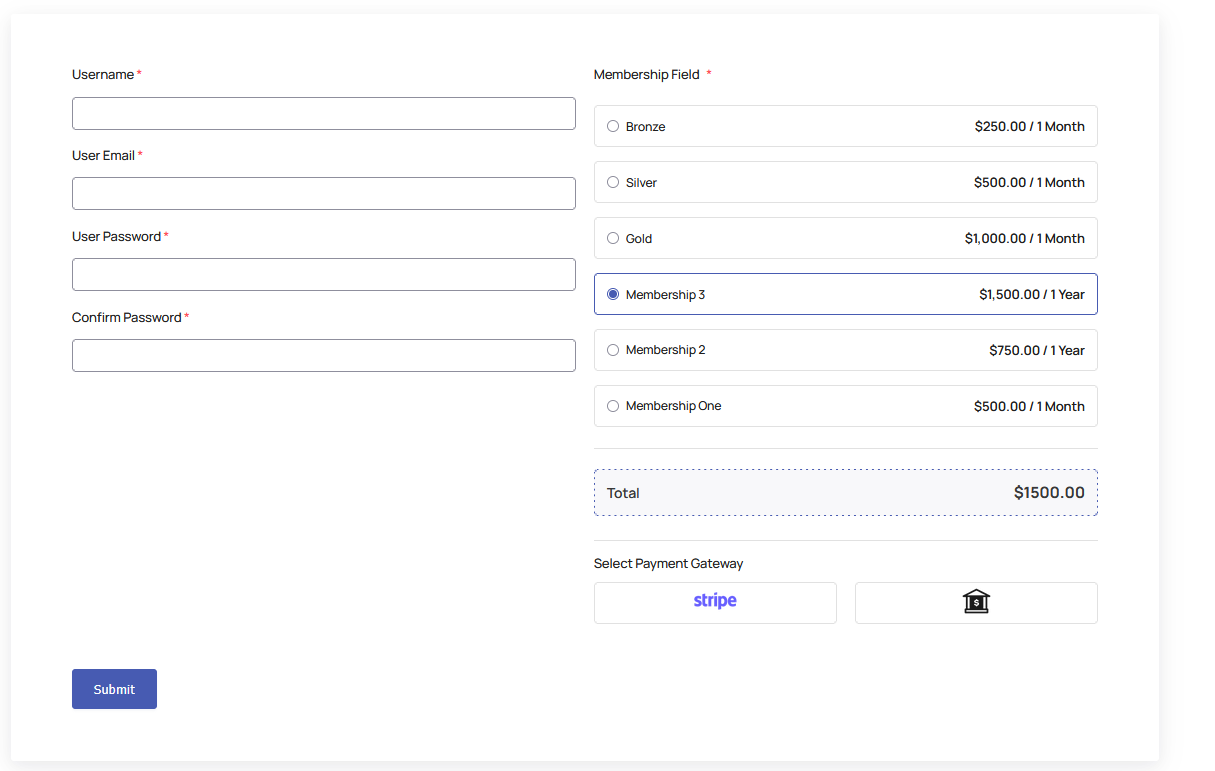
After you setup your payment gateways, users can choose either of these (plus more) two methods during the membership purchase/registration.
Setting Up Membership Upgrades
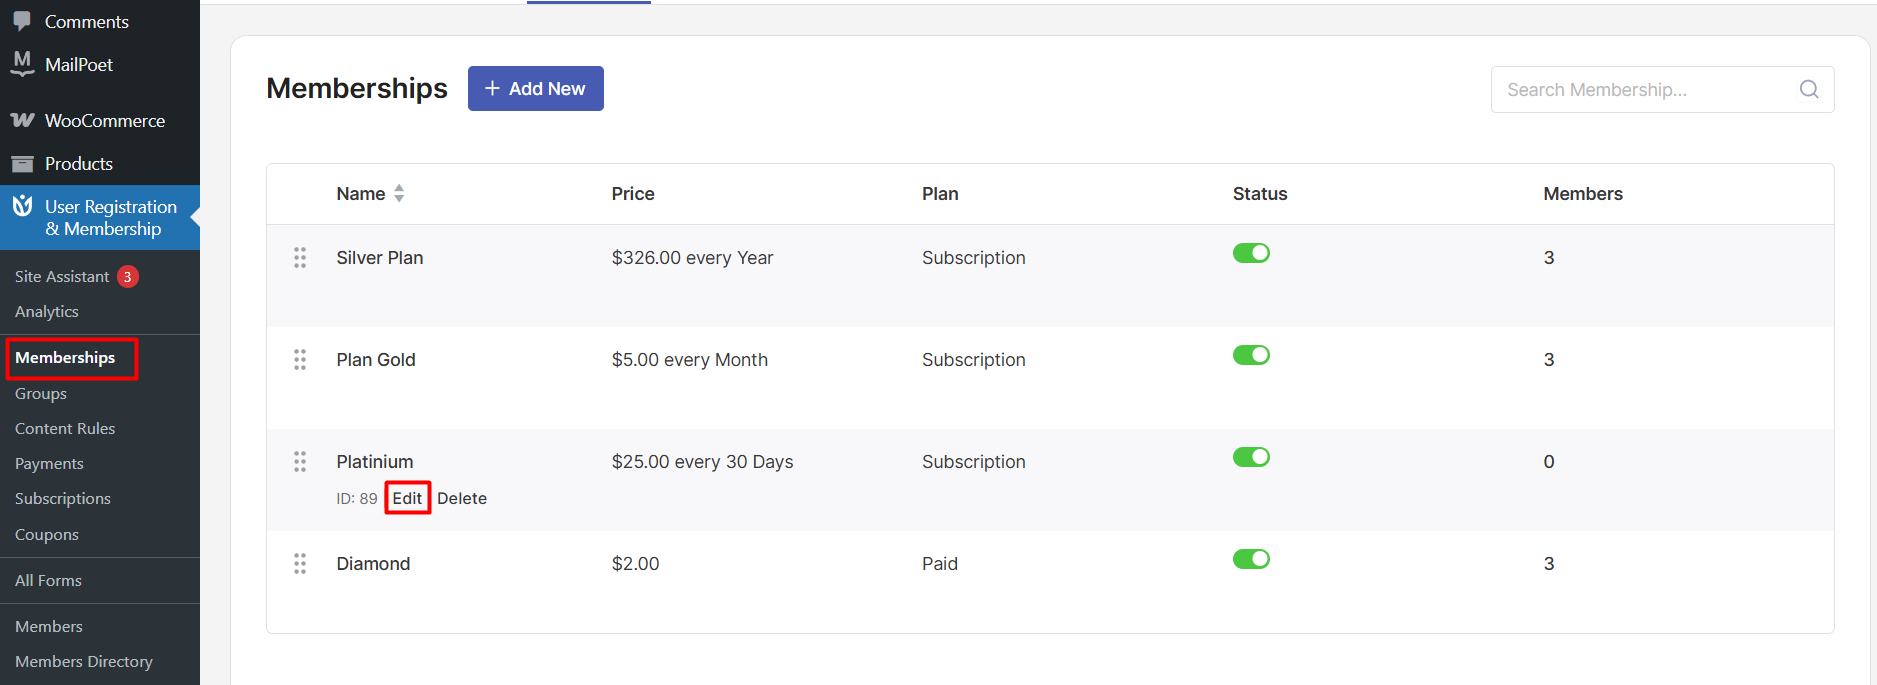
Let's go back to Memberships and click on Edit for the membership you just created.
If you want members to upgrade from this plan to a higher tier, toggle on the Upgrade Action option in the Advanced tab.
Click in the Upgrade Path field and select which membership plans this plan can upgrade to. You can select multiple upgrade options.
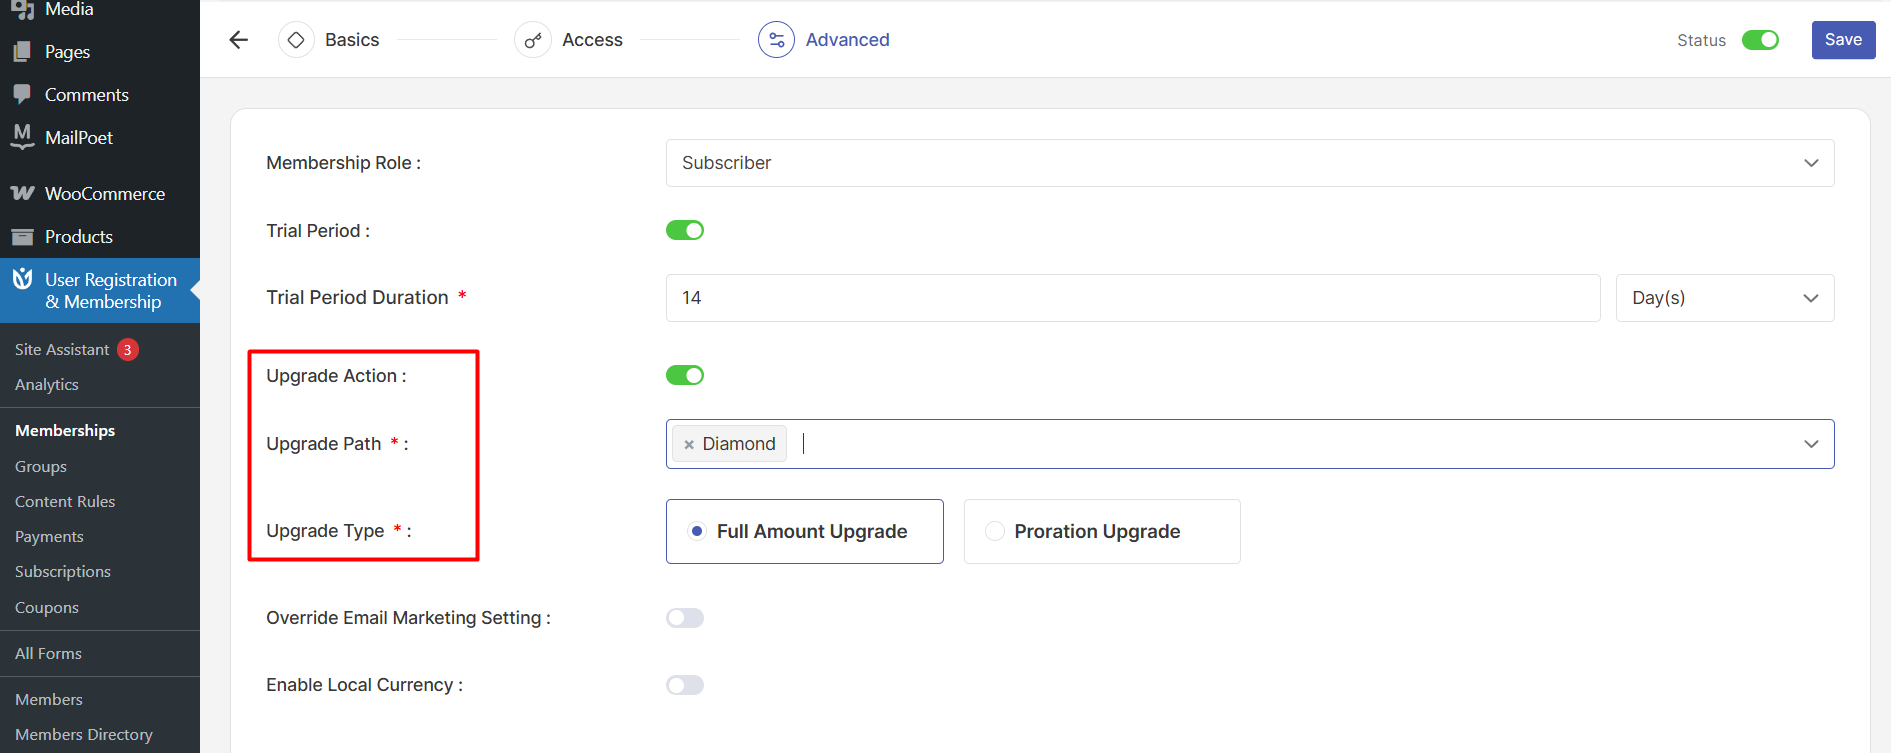
Choose the upgrade pricing model. Full Amount Upgrade charges the complete price of the new plan. Proration Upgrade calculates the difference based on remaining subscription time, so members only pay for the unused portion.
Saving Your Membership Plan
Once you have configured all the settings, click the Save/Publish button in the top-right corner to save your subscription plan.
Your subscription membership plan is now active and ready to accept recurring payments from members.
Adding the Membership to a Registration Form
To allow users to sign up for your subscription plan, you need to add it to a registration form. Go to User Registration & Membership > All Forms > Registration Forms.
Select an existing form or create a new one. In the form builder, search for Membership Field in the left panel and drag it into your form.
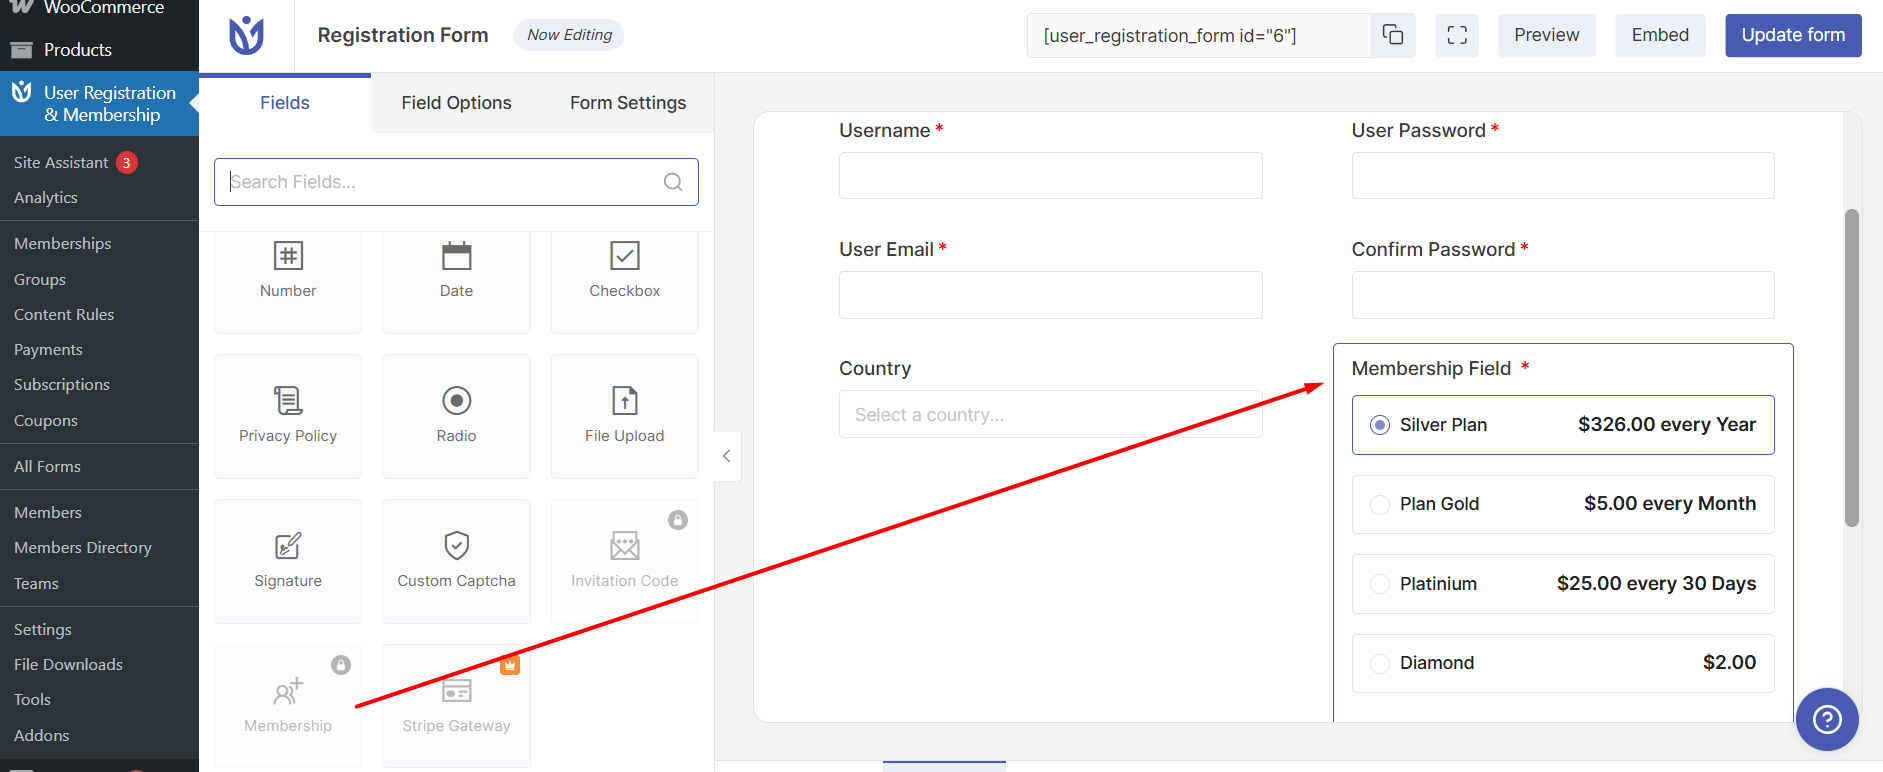
Click on the Membership Field to configure its options.
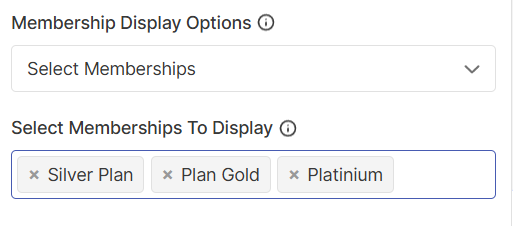
Under Membership Display Options, choose Show all active memberships to display all your plans, or Select a group if you have organized memberships into groups.
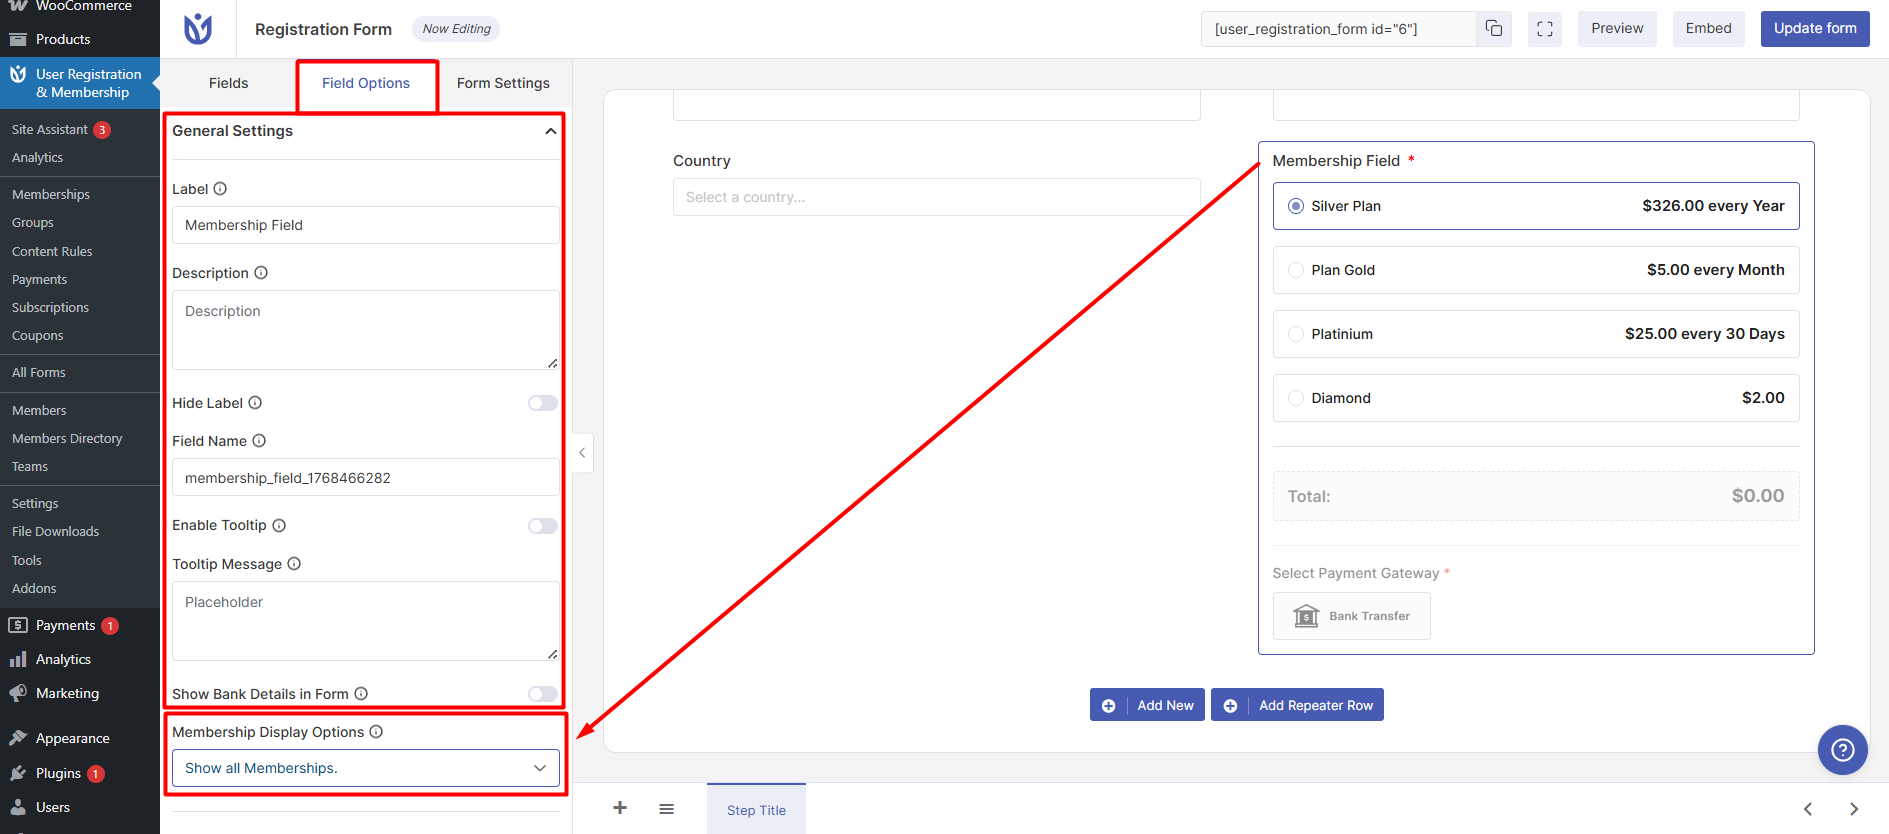
Click Update Form to save your changes. Users who fill out this form will now see your subscription plan as an option during registration.
Setting Up Registration and Other Pages
By default User Registration and Membership adds necessary new pages on your website like My Account page, signup page, Pricing page etc. But, you can manually assign these pages as well.
Go to User Registration & Membership > Settings > General > Pages to configure where users go during and after registration.
Assign the Pages from the dropdown, if you prefer. This is where members are redirected after successfully completing payment and registration.
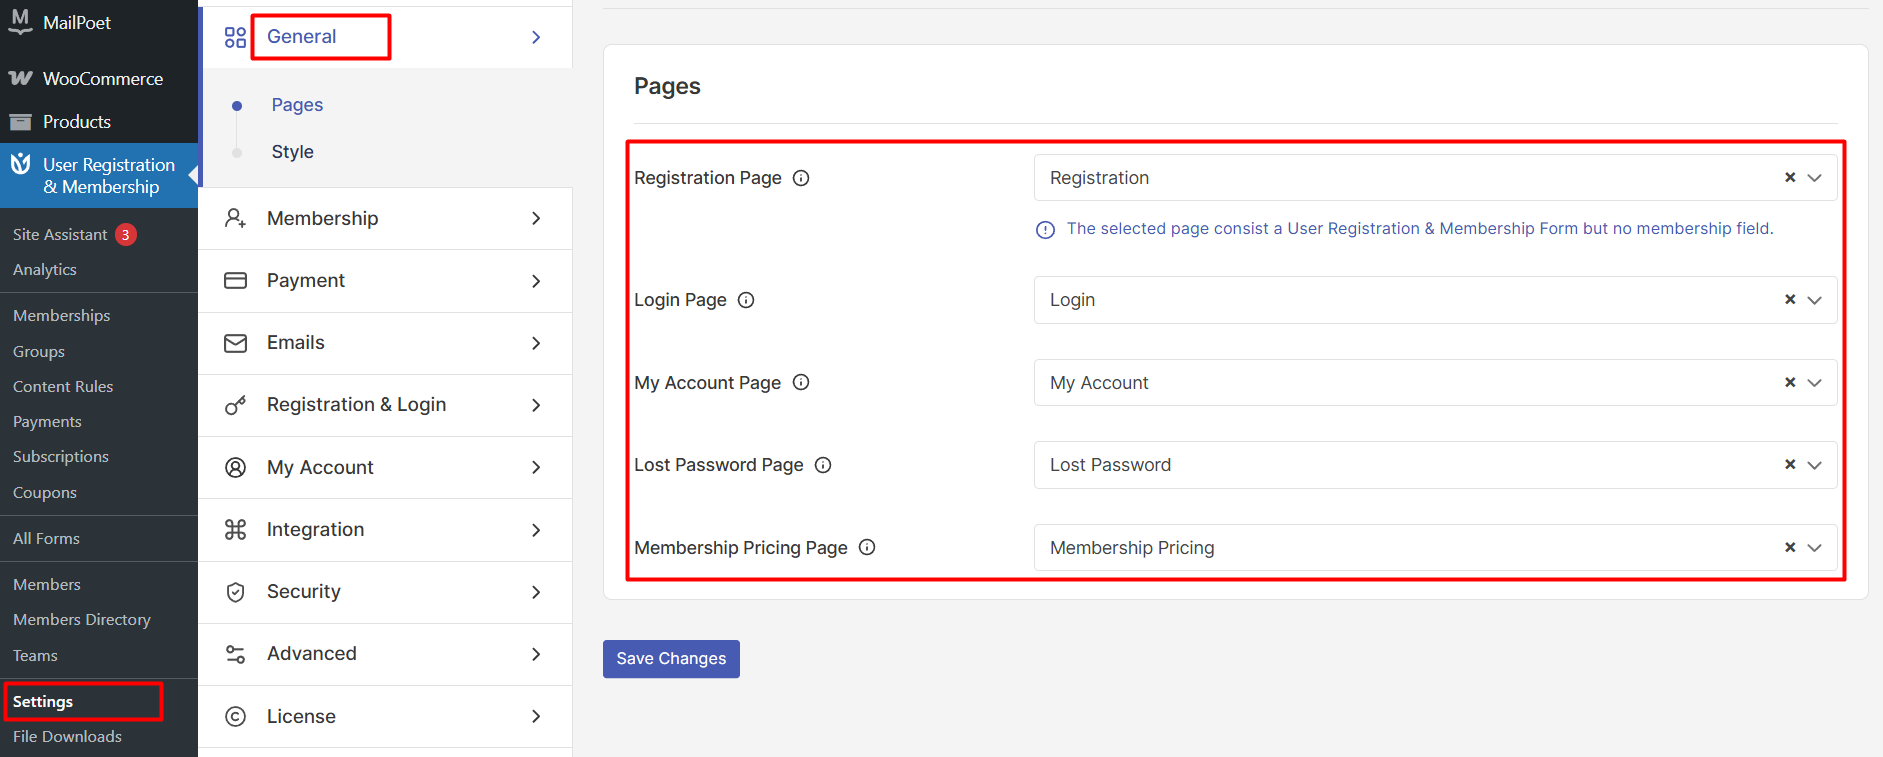
Click Save Changes. Your subscription membership system is now fully configured.
Frequently Asked Questions
Can I offer both monthly and yearly subscription options?
Yes. Create separate membership plans for each billing cycle. For example, create one plan with a monthly billing cycle and another with a yearly billing cycle. Both can provide access to the same content but with different pricing and renewal schedules.
What happens when a subscription payment fails?
User Registration & Membership includes smart payment recovery that automatically retries failed payments and sends reminder emails to members. You can configure retry attempts and email notifications in the payment settings.
Can members cancel their subscriptions?
Yes. Members can cancel their subscriptions from the Payment Details tab in their account dashboard. They can choose to cancel at the end of the current billing cycle or cancel immediately. If they cancel at the end of the billing cycle, they can reactivate the subscription before it expires.
How do I restrict content to subscription members only?
Go to the Access tab when editing your membership plan. Click the Content dropdown and select the pages, posts, or content types you want to restrict. Only members with an active subscription to this plan will be able to access the restricted content.
That's it! Now you know how to create a recurring subscription membership plan with User Registration & Membership Pro. Next, would you like to learn how to restrict content to your subscription members? Be sure to check out our guide on content restriction for all the details.