
Edit and Configure Login Forms Using the Builder
Customize login forms with drag-and-drop functionality to match your brand, configure fields, and enhance user experience in WordPress.
Last updated on Jul 14, 2026
Would you like to customize your login form to match your brand and improve user experience? User Registration & Membership allows you to fully customize login forms using a visual builder with drag-and-drop functionality. This tutorial will show you how to edit login form fields, configure settings, and customize the appearance of your login forms.
Before getting started, make sure you've installed and activated the User Registration & Membership plugin on your WordPress site.
Accessing the Login Form Builder
To begin customizing your login form, go to User Registration & Membership → All Forms → Login Forms from your WordPress dashboard. This will open the Login Form Builder interface where you can configure all aspects of your login form.
Here, you'll see the form preview on the right side and configuration options on the left side organized into two main tabs: Field Options and Form Settings.
Configuring Login Form Fields
The Field Options tab allows you to customize individual fields in your login form. Click on any field in the form preview to edit its settings.
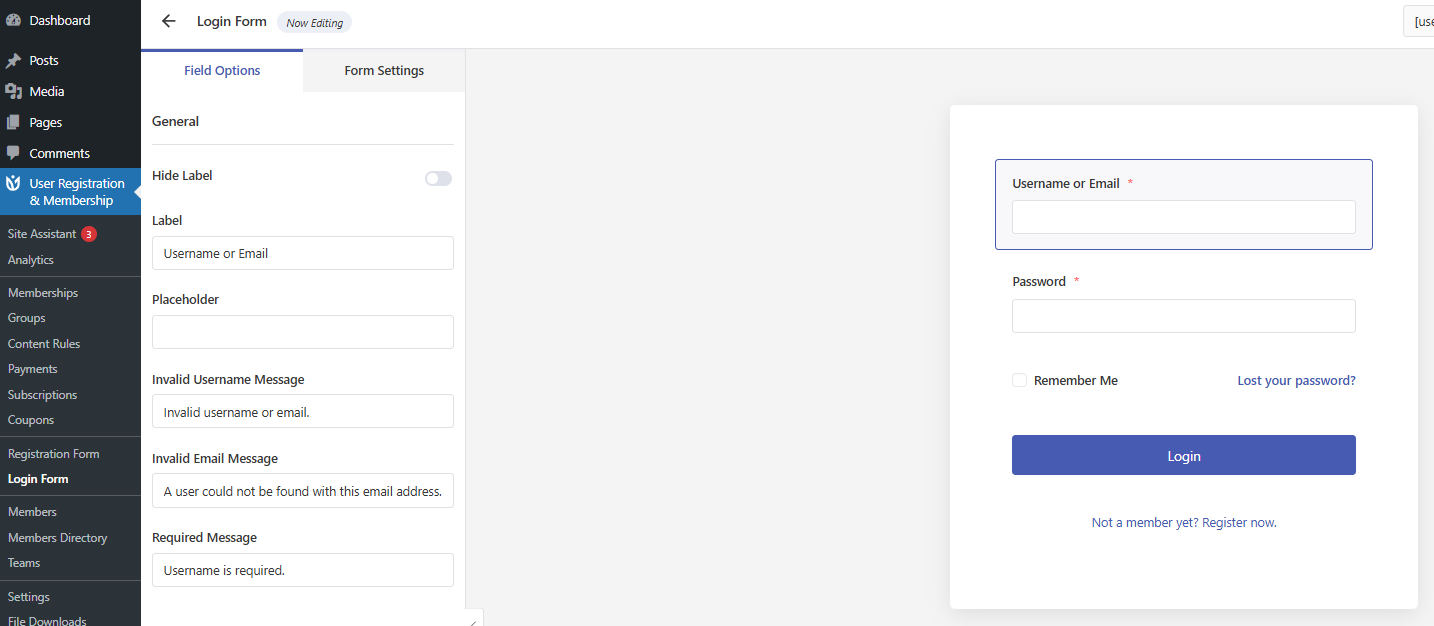
Username or Email Field
Click on the Username or Email field to configure these options:
Hide Label: Toggle to show or hide the field label
Label: Change the text displayed above the field
Placeholder: Set the example text shown inside the empty field
Invalid Username Message: Set the message shown when an invalid username is entered
Invalid Email Message: Set the message shown when an invalid email is entered
Required Message: Customize the error message when the field is left empty
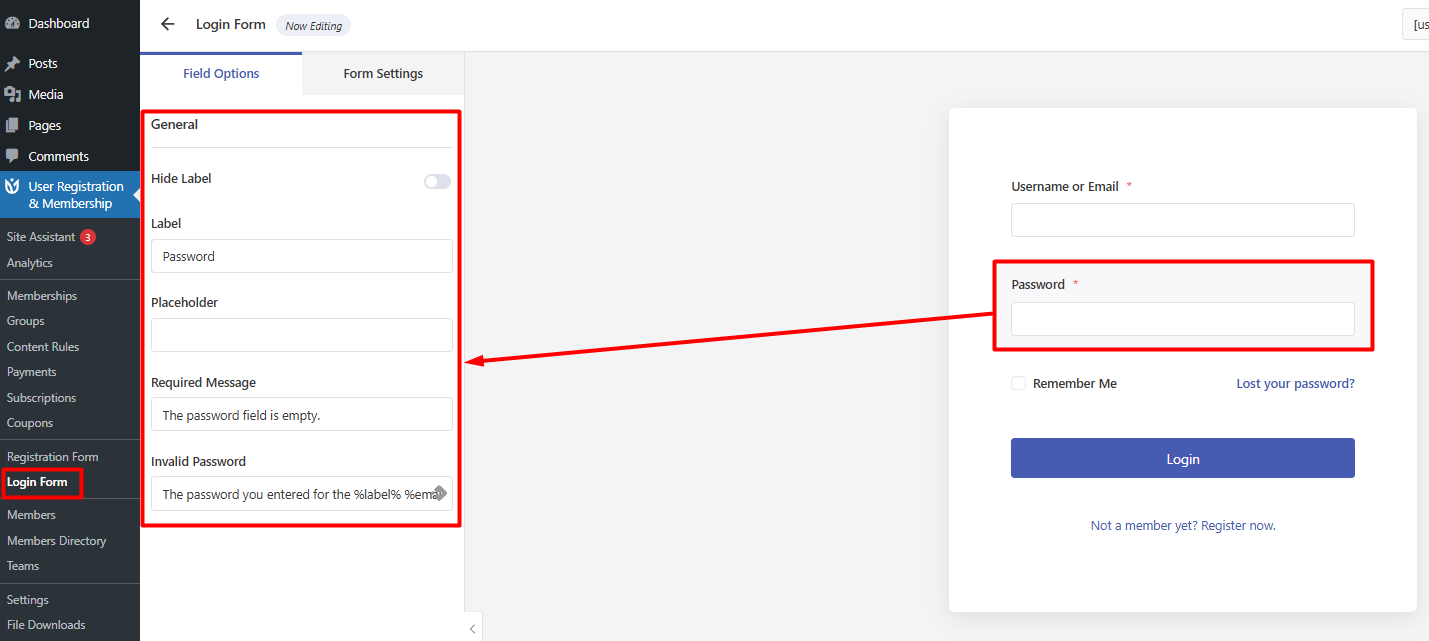
Password Field
Click on the Password field to configure these options:
Label: Change the text displayed above the field
Placeholder: Set the example text shown inside the empty field
Required Message: Customize the error message when the field is left empty
Invalid Password Message: Set the message shown when an incorrect password is entered
Hide Label: Toggle to show or hide the field label
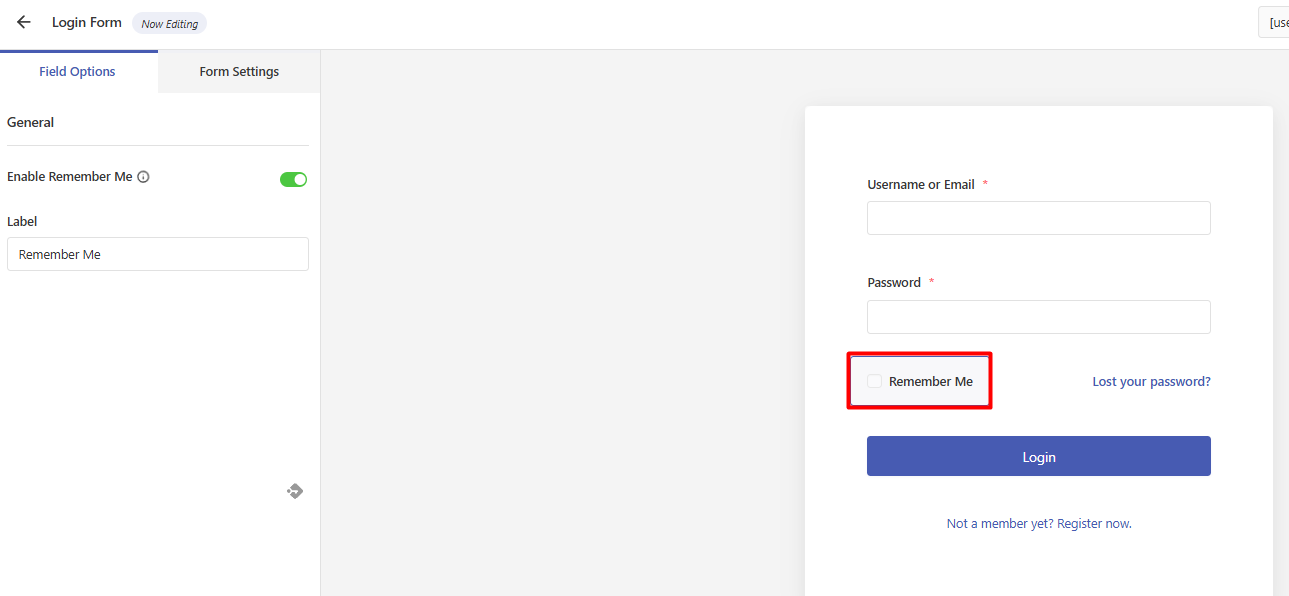
Remember Me Checkbox
Enable the Remember Me checkbox to allow users to stay logged in across sessions. You can customize the label text that appears next to the checkbox.
Password Reset Link
Enable the Password Reset Link to add a "Lost Your Password?" link to your login form. When enabled:
Select the Lost Password Page from the dropdown menu
Customize the link text if desired
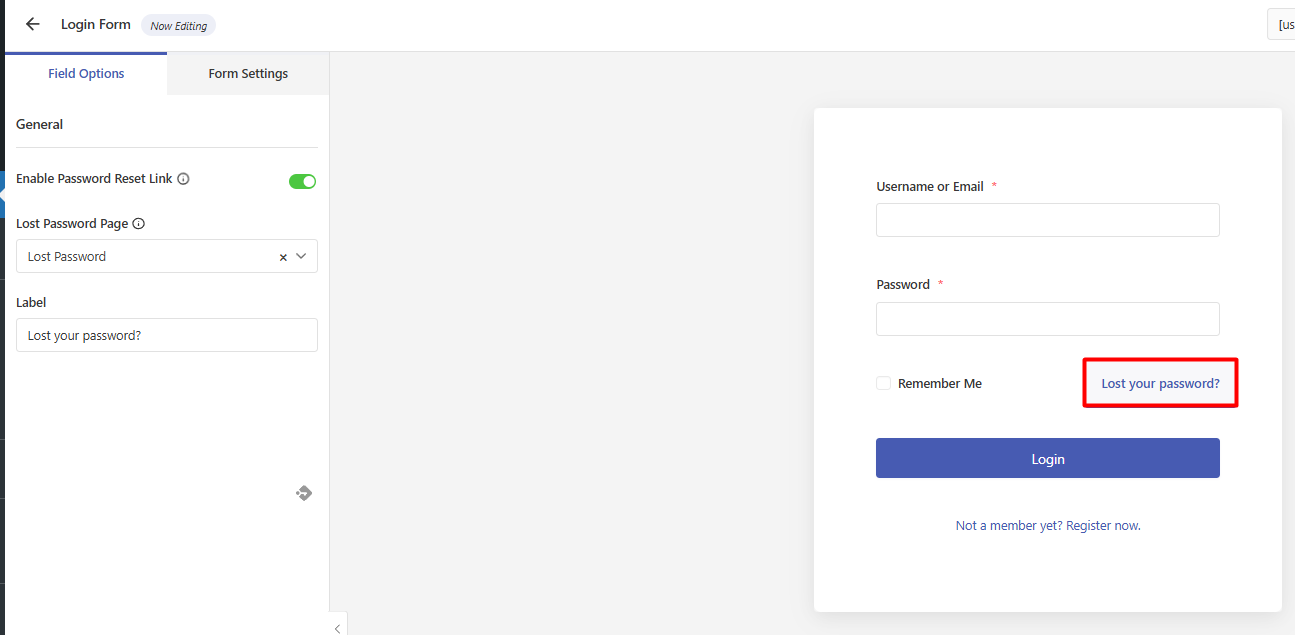
The lost password page must contain the [user_registration_lost_password] shortcode to function properly.Login Button
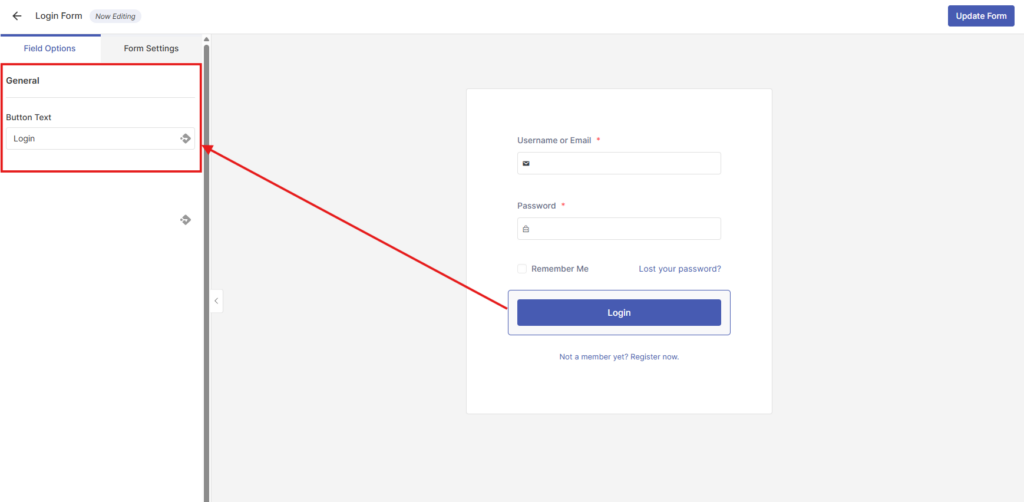
Customize the text displayed on the login button. The default text is "Login" but you can change it to anything you prefer.
Registration Link
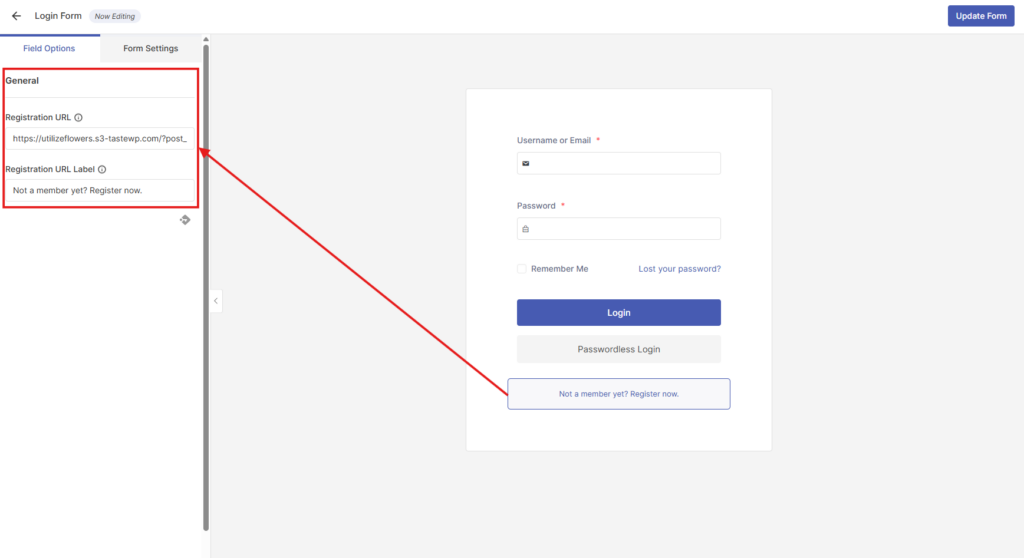
Add a link to your registration page for new users:
Enter the slug of your registration page in the Registration URL field
Customize the Registration URL label text (e.g., "Not a member yet? Register now?")
Configuring Form Settings
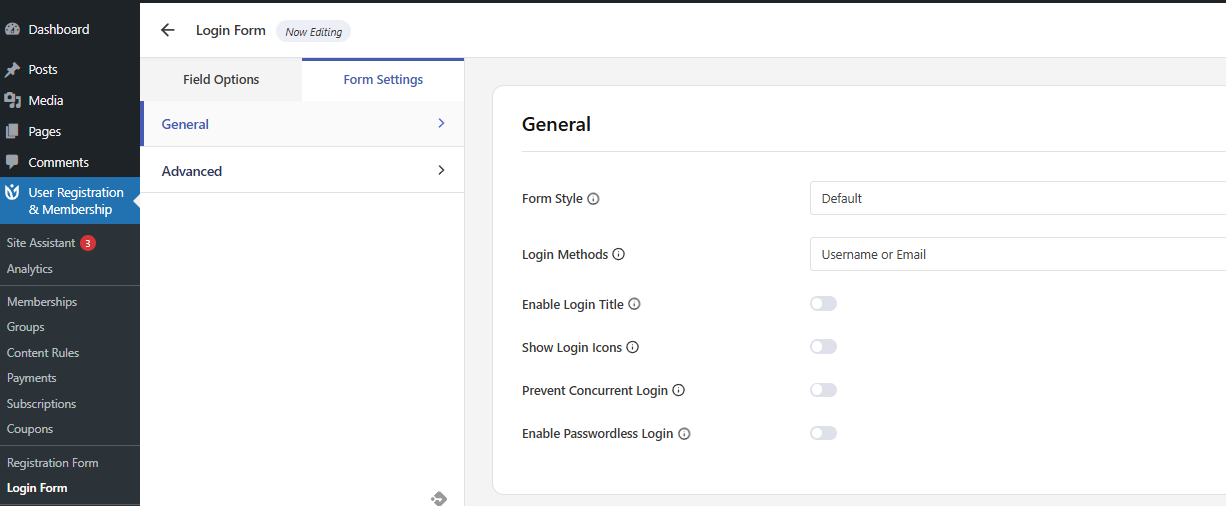
Switch to the Form Settings tab to access global settings for your login form. This tab is organized into two sections: General and Advanced.
General Settings
Form Style
Choose from five visual templates to change the overall appearance of your login form:
Default: Standard form styling
Bordered: Form with visible borders
Flat: Minimalist flat design
Rounded: Form with rounded corners
Rounded Edge: Form with rounded edge styling
Login Methods
Select how users can authenticate:
Username or Email: Users can log in with either their username or email address
Username Only: Users must log in with their username
Email Only: Users must log in with their email address
When changing login methods, remember to update the field label and placeholder text to match your selection.
Optional Features
Toggle these features on or off based on your needs:
Enable Login Title: Shows a welcome message at the top of the login form
Show Login Icons: Adds icons to form fields for visual identification (Pro feature)
Prevent Concurrent Login: Restricts simultaneous logins from the same IP address to prevent account sharing
Enable Redirect Back to Previous Page: Returns users to the page they were viewing before login (Pro feature)
Enable Passwordless Login: Adds a passwordless login button that sends a login link via email (Pro feature)
Set Passwordless Login as Default: Makes passwordless login the default login method (Pro feature)
Advanced Settings
Ajax Login
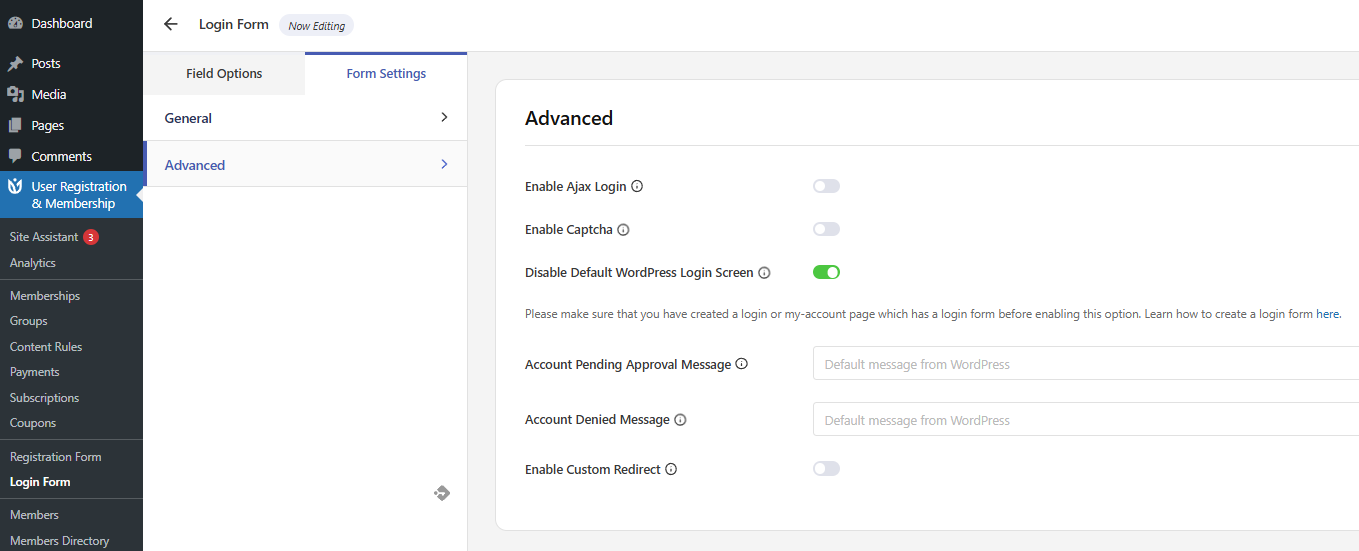
Enable Ajax Login to show error messages inline without reloading the page. This provides a smoother user experience by submitting the form asynchronously.
Hide Field Labels
Toggle this option to hide form field labels and show only placeholders. This creates a cleaner, more minimalist form design.
Captcha
Enable Captcha to add Google reCaptcha security to your login form. This helps prevent automated bot login attempts.
WordPress Login Screen Settings
Configure how your custom login form interacts with the default WordPress login:
Disable Default WordPress Login Screen: When enabled, replaces the default WordPress login at /wp-login.php with your custom login form
Redirect Default WordPress Login URL: Select which page users should be redirected to when they visit the default WordPress login URL
Custom Messages
Customize the messages shown to users in specific situations:
Account Pending Approval Message: Message displayed when a user's account is awaiting admin approval
Account Denied Message: Message displayed when a user's account has been denied by an administrator
The Account Pending Approval Message is NOT shown for accounts pending payment approval.
Previewing and Saving Changes
All changes you make in the Login Form Builder are reflected in real-time in the form preview on the right side of the screen. This allows you to see exactly how your login form will appear to users.
Once you're satisfied with your customizations, click the Update button at the top of the page to save all your changes.