
Adding Login/Lougout, Change Passwords Links in Navigation Menu
Learn how to add login, logout, and password change links to your WordPress navigation menu using the User Registration & Membership plugin's endpoint features.
Last updated on Jul 15, 2026
Would you like to add login, logout, and change password links to your WordPress site's navigation menu? User Registration & Membership makes it easy to add these essential user account links directly to your site's menu, giving visitors quick access to account functions. This tutorial will show you how to add these links using three different methods.
Before getting started, make sure you've installed and activated the User Registration & Membership plugin on your WordPress site.
Understanding User Registration Endpoints
User Registration & Membership uses endpoints to create URLs for different account functions. These endpoints are configured in your plugin settings and can be added to your navigation menu in several ways.
The most common endpoints include:
Login — Takes users to the login page
Logout — Logs users out and redirects them
Change Password — Opens the password change page
My Account — Takes users to their account dashboard
Method 1: Using the User Registration Menus (Quickest Method)
This is the fastest way to add login, logout, and change password links to your menu.
Adding Endpoint Links
From your WordPress dashboard, go to Appearance → Menus. Select the menu where you want to add the links (typically your Primary Menu or Header menu).
In the left sidebar, look for the URM Menus section. If you don't see it, click Screen Options at the top of the page and make sure URM Menus is checked.
Check the boxes next to the endpoints you want to add:
Profile Details
Change Password (for change password functionality)
Logout
Any other endpoints you need
Click Add to Menu. The selected endpoints will appear in your menu structure on the right.
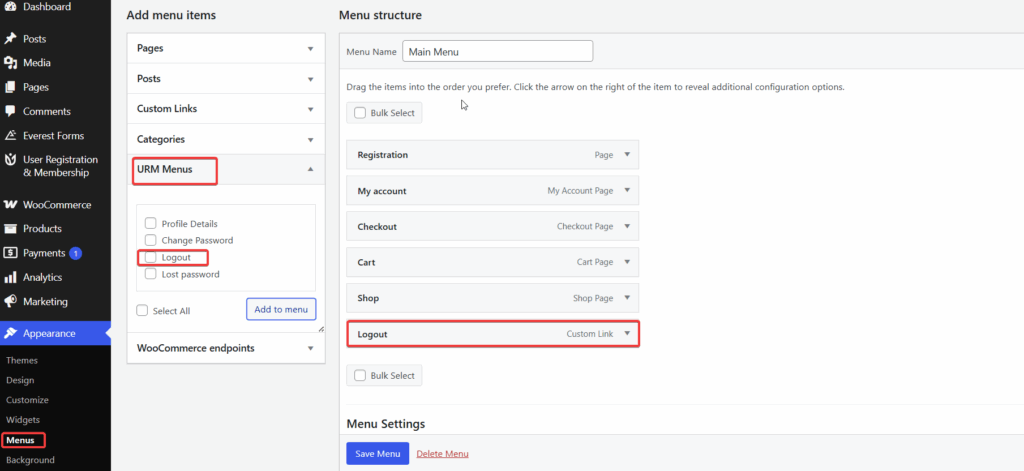
Arrange the menu items by dragging them to your preferred position. Click Save Menu to apply your changes.
Method 2: Using the Dynamic Login/Logout Block (Block Themes)
If you're using a block theme (like Twenty Twenty-Four), you can add a dynamic login/logout link that automatically changes based on whether the user is logged in.
This method requires User Registration & Membership plugin version 4.2.3 or above.
Adding the Dynamic Link
Navigate to Appearance → Editor in your WordPress dashboard.
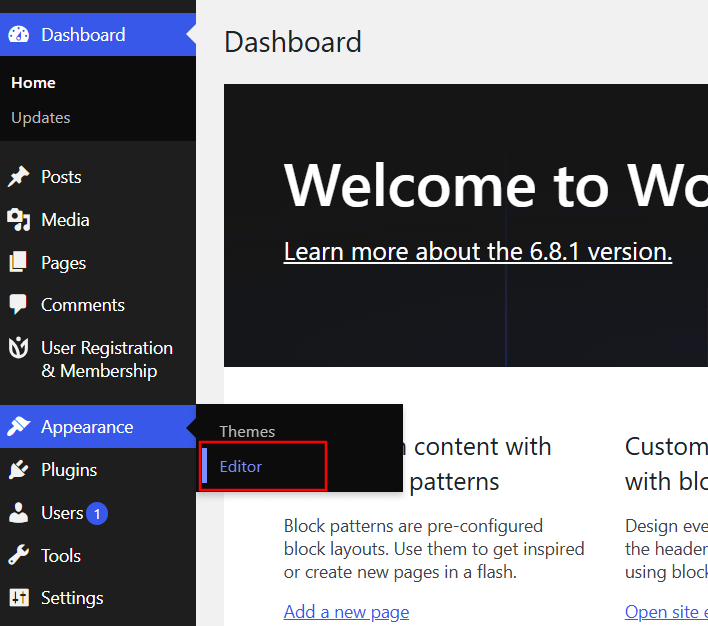
Click on Navigation from the template editor to view your site's navigation menus.
Select the navigation menu you want to modify.
Click on the navigation bar in the editor (make sure you click the navigation bar itself, not other sections).
Click the [+] (Add Block) button that appears.
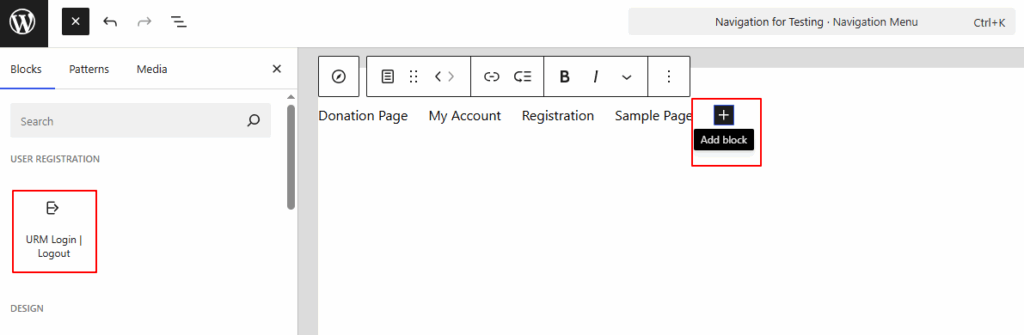
Search for "URM login logout" in the block inserter.
Select or drag and drop the URM Login | Logout block into your navigation.
Configuring the Block
In the right sidebar, you'll see customization options:
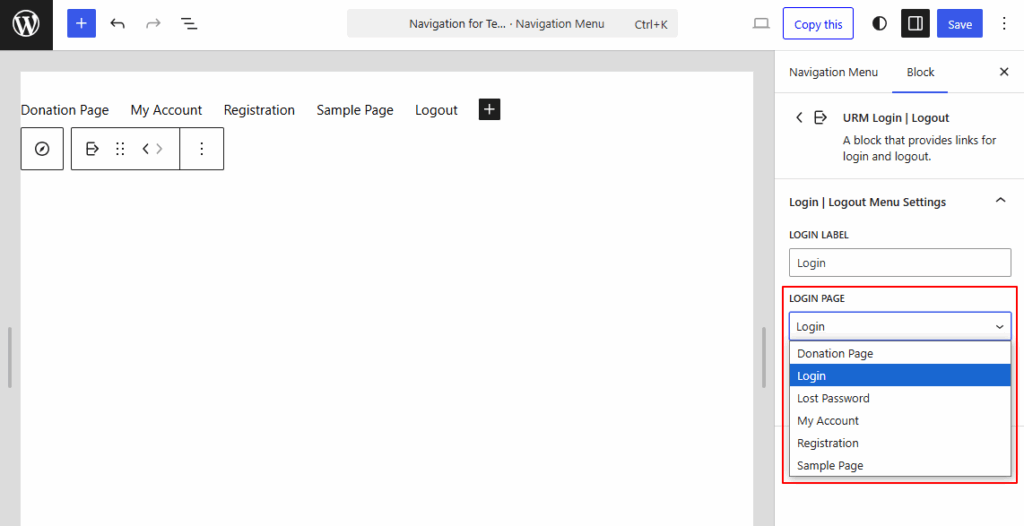
Login Label: Enter the text you want to display for the login link (e.g., "Login", "Sign In", "Member Login").
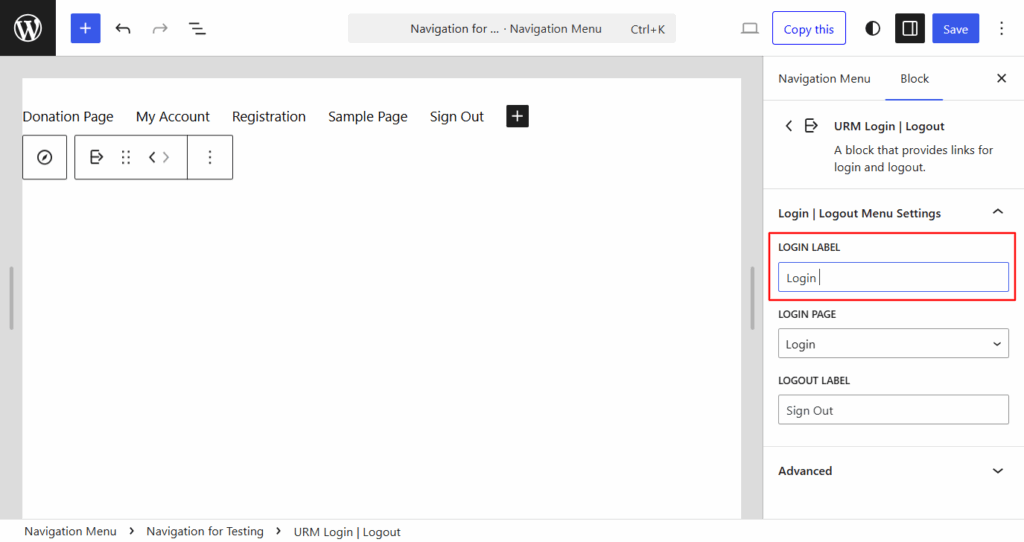
Login Page: Select the page users should be redirected to when they click the login link. We recommend selecting your designated login or registration page.
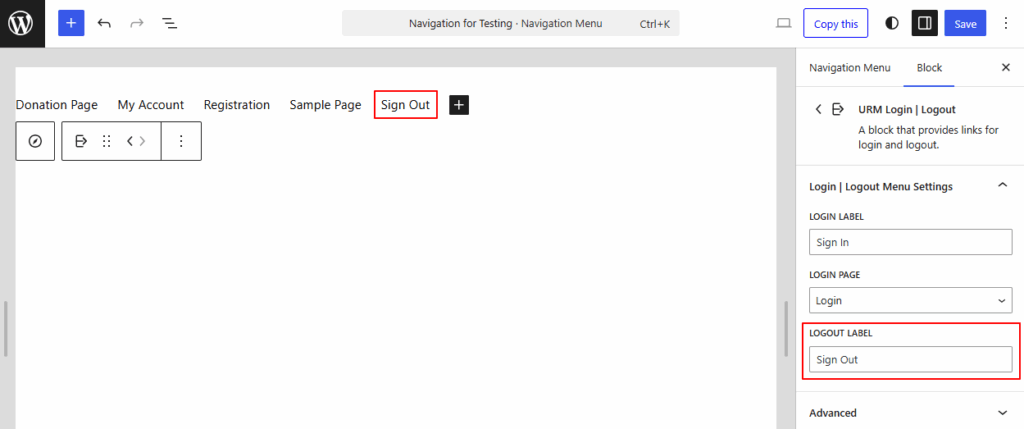
Logout Label: Enter the text you want to display for the logout link (e.g., "Logout", "Sign Out", "Exit").
Additional CSS Class (optional): Add custom CSS classes if you want to apply specific styling to the link.
The block automatically adjusts what visitors see:
Logged-out users see the login link
Logged-in users see the logout link
Administrators see the logout option
Method 3: Adding Custom Links Manually
In your WordPress backend navigate to User Registration > Settings > General > My Account Endpoints and you will see what the URL of the edit-address should be, it is often set to “/my-account/user-logout/”
Once you find out what the URL is navigate to Appearance > Menus > and select Menu (Primary Menu (header))
Add a new link to your menu using the “Links” menu creation option, see screenshot below to see how we’ve added a custom log out link to the menu.
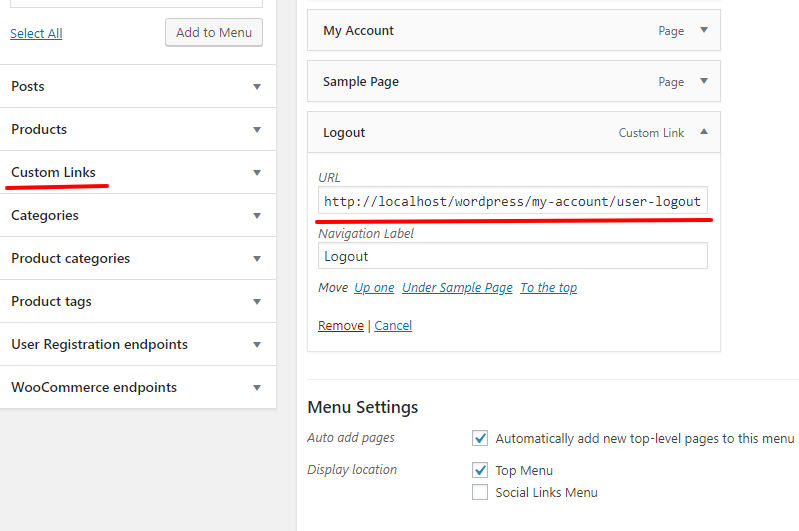
You can similarly add all provided endpoints such as (Lost Password, Change Password etc.)and endpoints you created.
Testing Your Menu Links
After adding your links, test them to make sure they work correctly:
Open your site in an incognito or private browsing window
Verify that logged-out users see the login link (if using dynamic method)
Click the login link and verify it takes you to the correct page
Log in with a test account
Verify that logged-in users see the logout link (if using dynamic method)
Click the change password link and verify it opens the password change page
Click the logout link and verify it logs you out successfully
That's it! Now you know how to add login, logout, and change password links to your WordPress navigation menu. Next, would you like to customize the appearance of these links? Be sure to check out our guide on customizing menu styles with CSS.