
Zapier
ProAutomate user registration workflows by connecting forms to 1,500+ apps through Zapier integration without coding.
Last updated on Jul 15, 2026
Would you like to automatically send user registration data to thousands of other apps? User Registration & Membership allows you to connect your registration forms with Zapier, enabling you to automate workflows and sync data with over 1,500 apps without writing any code. This tutorial will show you how to set up and configure the Zapier integration.
Before getting started, make sure you have installed and activated the User Registration & Membership Pro plugin. The Zapier addon is available with Plus or Professional plan licenses. You will also need an active Zapier account.
Activating the Zapier Addon
To begin using Zapier with your registration forms, you first need to activate the Zapier addon.
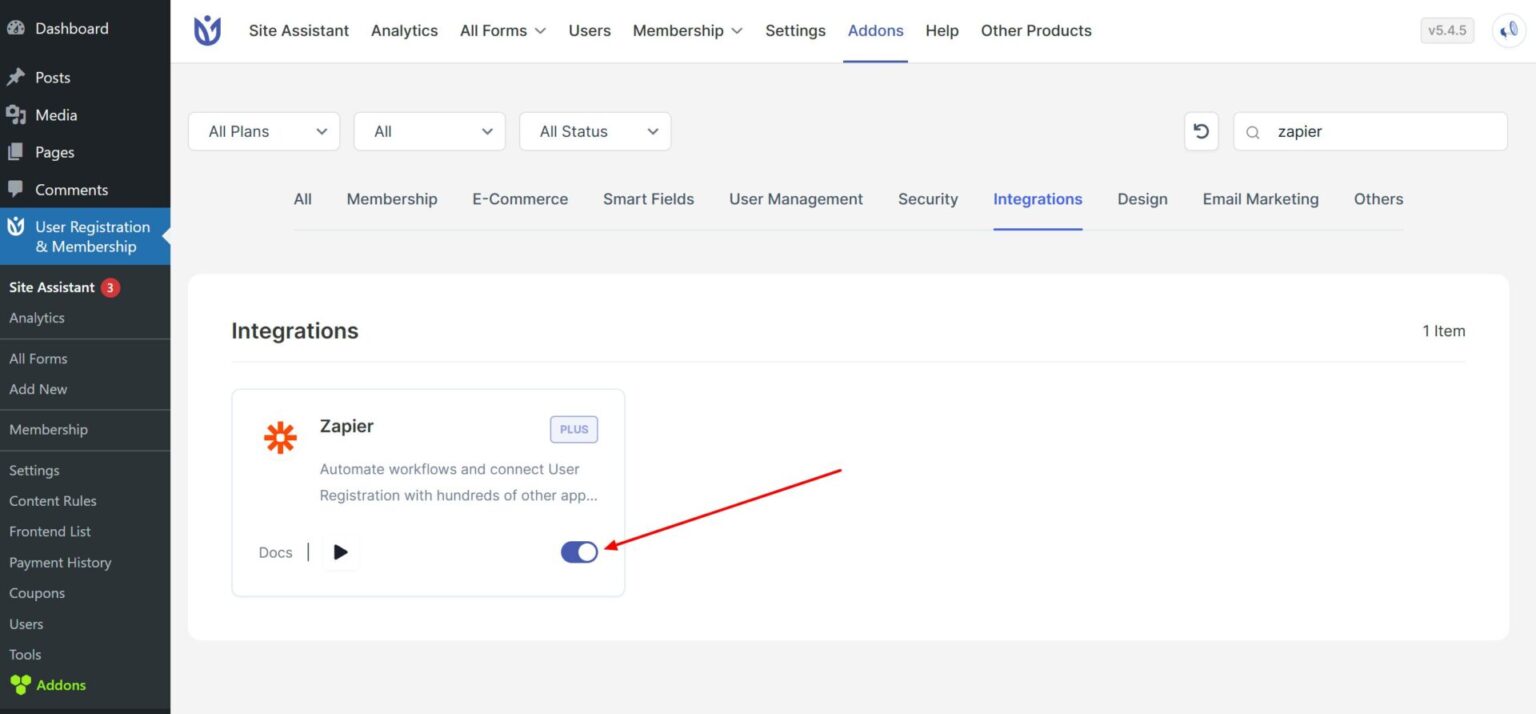
From your WordPress dashboard, go to User Registration & Membership > Addons. Locate the Zapier addon in the list and toggle the switch to Activate. Once activated, the Zapier integration settings will become available in your form settings.
Creating a Zap in Zapier
A Zap is an automated workflow that connects your registration form to another app. To create a Zap, you need to set up a webhook connection between User Registration & Membership and Zapier.
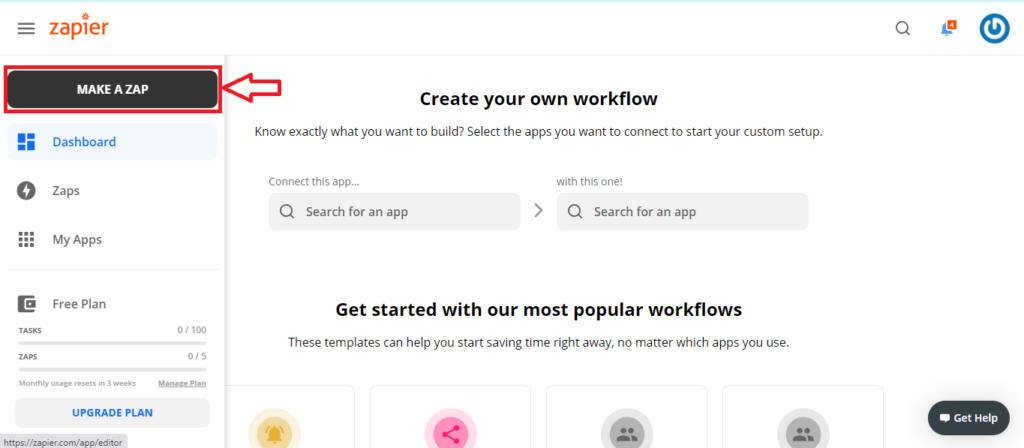
Log into your Zapier account and click the Make A Zap button.
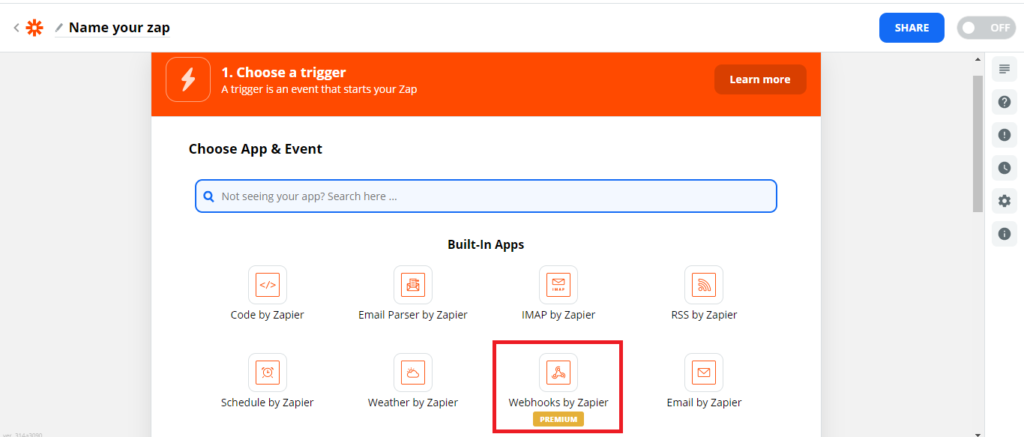
When prompted to choose a trigger app, search for and select Webhooks by Zapier.
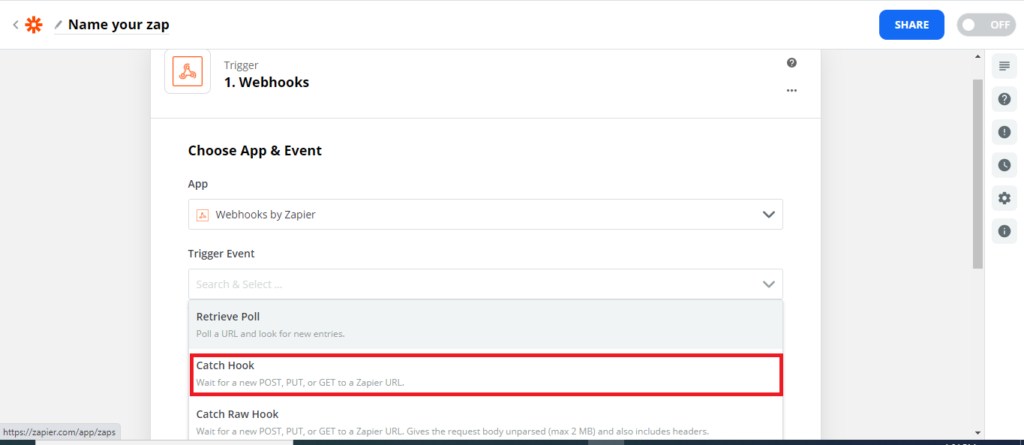
For the Trigger Event, select Catch Hook.
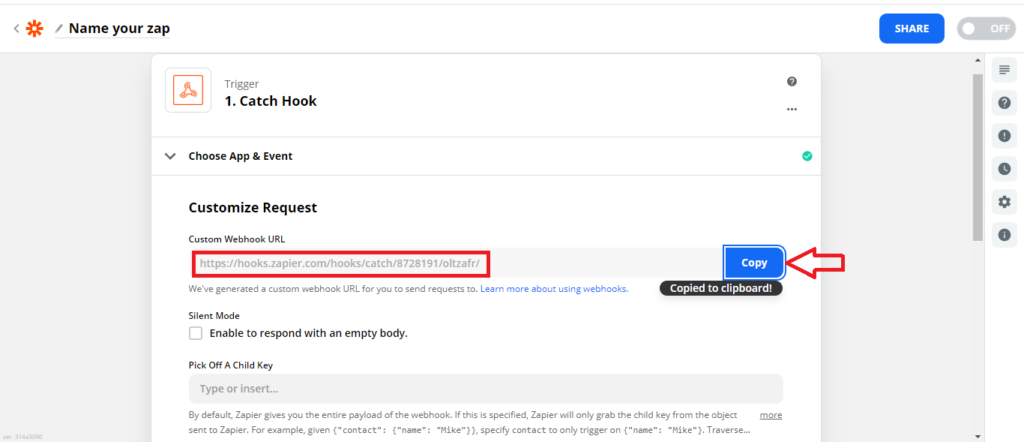
Zapier will generate a custom Webhook URL for you. Copy this URL as you will need it in the next step.
Connecting Your Registration Form to Zapier
Now that you have your webhook URL from Zapier, you can connect it to your registration form.
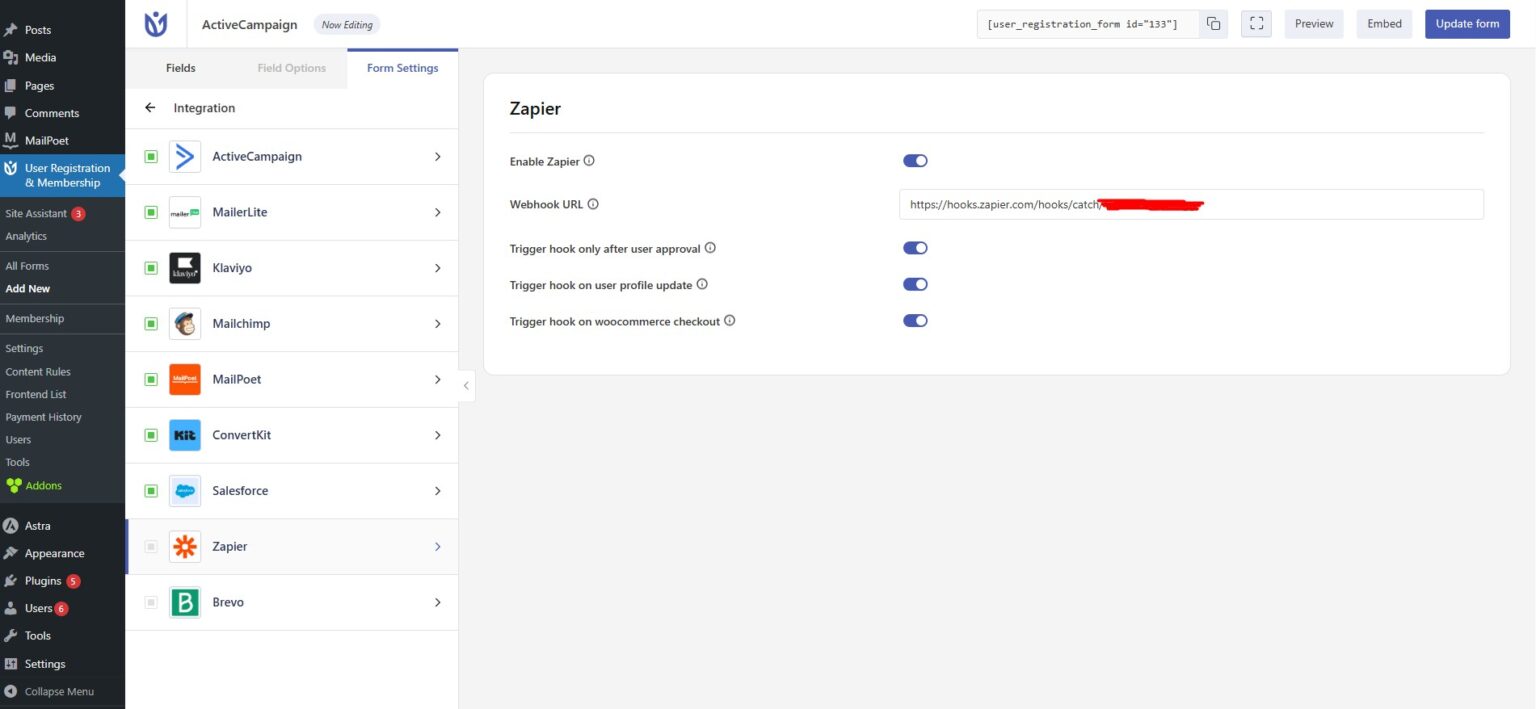
In WordPress, go to User Registration & Membership > Add New to create a new form, or select an existing form to edit. Once your form is open in the Form Builder, navigate to the Form Settings tab. Click on Integration > Zapier Settings to access the integration options.
Check the Enable Zapier option to activate the integration for this form. Paste the Webhook URL you copied from Zapier into the provided field. This URL tells your form where to send the registration data.
Configuring Trigger Conditions
User Registration & Membership gives you control over when data is sent to Zapier. You can configure optional trigger conditions to determine exactly when the webhook fires.
In the Zapier Settings section, you will find three trigger options. Trigger hook only after user approval sends data to Zapier only after an admin approves the user registration. This is useful if you manually review registrations before granting access. Trigger hook on user profile update sends the webhook when an existing user updates their profile information. Trigger hook on WooCommerce checkout fires the webhook during the WooCommerce checkout process if you have WooCommerce integration enabled.
Enable the trigger conditions that match your workflow needs. You can enable multiple triggers if needed. Once configured, click Update to save your form settings.
Testing the Connection
Before going live, you should test the connection to ensure data flows correctly from your registration form to Zapier.
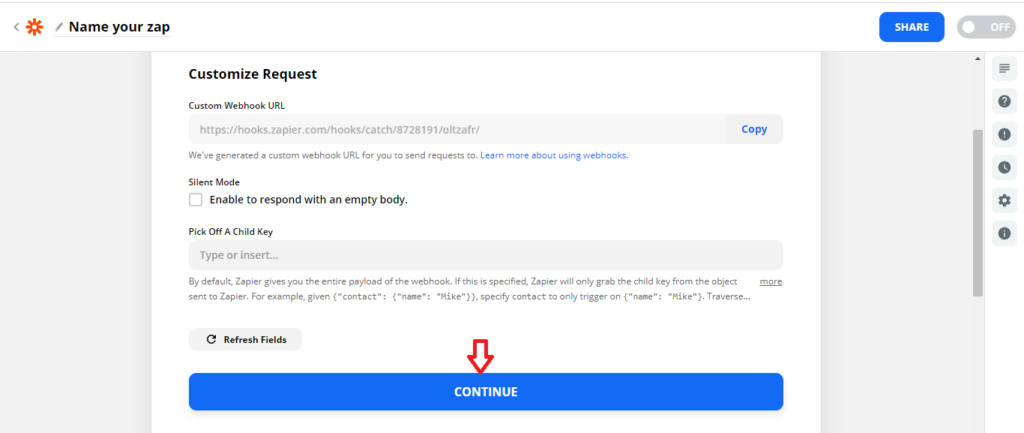
Submit a sample form entry using your registration form. This sends test data to Zapier through the webhook. Return to Zapier and click Continue in your Zap setup.
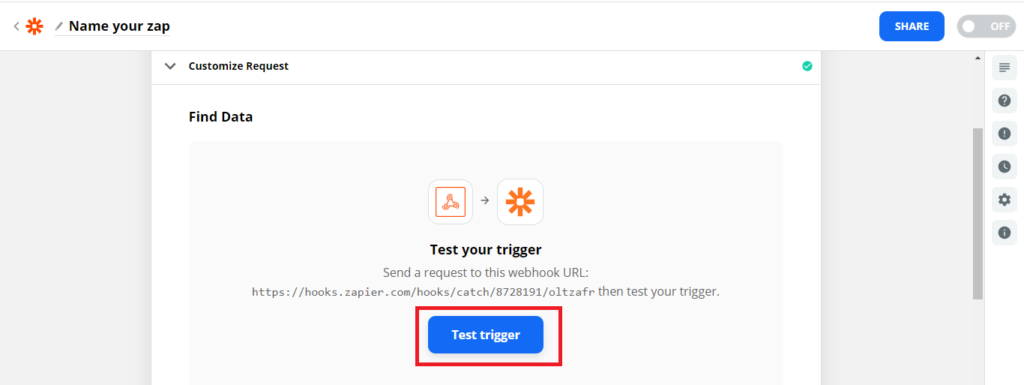
Click Test Trigger to verify that Zapier received the form data.
If the test is successful, Zapier will display the data it received from your form.
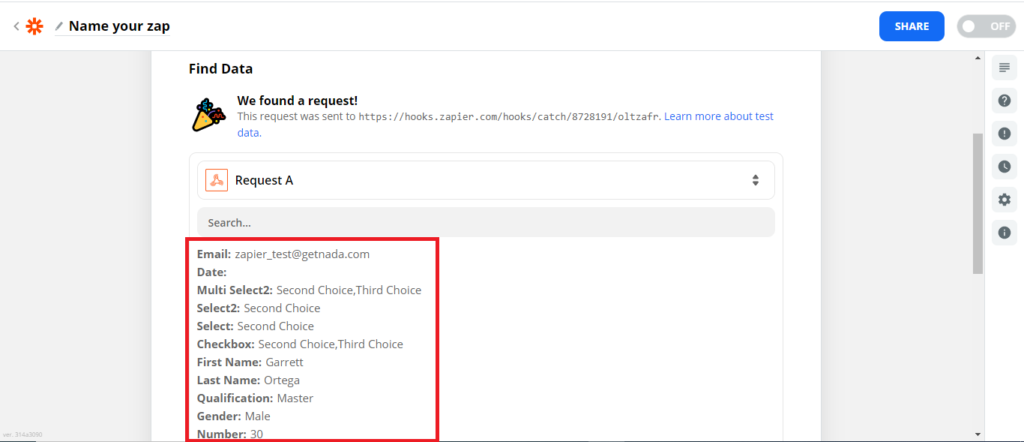
Once the test passes, you can continue building your Zap by adding action steps that use the registration data.
What Happens After Setup
After completing the setup, your registration form will automatically send data to Zapier whenever the configured trigger conditions are met. From Zapier, you can route this data to any of the 1,500+ connected apps to automate tasks like adding contacts to email lists, creating CRM records, sending notifications, or updating spreadsheets.
That's it! Now you know how to integrate Zapier with User Registration & Membership. Next, would you like to explore other integrations? Be sure to check out our guides on connecting with email marketing platforms like Mailchimp and ActiveCampaign for more ways to automate your member management.