
Woocommerce Integration
ProIntegrate WooCommerce with custom registration forms, add checkout fields, and sync user data to create seamless customer registration experiences.
Last updated on Jul 15, 2026
Would you like to connect your WooCommerce store with custom registration forms and membership features? User Registration & Membership allows you to add custom fields to WooCommerce checkout, sync user data between systems, and create seamless registration experiences for your customers. This guide will show you how to set up and configure the WooCommerce integration.
Before getting started, make sure you've installed and activated the User Registration & Membership plugin on your WordPress site. Then, make sure you've installed and activated the WooCommerce plugin and the WooCommerce addon for User Registration & Membership.
Activating the WooCommerce Addon
The WooCommerce addon is available with Plus and Professional plans of User Registration & Membership Pro.
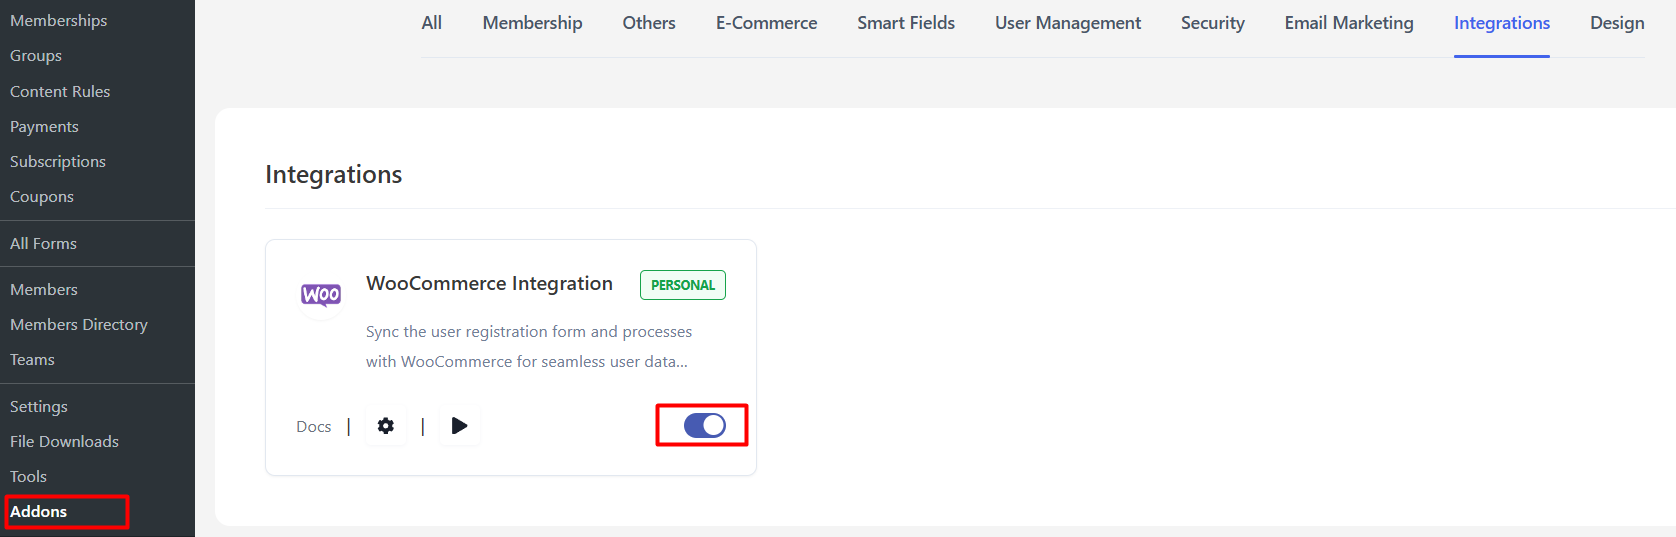
To activate the WooCommerce addon, go to User Registration & Membership > Addons. Locate the WooCommerce addon in the list and toggle it to Activate. Once activated, you'll see new WooCommerce-specific options in your form builder and settings.
Understanding WooCommerce Integration Features
The WooCommerce addon provides three main integration points:
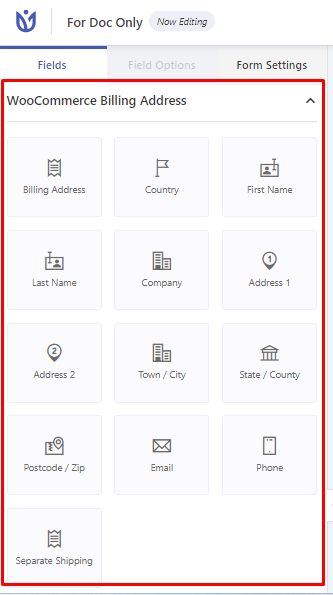
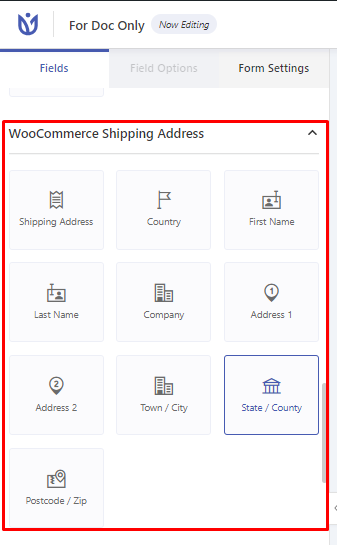
WooCommerce Fields in Registration Forms: Add 23 WooCommerce-specific fields to your registration forms, including 10 shipping address fields and 13 billing address fields (country, name, company, address, city, state, postcode, phone, email, and separate shipping option).
My Account Page Integration: Display User Registration form data in the WooCommerce My Account page, with extra tabs for Orders, Downloads, and Addresses appearing automatically after activation.
Checkout Page Sync: Sync User Registration form fields with the WooCommerce checkout registration, allowing customers to create accounts during purchase with your custom fields.
Adding WooCommerce Fields to Registration Forms
From the form builder, go to User Registration & Membership > Forms > Edit Form. In the form builder, you'll see WooCommerce fields available in the field palette once the addon is activated.
Drag and drop WooCommerce fields into your form. Available fields include:
Billing Address Fields: Billing Country, Billing First Name, Billing Last Name, Billing Company, Billing Address 1, Billing Address 2, Billing City, Billing State, Billing Postcode, Billing Email, Billing Phone
Shipping Address Fields: Shipping Country, Shipping First Name, Shipping Last Name, Shipping Company, Shipping Address 1, Shipping Address 2, Shipping City, Shipping State, Shipping Postcode, Separate Shipping Option
Once you've added the fields, click Update Form to save your changes.
Integrating User Registration Forms with WooCommerce My Account
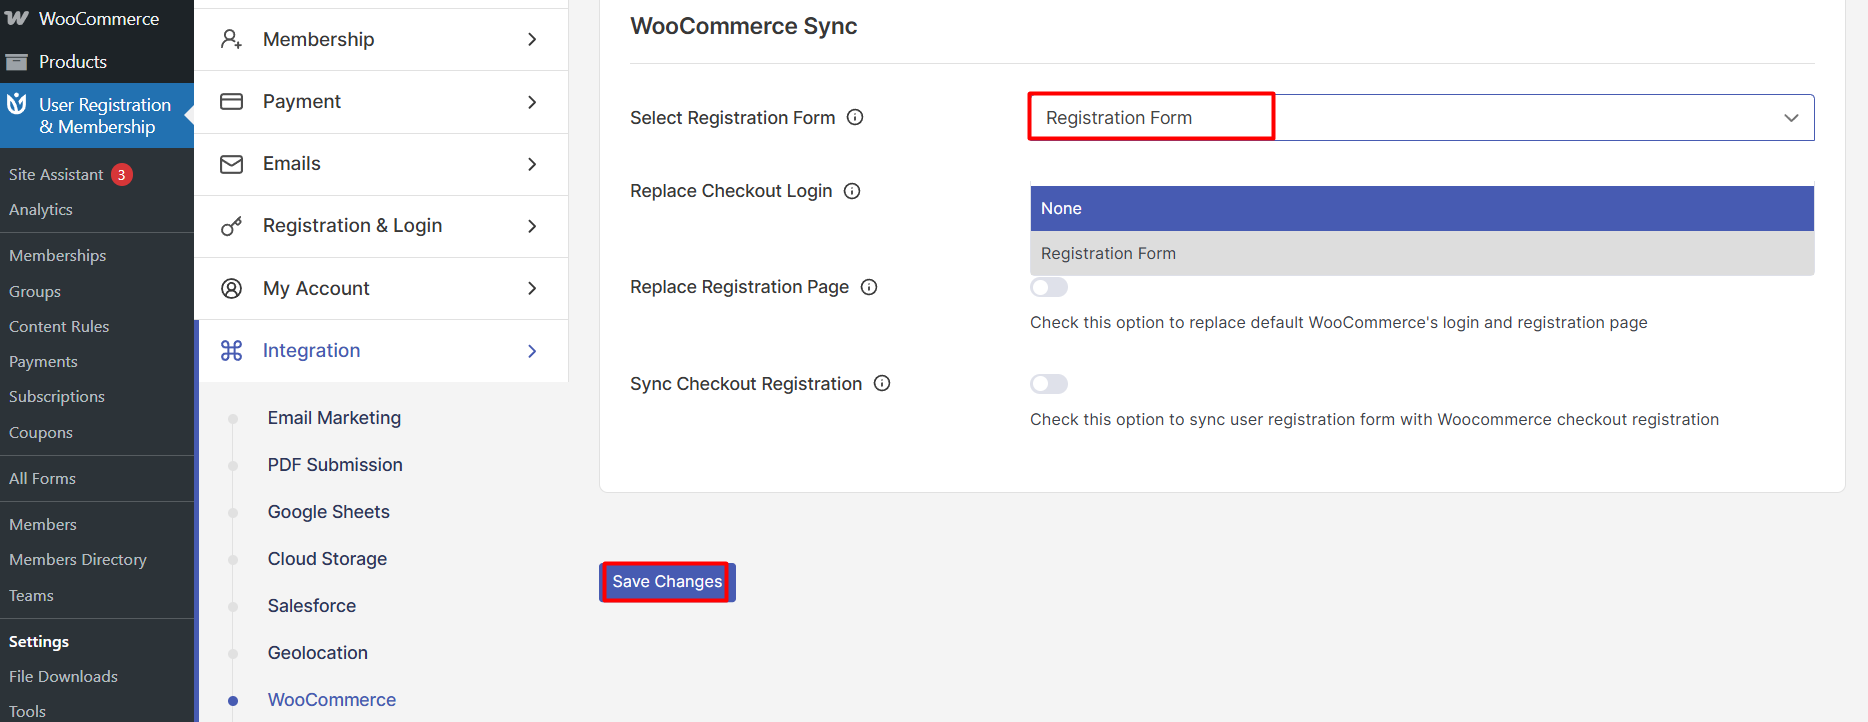
To display User Registration form data in the WooCommerce My Account page, go to User Registration & Membership > Settings > WooCommerce.
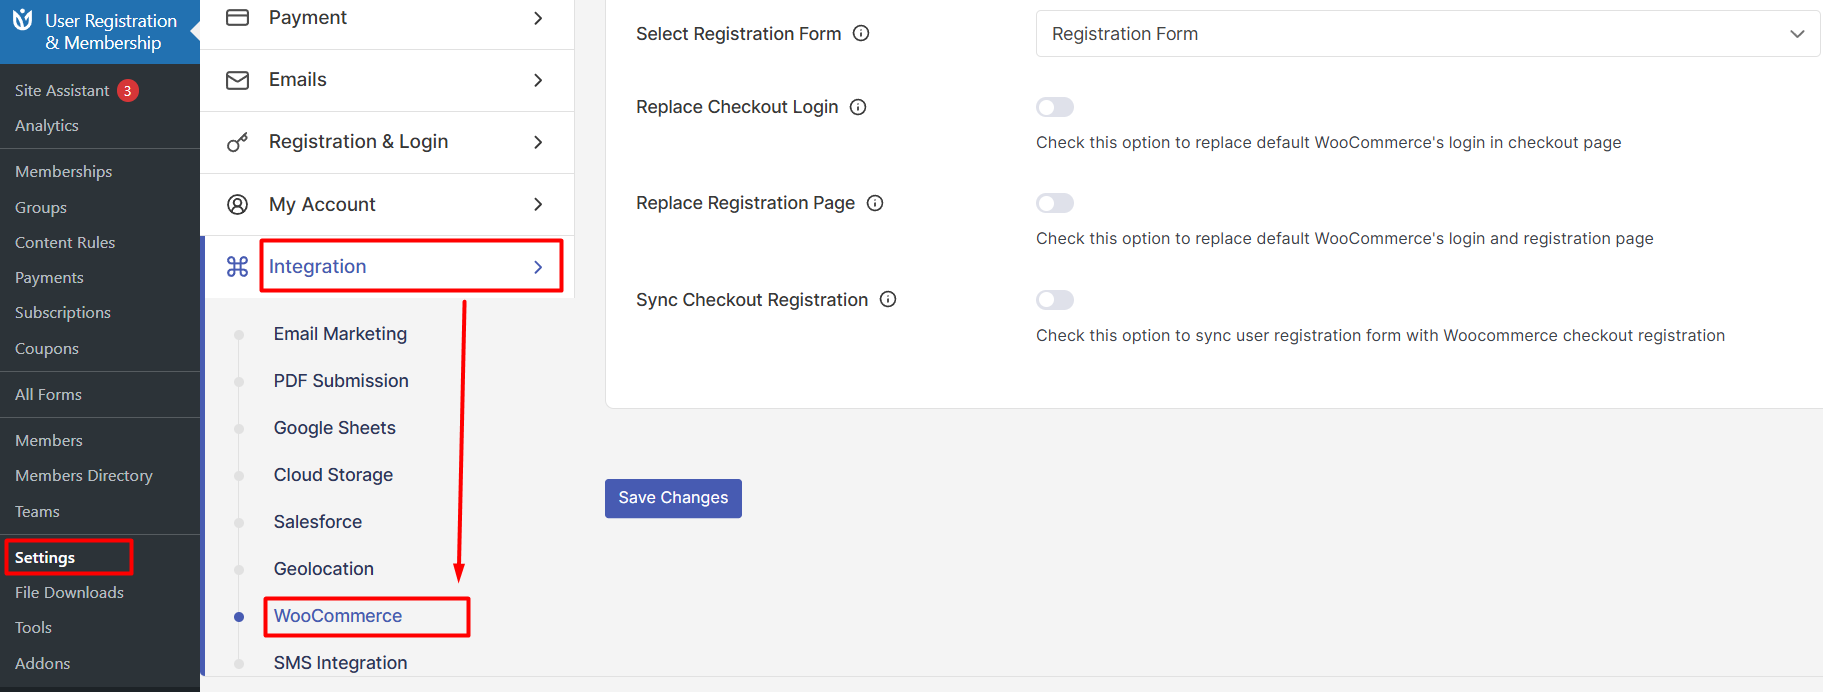
Select the registration form you want to integrate from the Registration Form dropdown. This determines which form's data will appear in the WooCommerce My Account page.
Click Save Changes to apply the integration.
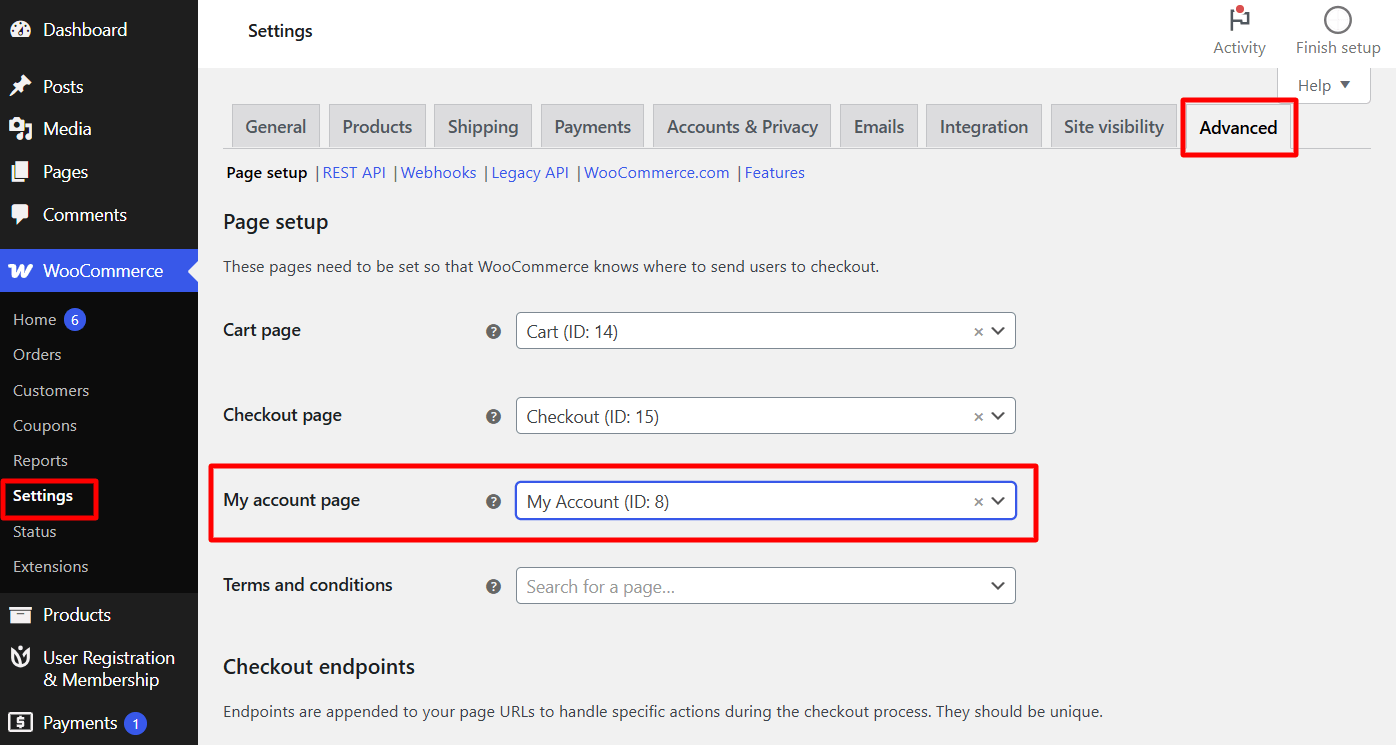
If both WooCommerce and User Registration create separate My Account pages, you may see a conflict. To resolve this, go to WooCommerce > Settings > Advanced and select the User Registration Account Page as the My account page. This ensures users see a unified account experience.
Replacing WooCommerce Login and Registration Pages
You can replace WooCommerce's default login and registration pages with User Registration forms for a consistent user experience.
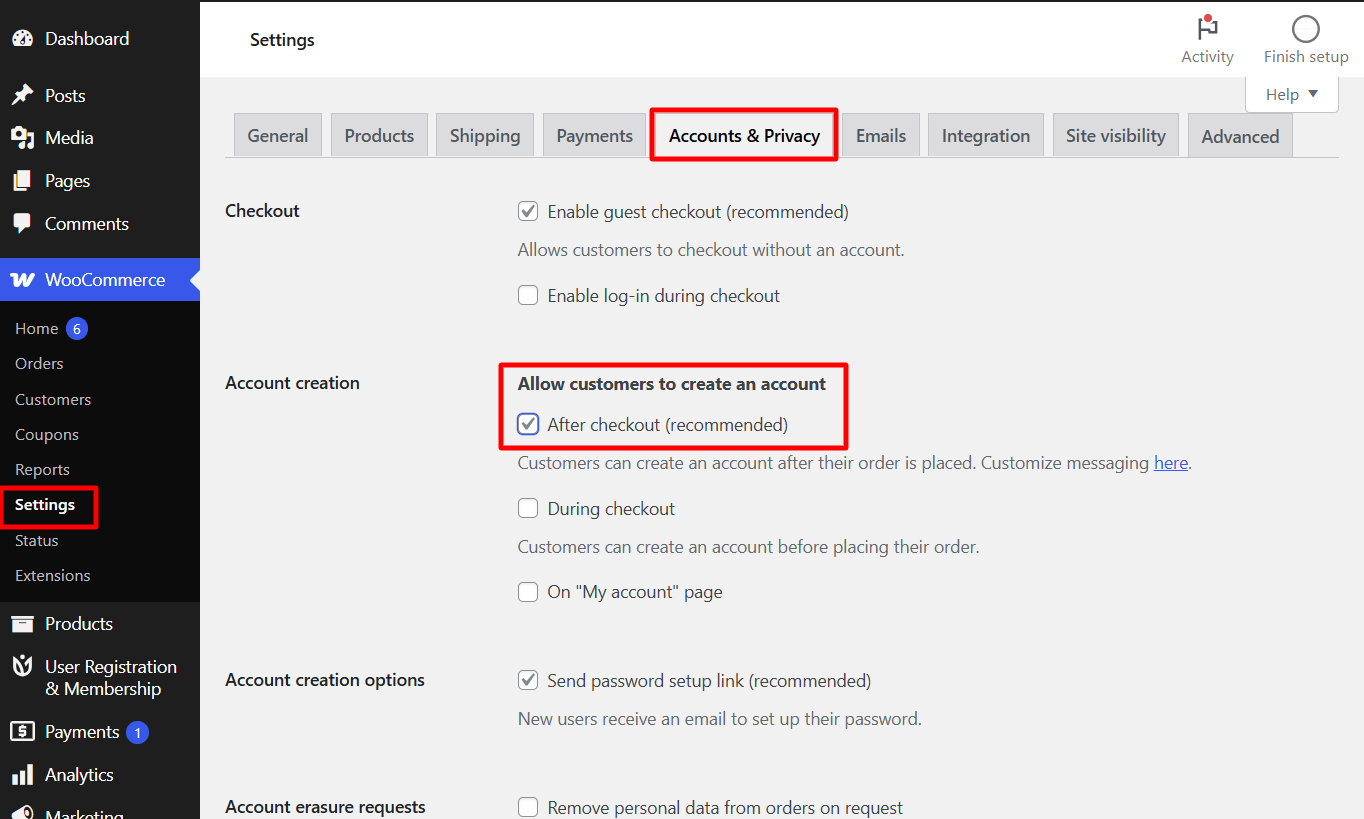
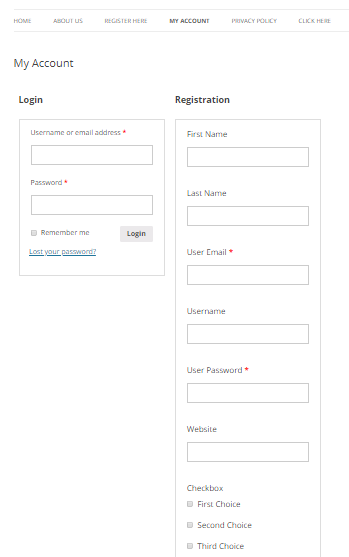
First, go to WooCommerce > Settings > Accounts and Privacy. Check the option Allow customers to create an account on the "My Account" page.
Then, go to User Registration & Membership > Integration > Settings > WooCommerce. Select your registration form from the dropdown, then check Replace default WooCommerce's login and registration page with User Registration forms.
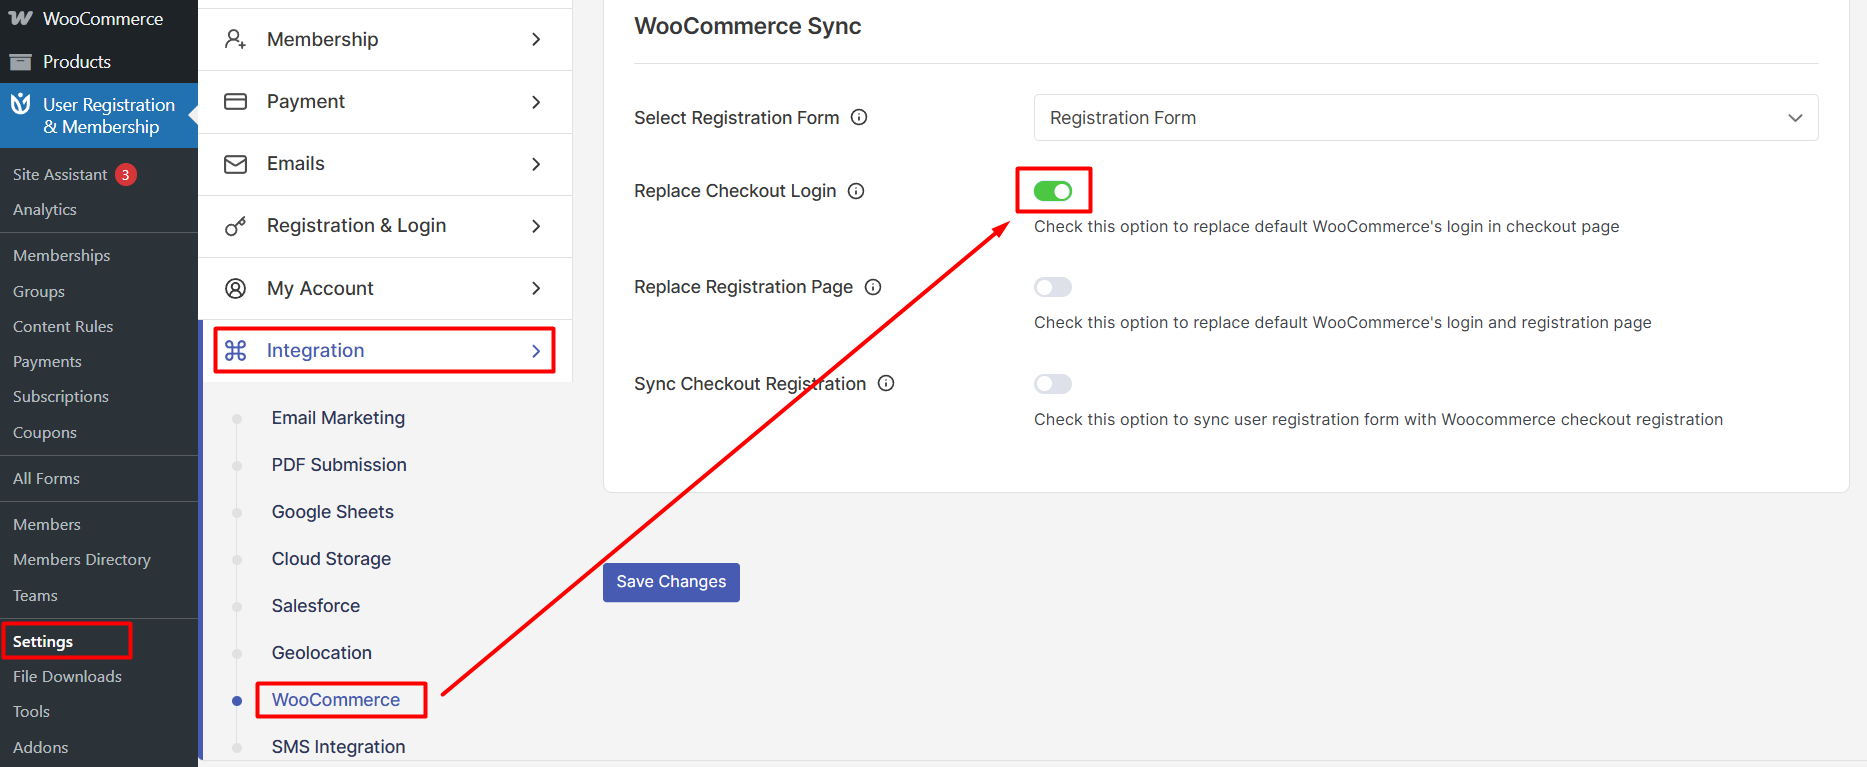
Click Save Changes to save your settings. Users will now see your custom User Registration forms instead of WooCommerce's default pages.
Syncing Registration Fields with WooCommerce Checkout
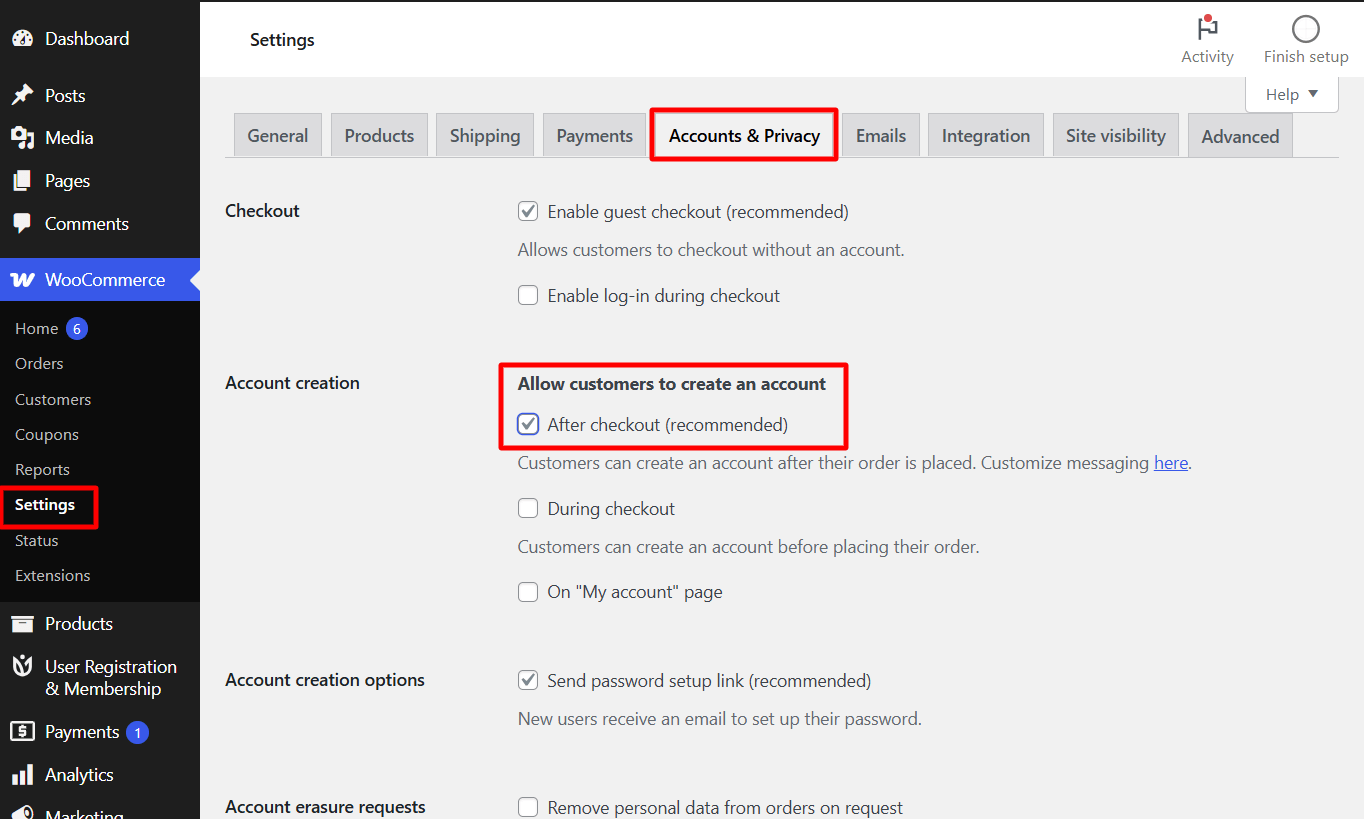
To display User Registration form fields during WooCommerce checkout, go to WooCommerce > Settings > Accounts and Privacy. Check the option Allow customers to create an account during checkout.
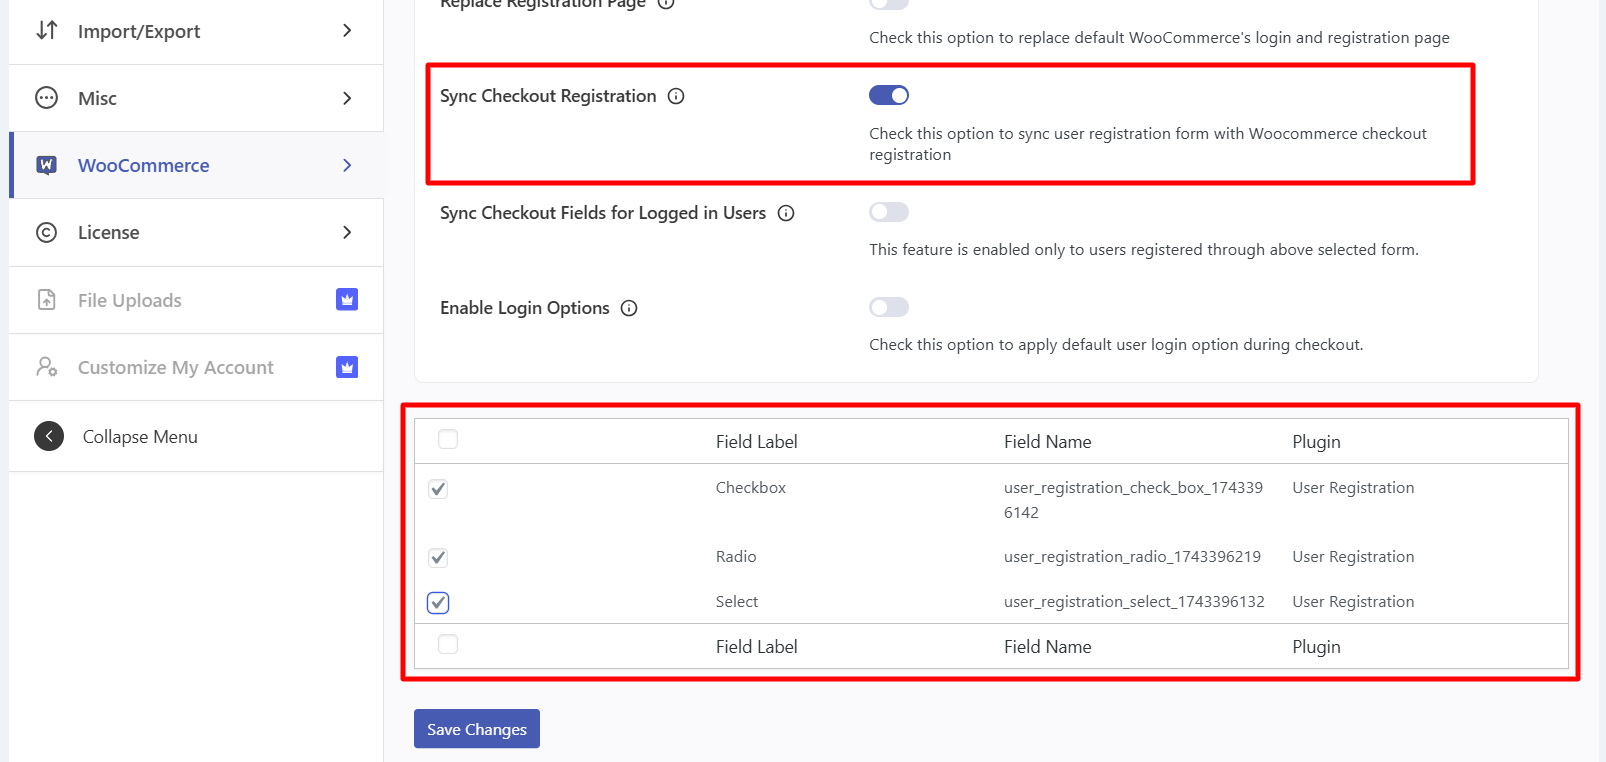
Then, go to User Registration & Membership > Settings > WooCommerce. Check Sync the user registration form with the WooCommerce checkout registration.
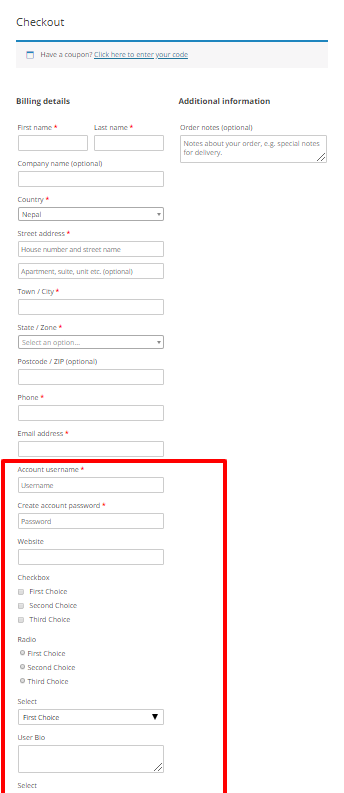
Only custom User Registration fields that don't already exist in WooCommerce's default registration will appear at checkout. This prevents duplicate fields and keeps the checkout process clean.
Alternative Method: Using the Sync Checkout Fields Block
You can also add specific fields to the checkout page using the Sync Checkout Fields block.
Navigate to Pages and open your Checkout page in the block editor. Add the Sync Checkout Fields block to the page.
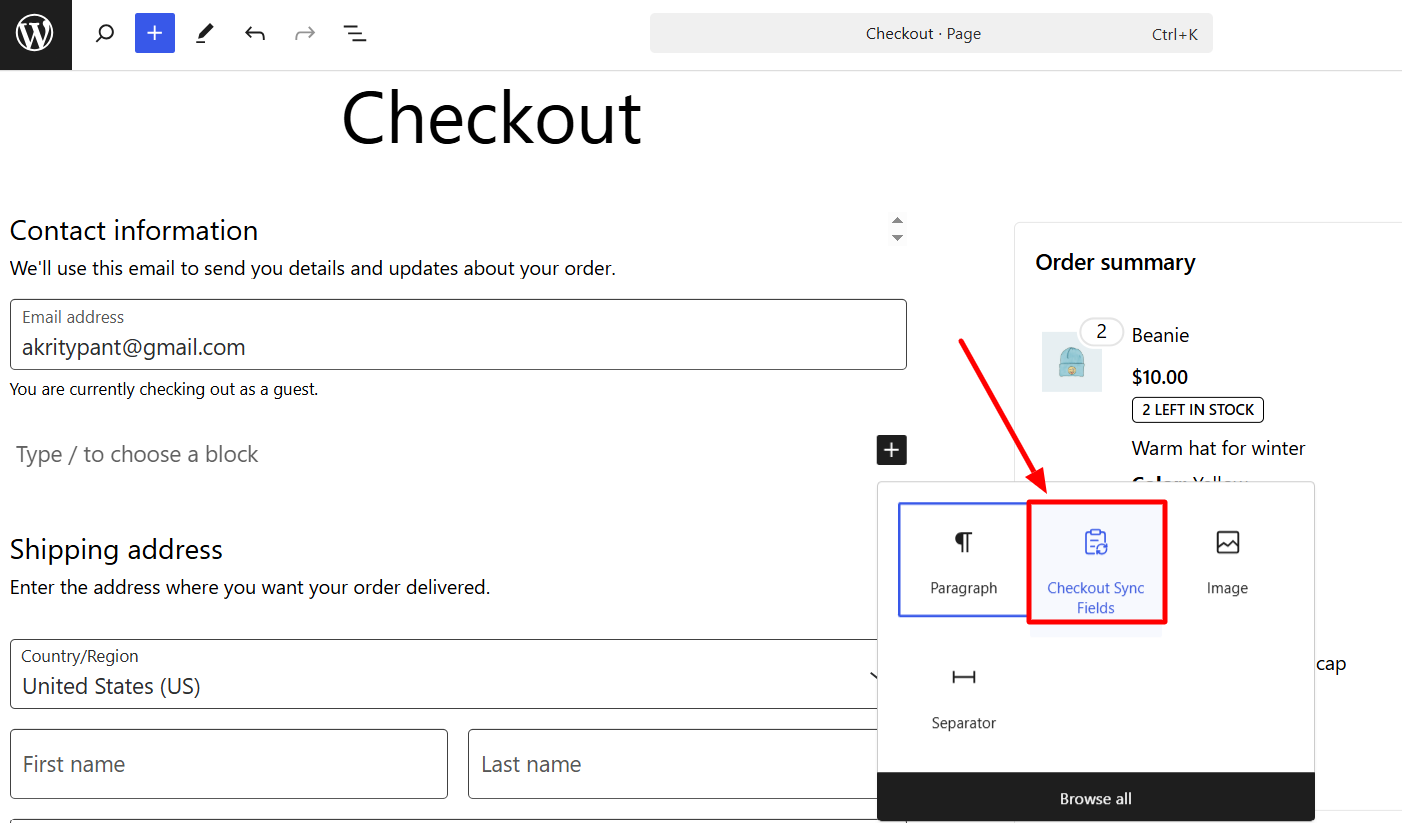
In the block settings on the right, select which User Registration fields you want to display at checkout.
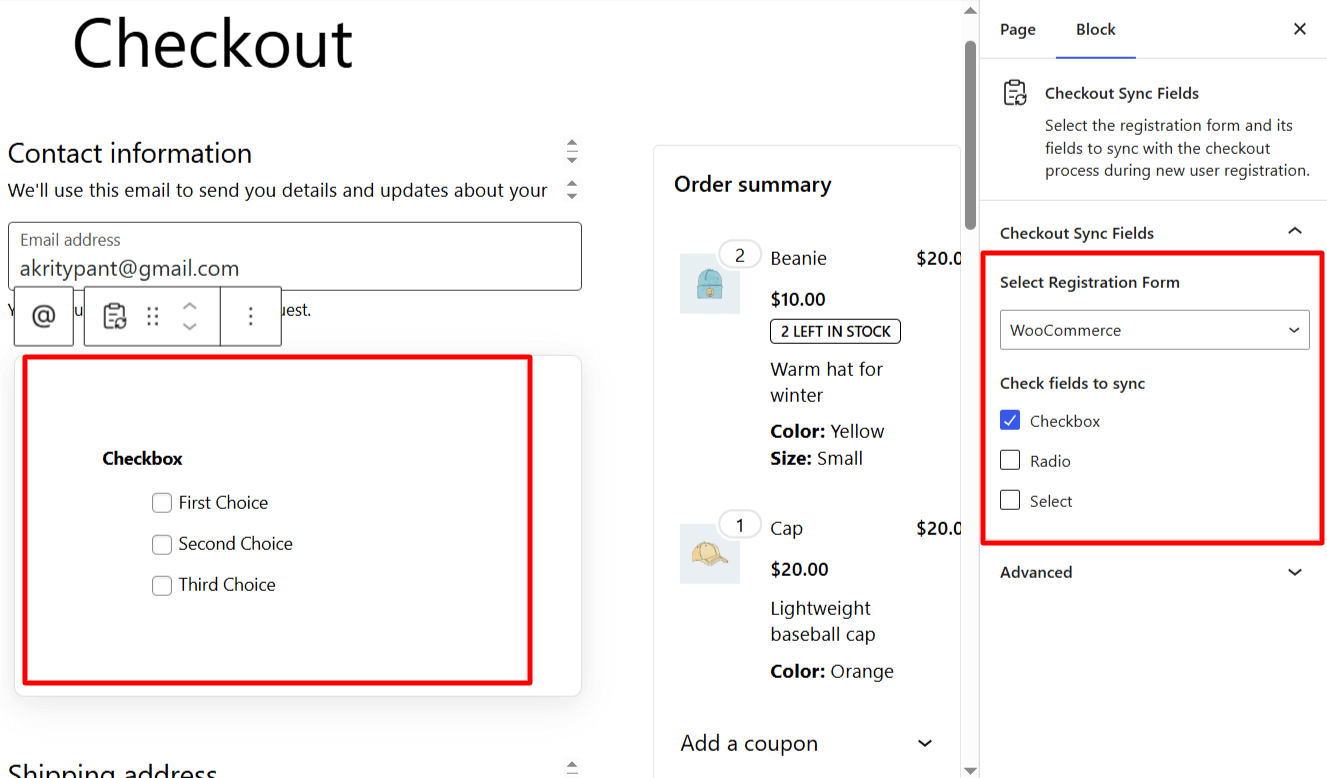
Click Update to save the page. The selected fields will now appear during the checkout registration process.
Enabling Login Options at Checkout
If you'd like to use the login options from your User Registration form (such as social login or passwordless login) in the WooCommerce checkout, go to User Registration & Membership > Settings > Integration > WooCommerce.
After selecting your registration form, check Enable Login Options to sync login methods from your User Registration form to the checkout page.
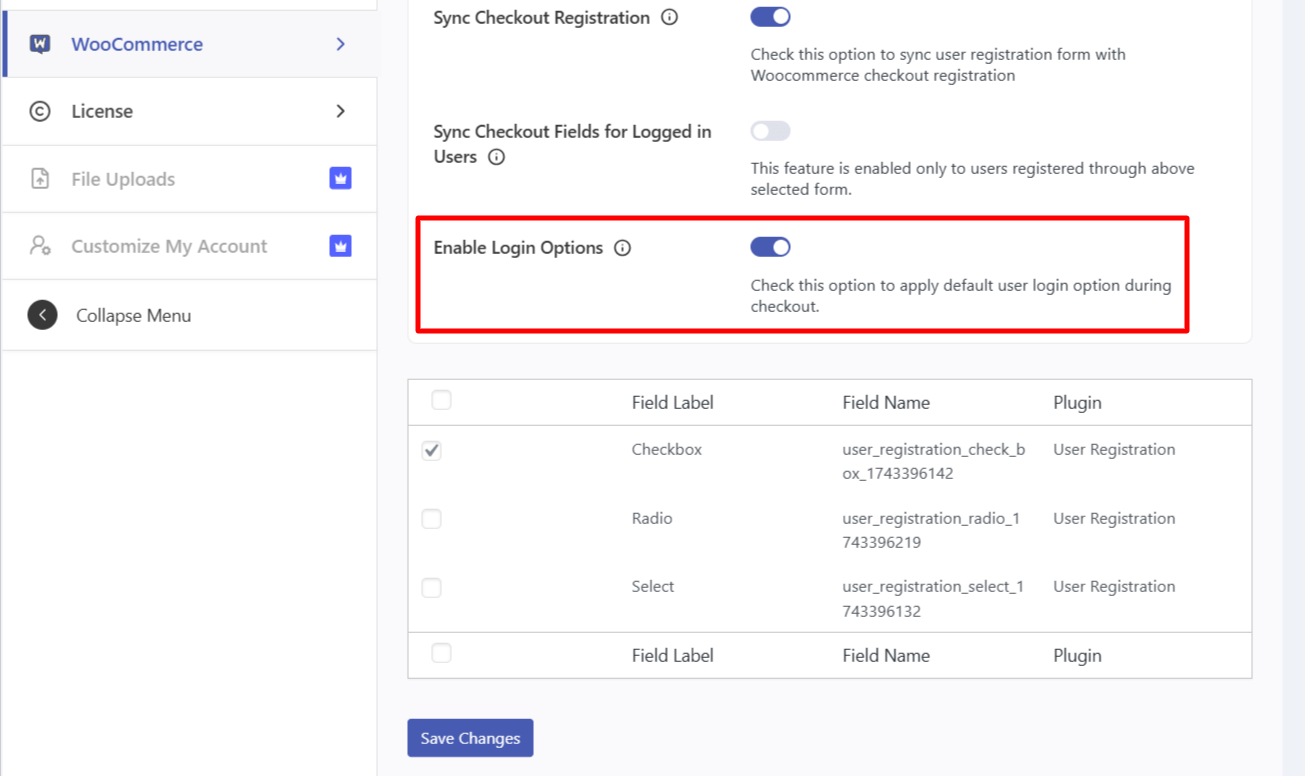
Click Save Changes to apply this setting.
Managing Billing and Shipping Addresses
Once the WooCommerce integration is active, users can edit their billing and shipping addresses directly from the My Account page.
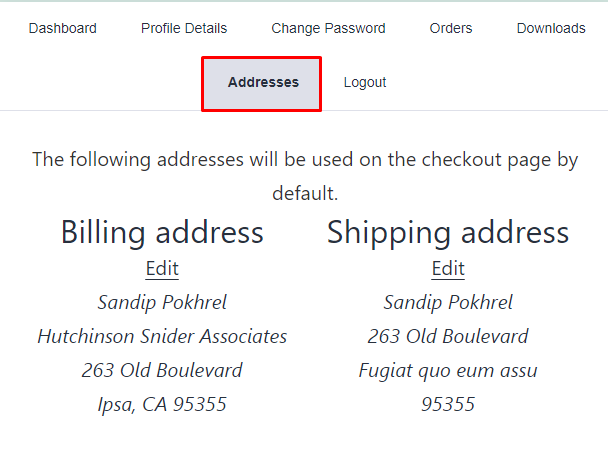
Users navigate to the Addresses tab in their account dashboard. Here, they'll see options to edit both billing and shipping addresses. Any changes made here will sync with both WooCommerce and User Registration data.
Integrating WooCommerce with Product Pages
You can map User Registration forms to specific WooCommerce products for product-specific registration.
Go to Products and select a product to edit. In the Product Data meta box, click the UR Form tab. Map your User Registration form to this product and select which fields should appear.
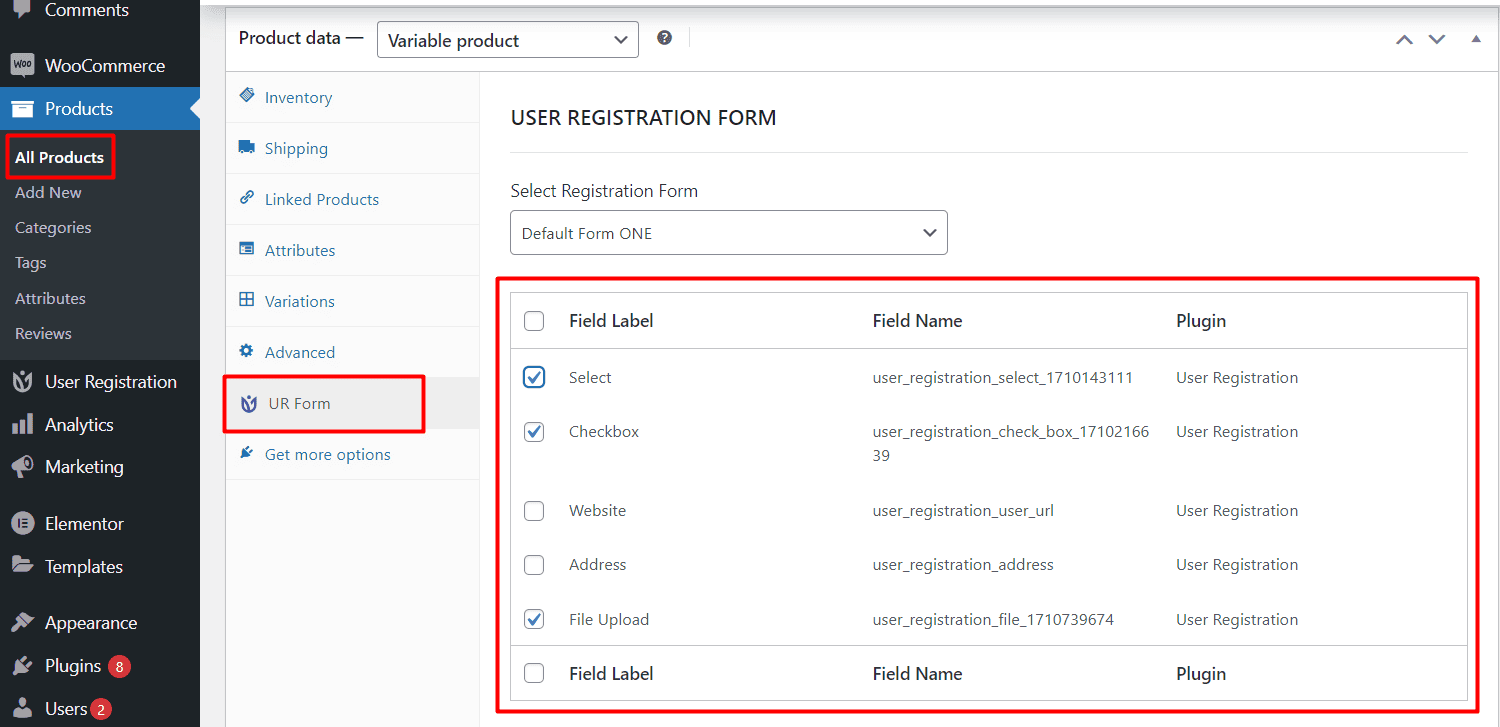
Click Update to save the product. When customers view or purchase this product, they'll see your custom registration fields.
Content Restriction for WooCommerce Products
The WooCommerce integration works with User Registration's content restriction features to control product visibility and purchasability.
Product-specific access rules are evaluated to determine if users can see or purchase products. Restricted products can be hidden from shop loops and search results based on your access rules.
To configure product restrictions, go to User Registration & Membership > Content Rules and create rules that target WooCommerce products.
Important Notes About WooCommerce Integration
Keep in mind these important details when using the WooCommerce integration:
The WooCommerce addon is only available for Plus and Professional plans
If you use a membership field in your registration form, Payment Fields cannot be used in the same form
Only custom User Registration fields that don't exist in WooCommerce's default registration are shown in checkout sync
Billing and shipping addresses can be edited from both the WooCommerce My Account page and the User Registration account page
Account page conflicts can occur when both plugins create separate My Account pages—resolve this by selecting one as the primary page in WooCommerce settings