
Salesforce Integration
ProLast updated on Jul 15, 2026
Would you like to automatically sync your WordPress registration data with Salesforce CRM? User Registration & Membership allows you to connect your registration forms directly to Salesforce, sending user information to your CRM as leads, contacts, or accounts without manual data entry. This tutorial will show you how to set up and configure the Salesforce integration.
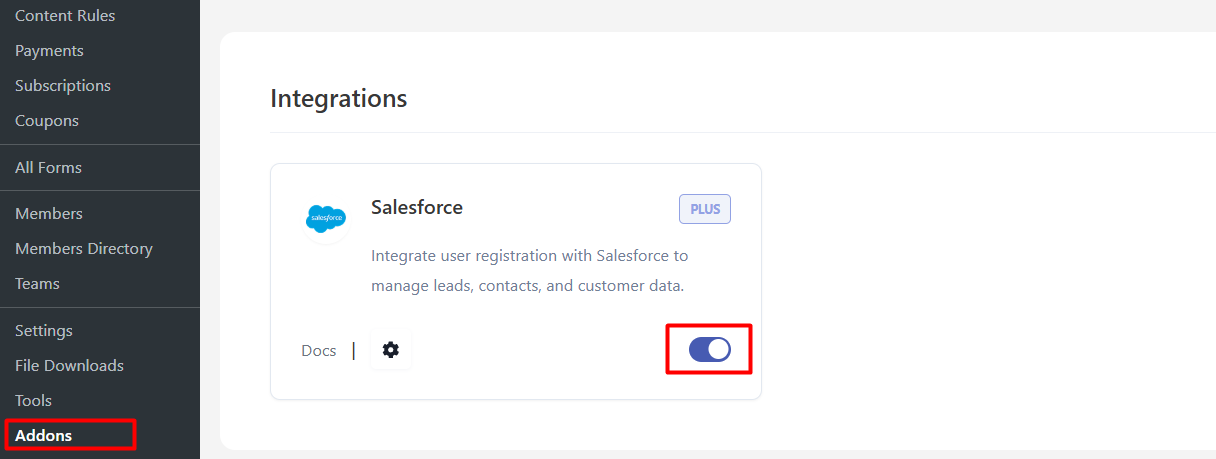
Before getting started, make sure you have installed and activated the User Registration & Membership Pro plugin on your WordPress site. Then, make sure you have installed and activated the Salesforce addon from User Registration & Membership > Addons > Salesforce.
Creating a Salesforce Connected App
To connect WordPress with Salesforce, you need to create a Connected App in your Salesforce account. This app generates the API credentials required for authentication.
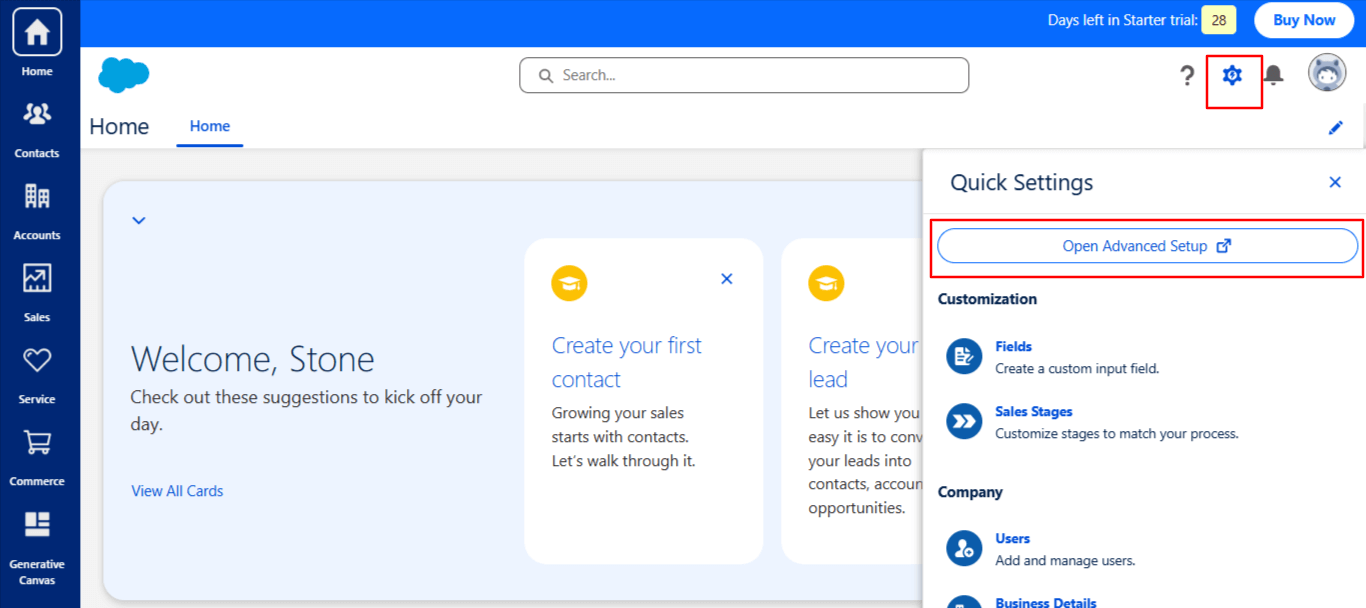
From your Salesforce dashboard, click the settings icon in the top right corner and select Open Advanced Setup.
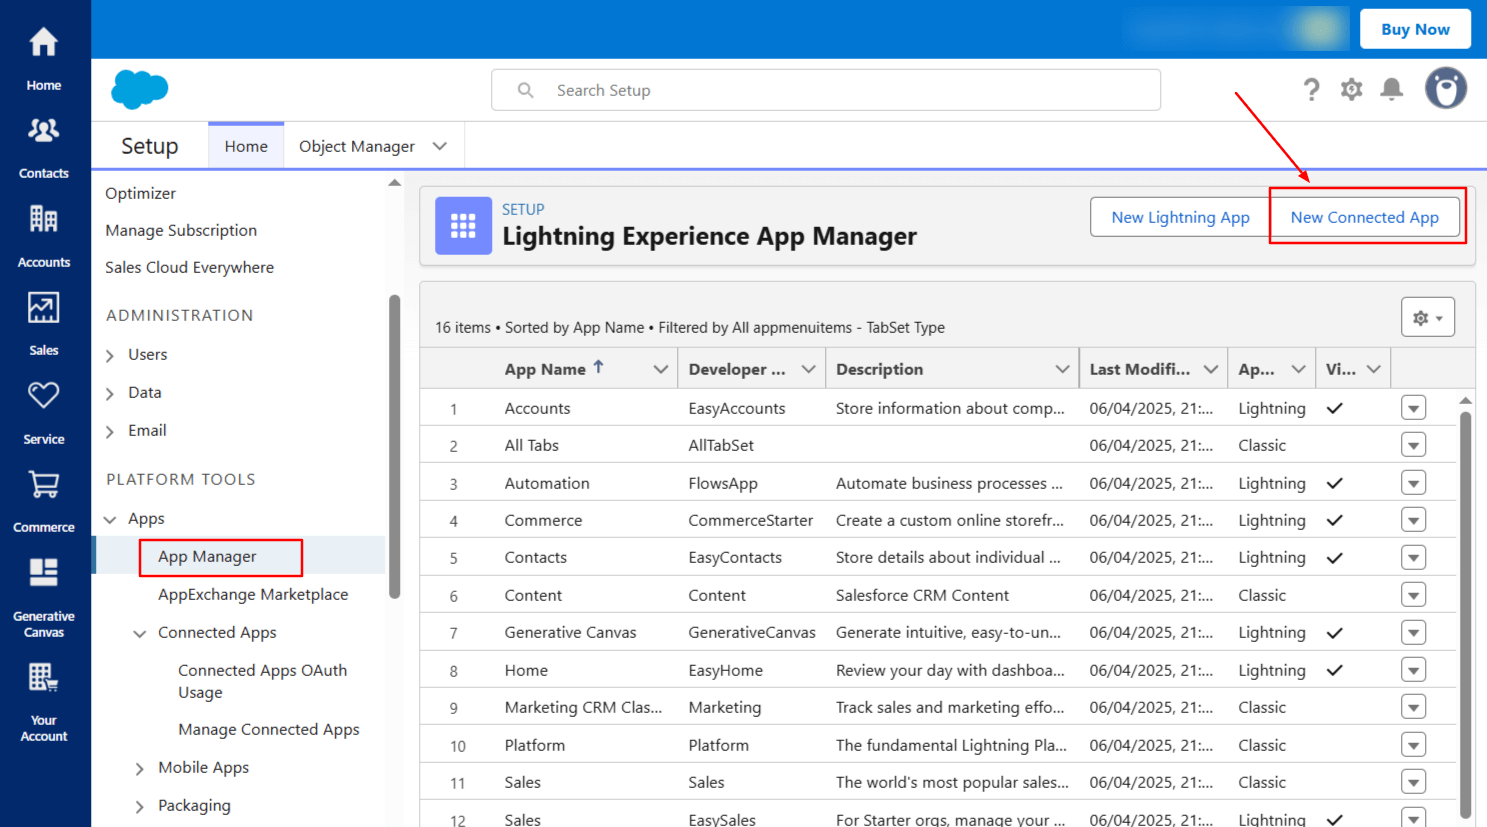
Once the setup page opens, navigate to Apps in the left sidebar, then click App Manager. Click the New Connected App button in the top right corner.
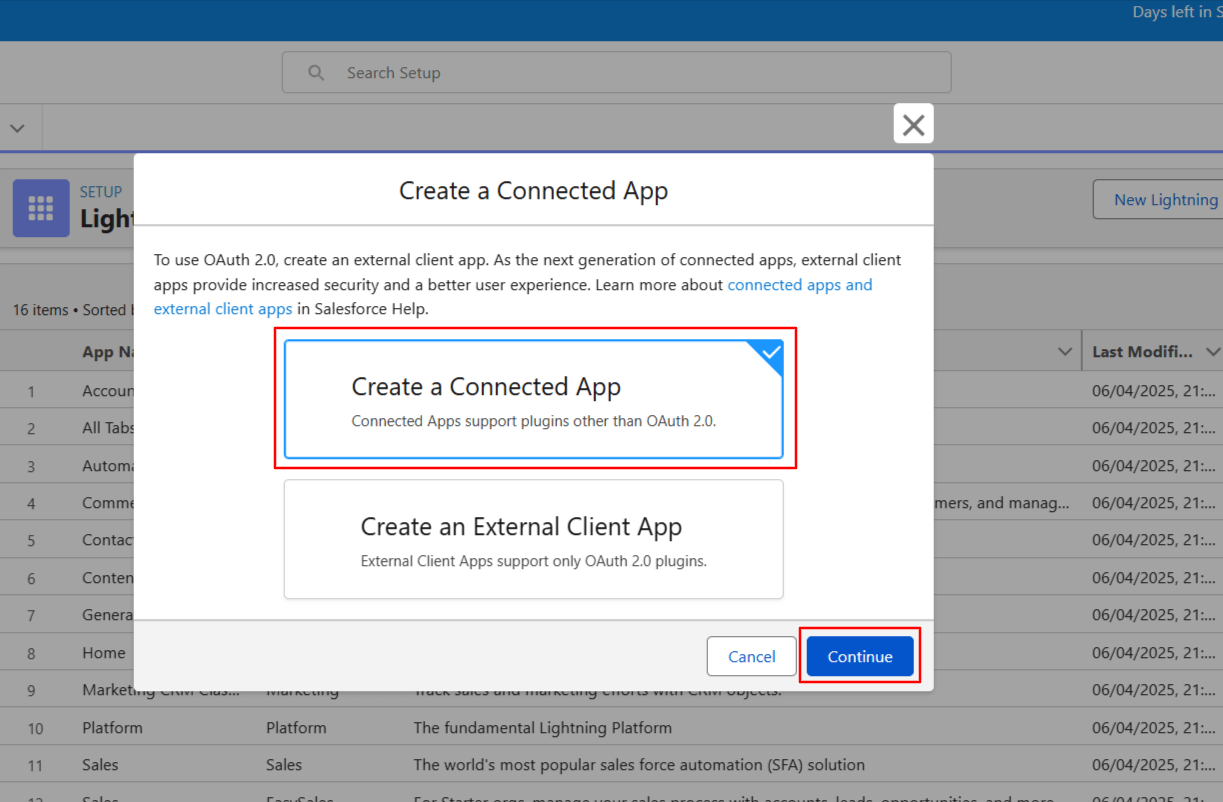
Choose Create a Connected App and click Continue.
Fill in the basic app information including the Connected App Name and your contact email address.
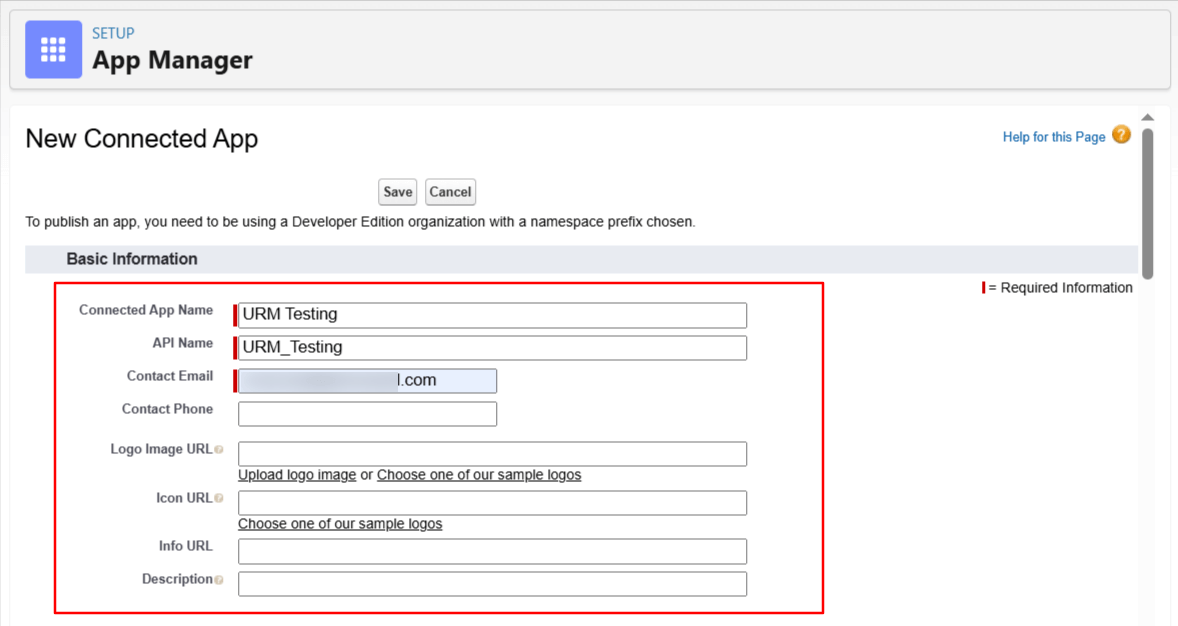
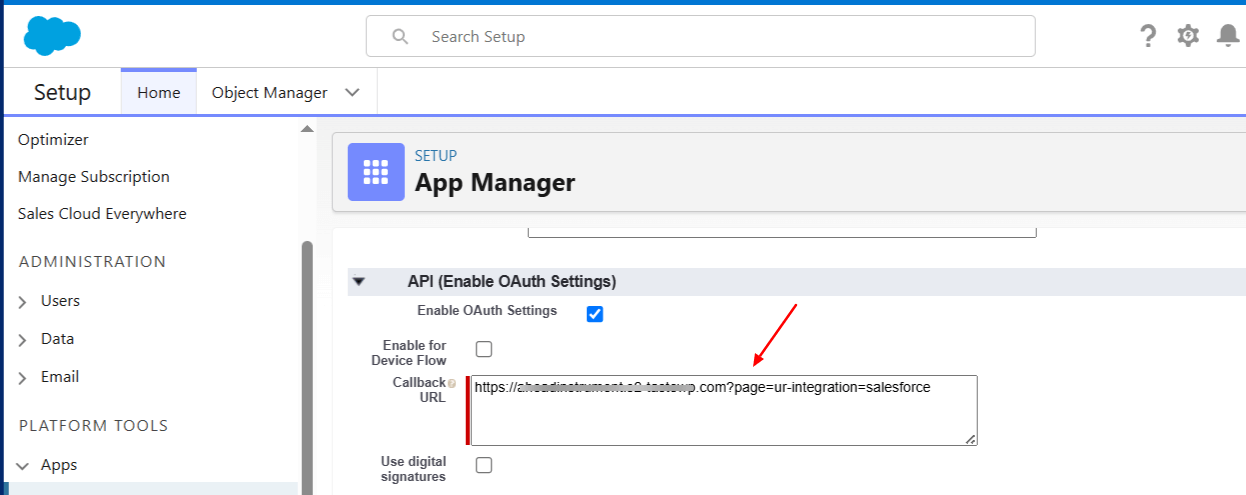
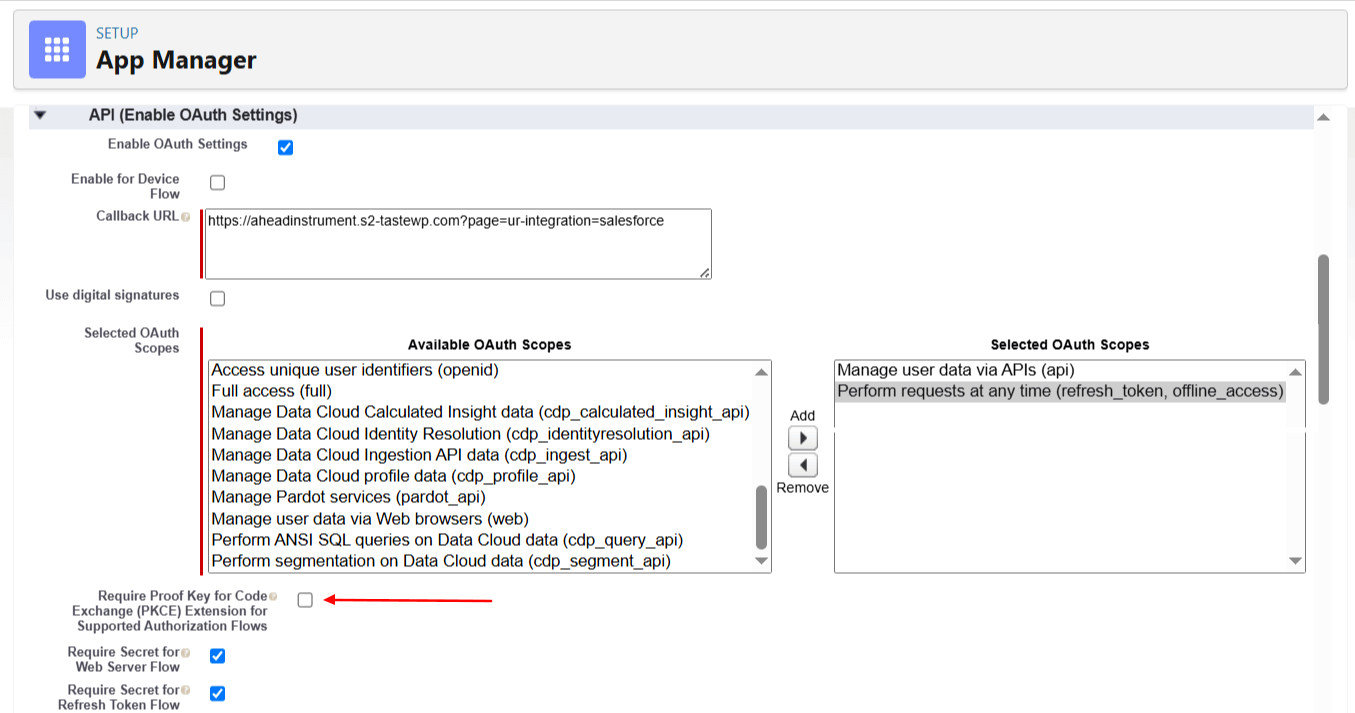
Next, enable OAuth Settings by checking the box. You need to retrieve your Callback URL from WordPress before proceeding.
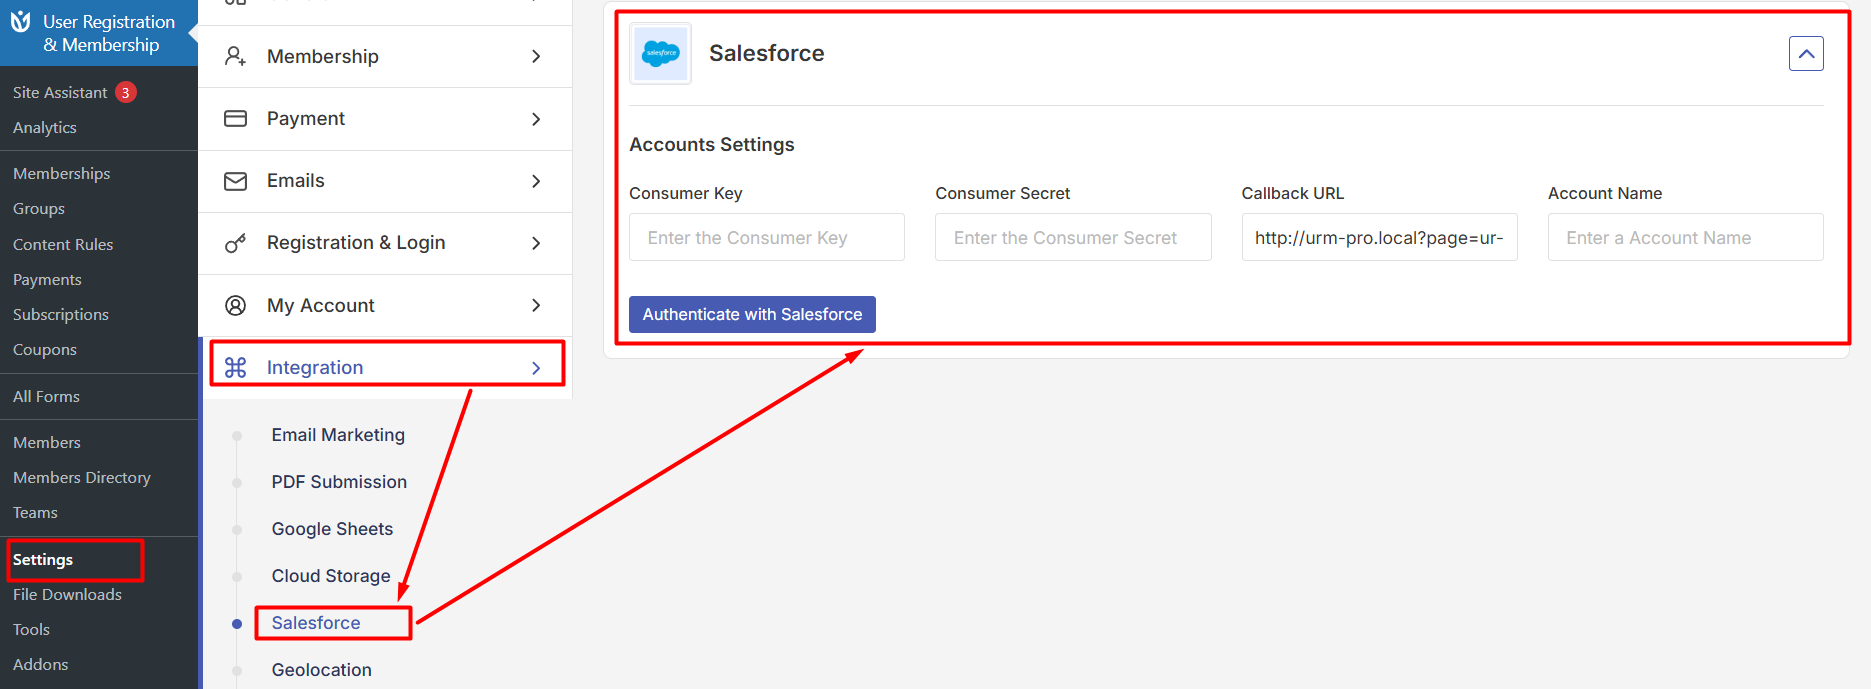
Go to User Registration & Membership → Settings → Integration → Salesforce in your WordPress dashboard. Copy the Callback URL displayed on this page.
Return to Salesforce and paste the Callback URL into the appropriate field.
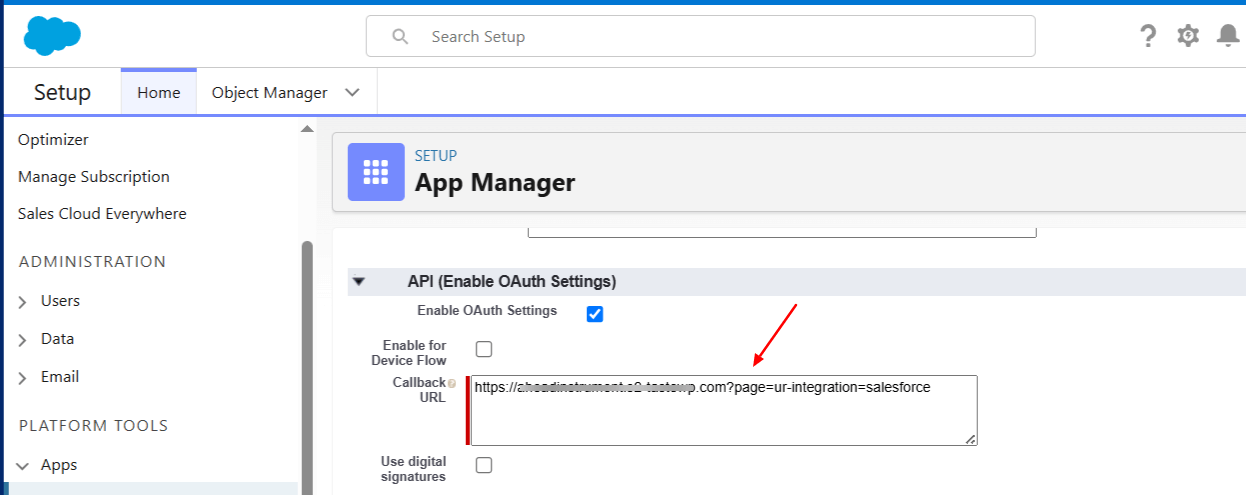
Under OAuth Scopes, add two required permissions: Manage user data via APIs and Perform requests at any time. Move these scopes from Available OAuth Scopes to Selected OAuth Scopes.
Uncheck the Require Proof Key for Code Exchange option. This setting must be disabled for the integration to work properly.
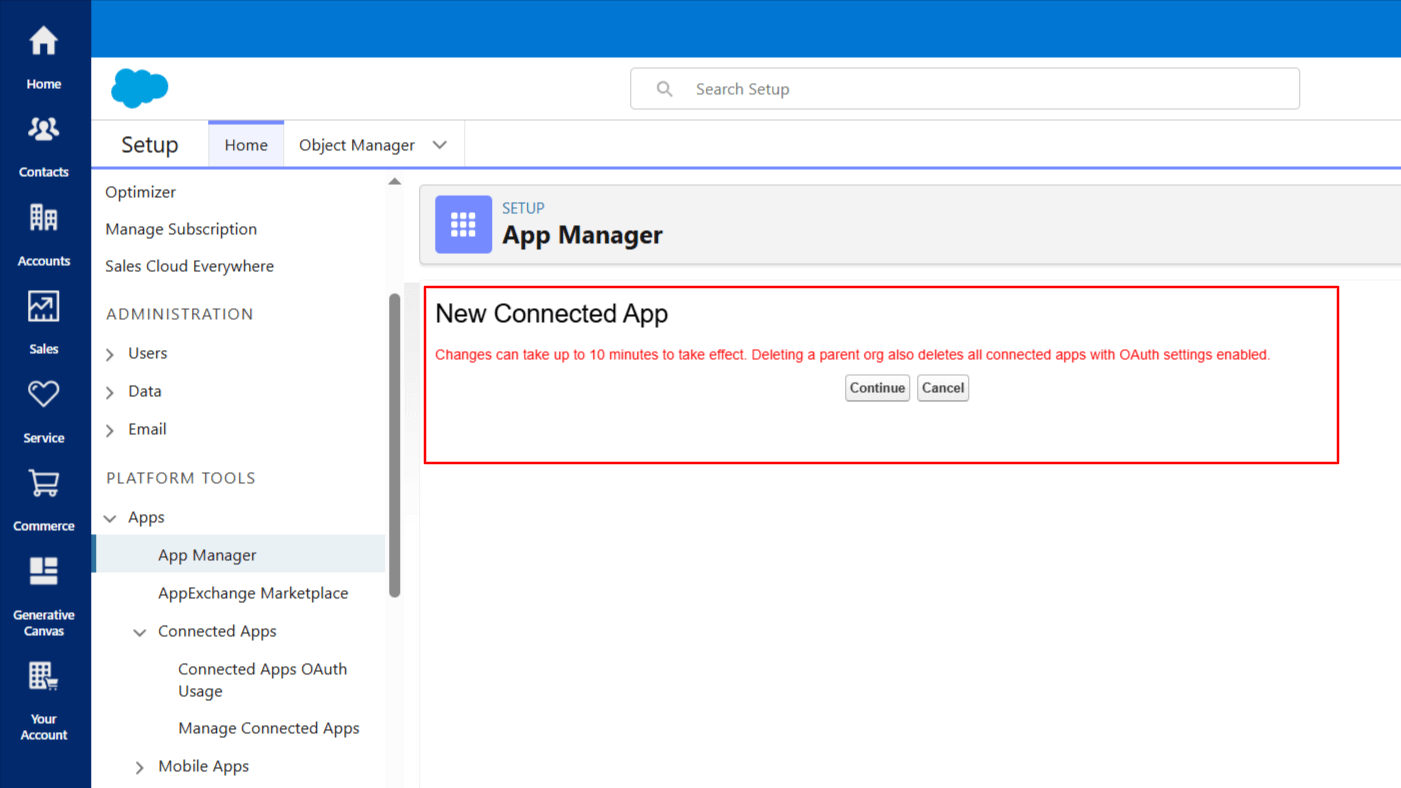
Click Save to create your Connected App. Salesforce requires a 10-minute waiting period before you can retrieve your API credentials. After waiting, click Continue.
Retrieving Your API Credentials
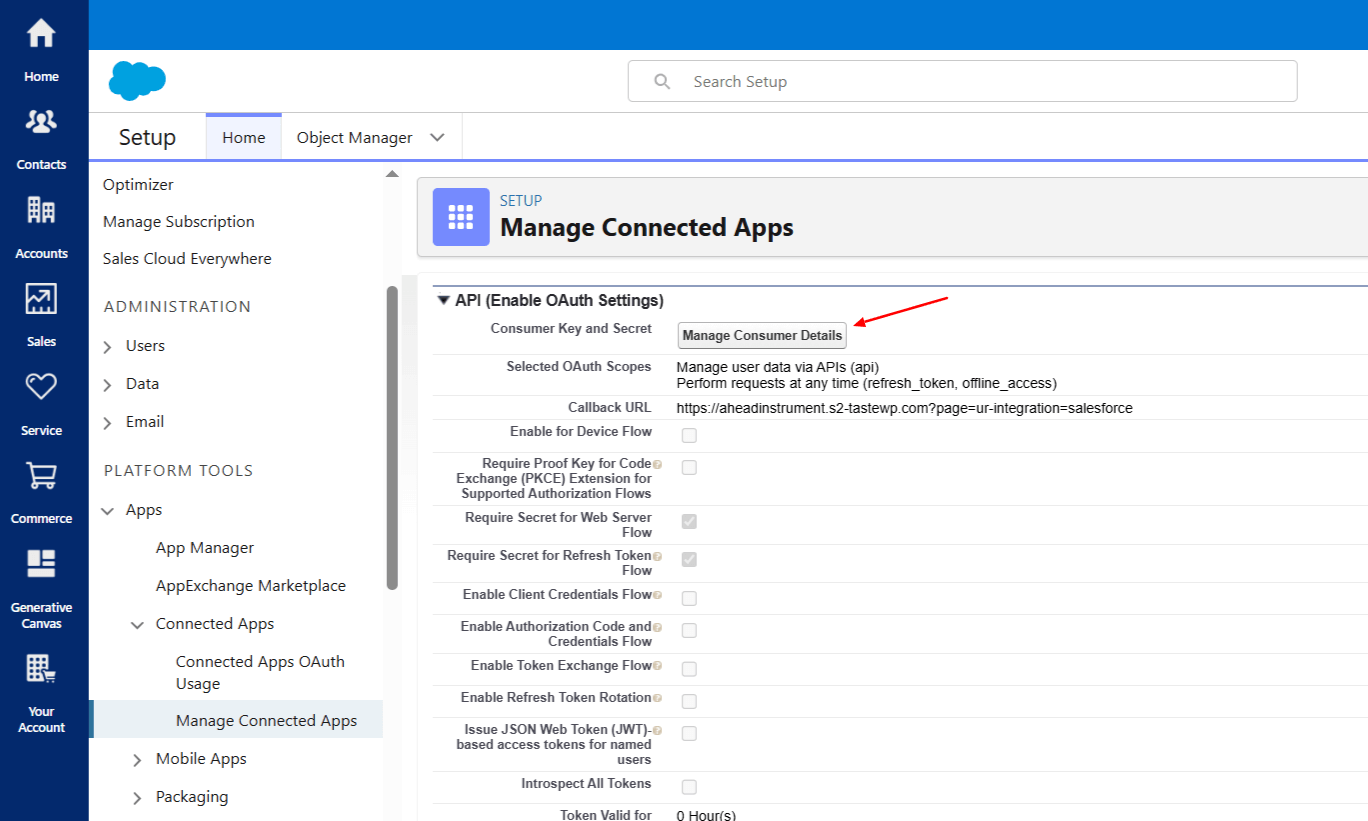
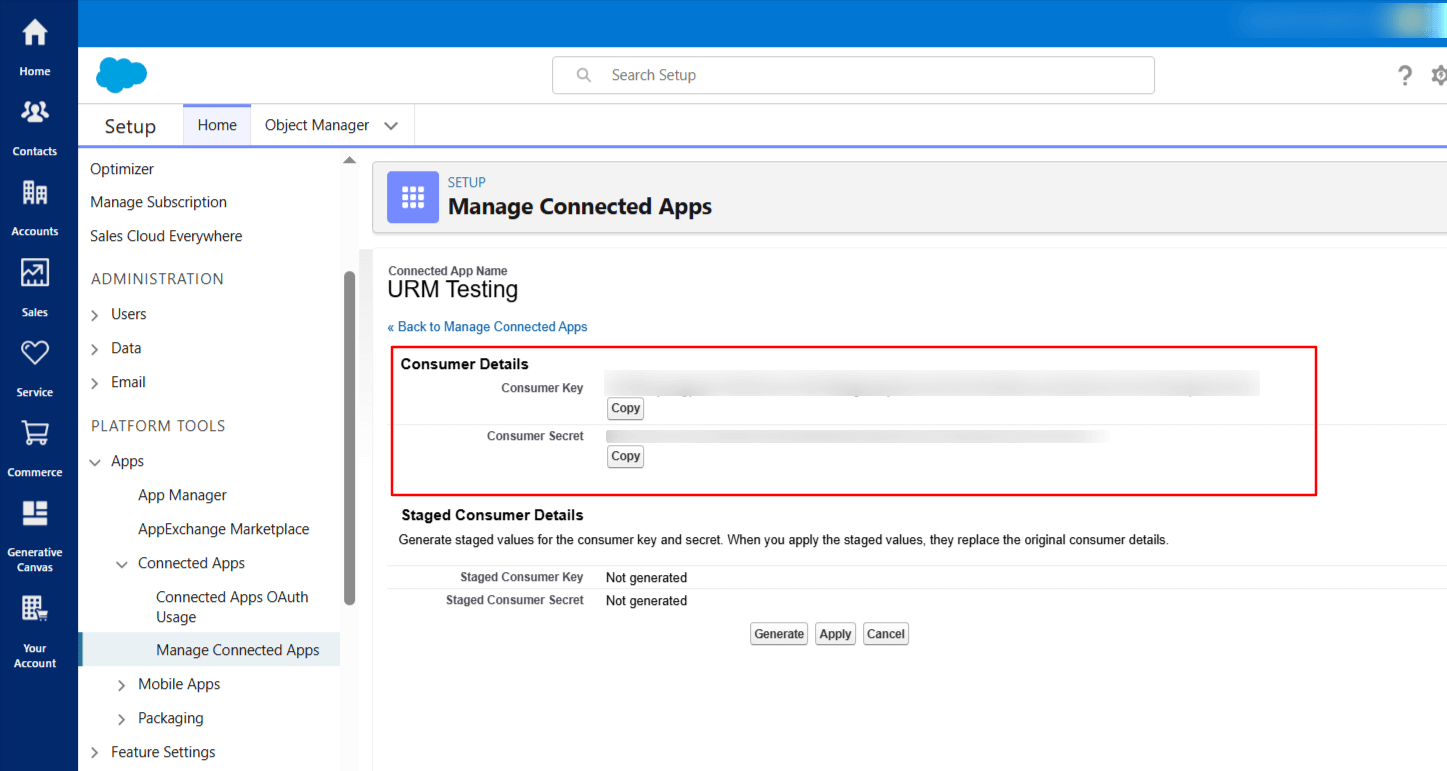
Once the waiting period is complete, click Manage Consumer Details on your Connected App page.
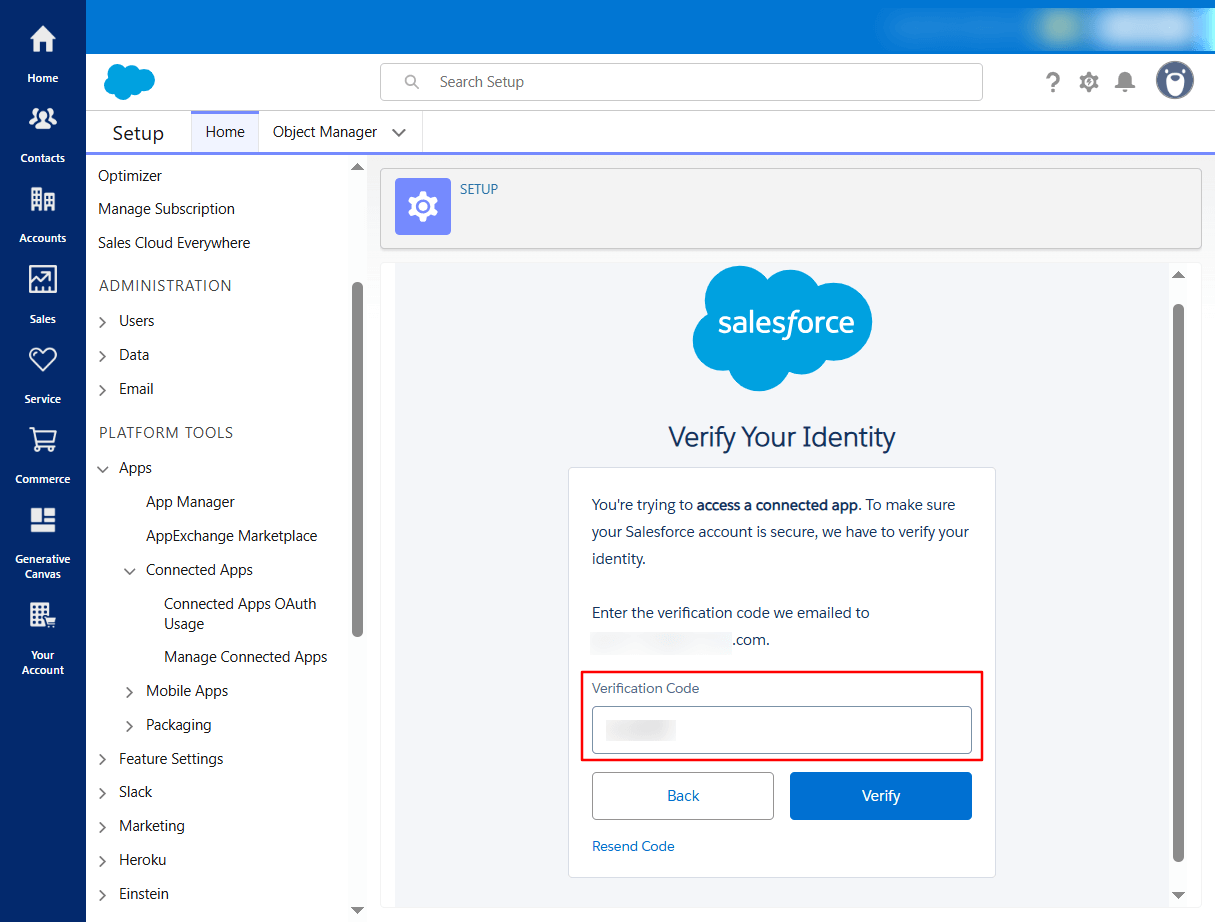
Salesforce will send a verification code to your email address. Check your inbox and enter the code when prompted.
After verification, Salesforce displays your Consumer Key and Consumer Secret. Copy both values and keep them secure.
Connecting WordPress to Salesforce
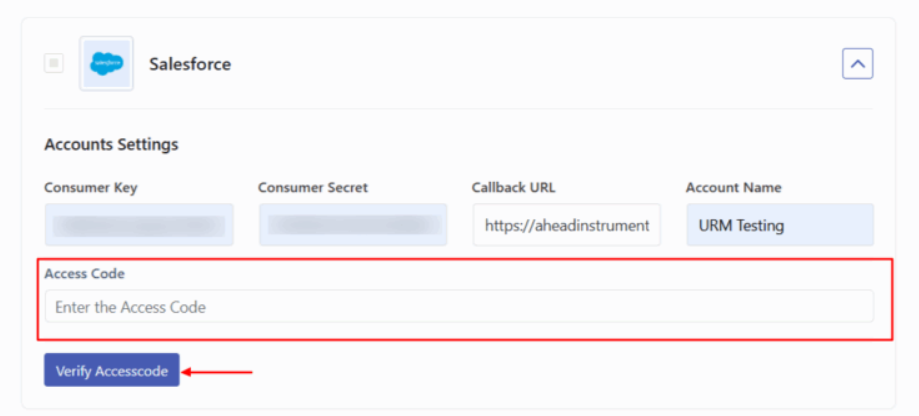
Return to your WordPress dashboard and navigate to User Registration & Membership → Settings → Integration → Salesforce. Paste your Consumer Key into the Consumer Key field and your Consumer Secret into the Consumer Secret field.
Enter a name for your Salesforce account in the Account Name field. This name is for your reference only and can be anything you choose.
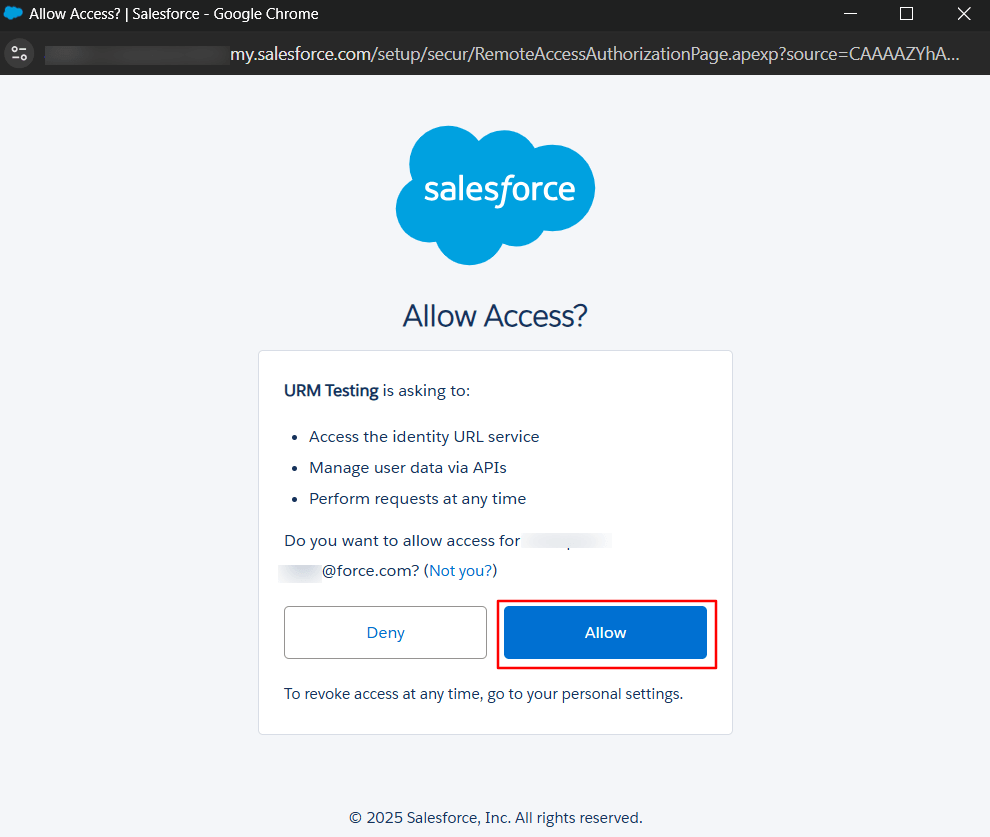
Click the Authenticate with Salesforce button. You will be redirected to Salesforce to authorize the connection. Log in to your Salesforce account if prompted and click Allow to grant WordPress access to your Salesforce data.
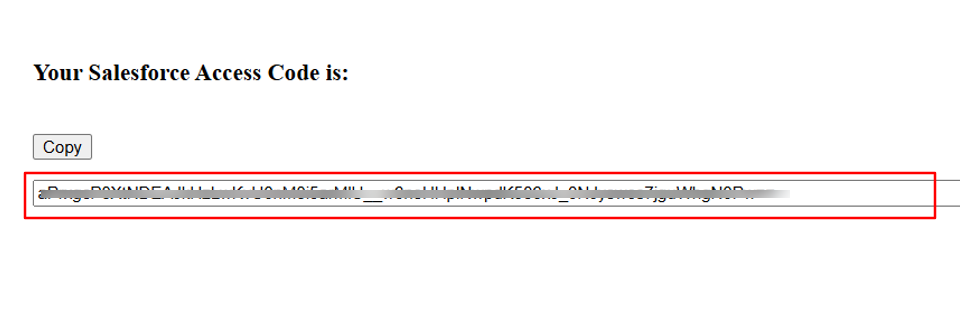
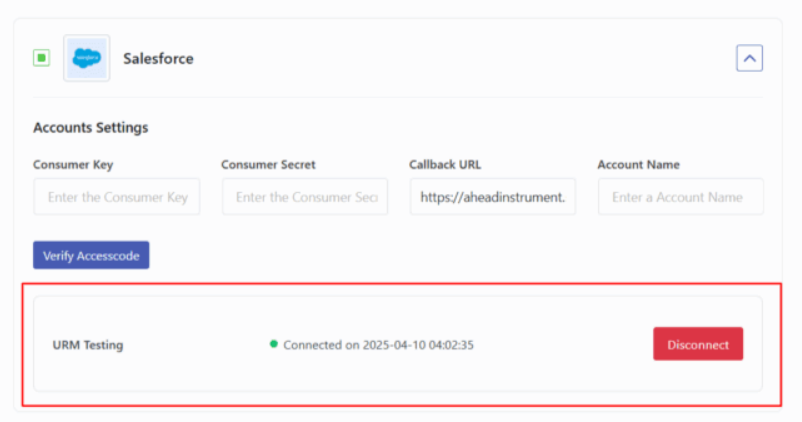
After authorization, Salesforce redirects you back to WordPress with an access code. Copy this access code from the URL or the page display. Paste the access code into the Access Code field in WordPress and click Verify Accesscode.
Once verified, your WordPress site is successfully connected to Salesforce.
Mapping Form Fields to Salesforce
Now that authentication is complete, you can configure which registration form data syncs to Salesforce. Go to User Registration & Membership → All Forms and select the form you want to connect.
Navigate to Form Settings → Integration → Salesforce and click Add New Connection. Give your connection a descriptive name and select your connected Salesforce account from the dropdown.
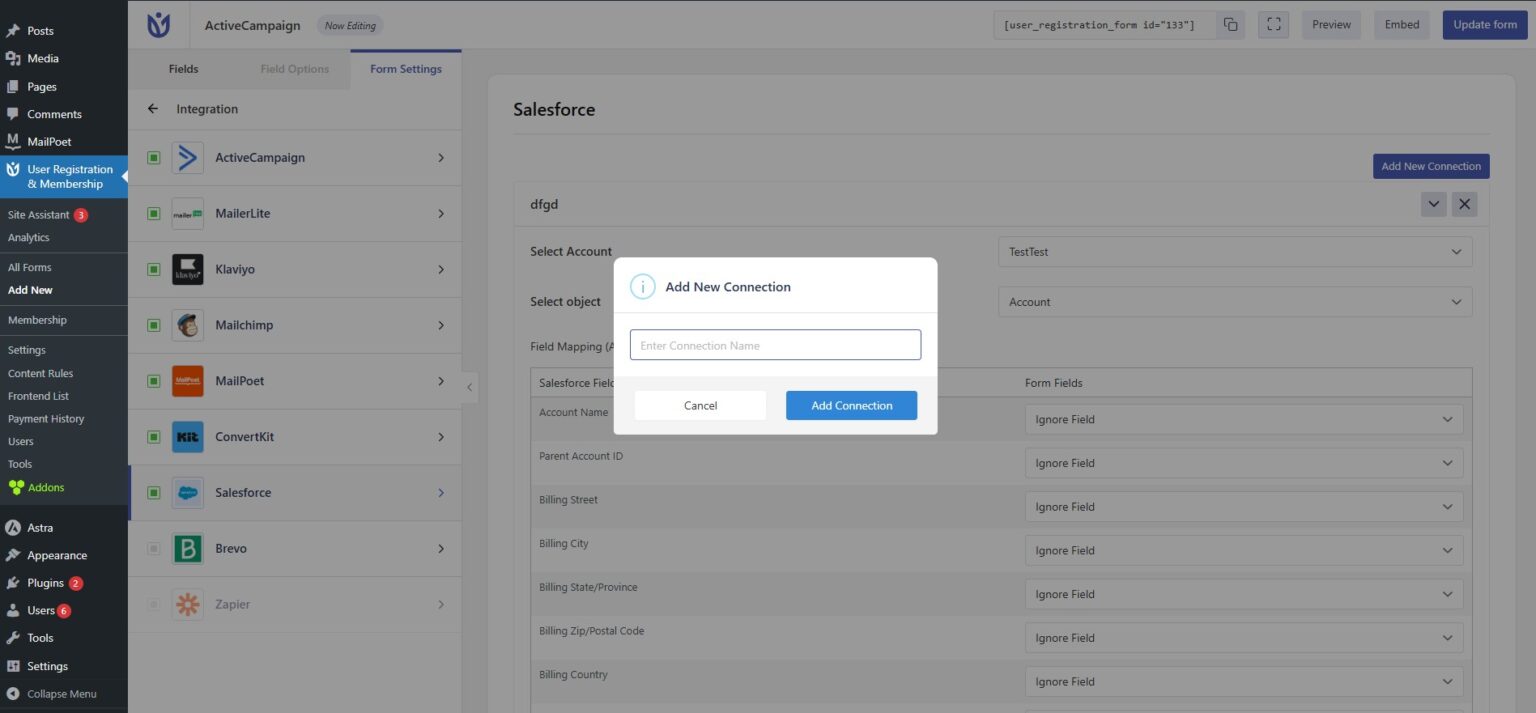
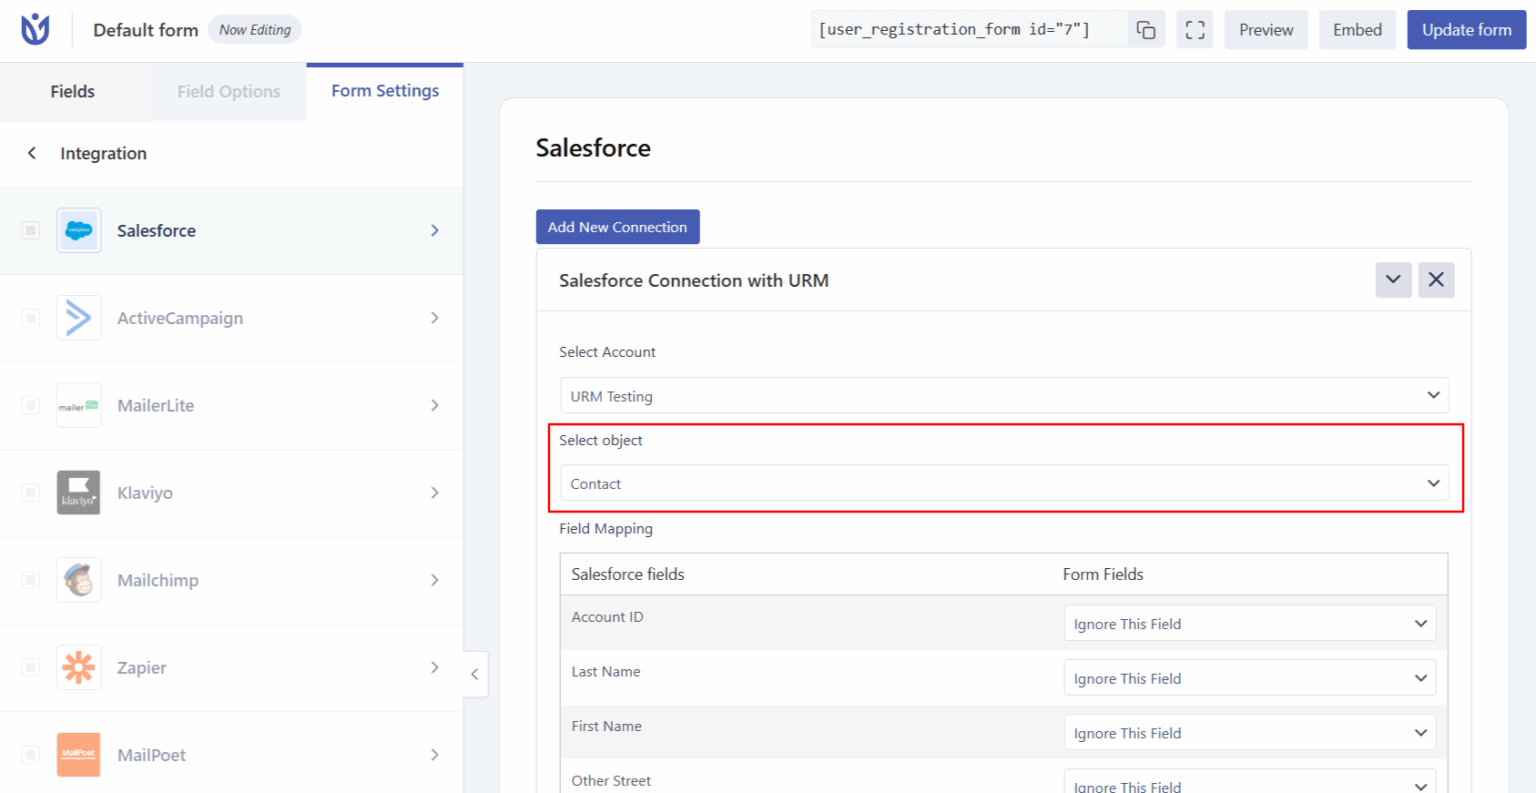
Choose which Salesforce objects to synchronize. You can select Leads, Contacts, or Accounts depending on how you want to organize your data in Salesforce.
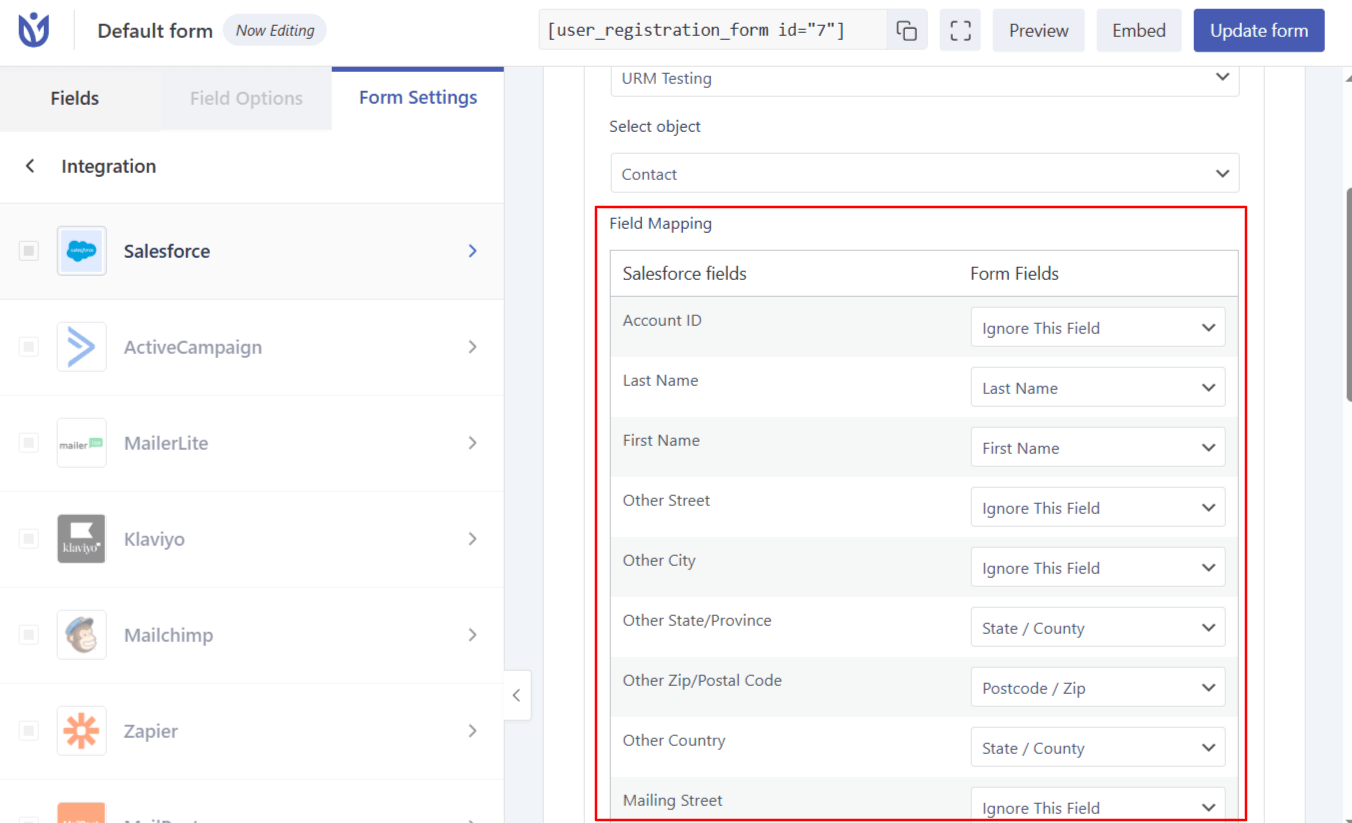
Map your WordPress registration fields to the corresponding Salesforce fields. For each field in your registration form, select the matching Salesforce field from the dropdown. This ensures that user data flows into the correct Salesforce fields.
Field types must be compatible between WordPress and Salesforce for proper data transfer. For example, email fields should map to email fields, and text fields should map to text fields.
Click Update Form to save your configuration.
Testing Your Integration
To verify that your integration works correctly, open your registration form in an incognito or private browser window. Fill out the form with test data and submit it.
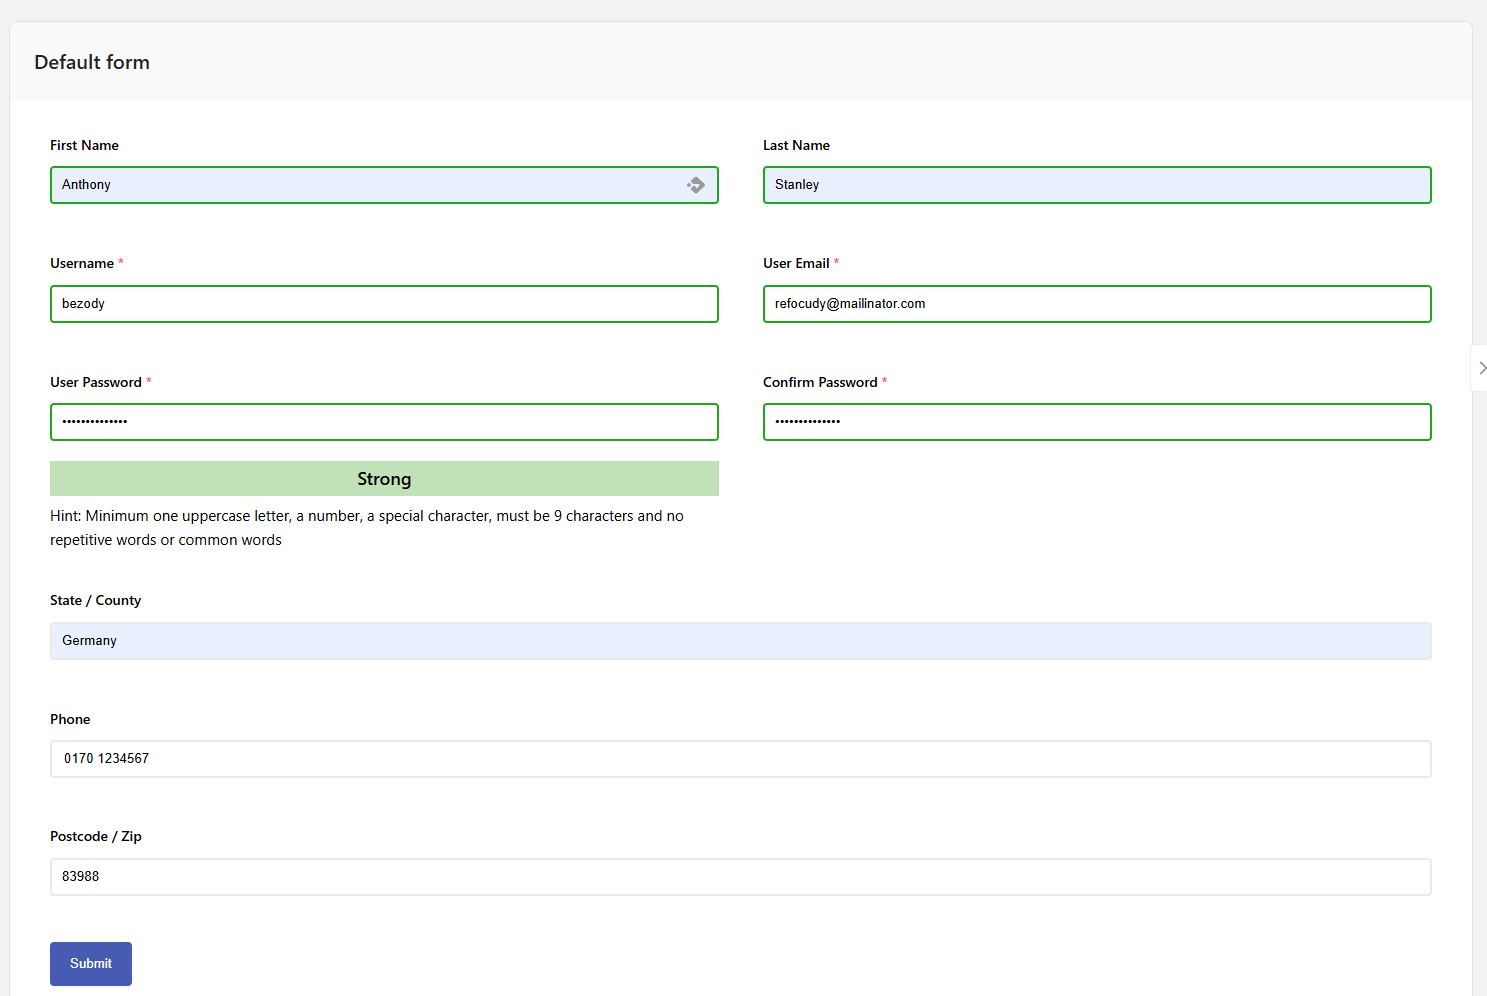
Log in to your Salesforce account and navigate to your contact list or the object type you configured. The test submission should appear in Salesforce with all mapped fields populated correctly.
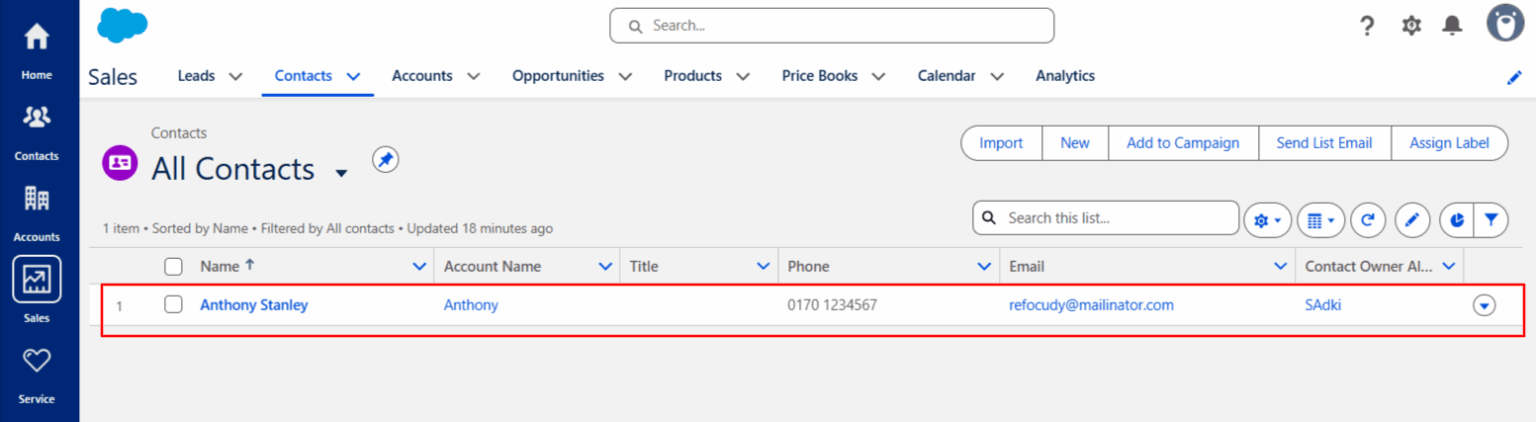
If data does not appear in Salesforce, verify that your field mappings are correct and that the Salesforce connection is still active in WordPress.
Using Conditional Logic
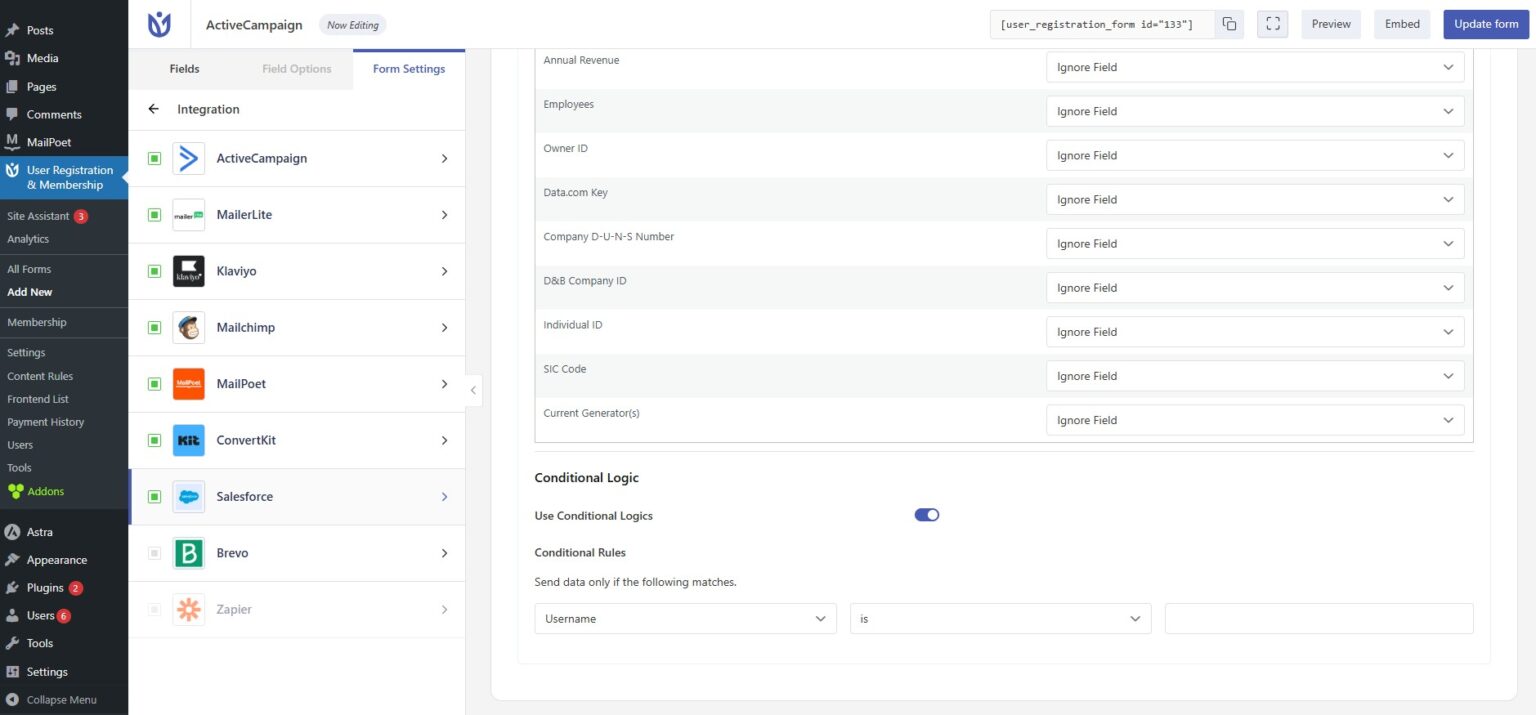
You can enable conditional logic to control when data is sent to Salesforce based on user responses. This feature allows sophisticated audience segmentation during registration.
In your form settings under the Salesforce integration section, enable Use Conditional Logic. Configure rules that determine which form submissions sync to Salesforce based on specific field values or user selections.
That's it! Now you know how to integrate User Registration & Membership with Salesforce CRM. Next, would you like to explore other CRM integrations? Be sure to check out our guide on email marketing integrations for more ways to sync your user data.