
MailerLite
ProIntegrate MailerLite with registration forms to automatically add new users to email lists and marketing campaigns.
Last updated on Aug 12, 2026
Would you like to automatically add new registrants to your MailerLite email lists? User Registration & Membership makes it easy to connect your registration forms with MailerLite, so every new user is automatically added to your email marketing campaigns. This tutorial will show you how to install and use the MailerLite addon with User Registration & Membership.
Before getting started, make sure you have installed and activated the User Registration & Membership plugin on your WordPress site. Then, make sure you have installed and activated the MailerLite addon.
The MailerLite addon is available with Plus or Professional plans.
Activating the MailerLite Addon
To activate the MailerLite addon, go to User Registration & Membership > Addons in your WordPress dashboard. Here, you'll see a list of all available addons.
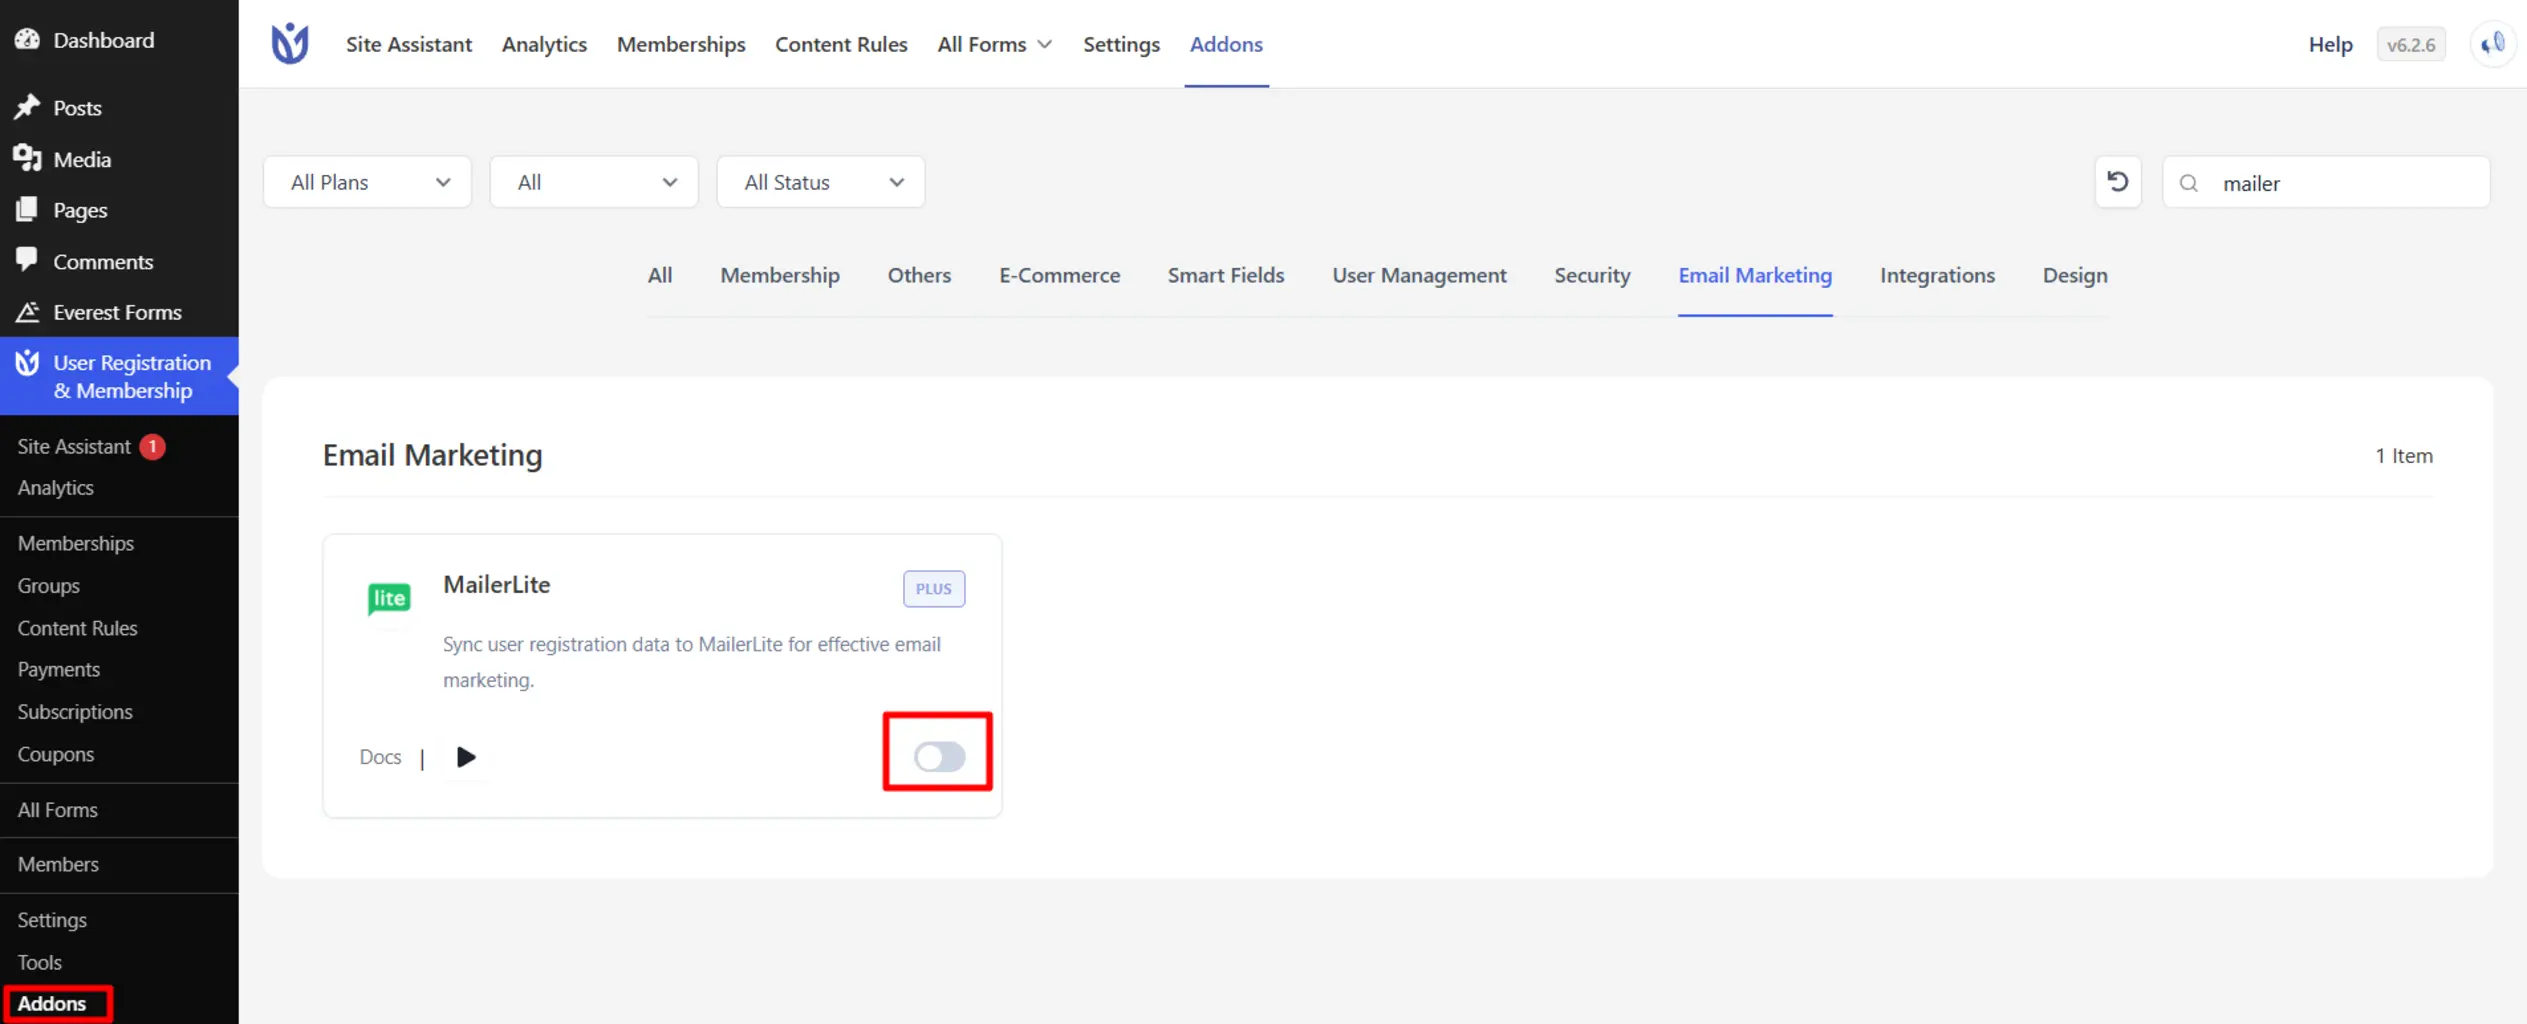
Find the MailerLite addon in the list and toggle the switch to activate it. Once activated, you can proceed to connect your MailerLite account.
Connecting Your MailerLite Account
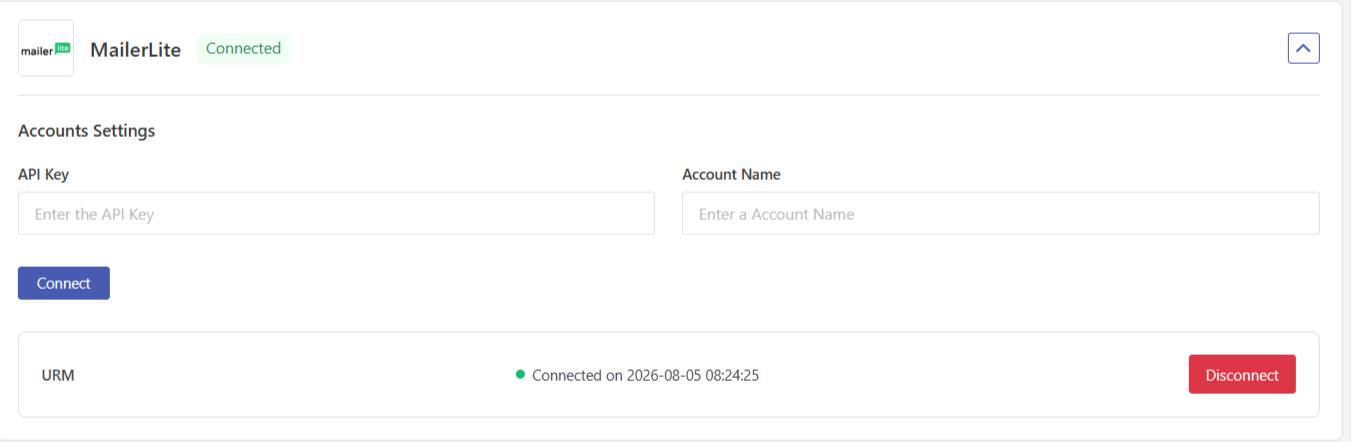
To connect your MailerLite account, go to User Registration & Membership > Settings > Integration > Email Marketing > MailerLite. Here, you'll configure the connection between your WordPress site and MailerLite.
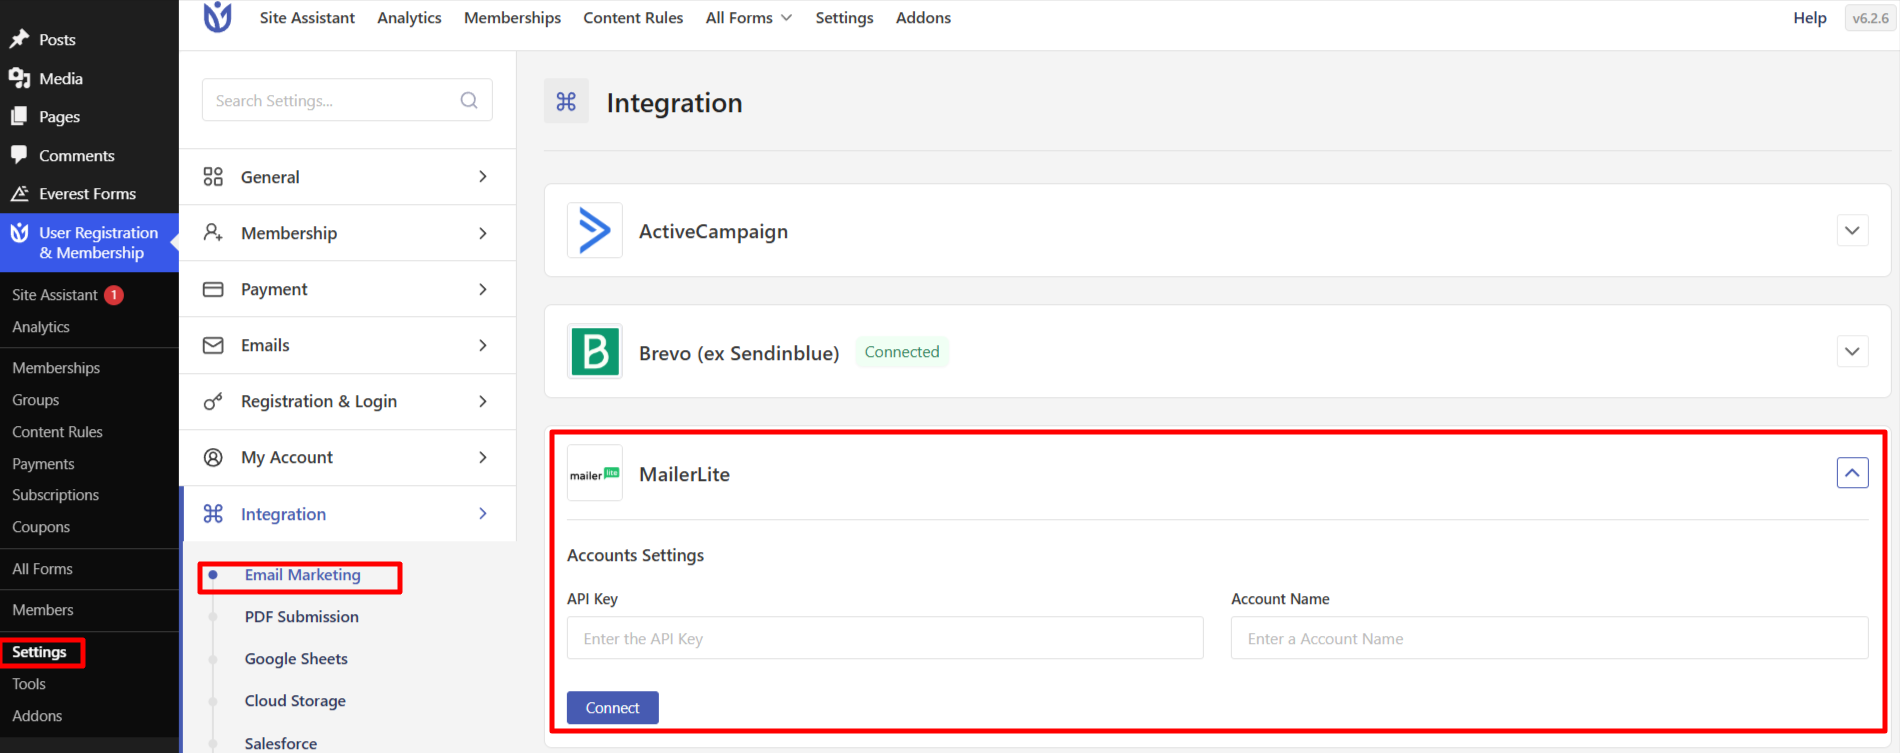
You'll need your MailerLite API key to complete the connection. To get your API key:
Log in to your MailerLite account
Navigate to Integrations > Developer API
Click Generate new token
Give your token a name and click Create token
Copy the generated API key
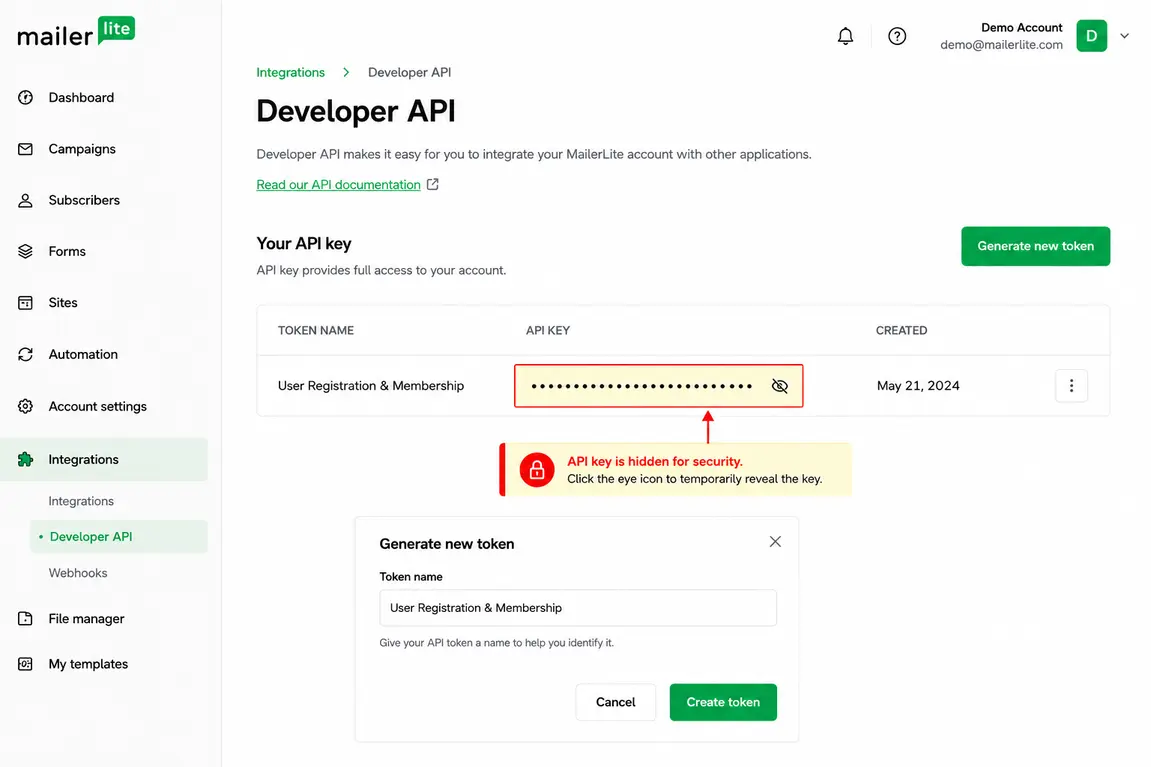
Once you have your API key, paste it into the API Key field in User Registration & Membership > Settings > Integration > MailerLite. Click Save Changes to connect your account.
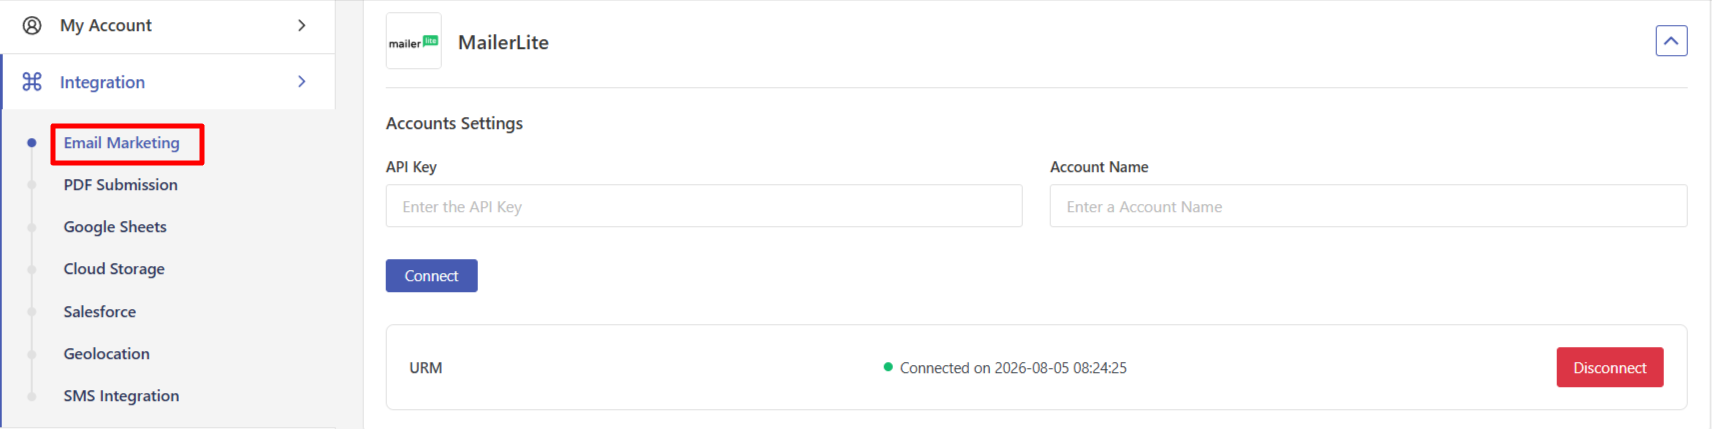
Once connected, you'll see a success message confirming the connection.
Adding MailerLite to a Registration Form
To add MailerLite integration to a registration form, create or edit a form to open the form builder. Then, go to Form Settings > Integration> MailerLite.
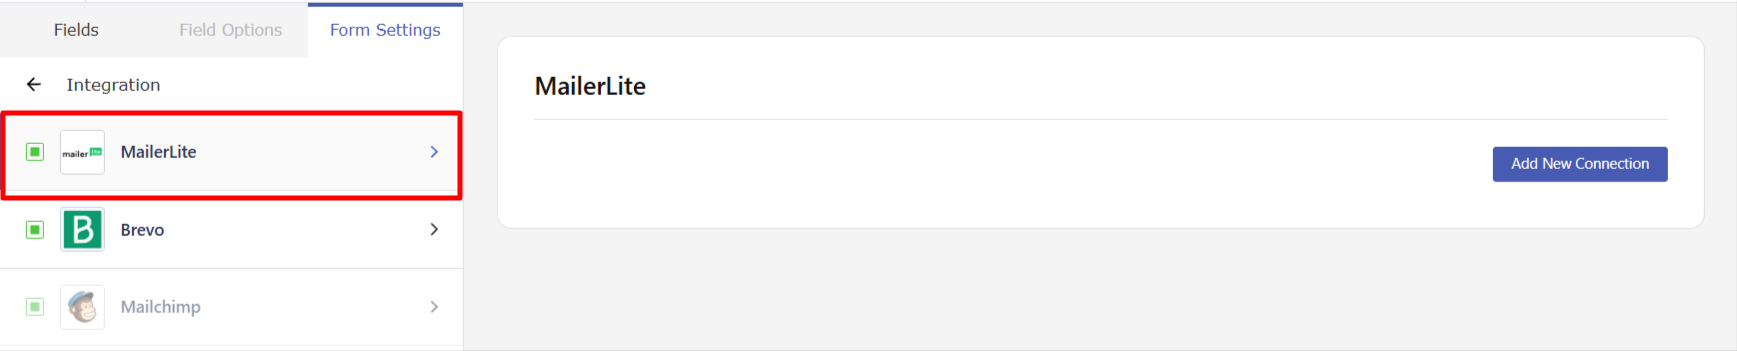
Click Add New Connection to create a new MailerLite connection for this form. You'll see a popup where you can configure the connection.
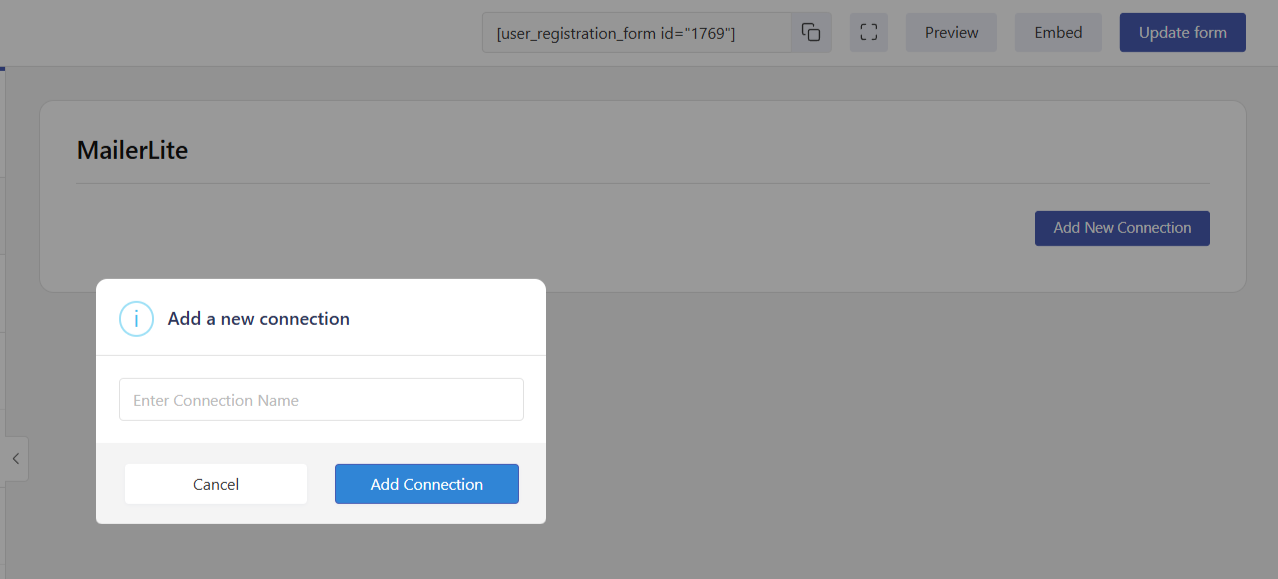
Enter a nickname for this connection. This is for your reference only and won't be visible to users. Then, select the MailerLite group you want to add subscribers to from the Group dropdown.
If you don't see your groups in the dropdown, make sure you've created groups in your MailerLite account first.
Mapping Form Fields to MailerLite
After selecting your group, you'll need to map your registration form fields to MailerLite fields. This tells the addon which information from your form should be sent to which field in MailerLite.
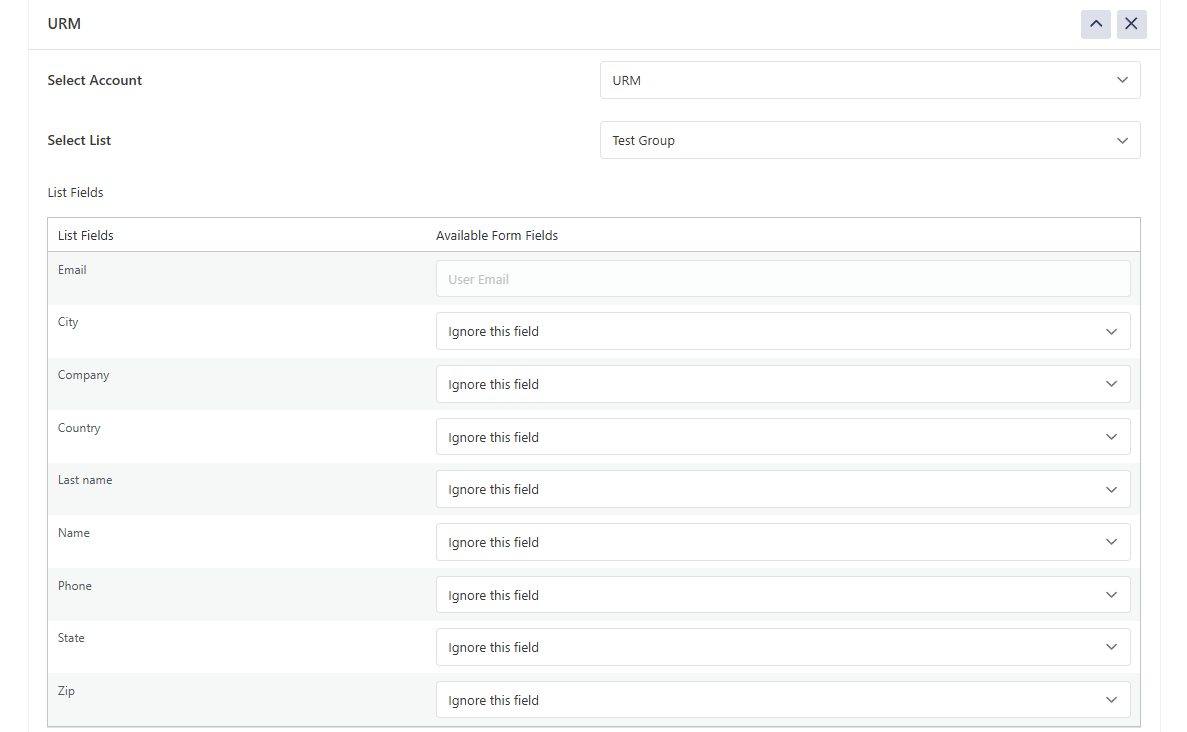
The Email field is required and will be mapped automatically. For additional fields:
Select a form field from the left dropdown
Select the corresponding MailerLite field from the right dropdown
Click the + button to add more field mappings
Common field mappings include First Name, Last Name, and Phone. You can map as many fields as you need.
Custom fields must be created in your MailerLite account before they appear in the mapping dropdown.
Use Double Opt-in
Enable the Use Double Opt-in option if you want MailerLite to send a confirmation email before subscribing users. Users will only be added to your MailerLite audience after they verify their email address.

Using Conditional Logic
If you'd like to control when users are added to MailerLite based on their form responses, toggle on Enable Conditional Logic.
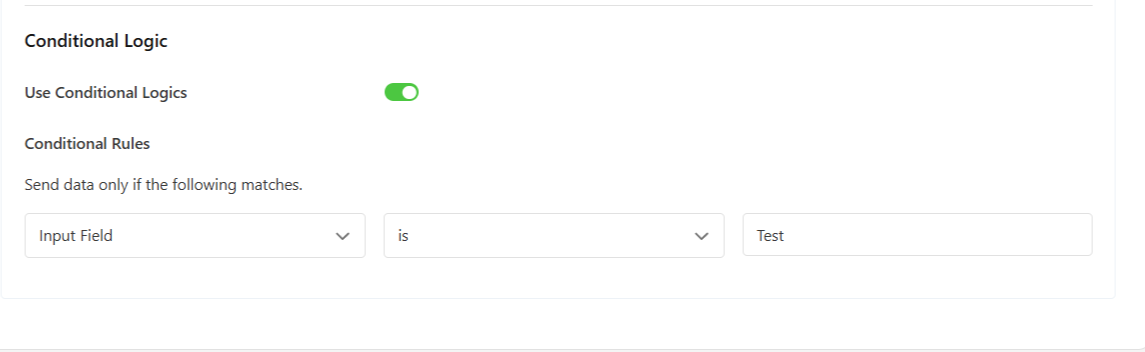
Once enabled, you can set conditions like:
Only add users who select a specific option from a dropdown
Only add users who check a newsletter subscription checkbox
Only add users based on their selected user role
Click Add Condition to create your first rule. Select the form field, choose the condition type, and enter the value to match.
Testing Your MailerLite Connection
After configuring your MailerLite connection, click Save to save your settings. Then, we recommend testing the connection by submitting a test registration.
To test:
Open your registration form on the front end
Fill out the form with test information
Submit the form
Check your MailerLite account to verify the subscriber was added
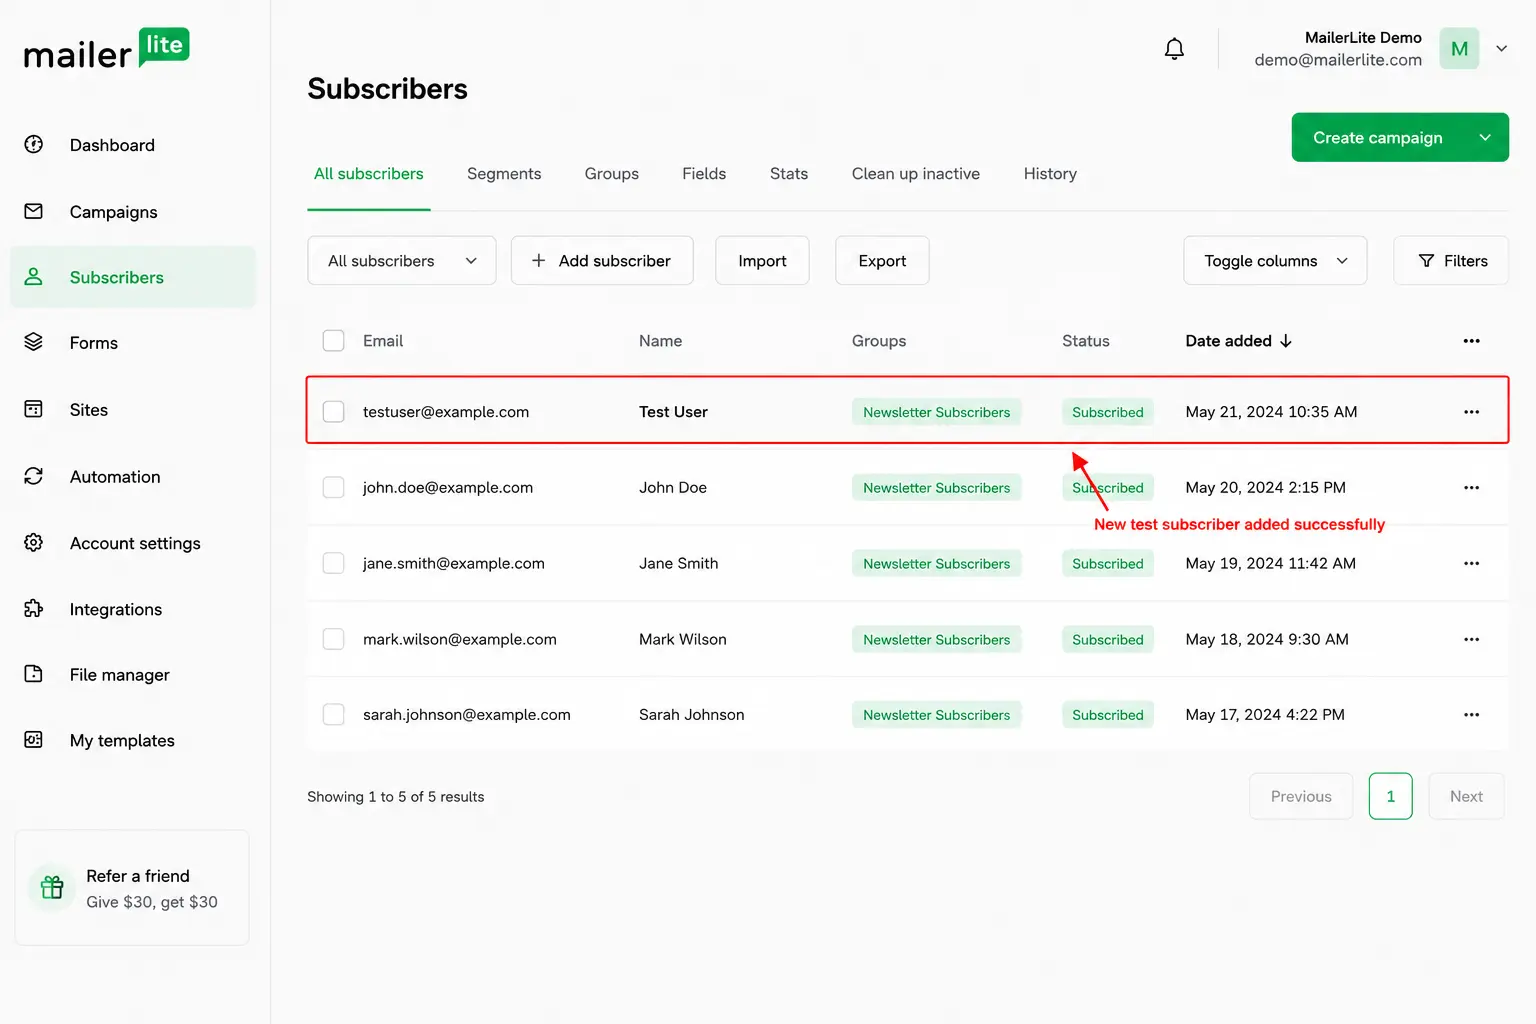
If the subscriber appears in your MailerLite group with the correct information, your connection is working correctly.
Managing Multiple MailerLite Connections
You can add multiple MailerLite connections to a single form. This is useful if you want to add users to different groups based on their selections.
To add another connection, click Add New Connection again in Form Settings > MailerLite. Each connection can have its own group selection, field mapping, and conditional logic.
To edit an existing connection, click the edit icon next to the connection name. To delete a connection, click the delete icon.
Frequently Asked Questions
Why don't I see my MailerLite groups in the dropdown?
Make sure you've created groups in your MailerLite account first. Then, verify your API key is entered correctly in User Registration & Membership > Settings > Integration > MailerLite. If groups still don't appear, try disconnecting and reconnecting your account.
Can I add users to multiple groups at once?
Yes. Create multiple MailerLite connections in your form settings, each pointing to a different group. Users will be added to all groups when they submit the form.
What happens if a user is already in my MailerLite group?
MailerLite will update the existing subscriber with any new information from the form. Duplicate subscribers are not created.
Can I use conditional logic to add users to different groups?
Yes. Create multiple MailerLite connections, each with different conditional logic rules. Users will only be added to groups where they meet the conditions.
That's it! Now you know how to connect User Registration & Membership with MailerLite. Next, would you like to learn how to segment your email lists based on user roles or membership levels? Be sure to check out our guide on using conditional logic with the MailerLite addon for all the details.