Mailchimp
ProAutomatically sync new user registrations with Mailchimp email lists to streamline your email marketing without manual data entry.
Last updated on Jul 15, 2026
Would you like to automatically add new users to your Mailchimp email lists when they register on your site? User Registration & Membership allows you to sync registration data directly with Mailchimp, so you can build your email marketing lists without manual work. This tutorial will show you how to connect Mailchimp to your registration forms and configure the integration.
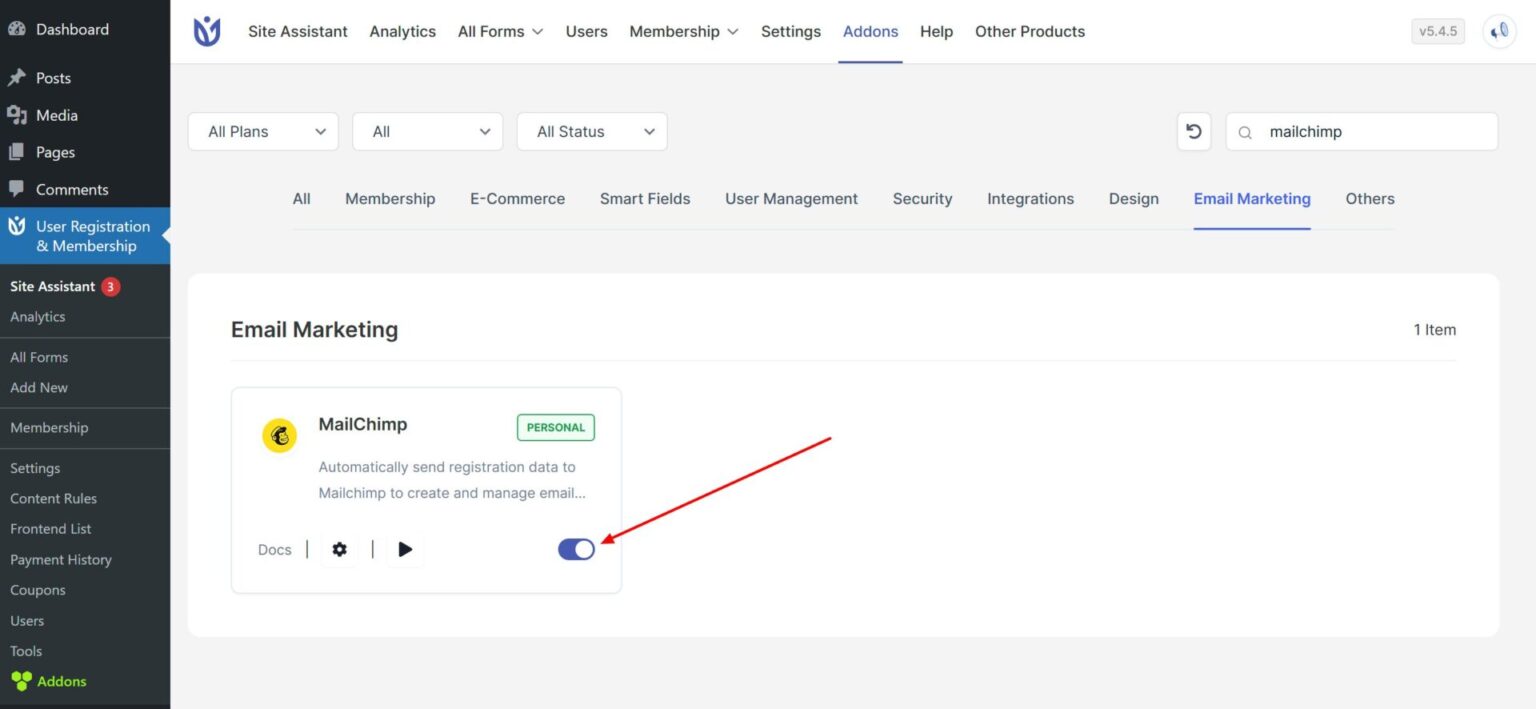
Before getting started, make sure you've installed and activated the User Registration & Membership plugin. Then, make sure you've installed and activated the Mailchimp addon from User Registration & Membership > Addons (available with Personal plan or higher).
You'll also need an active Mailchimp account with at least one audience list created.
Getting Your Mailchimp API Key
To connect User Registration & Membership with Mailchimp, you'll need your API key and username from your Mailchimp account.
Log in to your Mailchimp account and click on your profile name in the top right corner.
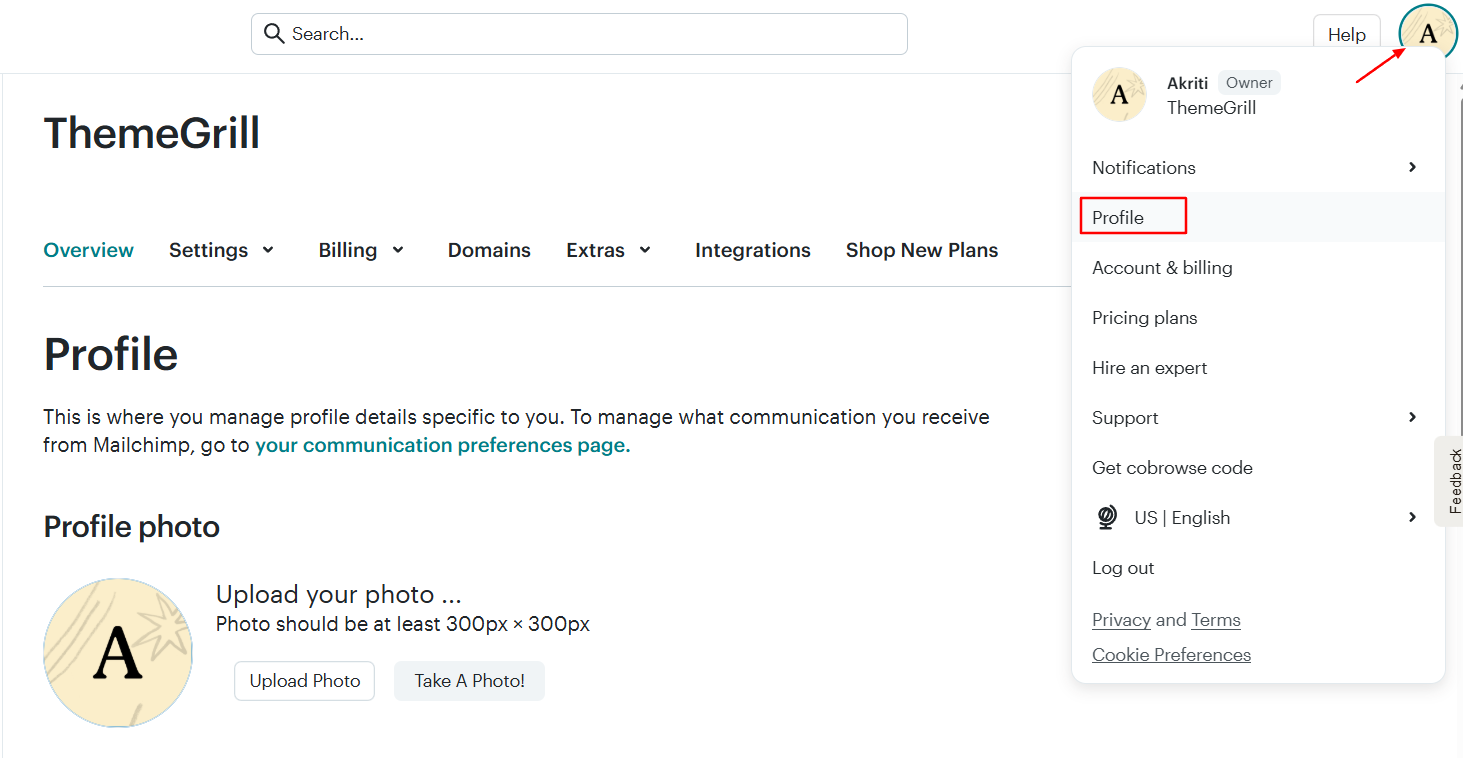
From the dropdown menu, go to Extras > API Keys.
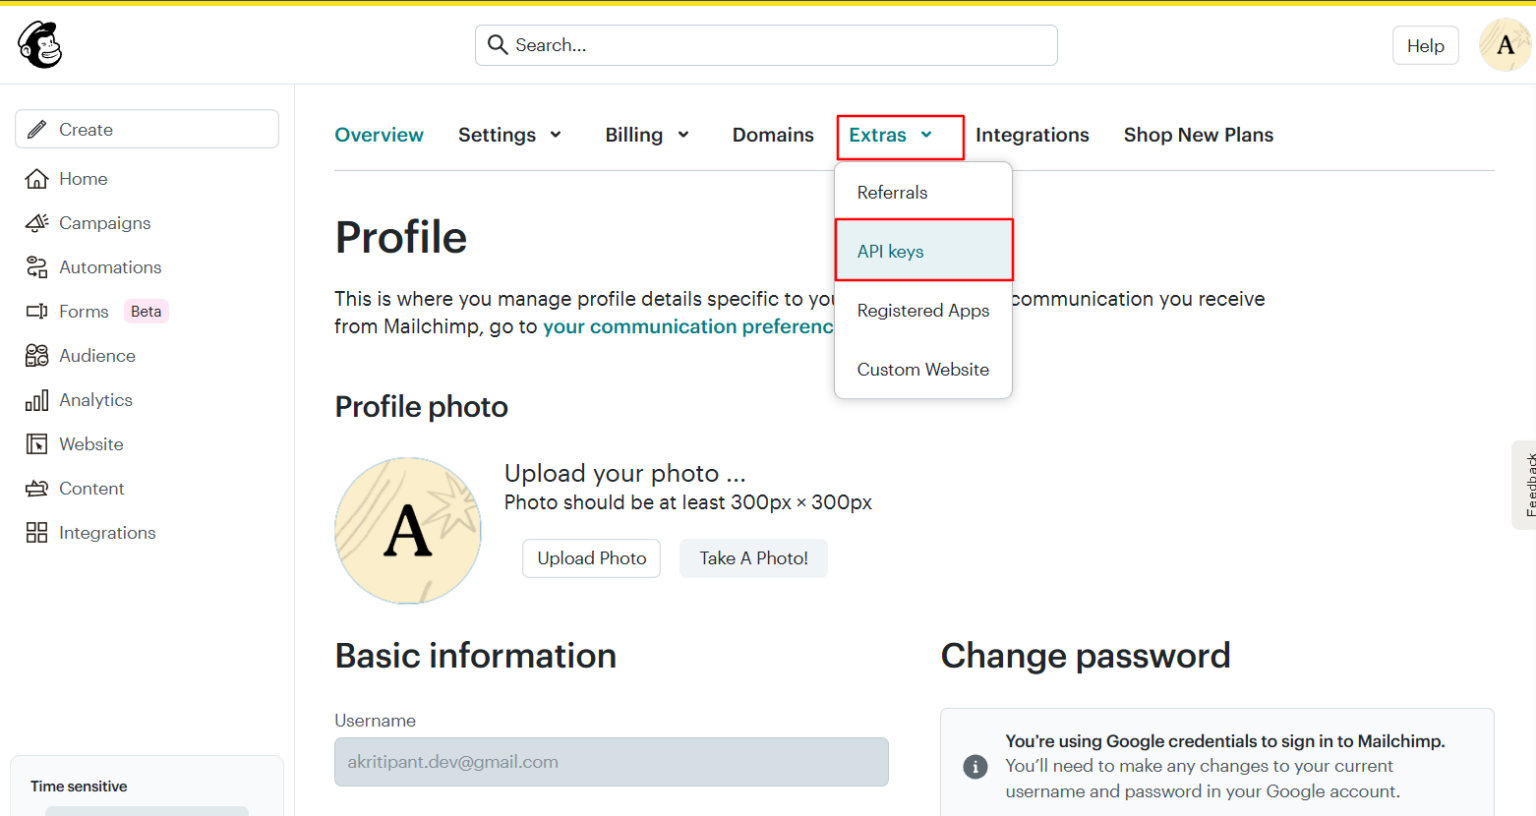
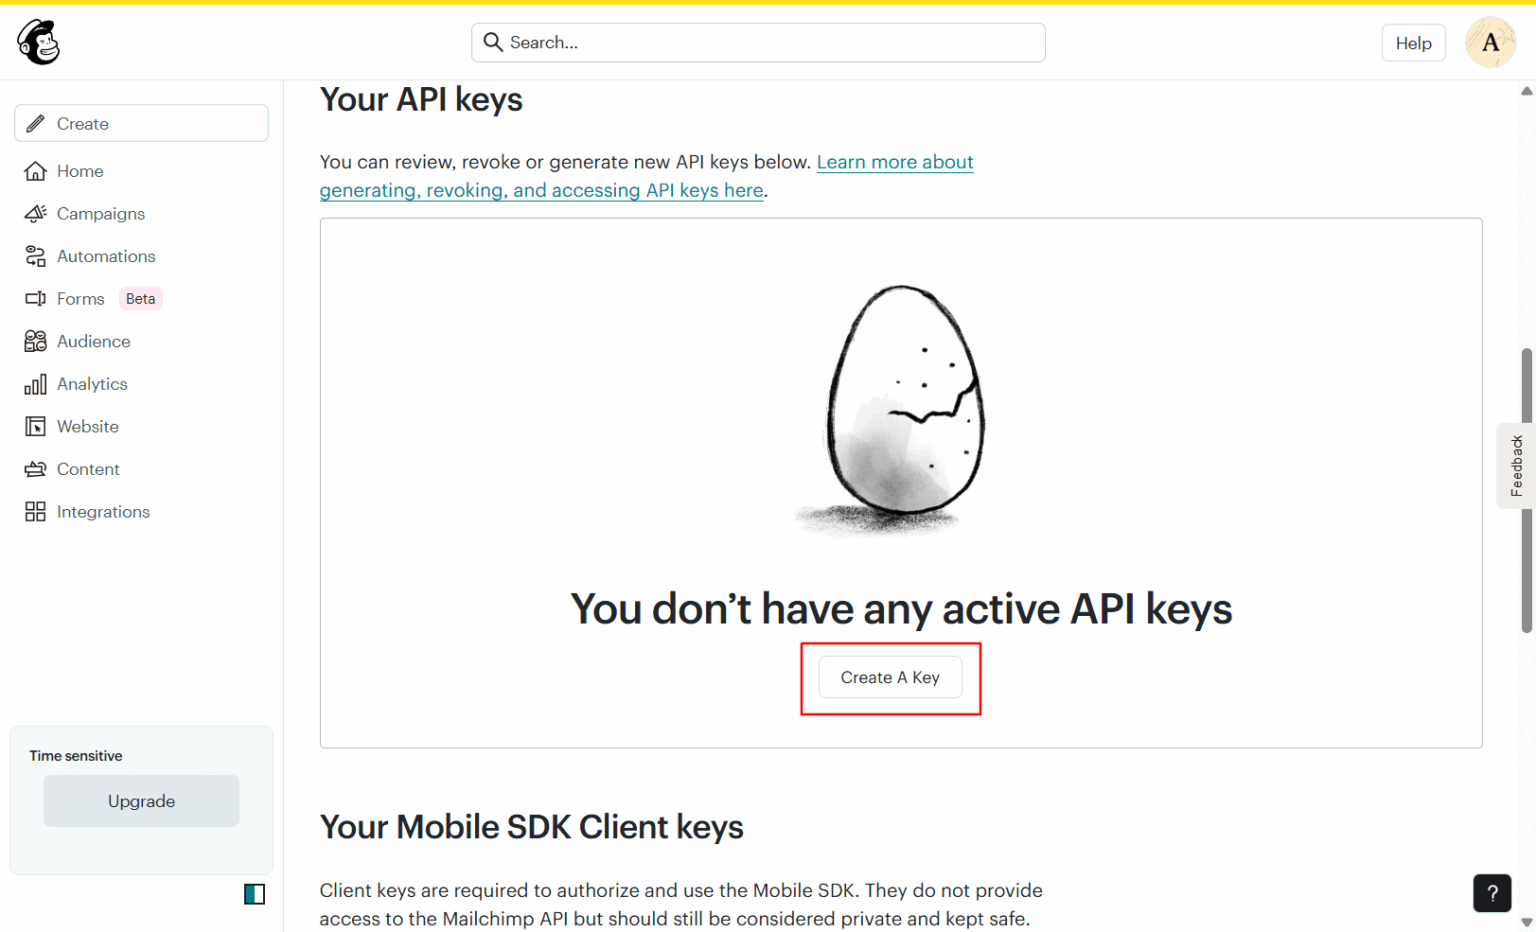
On the API Keys page, click Create A Key.
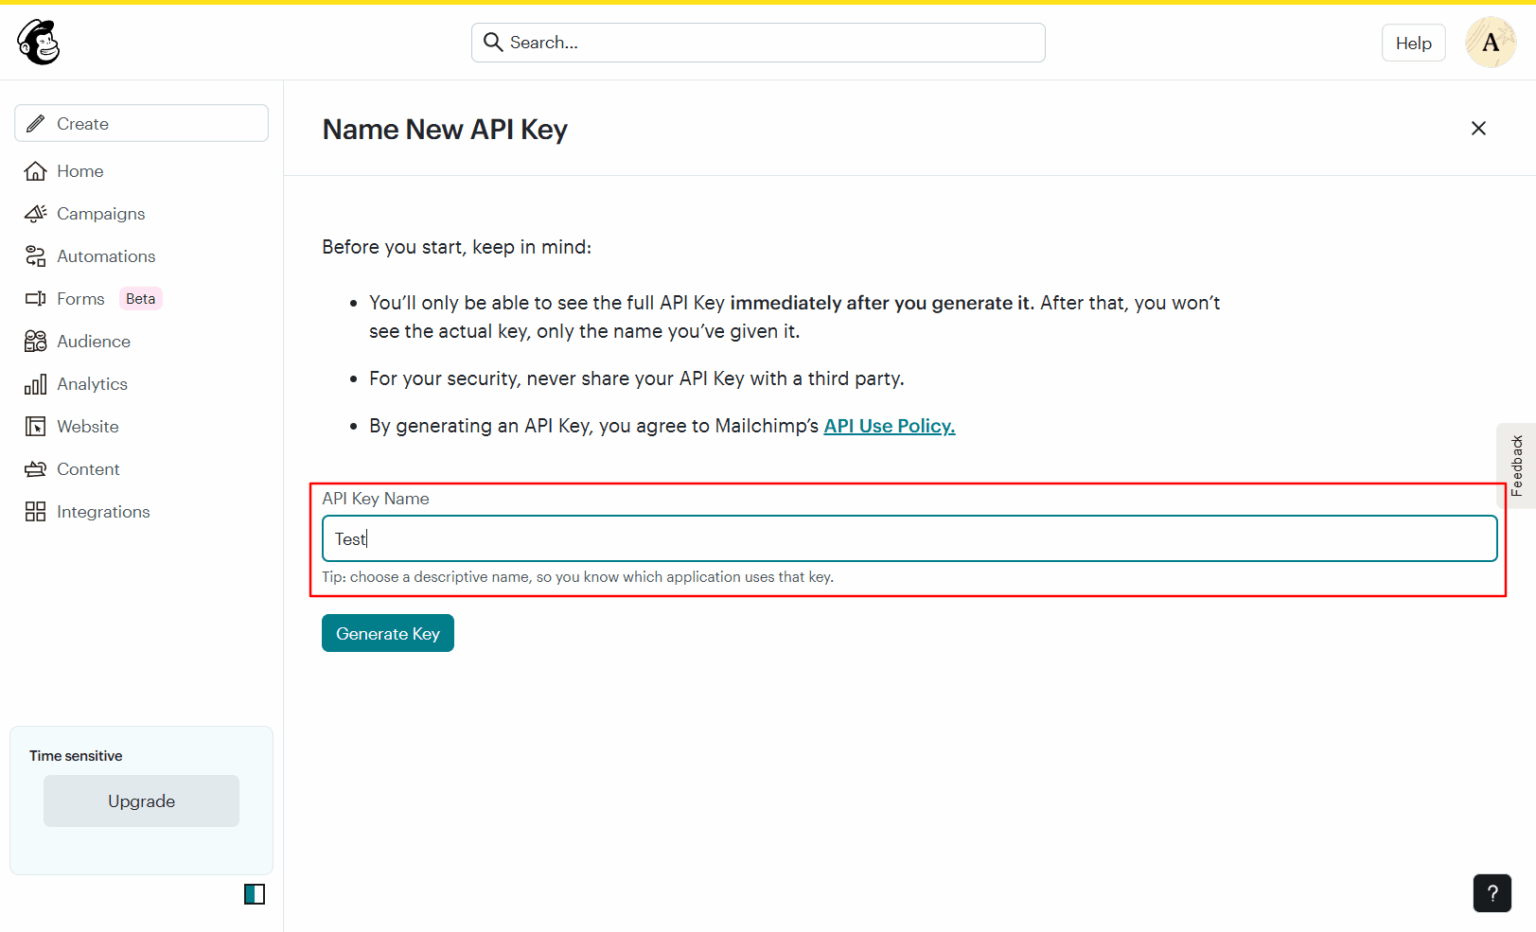
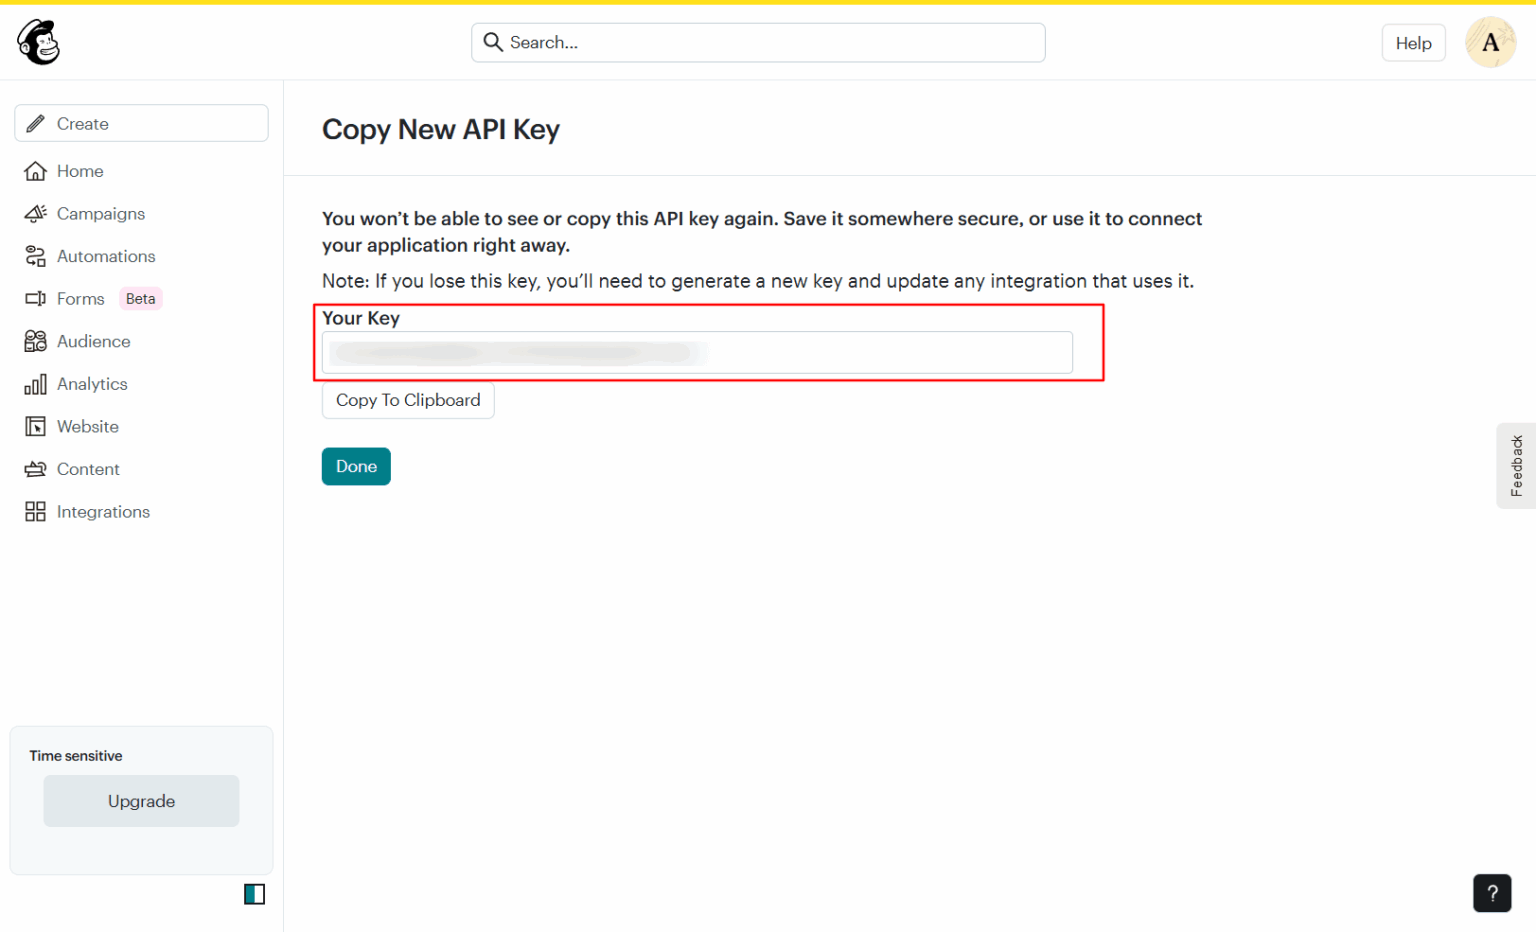
Give your API key a descriptive name so you can identify it later, then click Generate Key. Once the key is generated, copy it to your clipboard — you'll need this in the next step.
Keep your API key secure. Never share it publicly or commit it to version control systems.
Connecting Mailchimp to User Registration & Membership
Now that you have your API key, you can connect Mailchimp to the plugin.
In your WordPress dashboard, go to User Registration & Membership > Settings > Integration > Mailchimp. Paste your API key into the API Key field, then enter your Mailchimp username in the Username field. Click Connect to establish the connection.
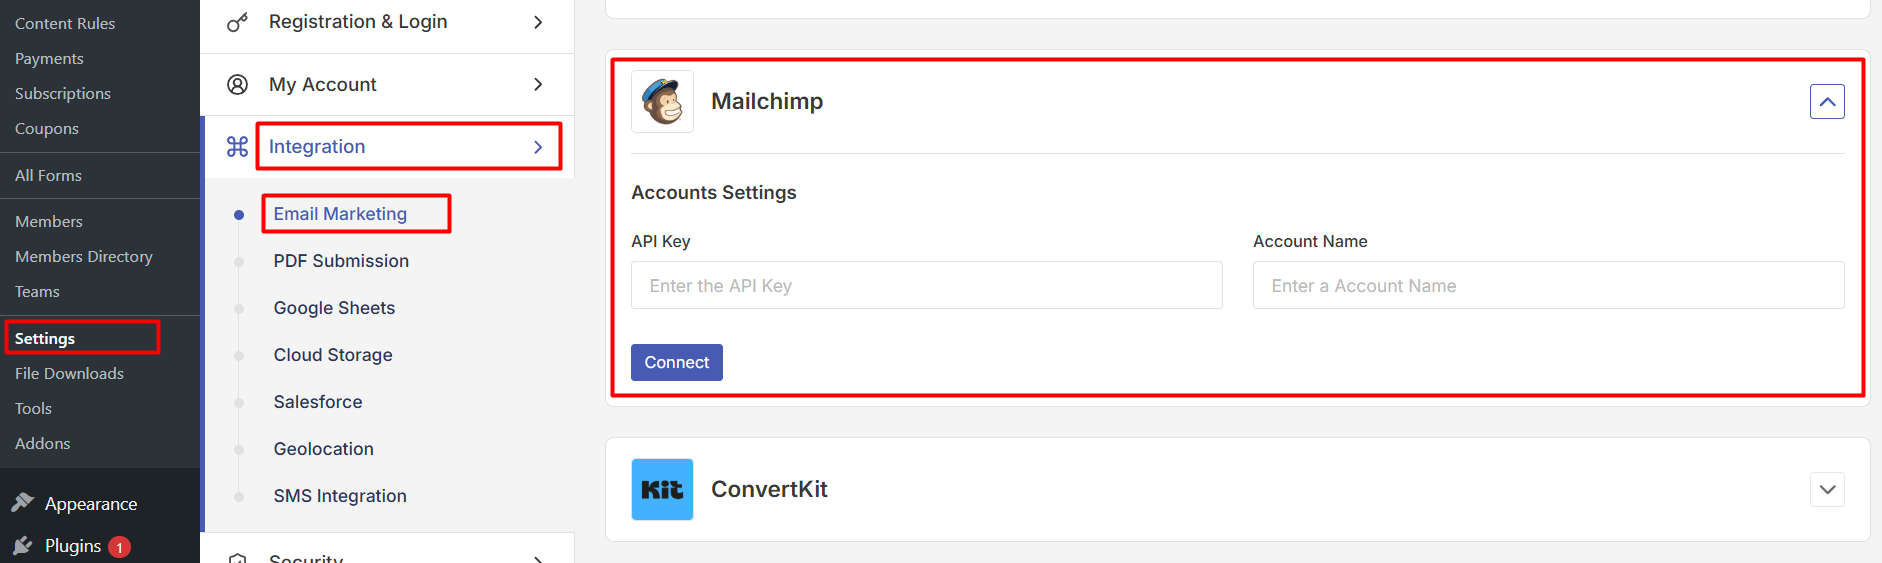
Once connected, you'll see a confirmation message. Your Mailchimp account is now linked to User Registration & Membership, and you can start syncing users to your email lists.
Adding Mailchimp to a Registration Form
With Mailchimp connected at the global level, you can now configure individual registration forms to send data to specific Mailchimp lists.
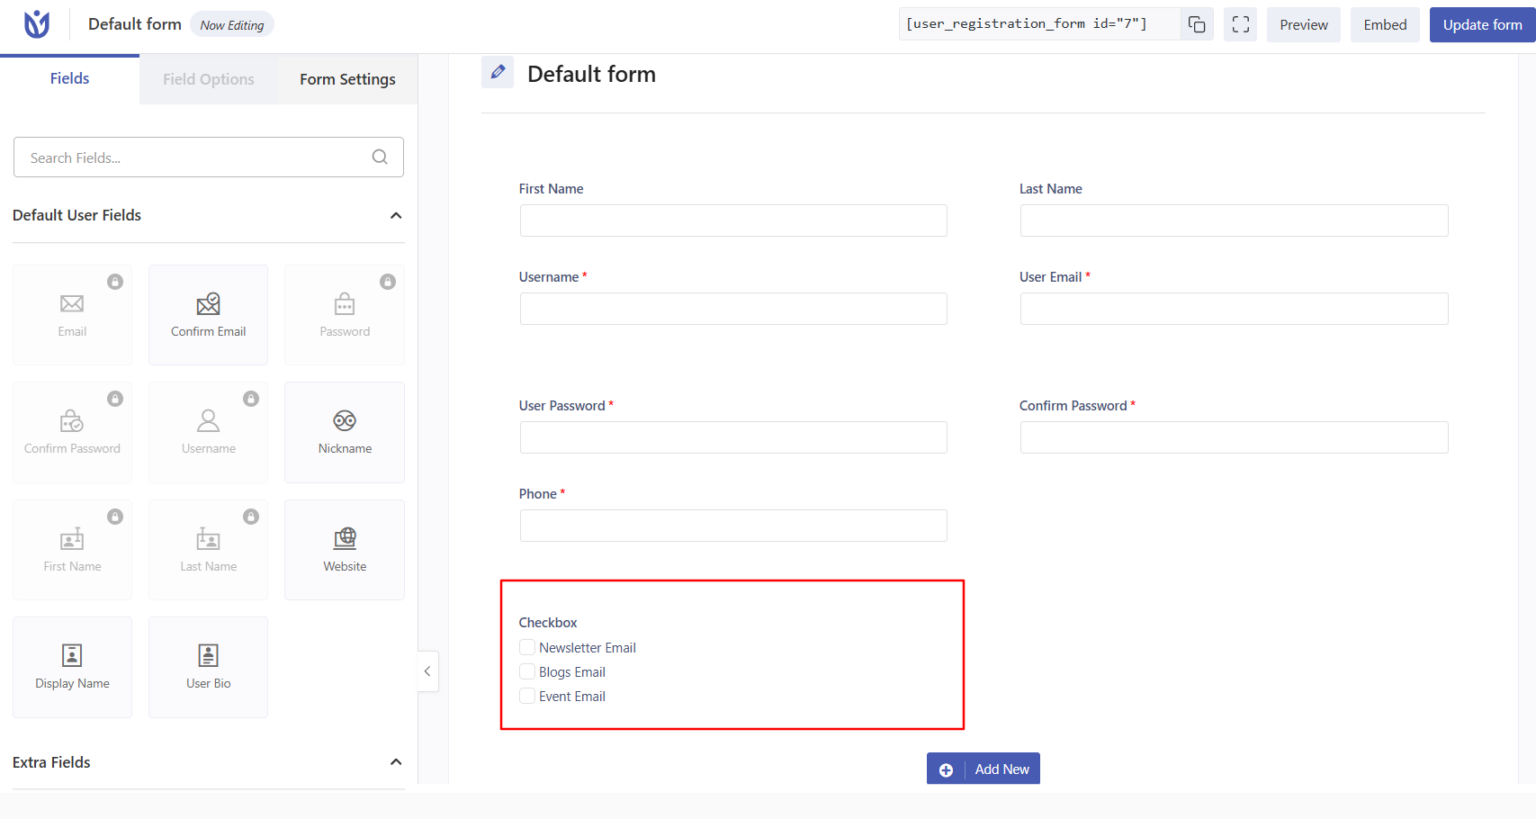
Go to User Registration & Membership > All Forms and either create a new form or edit an existing one. Make sure you add a Checkbox field, if you want to use Conditional Logic for Mailchimp integration.
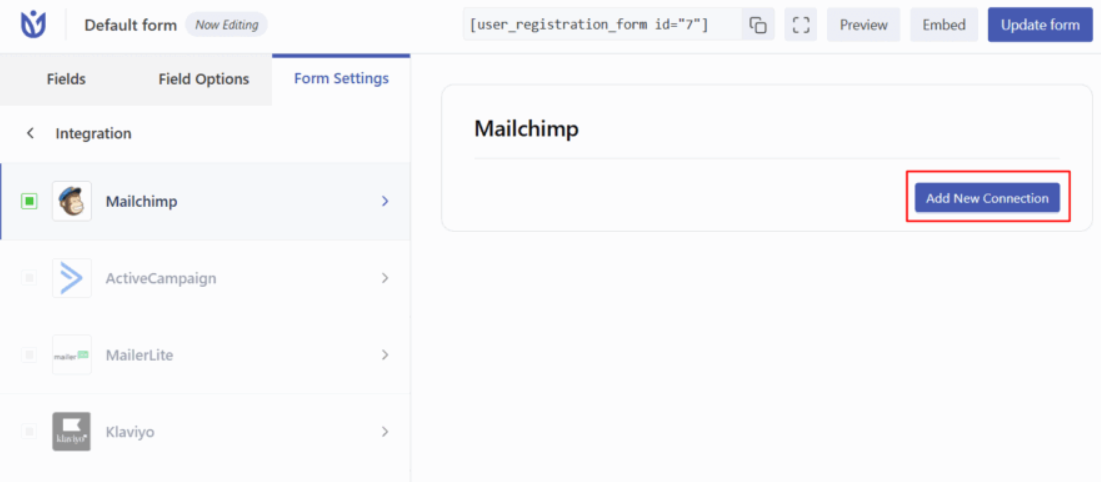
Navigate to Form Settings > Mailchimp > Integration and click Add New Connection.
Give your connection a descriptive name (this is for internal reference only) and click Add Connection. This opens the connection configuration panel where you'll map your form fields to Mailchimp.
Mapping Form Fields to Mailchimp
Field mapping tells User Registration & Membership which form data to send to which Mailchimp fields.
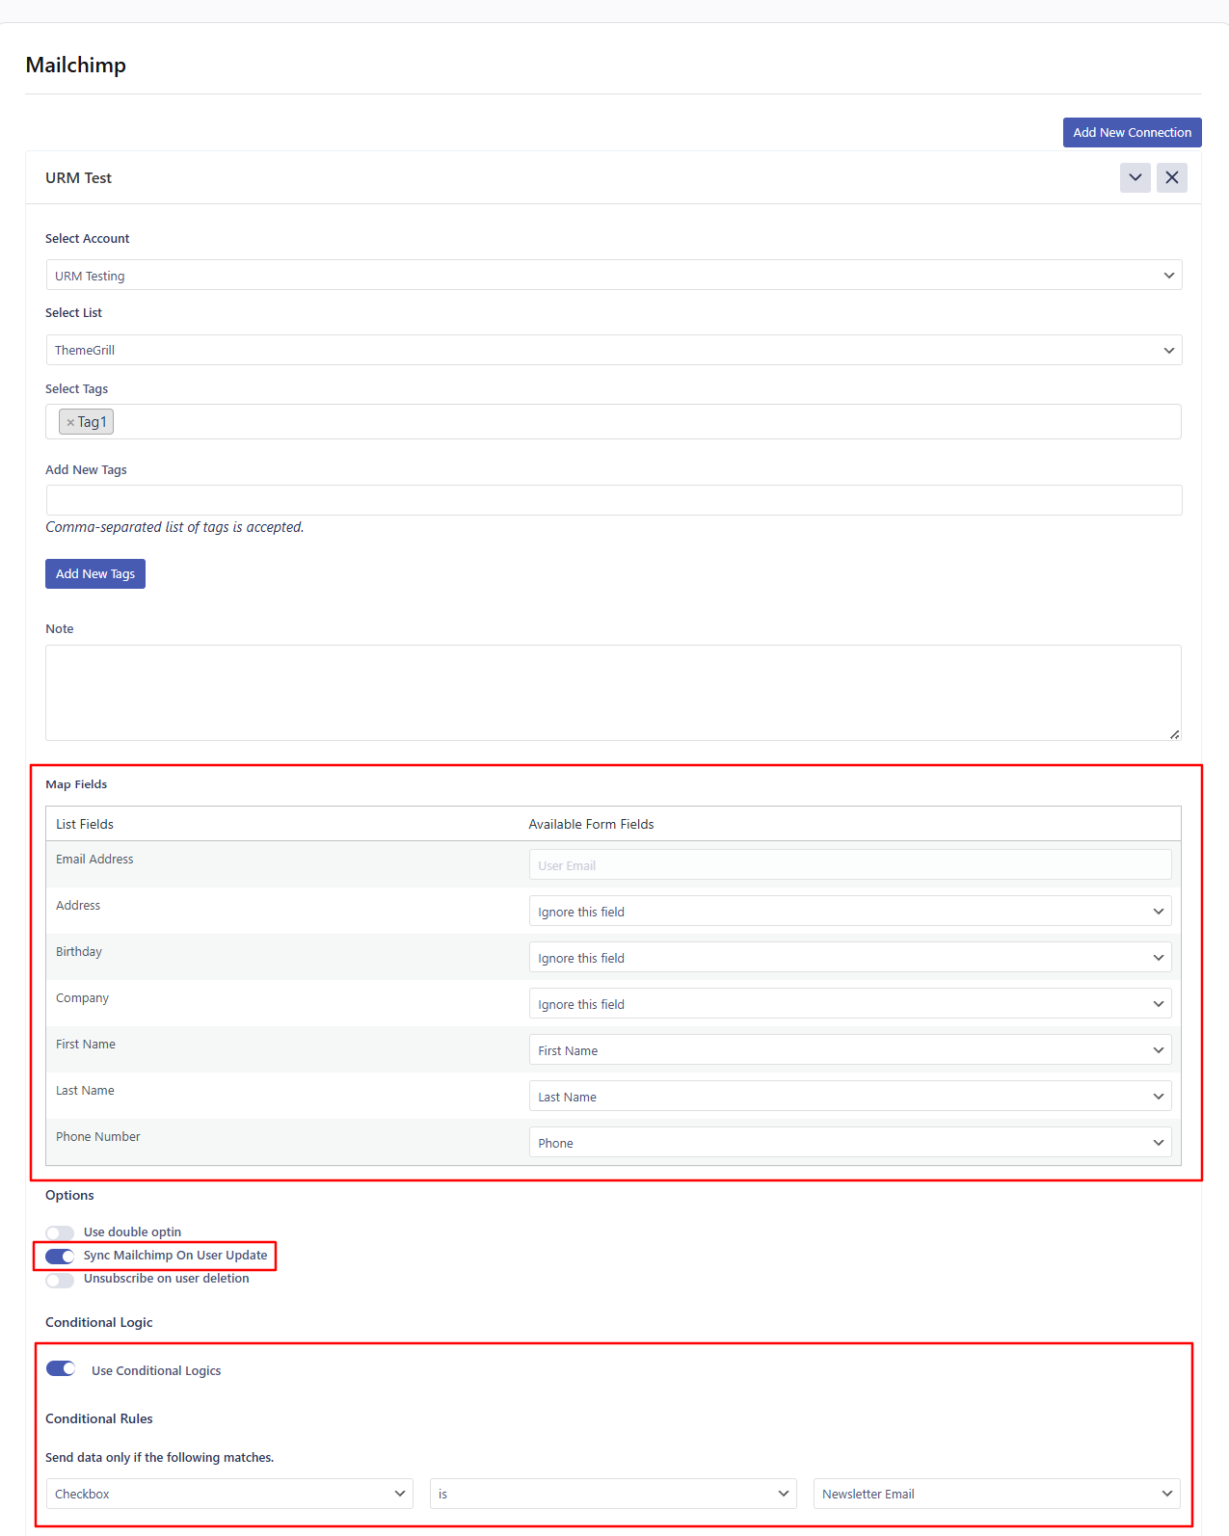
In the connection settings, you'll see options to map your form fields to Mailchimp list fields. Make sure the data types match between your form fields and Mailchimp fields — for example, email fields should map to email fields, text fields to text fields, and so on.
To verify your Mailchimp field types, log in to Mailchimp and go to Audience > Settings > Audience fields and |MERGE| tags. This shows you the exact field structure of your Mailchimp list.
Adding Tags to Organize Subscribers
Tags help you organize and segment your Mailchimp subscribers based on where they registered or what they're interested in.
In the Mailchimp connection settings, you can add tags to automatically label new subscribers. You can select existing tags from your Mailchimp account or create new ones directly from the plugin interface.
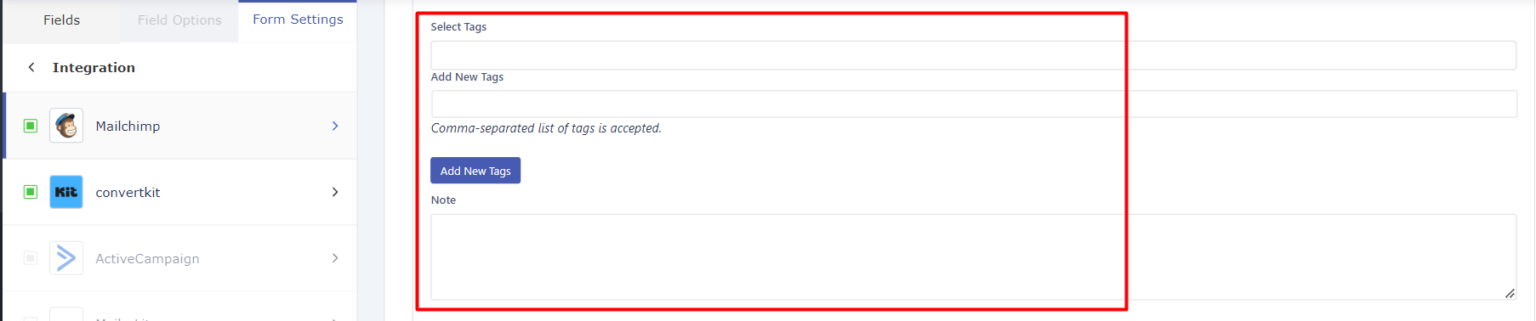
Tags are custom labels that help you identify and segment subscribers. For example, you might tag users who register through a specific form as "Website Signup" or "Premium Members."
Use Double Optin: If you want to send a verification message to users before subscribing, check the ‘Use double option’ checkbox.
Sync Mailchimp on user update: Enable this option to sync the user’s data to Mailchimp when the users update their profile details from the My Account page.
Unsubscribe on user deletion: Enable this option to delete the user’s contact from the Mailchimp account then their account is deleted from the site.
Using Conditional Logic for Audience Segmentation
Conditional logic lets you send users to different Mailchimp lists or apply different tags based on their form responses.
Enable Use Conditional Logic in the connection settings to set up rules. You can create conditions based on any form field value — for example, send users who select "Premium Plan" to one list and users who select "Basic Plan" to another.
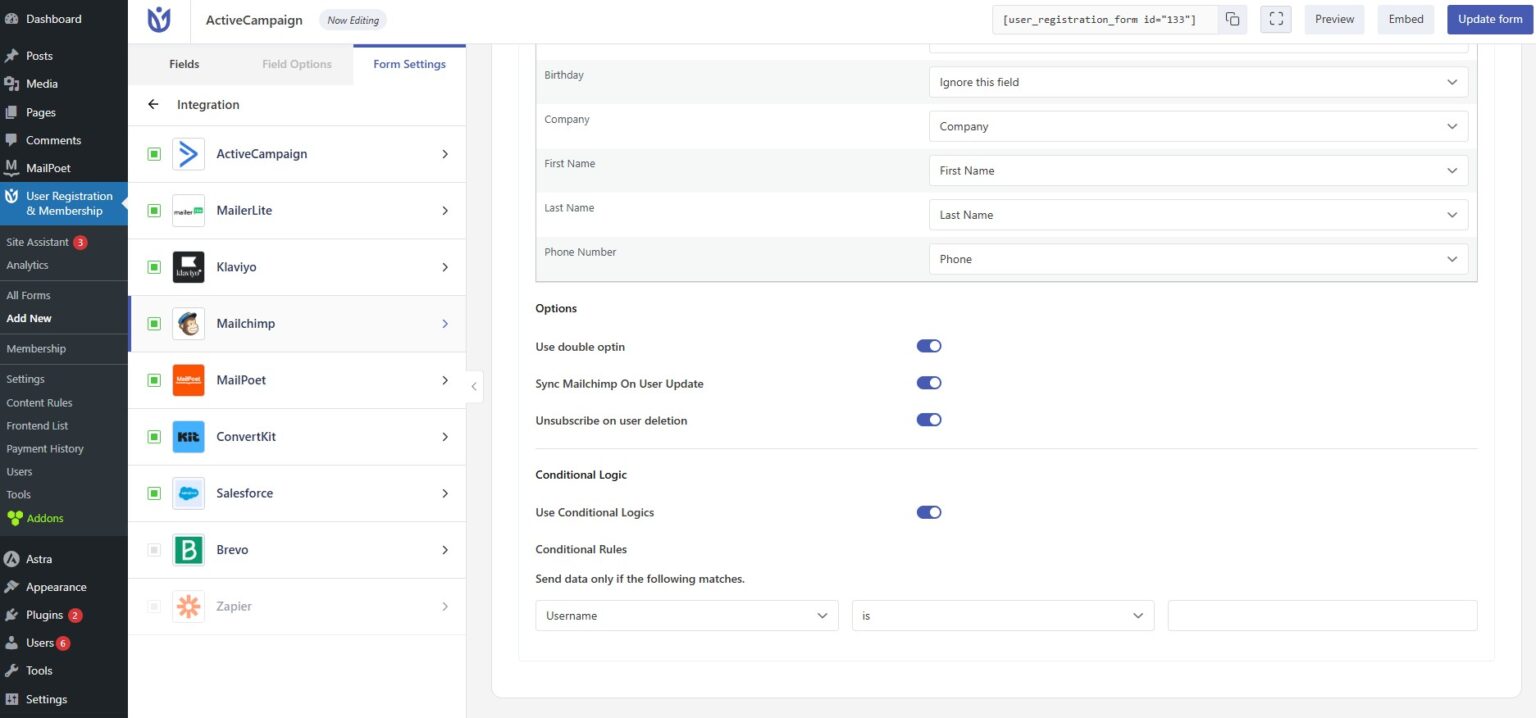
Conditional logic evaluates form field values in real-time during registration, allowing sophisticated audience segmentation without manual sorting.
Adding Users to Mailchimp Groups
Mailchimp groups let you organize subscribers within a single list based on their interests or preferences.
In the Mailchimp connection settings, you can select which Mailchimp groups to add users to automatically. Groups you've created in your Mailchimp account will appear in the dropdown menu.
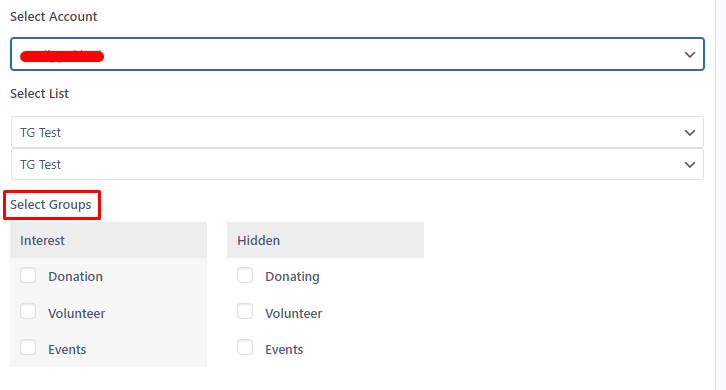
Groups are different from tags — groups are visible to subscribers and often used for preference management, while tags are internal labels for your organization.
Testing Your Mailchimp Integration
Before going live, test your Mailchimp integration to make sure data flows correctly.
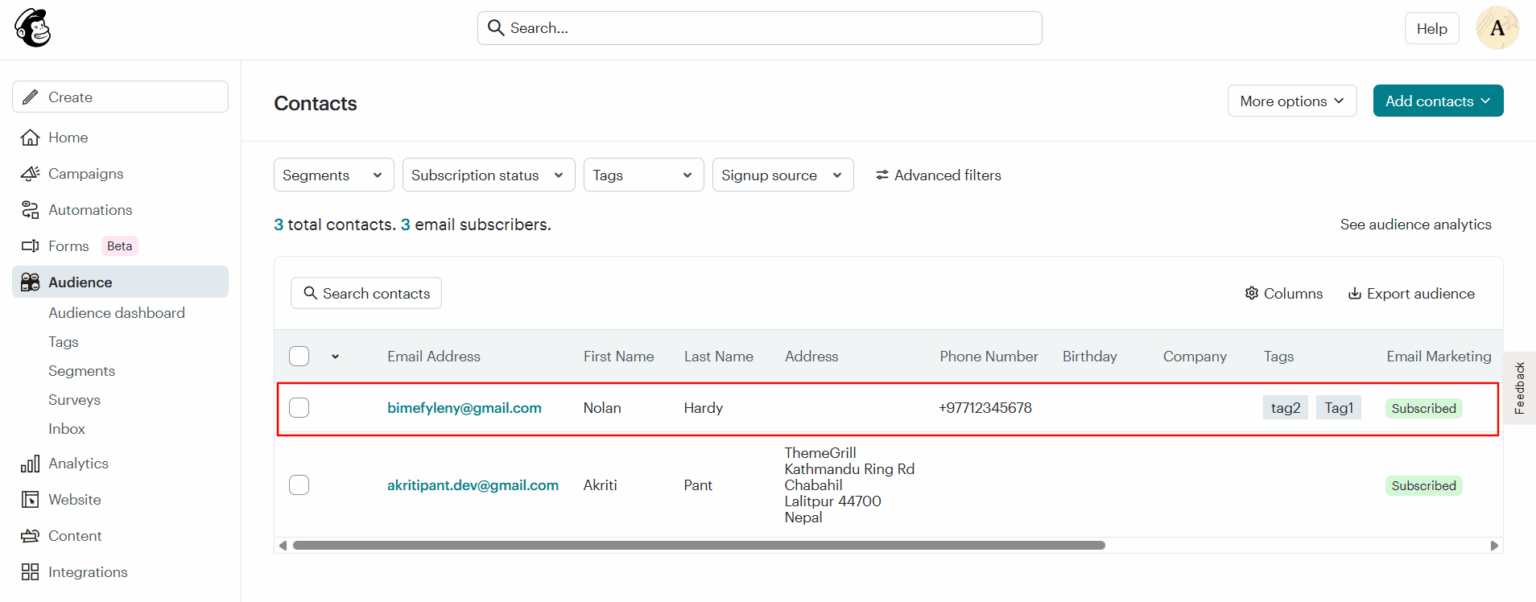
Submit a test registration through your form using a real email address you can access. Then, log in to your Mailchimp account and check your audience list. The test user should appear in your contacts with the correct field data, tags, and group assignments.
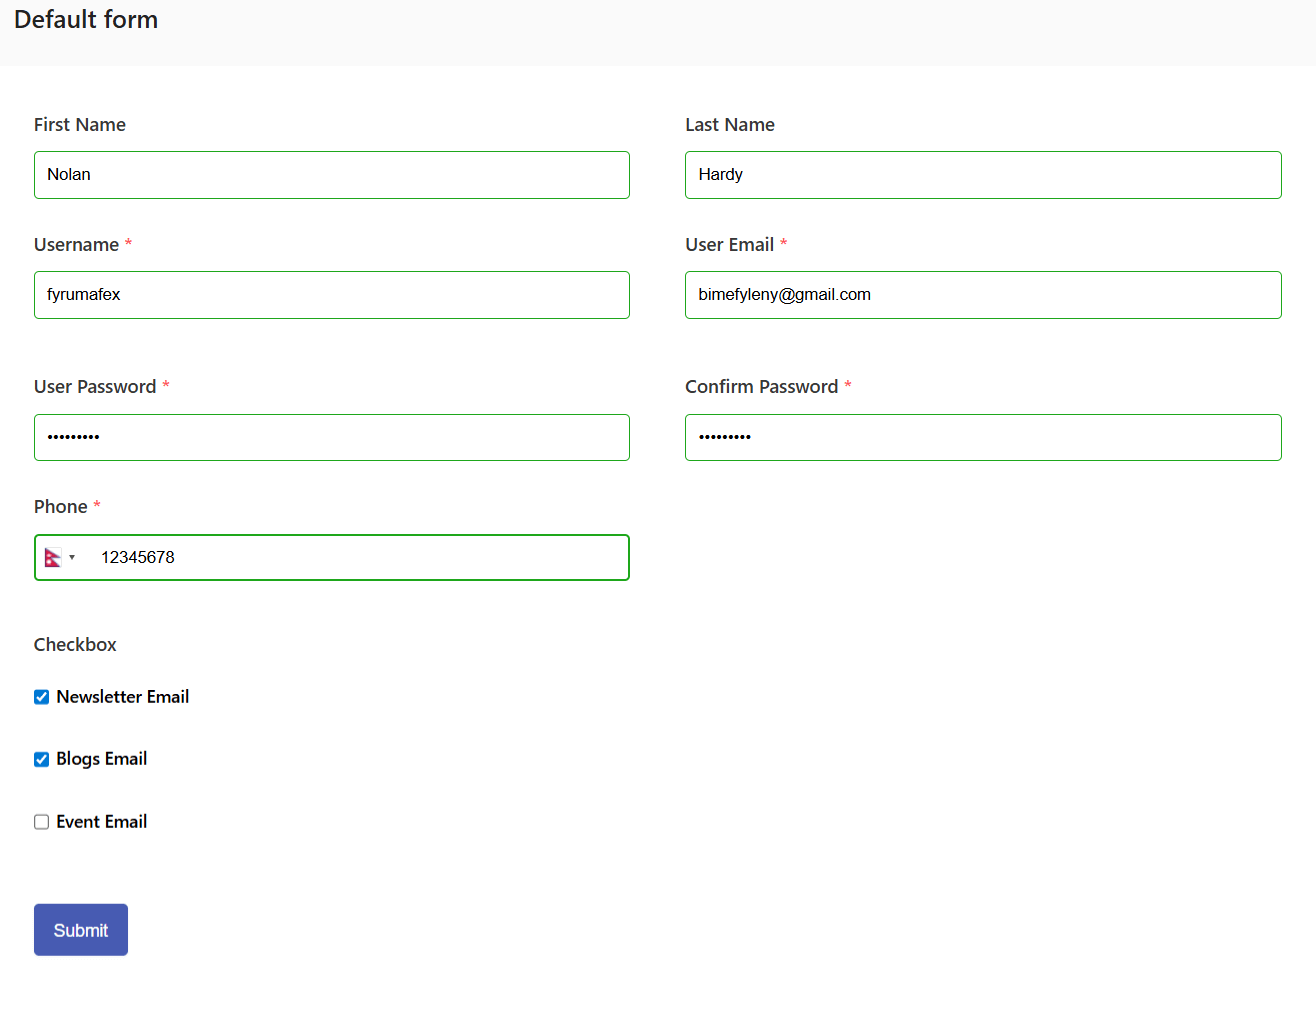
If the user doesn't appear, check your connection settings and field mappings. Make sure your API key is valid and your Mailchimp account is active.