Klaviyo Integration
ProAutomatically sync new member registrations to Klaviyo email lists for targeted campaigns and marketing automation without manual data entry.
Last updated on Jul 15, 2026
Would you like to automatically add new members to your Klaviyo email lists when they register on your site? User Registration & Membership allows you to sync registration data directly with Klaviyo, so you can send targeted email campaigns and automate your marketing workflows without manual data entry.
This tutorial will show you how to connect your Klaviyo account to User Registration & Membership and map your registration form fields to Klaviyo subscriber lists.
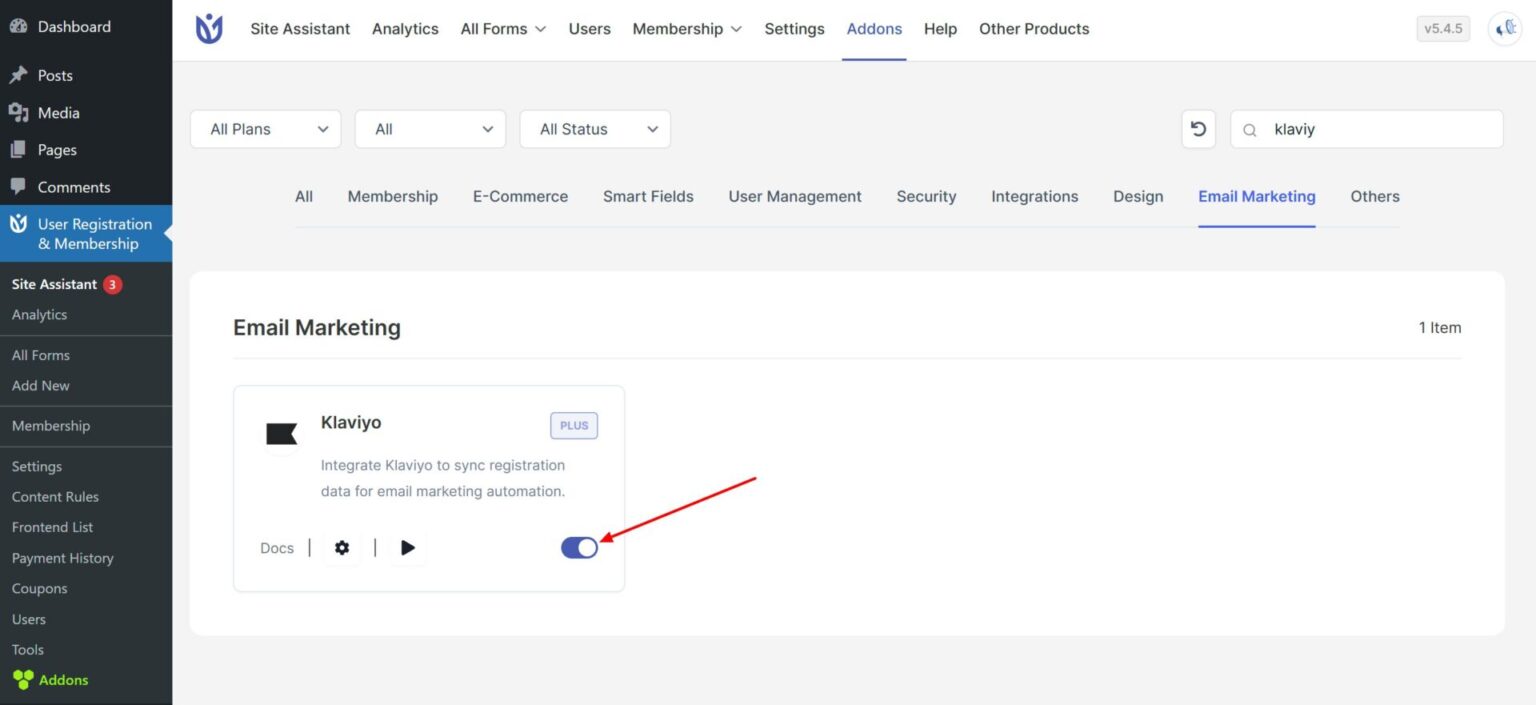
Before getting started, make sure you've installed and activated the User Registration & Membership Pro plugin on your WordPress site. Then, make sure you have an active Klaviyo account with at least one subscriber list created. Then, go to User Registration & Membership > Addons, search for Klaviyo and toggle to enable it.
Getting Your Klaviyo API Key
To connect User Registration & Membership with Klaviyo, you'll need a Private API Key from your Klaviyo account.
Log in to your Klaviyo account and click your Account Name in the bottom left corner.
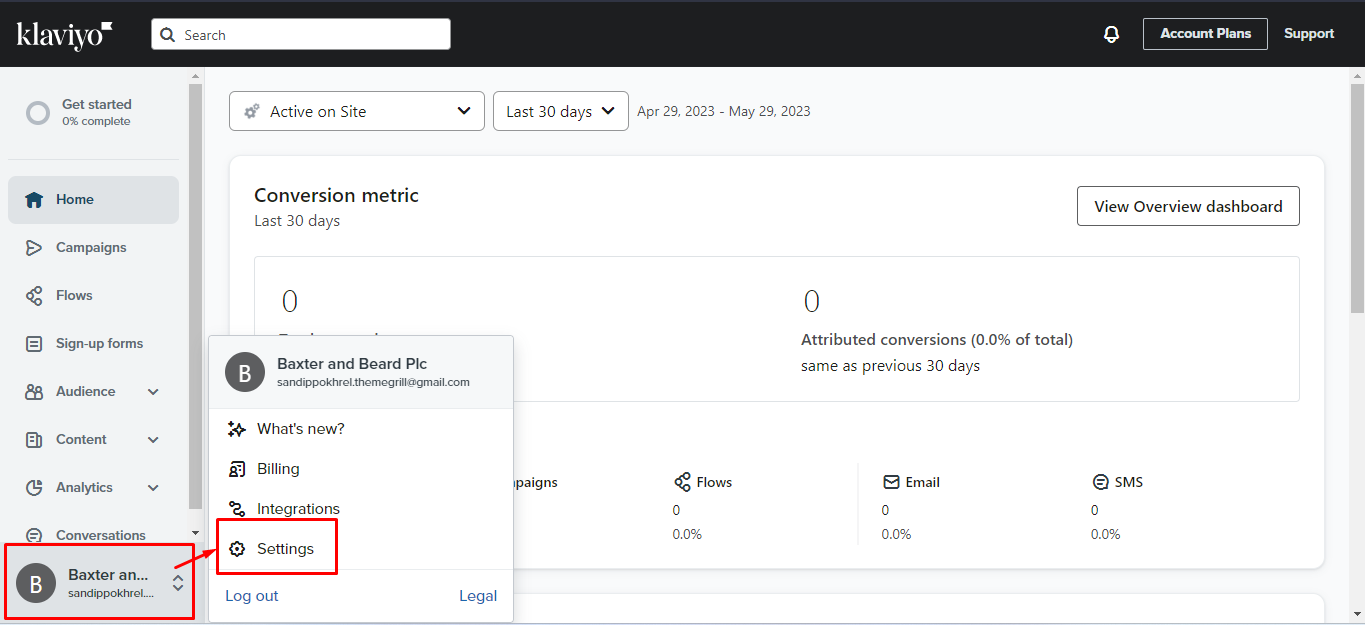
From the dropdown menu, go to Settings > Account > API Keys.
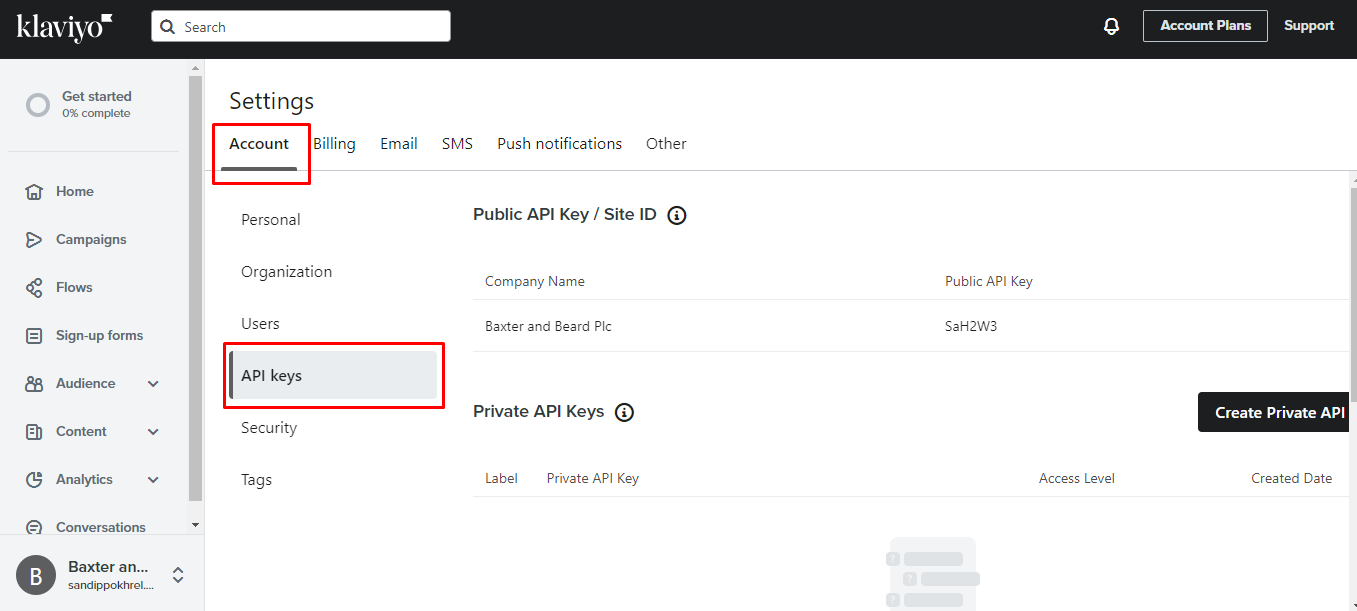
Click the Create Private API Key button.
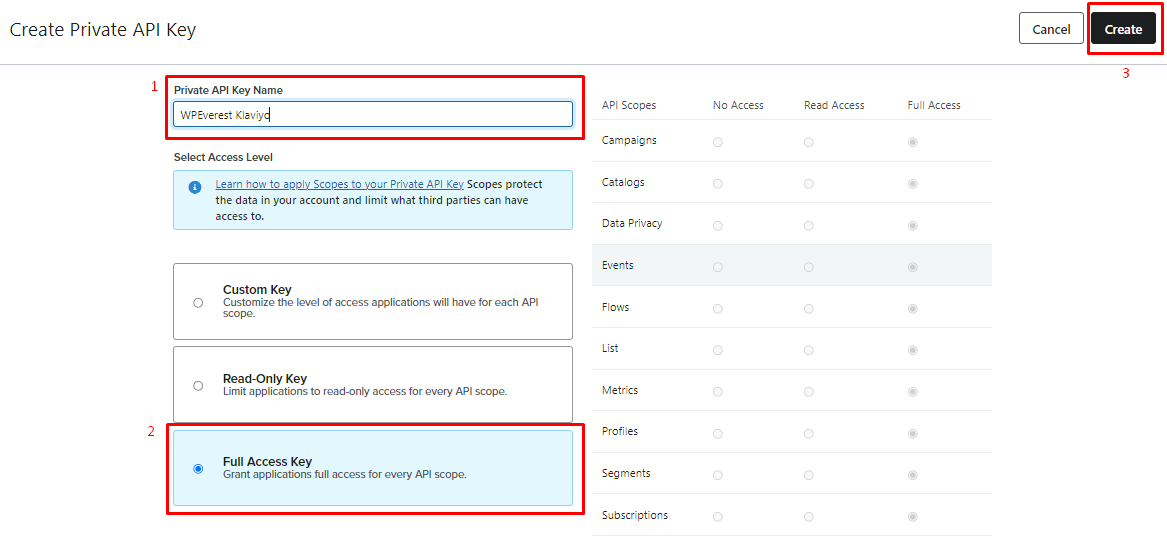
Klaviyo will ask you to provide a name for this key—you can use something like "URM Integration" to help you remember what it's for.
For the access level, choose Full Access Key. This permission level is required for the integration to work properly. Click Create to generate your API key.
Copy the API key that appears. You'll need to paste this into your WordPress site in the next step.
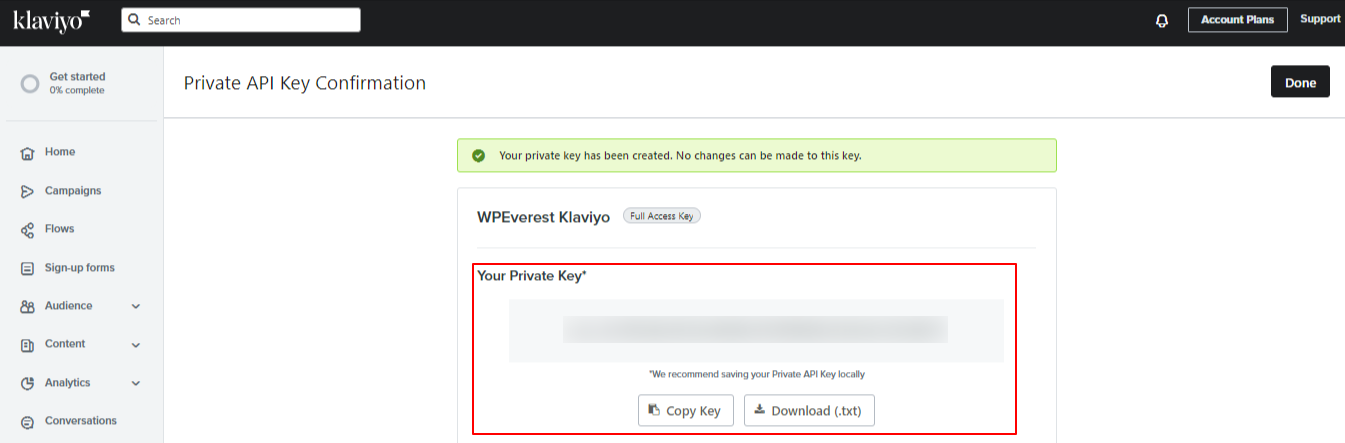
Keep your API key secure and never share it publicly. This key gives access to your Klaviyo account data.
Connecting Klaviyo to User Registration & Membership
Once you have your API key, go to your WordPress dashboard and navigate to User Registration & Membership > Settings > Integration > Klaviyo.
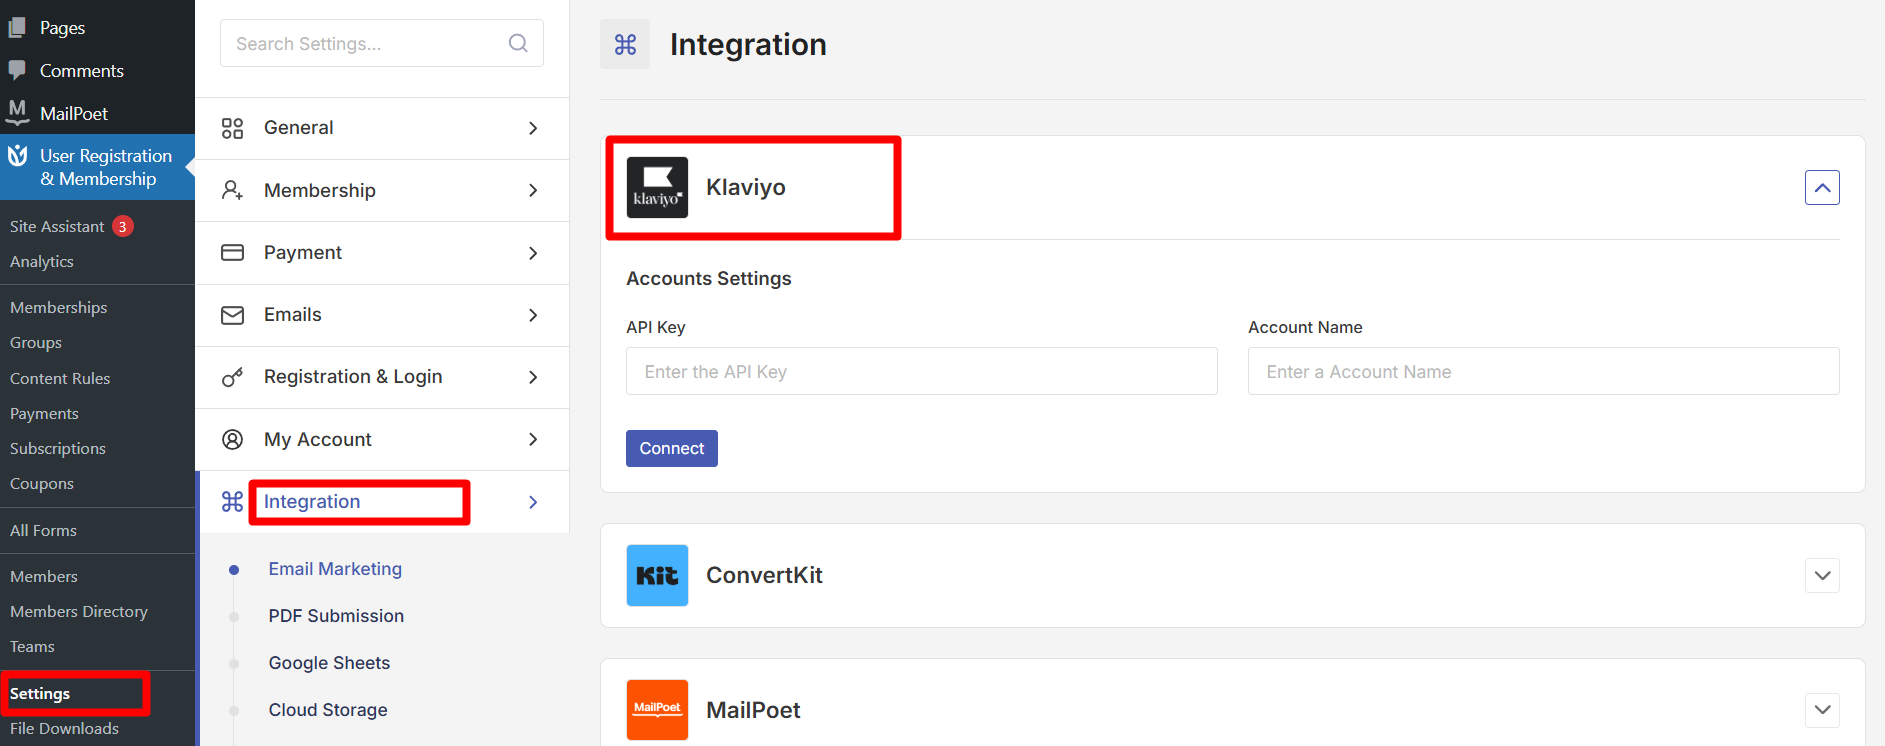
Paste your API key into the API Key field. In the Account Name field, enter any name you'd like—this is just for your reference and can be anything that helps you identify this connection (for example, "Main Klaviyo Account").
Click Connect to link your Klaviyo account with User Registration & Membership. Once connected, you'll see a confirmation message.
Mapping Form Fields to Klaviyo
Now that your accounts are connected, you can map your registration form fields to Klaviyo subscriber lists.
Go to User Registration & Membership > All Forms and click Edit on the registration form you want to connect to Klaviyo.
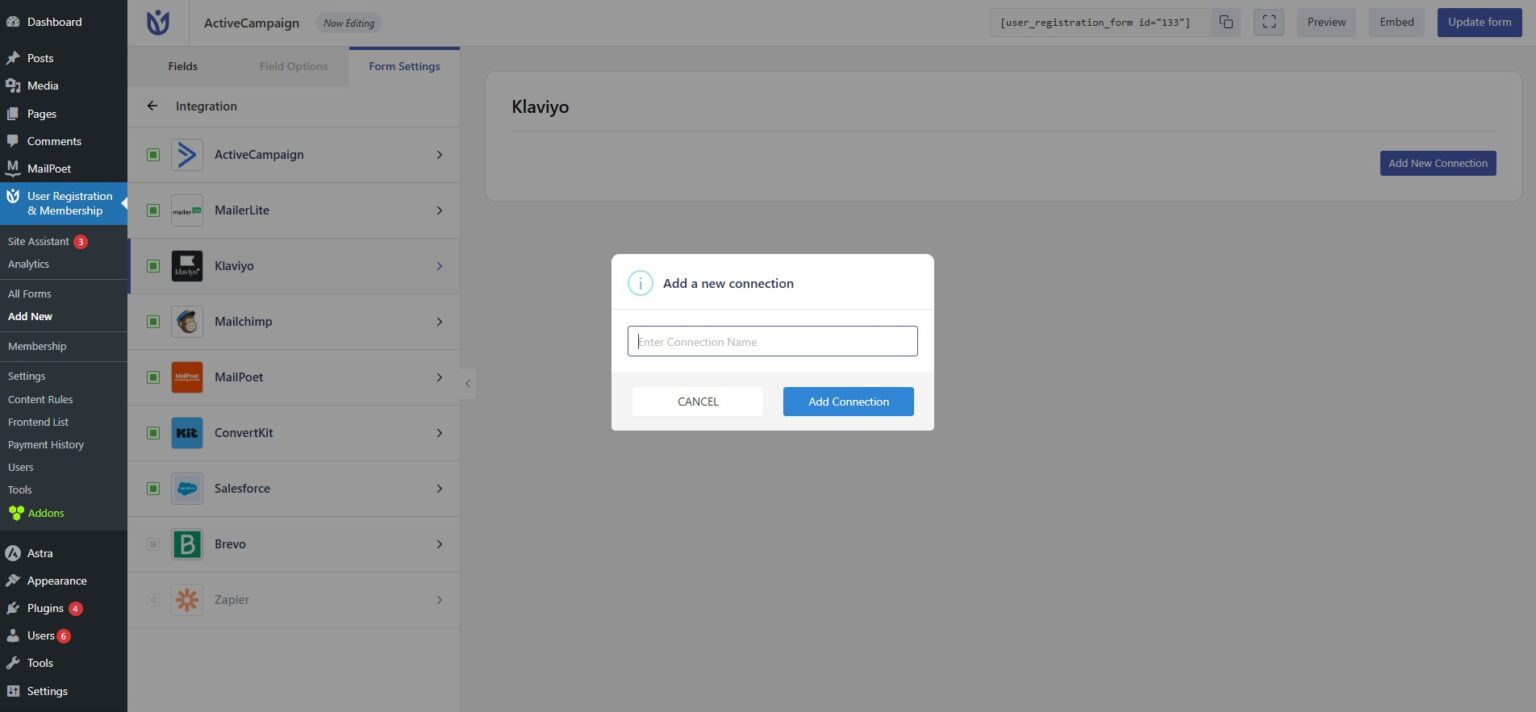
Navigate to Form Settings > Integration > Klaviyo and click Add New Connection.
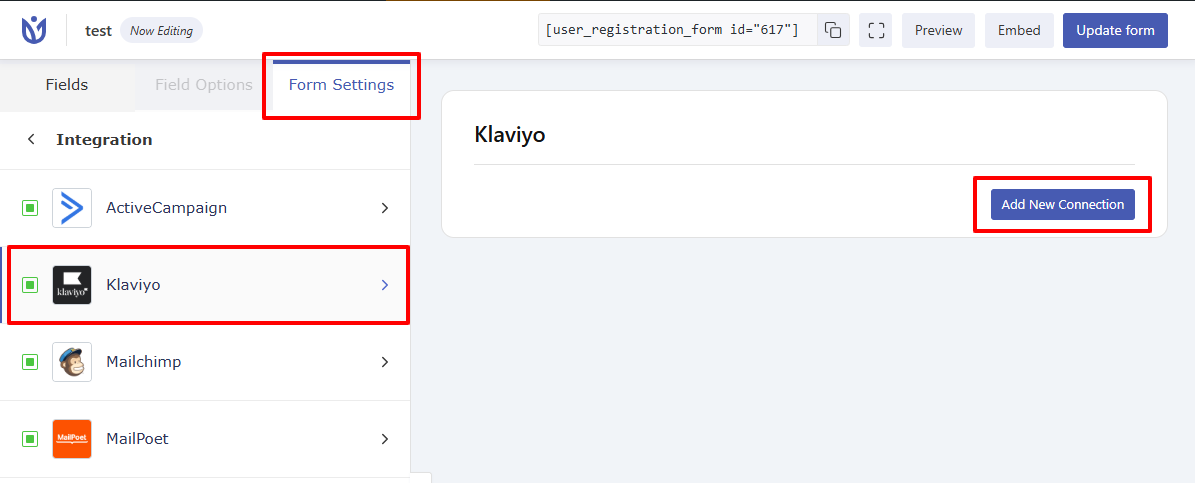
Provide a connection name—this is an internal label to help you identify this integration if you have multiple Klaviyo connections. Click Add Connection to continue.
You'll now see the field mapping interface. Here, you'll map your User Registration form fields to the corresponding fields in your Klaviyo subscriber list:
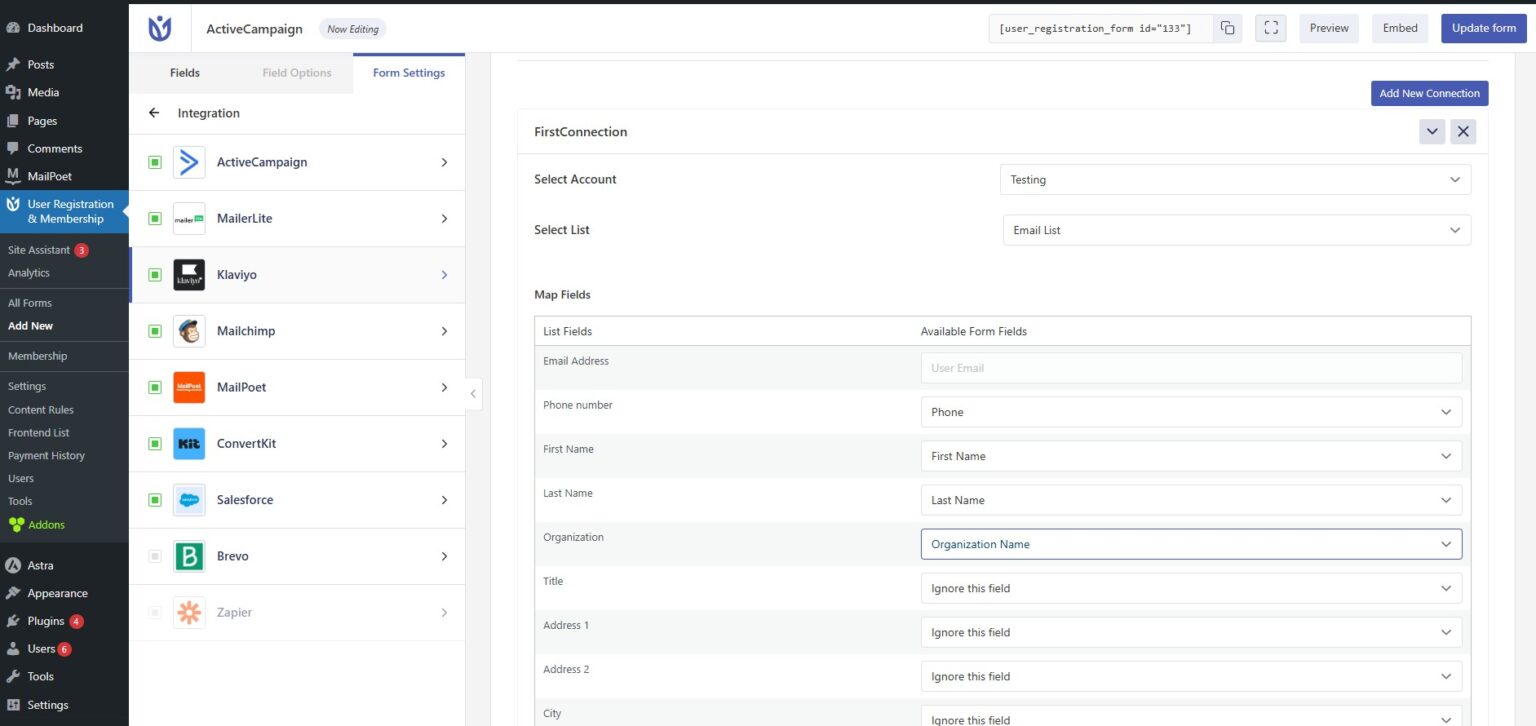
Select List: Choose which Klaviyo subscriber list you want to send registration data to
Email Address: Map your registration form's email field to Klaviyo's email field (required)
First Name: Map your form's first name field to Klaviyo's first name field (optional)
Last Name: Map your form's last name field to Klaviyo's last name field (optional)
The email field mapping is required—without it, Klaviyo won't be able to create subscriber records.
Configuring Sync Options
Below the field mapping, you'll see additional sync options:
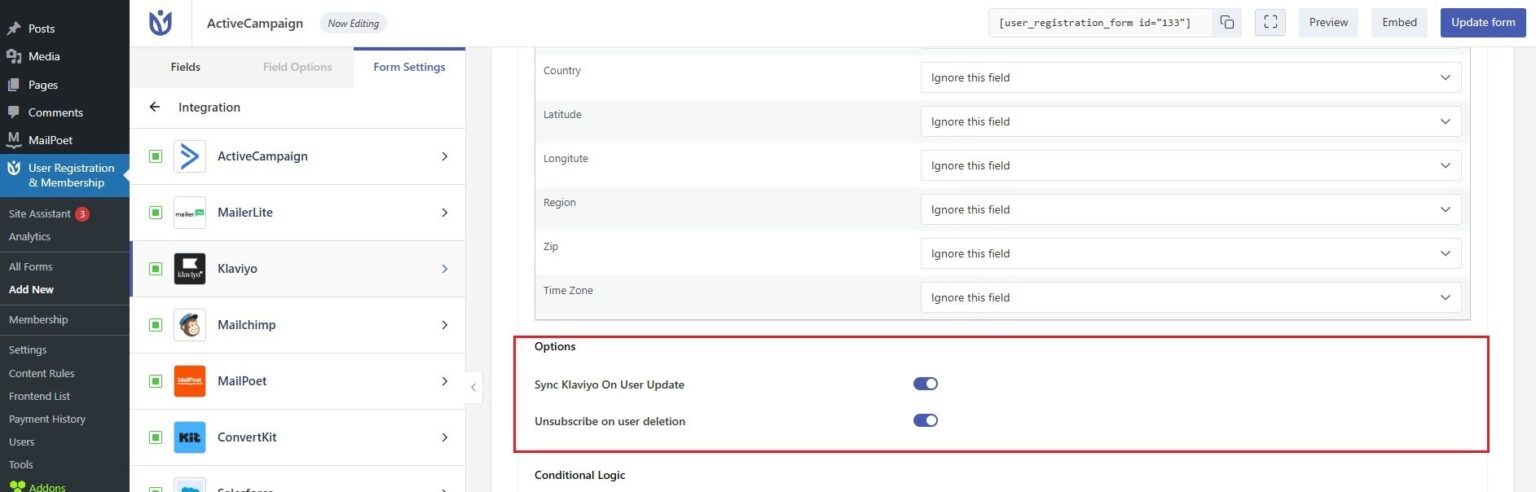
Sync Klaviyo on User Update: When enabled, any changes users make to their profile information in the My Account page will automatically sync to their Klaviyo contact record. This keeps your email list data current without manual updates.
Unsubscribe on User Deletion: When enabled, users who are deleted from your WordPress site will automatically be removed from your Klaviyo subscriber list. This helps you maintain a clean email list and comply with data privacy requirements.
Using Conditional Logic (Optional)
If you'd like to send registration data to Klaviyo only when certain conditions are met, you can enable conditional logic.
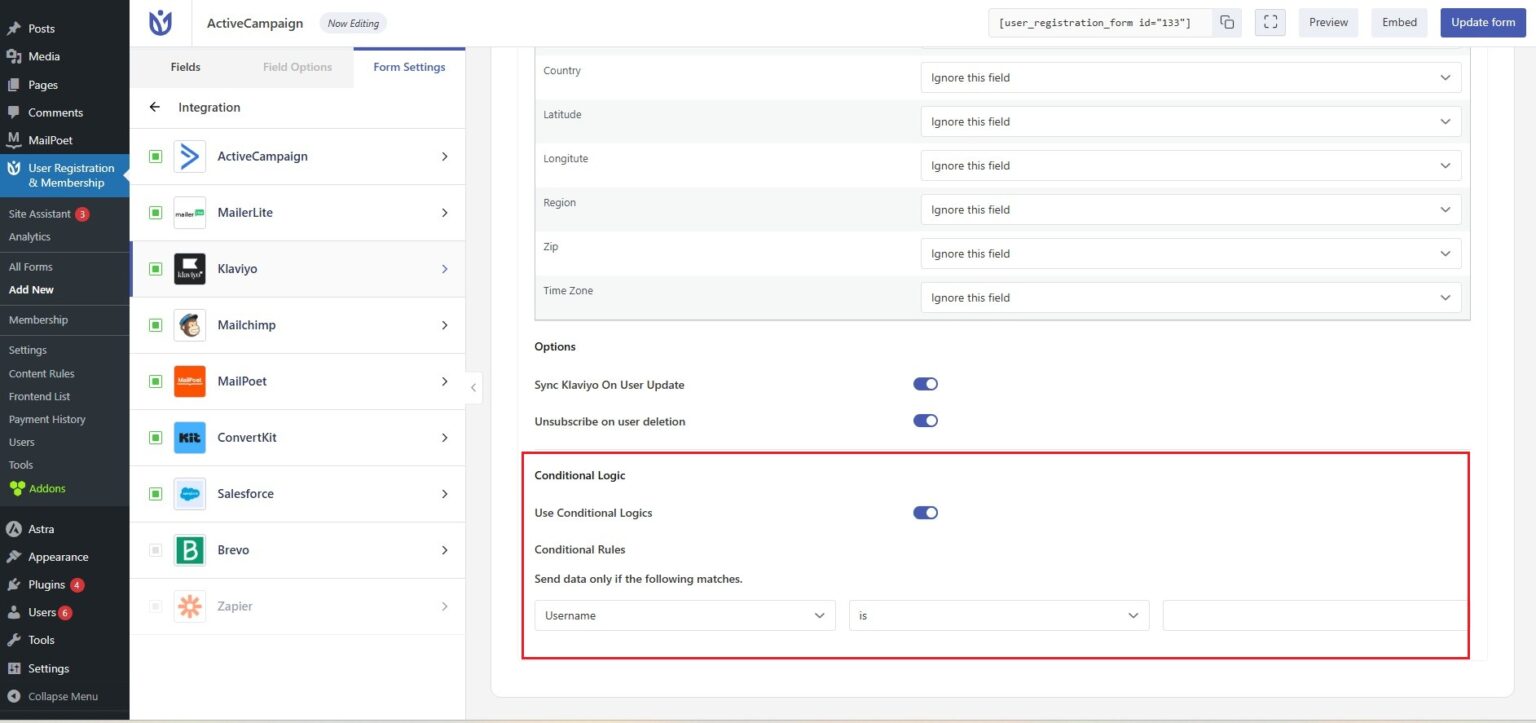
Click the dropdown arrow next to your Klaviyo connection name and select Enable Conditional Logic. This opens the conditional logic builder where you can add rules based on form field values.
For example, you could send data to Klaviyo only if a user selects "Yes" on a newsletter opt-in checkbox, or only if they choose a specific membership plan.
Add your conditions using the logic builder, then save your form settings.
Testing Your Integration
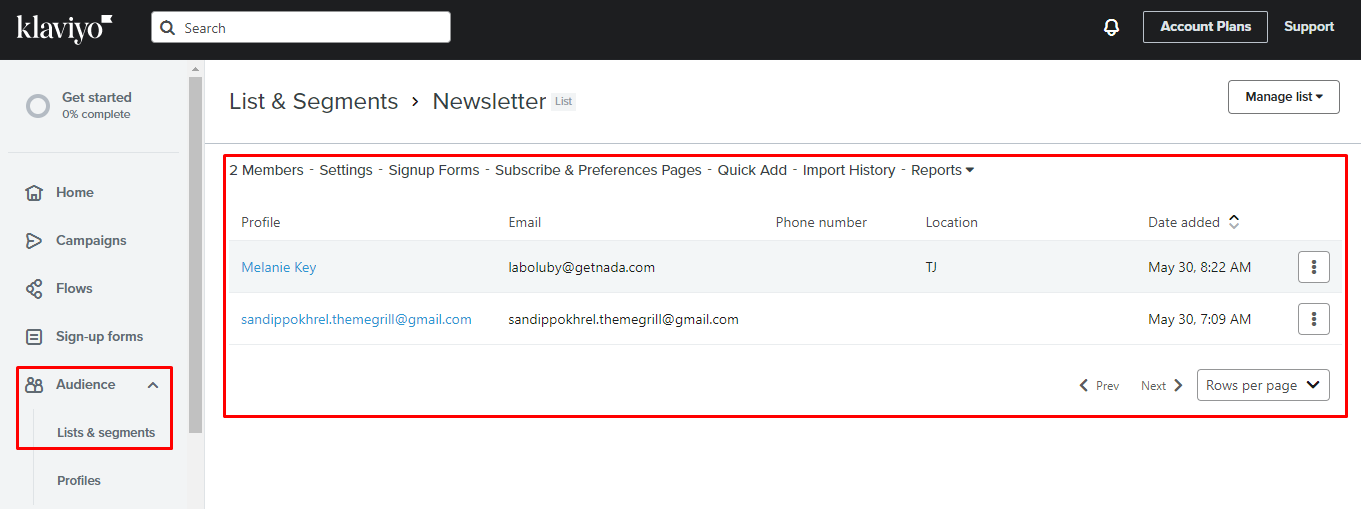
To verify everything is working correctly, submit a test registration through your form. Then, log in to your Klaviyo account and check your subscriber list—you should see the new contact appear with the mapped field data.