
Divi Builder Integration
Create visually stunning registration and membership pages using Divi Builder's drag-and-drop interface without writing any code.
Last updated on Jul 15, 2026
Would you like to design beautiful registration and membership pages without touching code? User Registration & Membership integrates directly with Divi Builder, allowing you to drag and drop registration forms, login forms, and membership features into your Divi-powered pages.
This guide will show you how to use Divi's visual editor to customize your user registration, login, profile, and membership pages.
Prerequisites
Before getting started, make sure you've installed and activated the following:
User Registration & Membership plugin (v4.1.4 or higher)
Divi Theme or Divi Builder plugin
WordPress admin access
If you're using the Divi Theme, the Divi Builder is already included—you don't need to install the plugin separately.
Installing the Required Plugins
Installing User Registration & Membership
From your WordPress dashboard, go to Plugins → Add New Plugin
Search for "User Registration & Membership"
Click Install Now, then Activate
Alternatively, if you have the Pro version:
Go to Plugins → Add New → Upload Plugin
Upload the User Registration & Membership Pro zip file
Click Install Now, then Activate
Installing Divi Builder
If you don't already have Divi installed:
For Divi Theme:
Go to Appearance → Themes → Add New Theme
Click Upload Theme
Upload the Divi theme zip file
Click Install, then Activate
For Divi Builder Plugin:
Go to Plugins → Add New → Upload Plugin
Upload the Divi Builder plugin zip file
Click Install Now, then Activate
You can purchase Divi Builder from the official Divi website.
Adding User Registration Modules to Divi Pages
User Registration & Membership provides several Divi modules that you can add to any page. All modules are prefixed with "URM" for easy identification.
Step 1: Open the Divi Builder
Navigate to Pages in your WordPress dashboard
Find the page you want to edit
Hover below the page name and click Edit with Divi
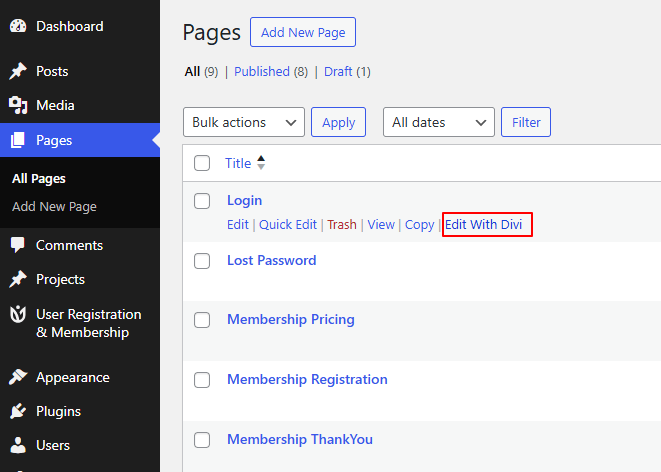
The Divi Builder visual editor will open.
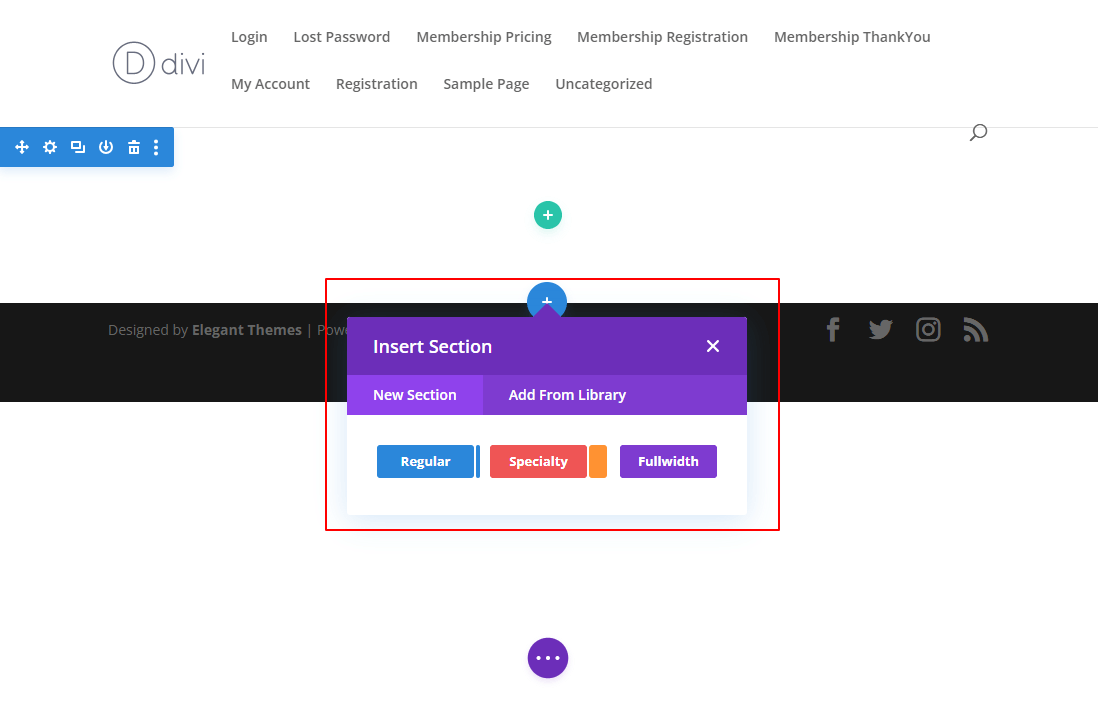
Step 2: Add a New Section
Click the blue + sign to add a new section to your page
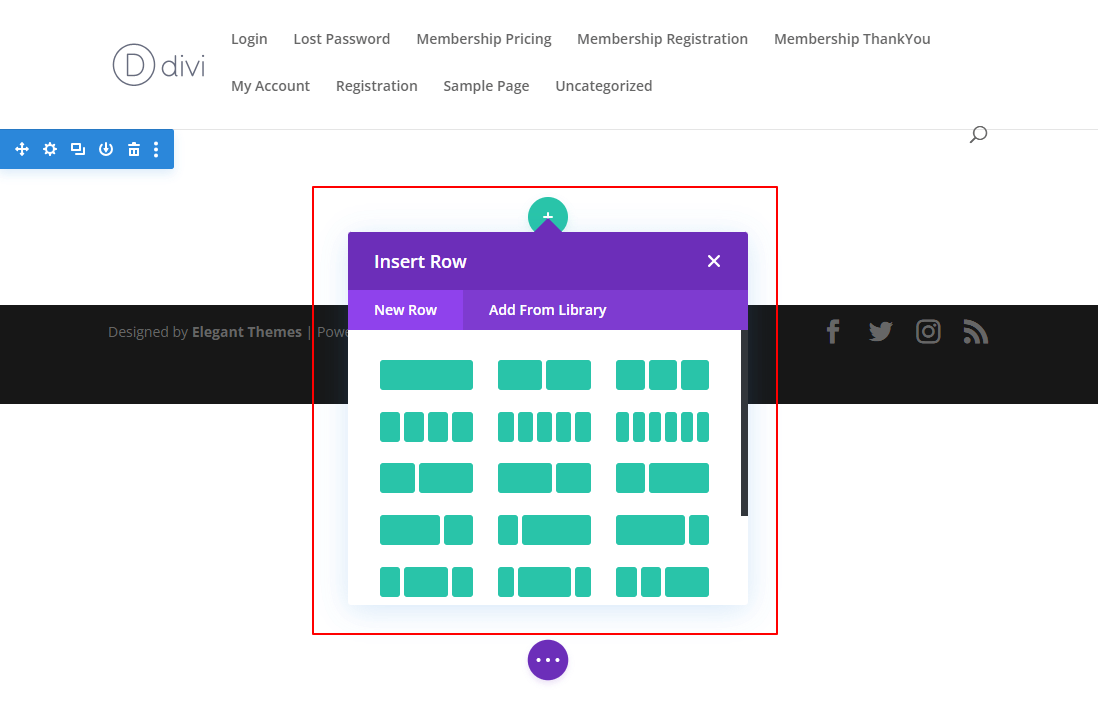
Click the green + sign to insert a row layout
Choose your preferred column structure
Step 3: Insert a User Registration Module
Click the black + sign under the row to insert a module
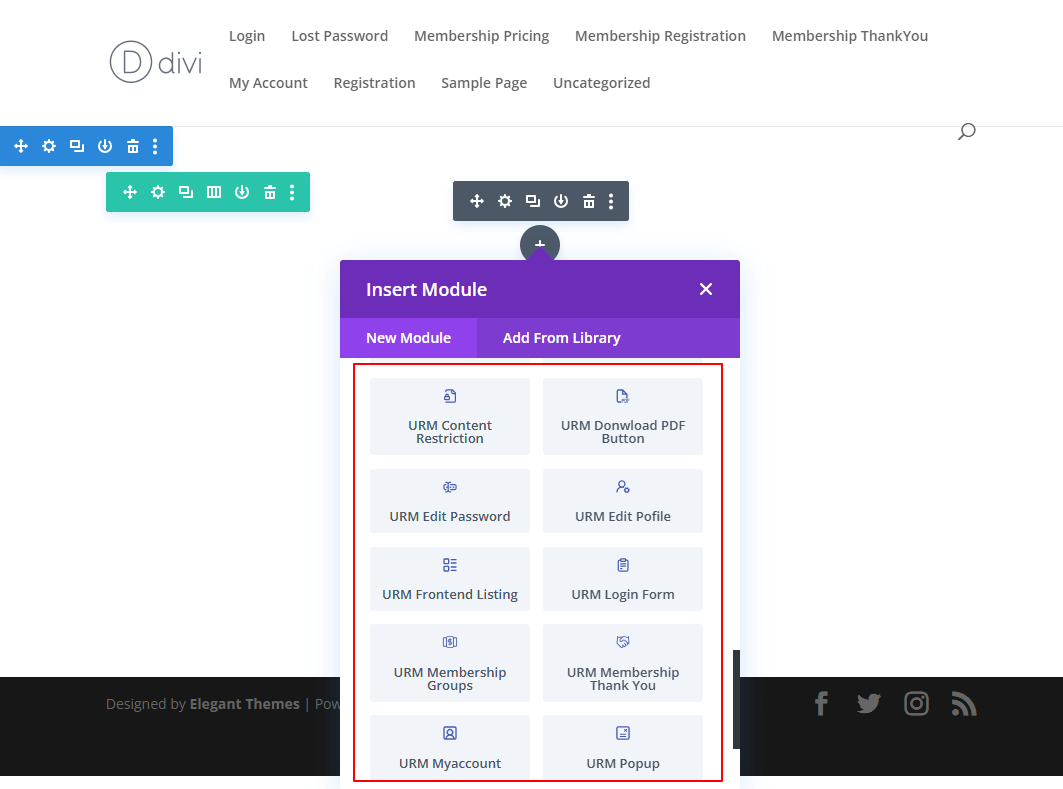
Scroll down to find User Registration & Membership modules
All URM modules start with the "URM" prefix
Available URM Modules:
URM Registration Form — Display registration forms
URM Login Form — Display login forms
URM Frontend Listing — Display member directories
URM Popup — Display popup forms
URM Download PDF Button — Add PDF download functionality (requires PDF Submission addon)
Step 4: Configure the Module
When you select a module, a settings pop-up will appear with three tabs:
Content Tab
Form/Component Selection: Choose which registration form, login form, or component to display
User State: Configure user state settings (options vary by module)
Module-specific options depending on which URM module you selected
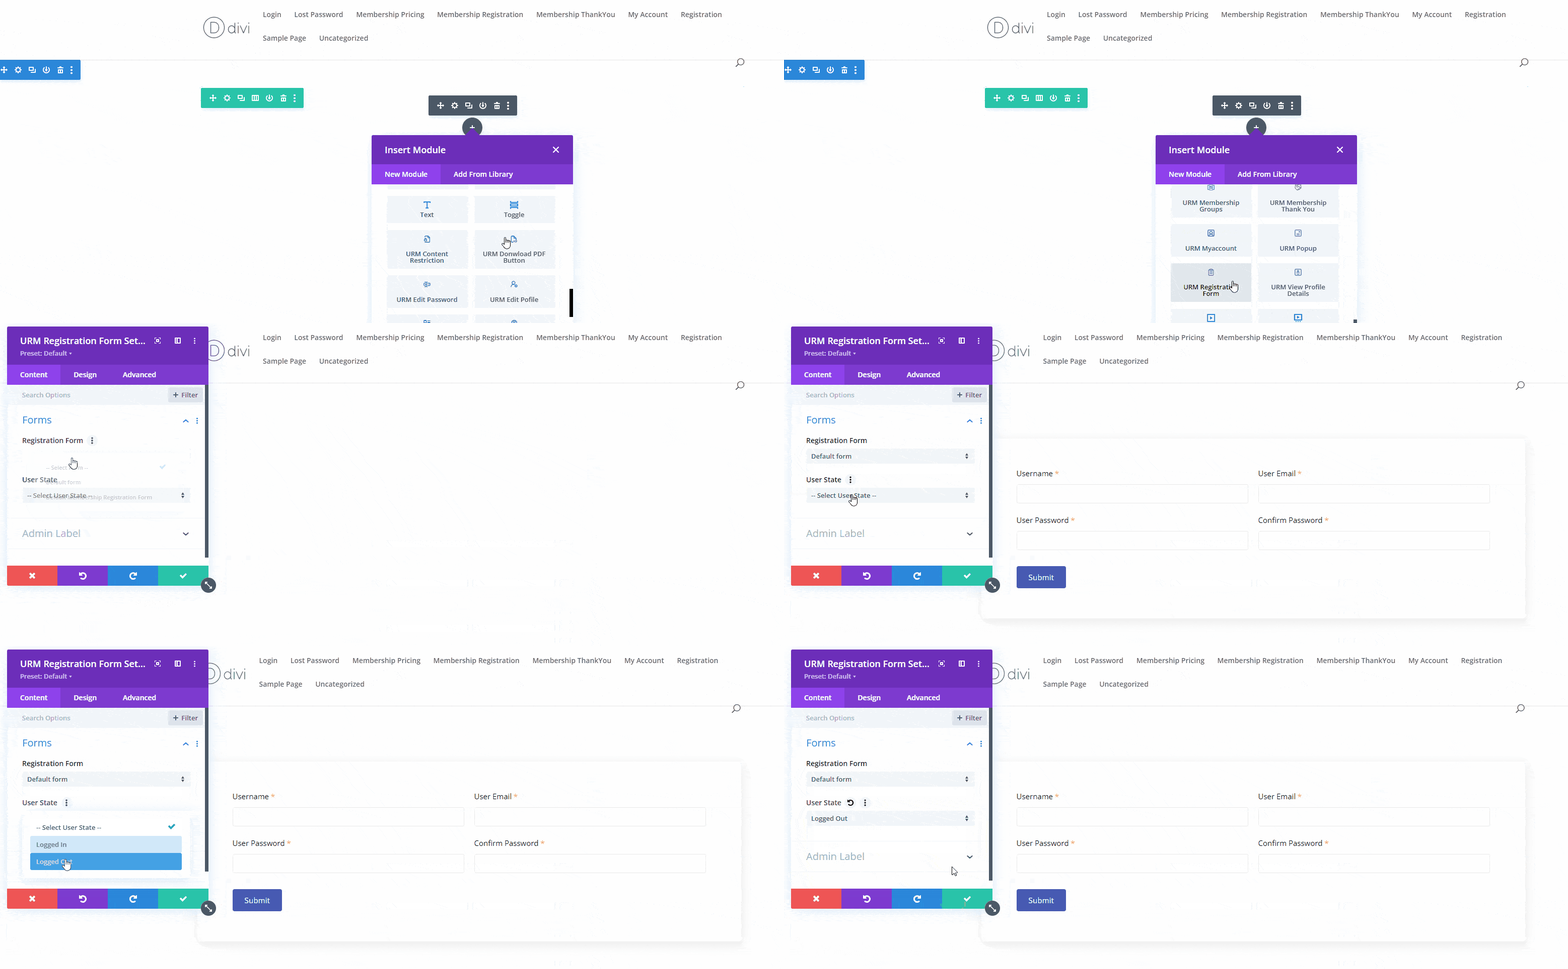
Design Tab
Modify visual appearance including colors, fonts, spacing, and borders
Customize the module's design to match your site branding
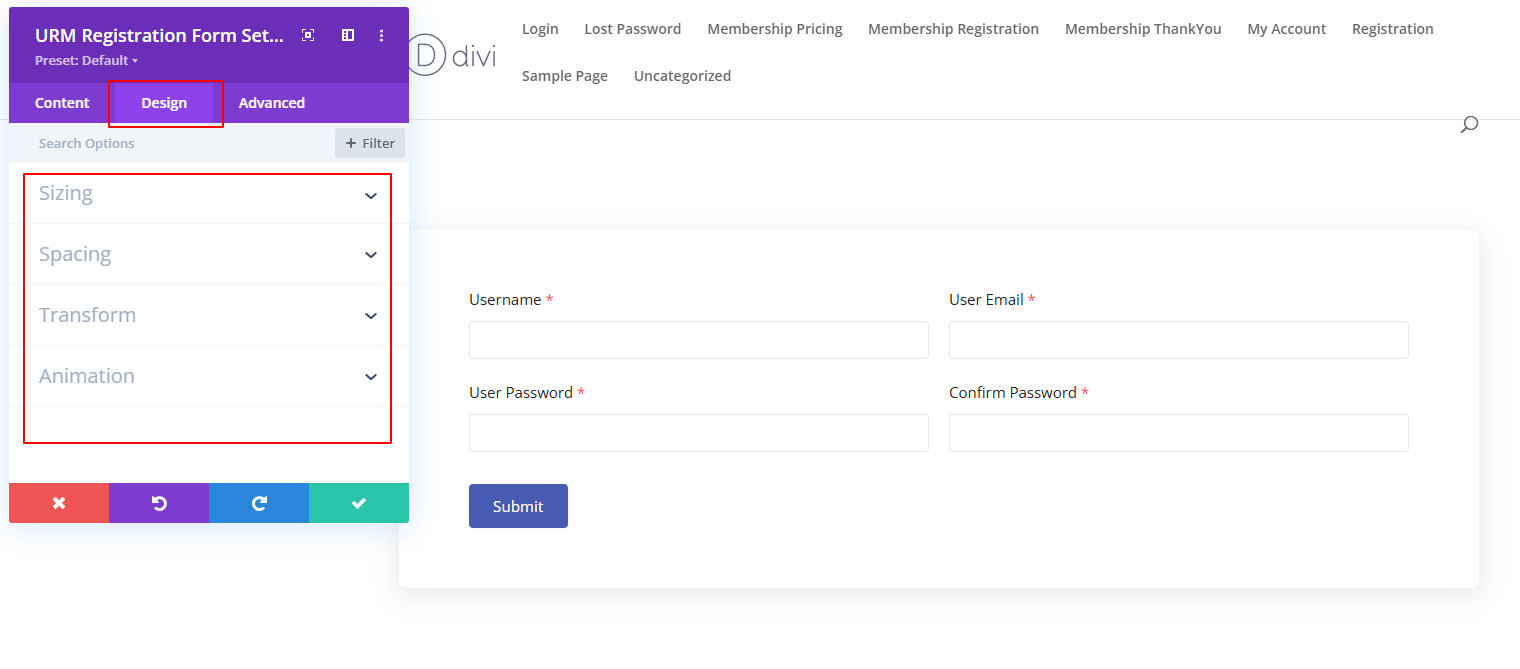
Advanced Tab
Add CSS ID & Classes for custom styling
Add Custom CSS for advanced customization
Configure Transitions and animations
Set Visibility conditions
Step 5: Save Your Changes
Click the green checkmark to save the module settings
Optionally, you can:
Duplicate the module
Add the module to your Divi Library for reuse
Lock the module to prevent accidental changes
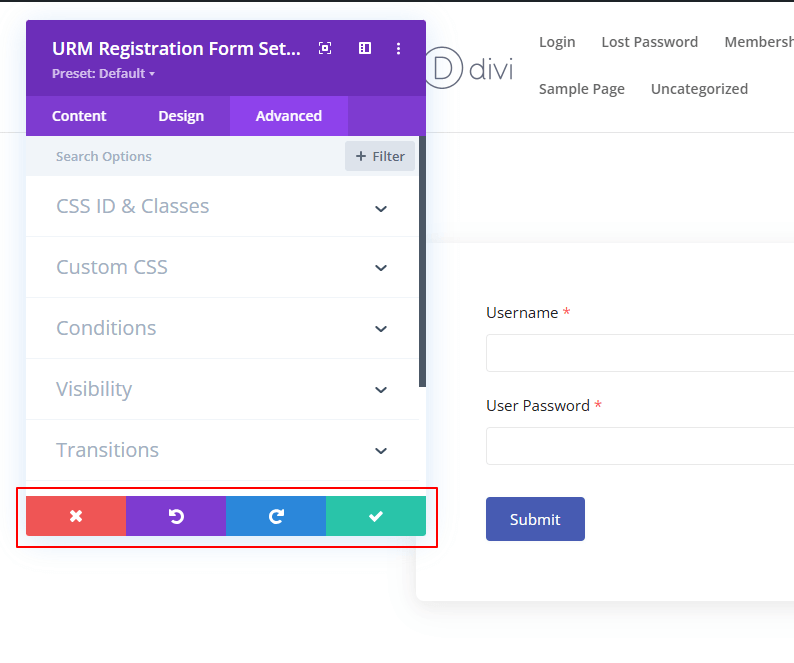
Step 6: Publish the Page
Once you've finished setting up all modules, click Save and exit the Divi Builder. Your registration or membership page is now live.
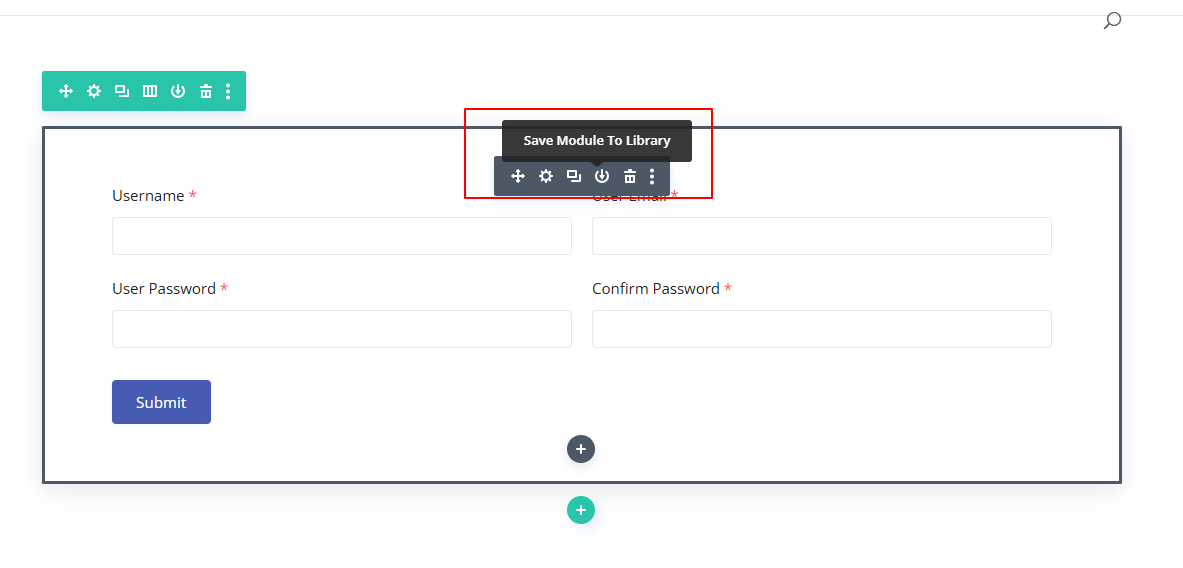
Example: Creating a Registration Page with Divi
Here's a complete example of building a registration page:
Create a new page or edit an existing one
Click Edit with Divi
Add a new section with a single-column row
Insert the URM Registration Form module
In the Content tab, select your registration form from the dropdown
In the Design tab, customize colors and spacing to match your site
Add a heading module above the form with a welcome message
Save and publish the page
Example: Adding a Login Popup with Divi
If you have the URM Pro plugin with popups created:
Edit your page with Divi Builder
Add the URM Popup module where you want the trigger button
In the Content tab:
Select which popup to display from the Popup dropdown
Toggle Use as Button to "On"
Enter your Button Text (e.g., "Sign In")
In the Design tab, style the button to match your site
Save the module
When visitors click the button, your login popup will appear.
Example: Adding a Member Directory with Divi
If you have the Frontend Listing addon active:
Edit your page with Divi Builder
Add the URM Frontend Listing module
In the Content tab, select your frontend listing from the Frontend Listing dropdown
Customize the design in the Design tab
Save and publish
You must create frontend listings first before they appear in the dropdown. If the Frontend Listing addon is not active, you'll see an error message.
Example: Adding a PDF Download Button with Divi
If you have the PDF Submission addon active:
Edit your page with Divi Builder
Add the URM Download PDF Button module
In the Content tab, toggle Preview to "On" to see how the button looks while editing
Customize the button design in the Design tab
Save the module
Visitors can click the button to download PDF versions of their registration submissions.
This module requires the PDF Submission addon to be active. If it's not installed, you'll see an error message.
Important Notes
Module Options Vary: The available settings in each URM module depend on which module you select. Registration forms have different options than login forms or member directories.
Pro Features: Some URM modules and features require User Registration & Membership Pro. Check your plan to see which integrations are available.
Additional Integrations: User Registration & Membership Pro also integrates with WooCommerce, Zapier, and other third-party services for extended functionality.