
ACF
ProLearn how to integrate Advanced Custom Fields (ACF) with User Registration Pro to seamlessly map and display custom user data in registration forms.
Last updated on Jul 15, 2026
Integrating Advanced Custom Fields (ACF) with User Registration
Would you like to display custom user data from ACF fields in your User Registration forms? User Registration & Membership allows you to map registration form fields to ACF custom fields, so user data flows seamlessly between both plugins.
This tutorial will show you how to connect User Registration Pro forms with ACF custom fields by creating ACF field groups and mapping them through the usermeta table.
Requirements: This feature requires the User Registration Pro plugin.
Before getting started, make sure you've installed and activated both the User Registration Pro plugin and the Advanced Custom Fields plugin on your WordPress site.
Installing Advanced Custom Fields
To begin, you'll need the ACF plugin installed on your site.
Go to Plugins → Add New in your WordPress dashboard. Search for "Advanced Custom Fields" and click Install Now, then Activate.
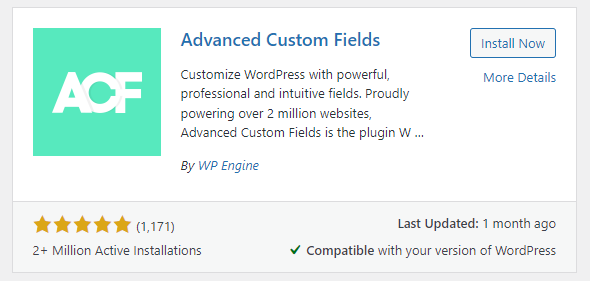
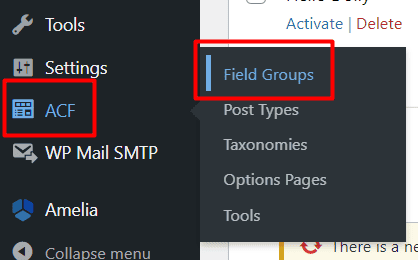
Once activated, you'll see a new ACF menu item in your WordPress admin sidebar.
Creating ACF Field Groups
Next, you'll create custom fields in ACF that will store your user data.
Navigate to ACF → Field Groups and click Add New. Enter a name for your field group — this helps you organize related fields together.
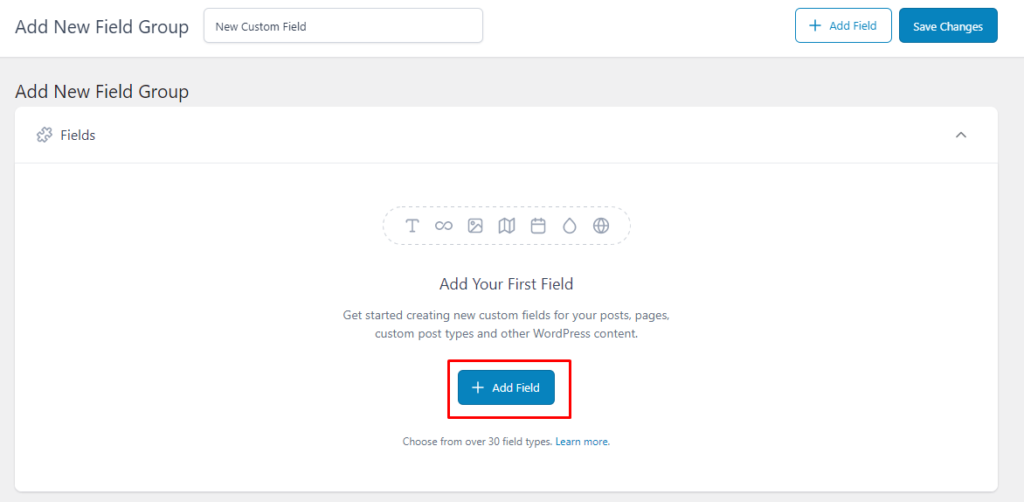
Click Add Field to create your first custom field.
You'll need to configure two key settings:
Field Label: The display name for your field (e.g., "Phone Number")
Field Type: The type of data this field will store (e.g., Text, Number, Email)
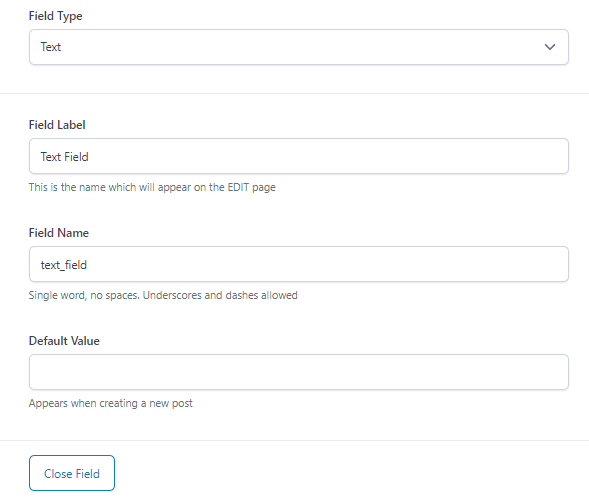
ACF automatically generates a Field Name when you create a field. You'll need this exact field name later when mapping to User Registration fields.
Scroll down to the Settings section. Under Location Rules, set where this field should appear. For user data, select User Form and choose the appropriate user context (e.g., Add / Edit).
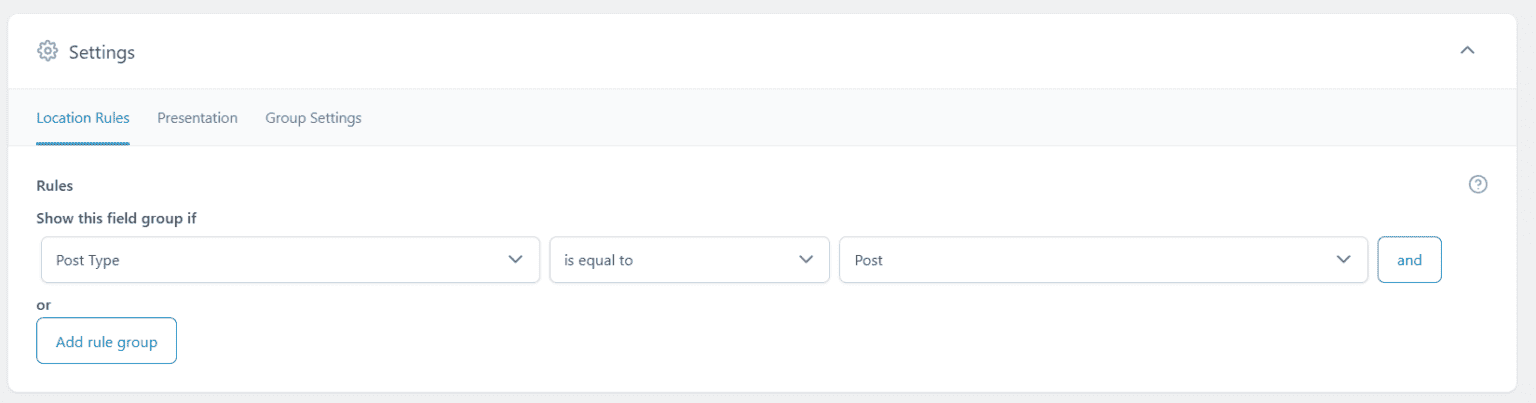
Click Save Changes to save your field group.
Mapping User Registration Fields to ACF
Now you'll connect your User Registration form fields to the ACF fields you just created.
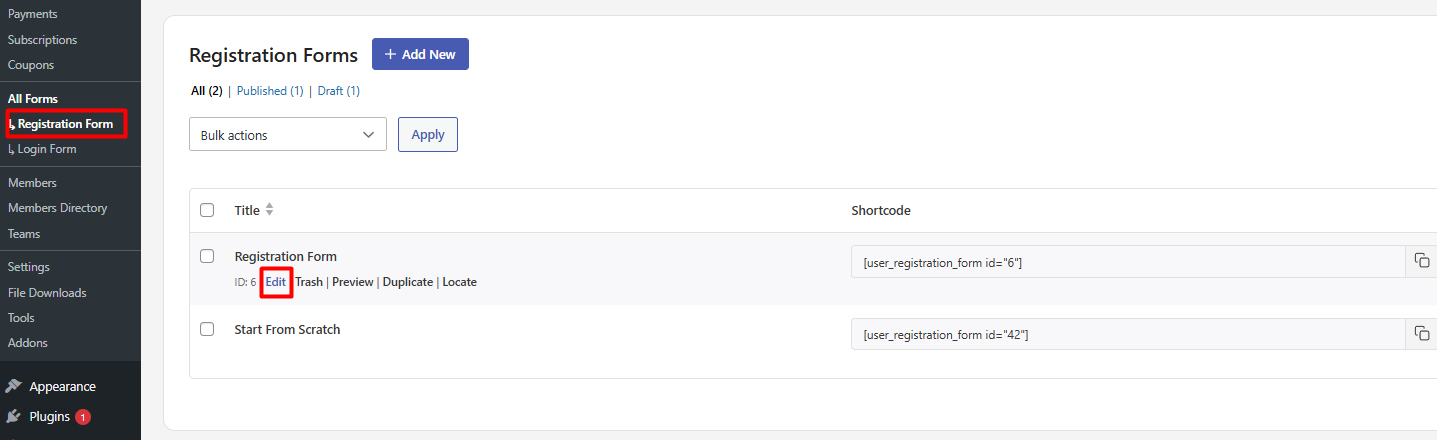
Go to User Registration → All Forms and select the form you want to map. Click Edit to open the form builder.
Navigate to Form Editor → Form Settings → Advanced in the form settings.
Enable the option to map form fields with external fields. This unlocks the field mapping interface.
Select Usermeta Table as the mapping destination. This is where both User Registration and ACF store custom user data.
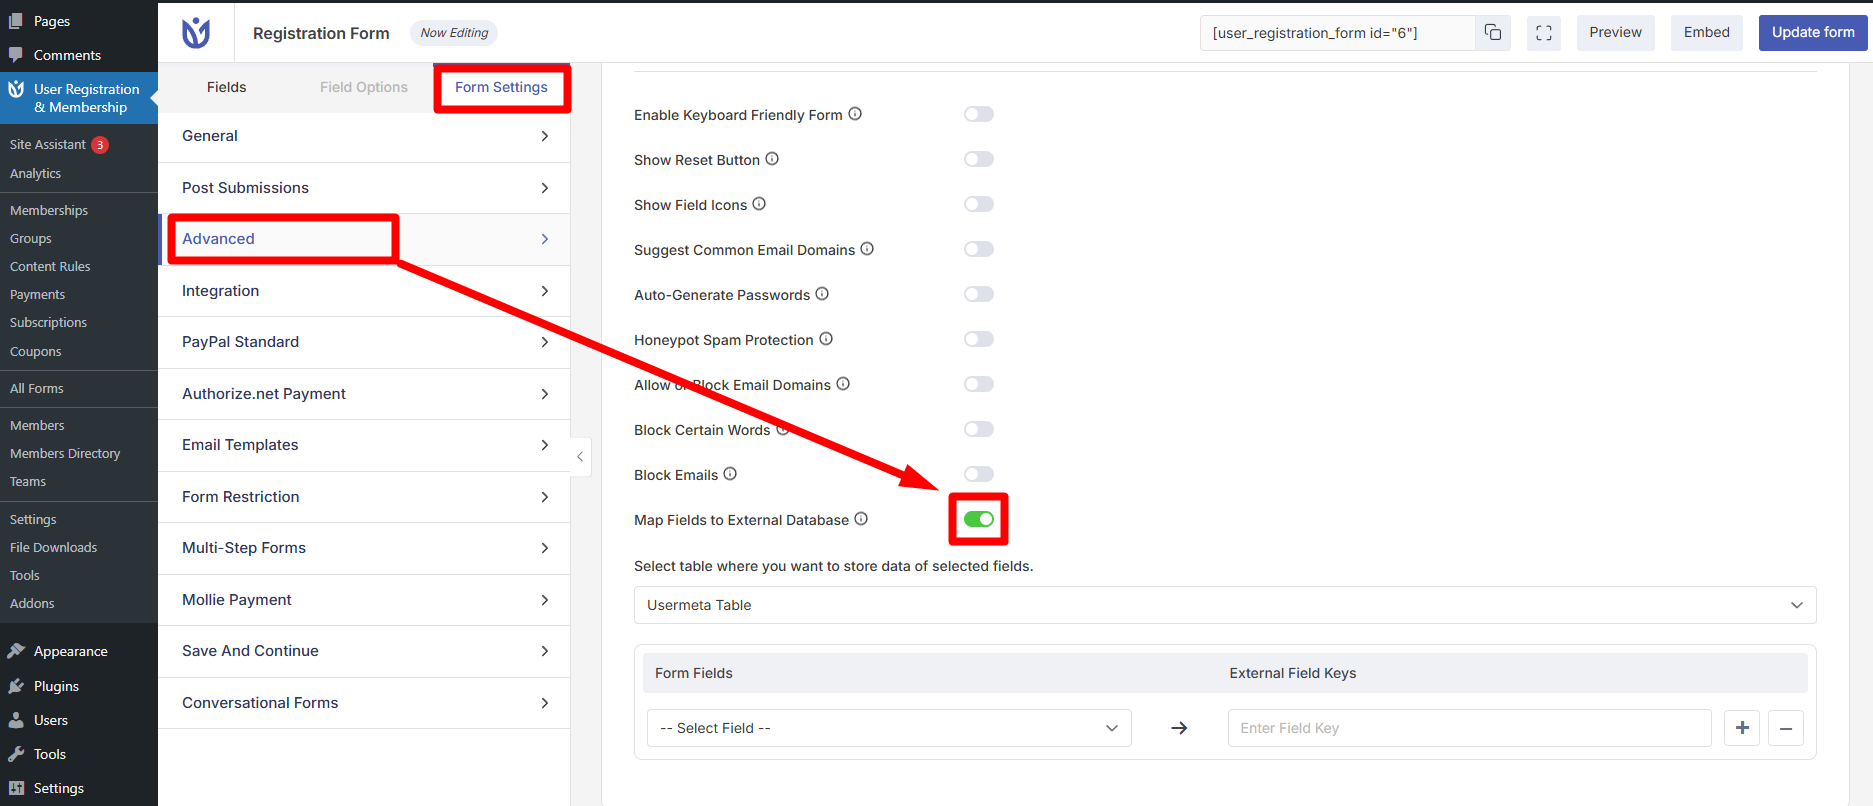
In the Form Fields section, select the User Registration fields you want to map. Click the + button to add multiple field mappings.
In the External Field keys section, enter the ACF Field Name for each corresponding field. These must match exactly — copy them directly from your ACF field settings.
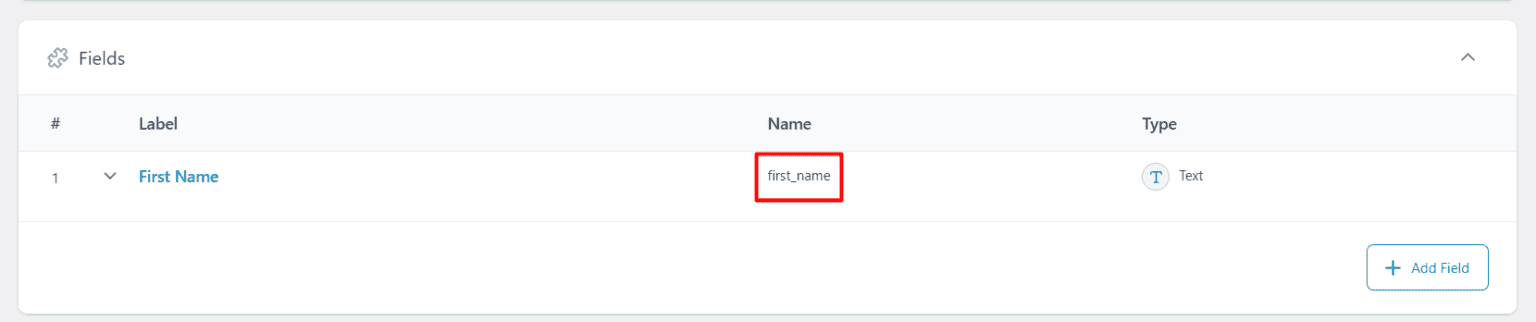
Tip: To find the exact ACF Field Name, go back to ACF → Field Groups, edit your field group, and look at the Field Name value for each field.
Click Update to save your form mapping.
Testing the Integration
Once mapped, data flows automatically between User Registration and ACF.
When a user registers through your User Registration form, the data they enter will be stored in the usermeta table and automatically synced to your ACF fields.
You can verify this by:
Submitting a test registration through your form
Going to Users → All Users in WordPress
Editing the test user
Scrolling down to see your ACF fields populated with the registration data