
Repeater Field
ProCollect multiple entries of the same information with repeater fields, allowing users to dynamically add sets of fields like work history or education during registration.
Last updated on Jul 14, 2026
Need to collect multiple entries of the same information during registration?
User Registration & Membership lets you add repeater fields to your forms, so users can submit repeated data (such as work experience, education history, or family member details) without creating separate fields for each entry. This tutorial will guide you through adding and configuring repeater fields in your registration forms.
Before you begin, ensure the User Registration & Membership plugin is installed and activated on your WordPress site. Also, make sure the Advanced Fields addon is installed and activated.
Understanding Repeater Fields
Repeater fields allow users to add multiple sets of the same group of fields during registration. For example, if you're collecting employment history, users can add multiple job entries, each with fields for company name, job title, start date, and end date, by clicking an "Add Another" button.
This is more user-friendly than creating fixed duplicate fields (like "Job 1," "Job 2," "Job 3") because users can add exactly as many entries as they need.
Installing the Advanced Fields Addon
Repeater fields are part of the Advanced Fields addon, which requires User Registration & Membership Pro. To install the addon, navigate to User Registration & Membership > Addons. Search for "Repeater Fields," then click toggle and Activate.
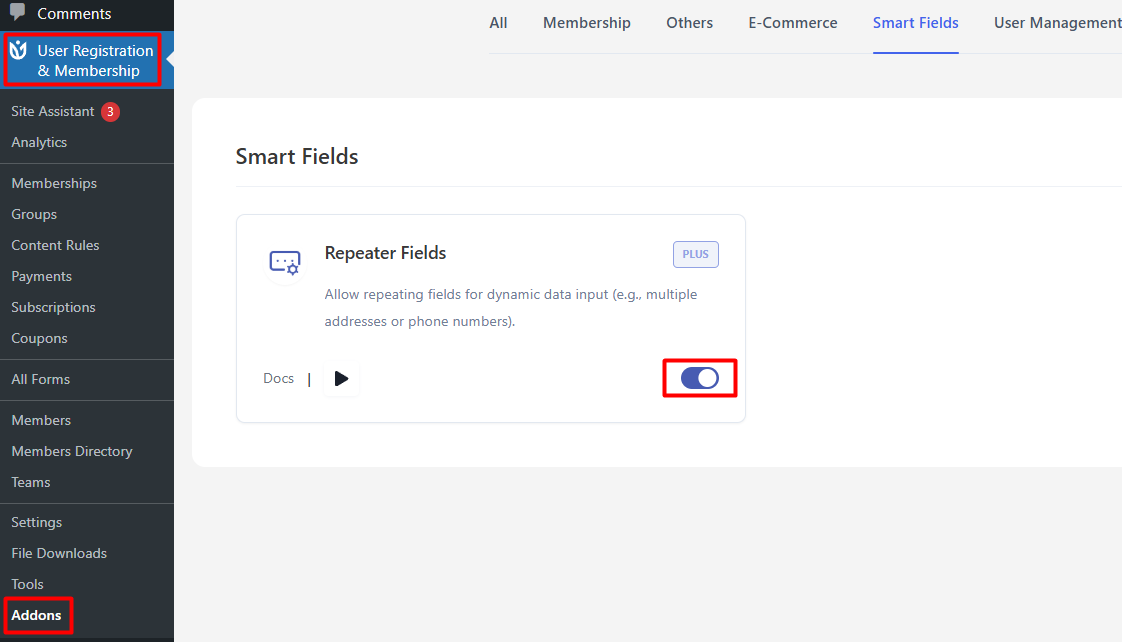
Once activated, the repeater field will appear in your form builder's field palette.
Adding a Repeater Field to Your Form
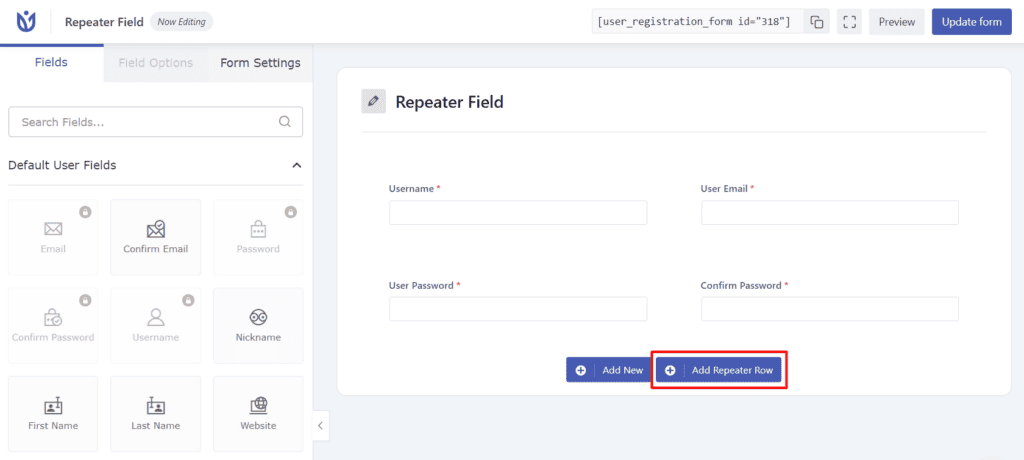
To add a repeater field, go to User Registration & Membership > Add New to create a new form, or select an existing form to edit. In the form builder, locate the Add Repeater Row field underneath the form.
Configuring Repeater Field Settings
Once you've added the repeater field, you'll see configuration options in the Field Options panel. Here, you'll configure the label, description, and behavior of the repeater.
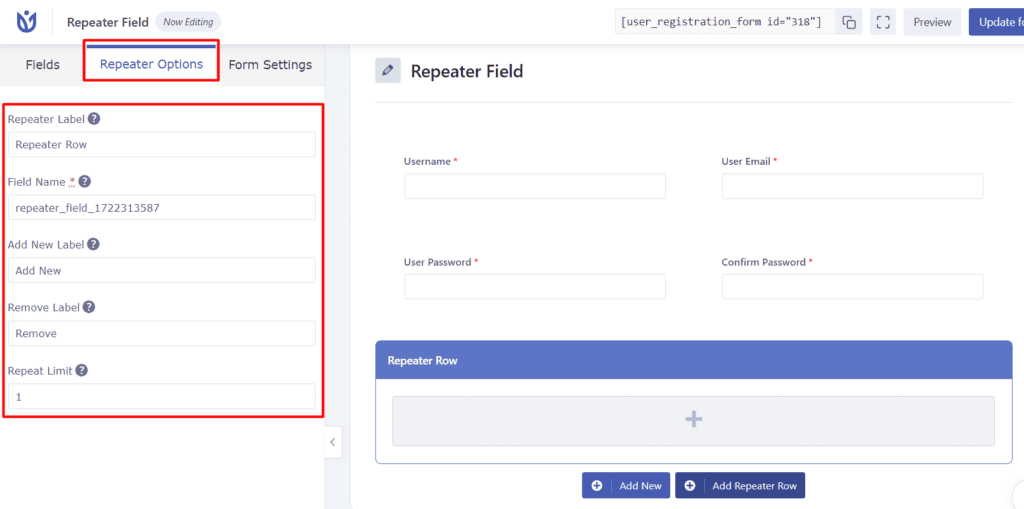
In the General Settings section, enter a Label for the repeater field (for example, "Work Experience" or "Education History"). Add a Add label and Remove Label text. You can also set a Field Name for internal reference. You can also set the repeat limit for the fields.
Adding Fields Inside the Repeater
The repeater field acts as a container for other fields. To add fields inside the repeater, drag any field type from the field palette and drop it directly into the repeater field area.
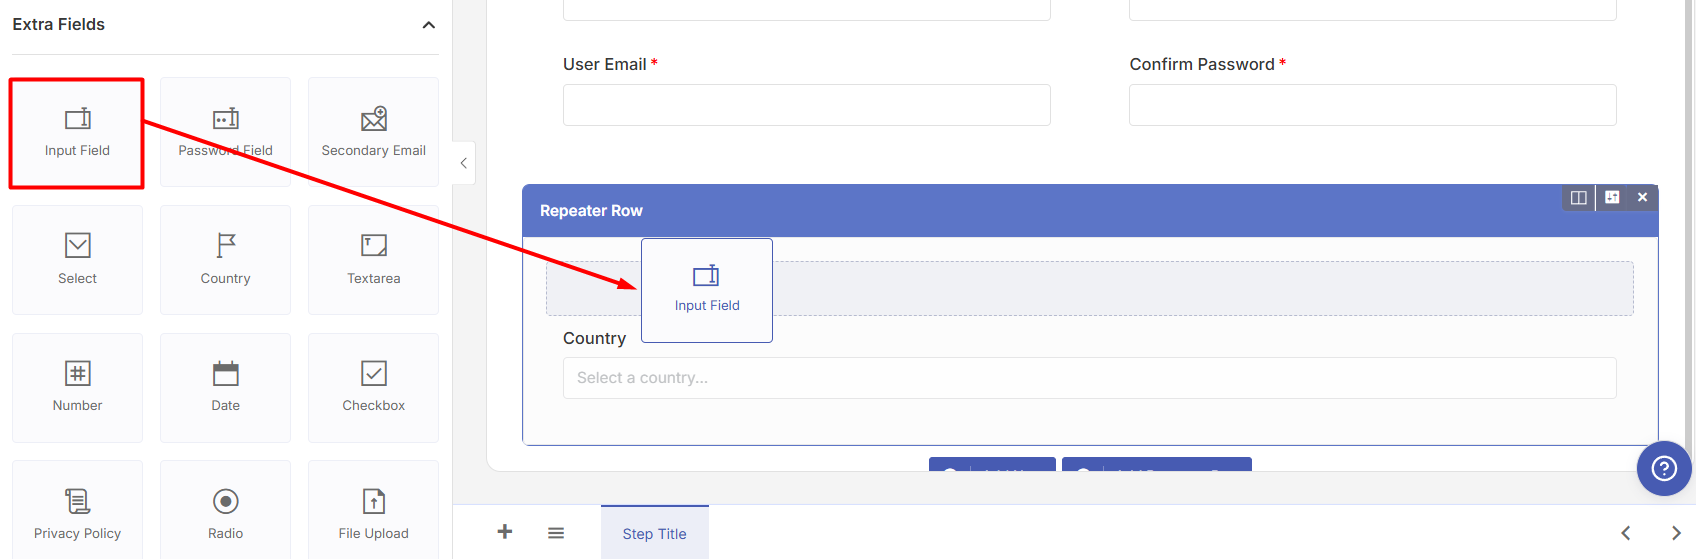
For example, if you're collecting work experience, you might add fields for Company Name (text field), Job Title (text field), Start Date (date field), and End Date (date field) inside the repeater.
Each field inside the repeater can be configured independently with its own label, placeholder, validation rules, and other settings. Click on any nested field to access its Field Options panel.
Previewing and Testing Your Form
Once you've configured your repeater field and added all necessary nested fields, click the Update Form button to save your changes. Then, click Preview to see how the form appears on the front end.
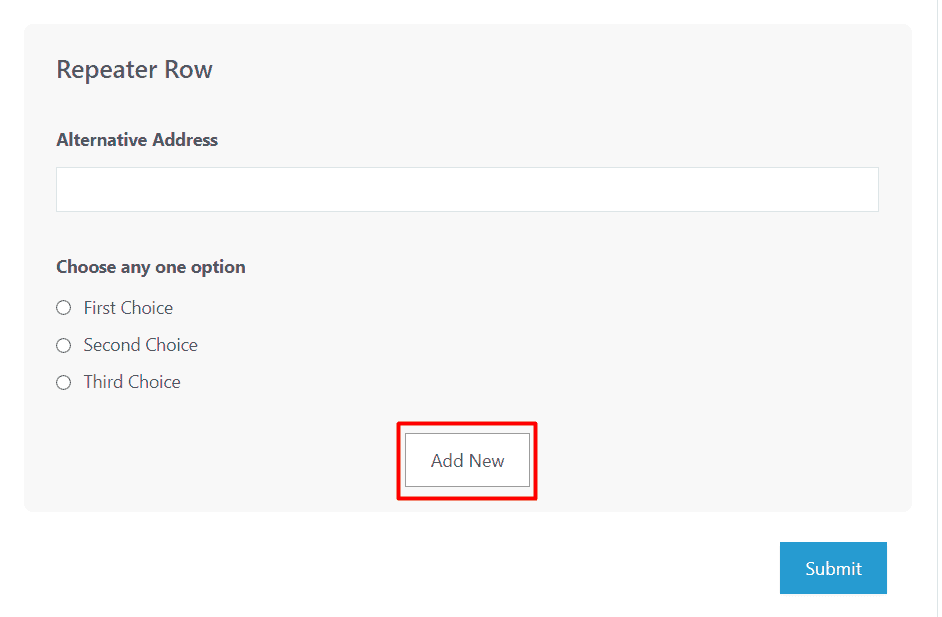
Test the repeater functionality by clicking the "Add Another" button to add multiple entries. Verify that the Repeat limit work as expected, and confirm that all nested fields display and validate correctly.
We recommend submitting a test registration in an incognito browser window to ensure the repeater data is captured and stored properly.
Common Use Cases for Repeater Fields
Repeater fields are useful in many registration scenarios. Here are some common examples:
Work Experience: Collect multiple job entries with company name, position, dates, and responsibilities
Education History: Gather details about schools attended, degrees earned, and graduation dates
Family Members: Collect information about dependents or household members
References: Allow users to provide multiple professional or personal references
Certifications: Collect details about professional certifications, licenses, or training
Event Attendees: Let users register multiple people for an event in a single form submission
That's it! Now you know how to add and configure repeater fields in your User Registration forms. Next, would you like to learn how to use conditional logic to show or hide repeater fields based on other form inputs? Be sure to check out our guide on using conditional logic with registration forms for all the details.