
Profile Picture Field
ProEnable users to upload profile photos during registration with the Profile Picture field, supporting device uploads and webcam capture.
Last updated on Jul 15, 2026
Want to allow users to upload a profile photo during registration? User Registration & Membership lets you add a Profile Picture field to your forms, enabling users to upload images from their device or capture photos directly using their webcam.
This tutorial will show you how to add and configure the Profile Picture field in your registration forms.
Prerequisites
Before getting started, make sure you've installed and activated the User Registration & Membership plugin on your WordPress site. Then, make sure you've installed and activated the Advanced Fields add-on, which is required for the Profile Picture field.
The Profile Picture field is a premium feature available with the Personal plan or higher.
Adding the Profile Picture Field to Your Form
To add a Profile Picture field to your registration form, follow these steps:
Step 1: Navigate to User Registration & Membership → All Forms in your WordPress dashboard.
Step 2: Click on the registration form you want to edit, or create a new form by clicking Add New.
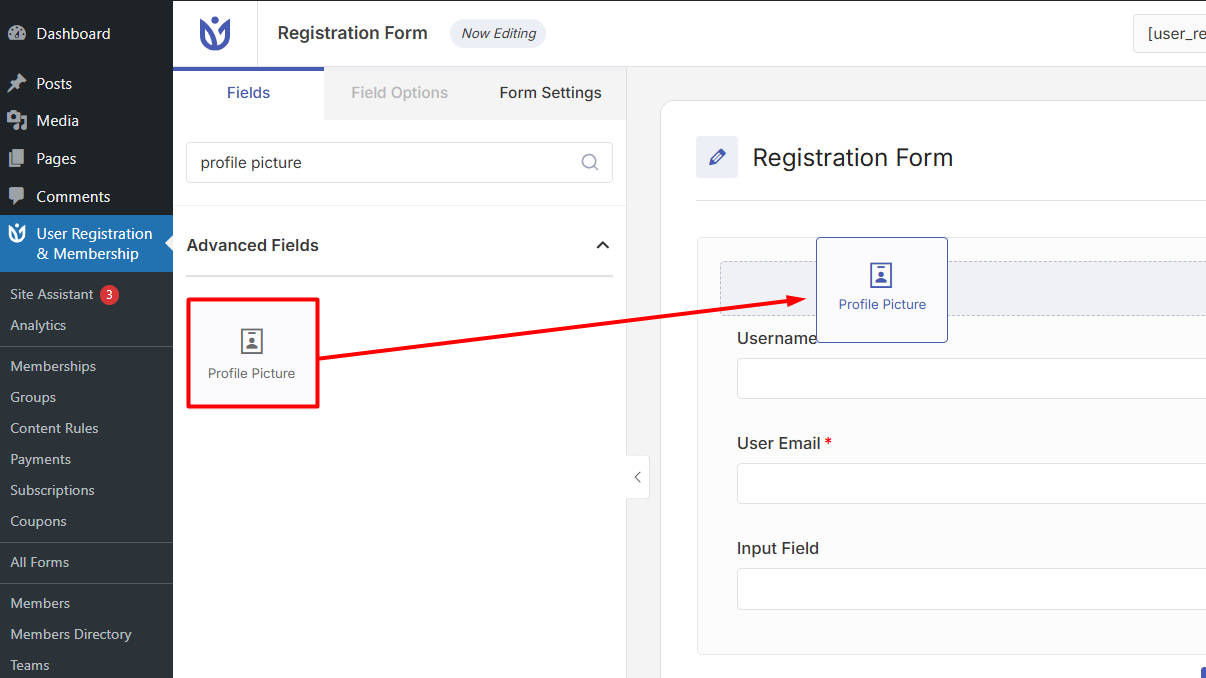
Step 3: In the form builder, locate the Profile Picture field in the left sidebar under the Advanced Fields section.
Step 4: Drag and drop the Profile Picture field onto your form canvas where you want it to appear.
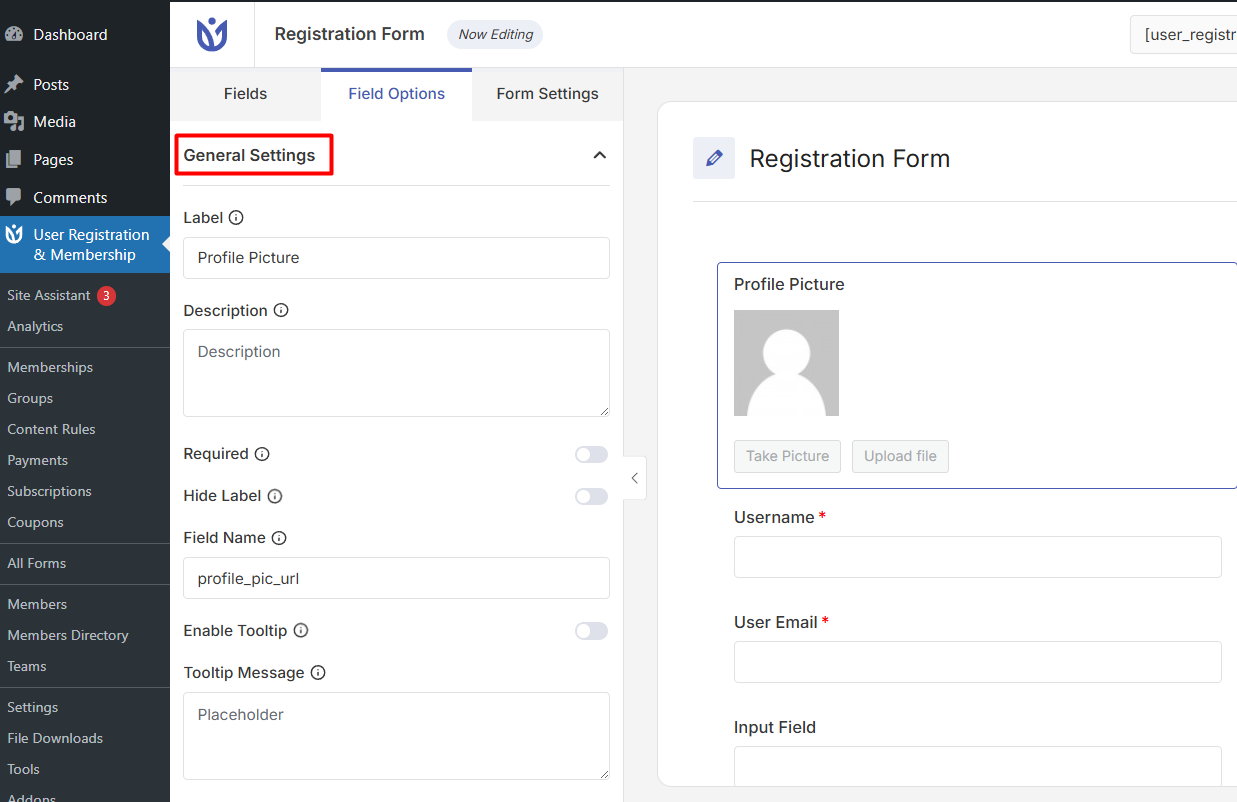
Step 5: Click on the Profile Picture field in your form to open the Field Options panel on the left.
Configuring Profile Picture Field Settings
Once you've added the Profile Picture field, you can customize how it works:
General Settings
Label: Change the text that appears above the field (default: "Profile Picture")
Description: Add helpful text to guide users on uploading their photo
Required: Toggle this on to make profile picture uploads mandatory
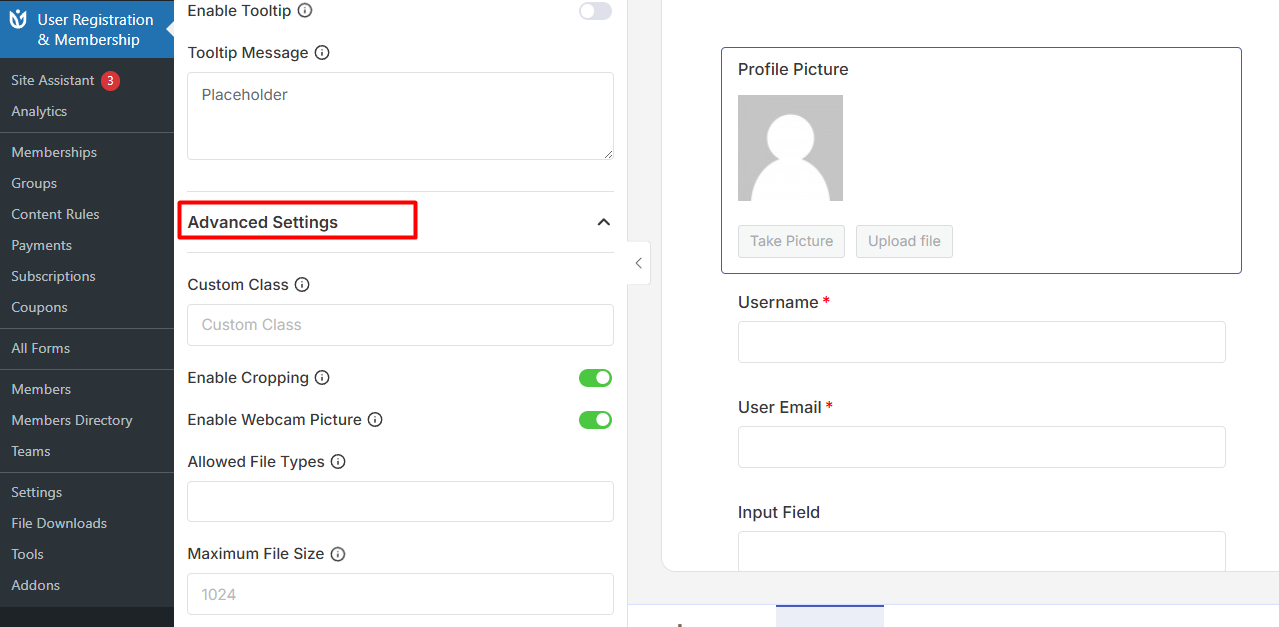
Advanced Settings
Click on Advanced Settings to access additional configuration options:
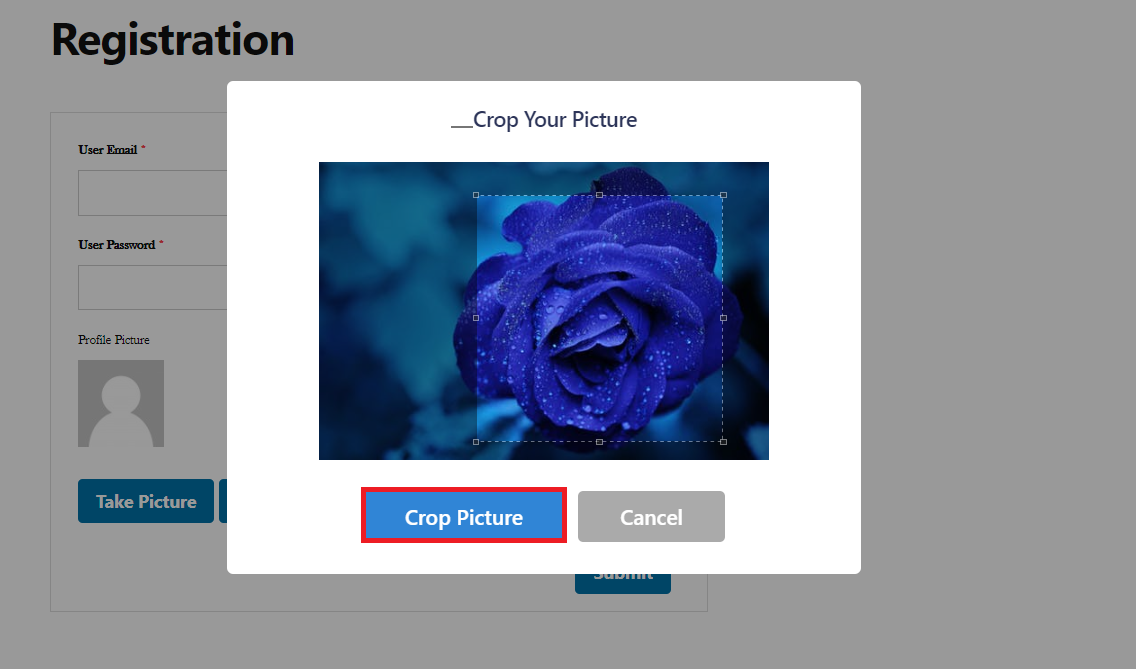
Enable Cropping: Allow users to crop the image while uploading to fit the desired size
Enable Take Picture: Allow users to use their webcam to capture a profile picture directly
Valid File Types: Choose which file types are accepted for upload (e.g., JPG, PNG, GIF)
Max File Size Allowed: Set the maximum file size allowed for profile picture uploads
Step 6: Configure these settings based on your needs, then click Update Form to save your changes.
Important Notes About the Profile Picture Field
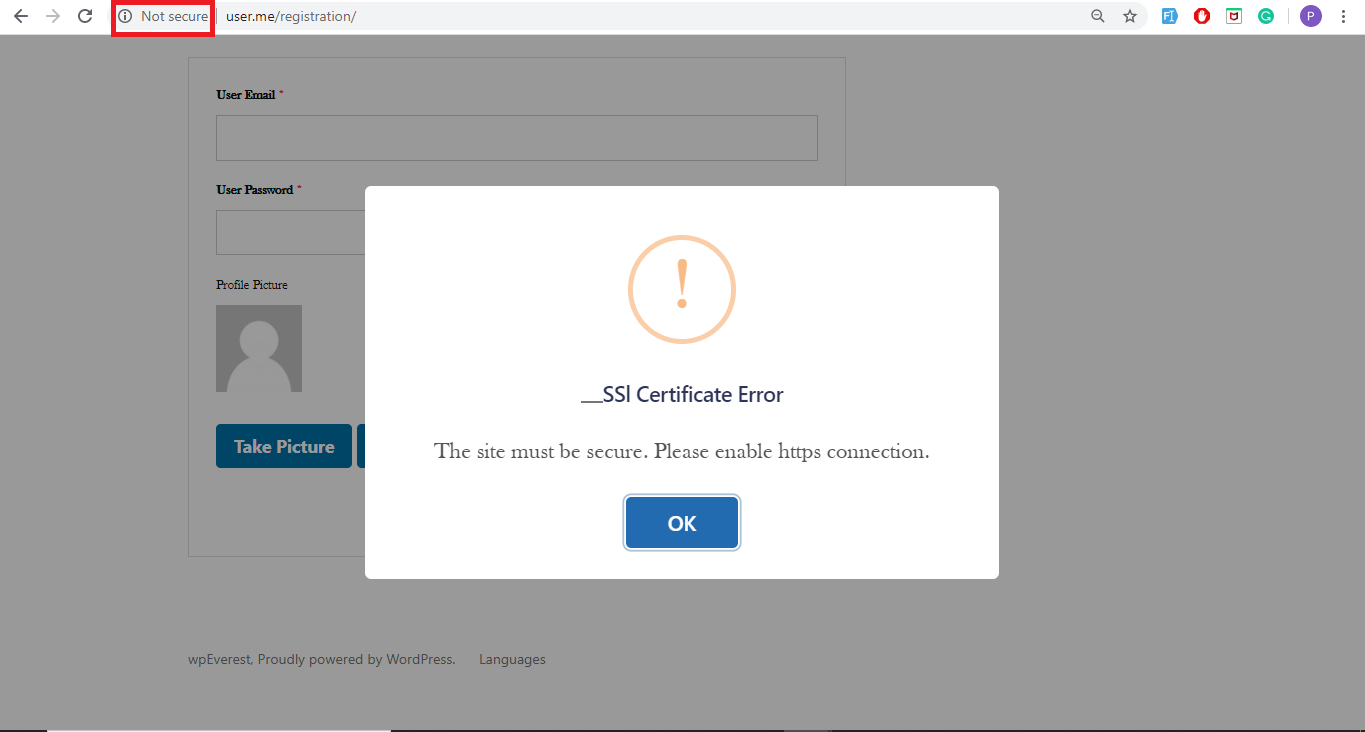
HTTPS is required: Your site MUST be secured with SSL and HTTPS for the Profile Picture field to work on the frontend. Without HTTPS, the field will show an error to users.
Upload or capture: Users can either upload an existing file from their computer or capture a photo directly using their webcam (if you enable the Take Picture option).
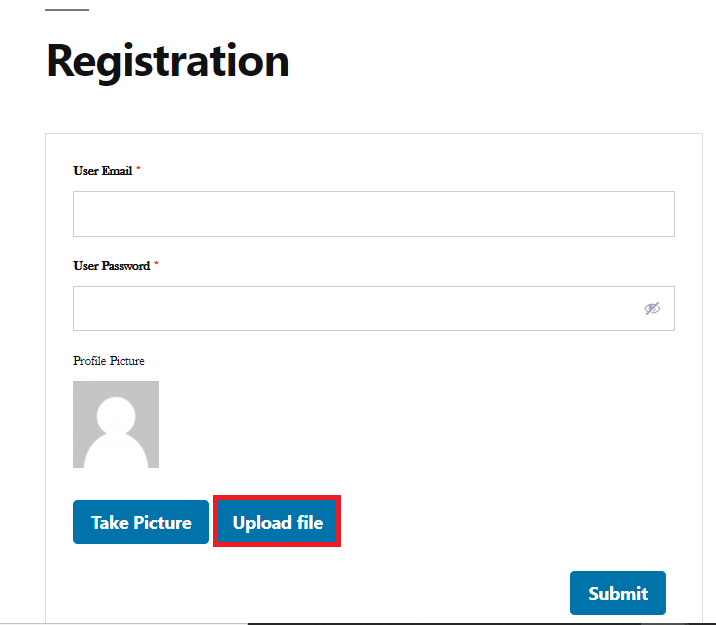
Image cropping: When cropping is enabled, users can adjust the image to fit the desired size after selecting or capturing their photo.
How Users Upload Profile Pictures
Once you've added the Profile Picture field to your form, here's what users will experience:
Users navigate to your registration form
They see the Profile Picture field with two options:
Upload a File from their computer
Take a Picture using their webcam (if enabled)
After selecting or capturing an image, users can crop it to fit the desired size (if cropping is enabled)
The profile picture is saved with their registration