
Pattern validation in Form Fields
ProSet up pattern validation for input fields to enforce specific data formats like phone numbers and postal codes using built-in patterns or custom regex.
Last updated on Jul 14, 2026
Would you like to ensure users enter data in a specific format when filling out your registration forms? User Registration & Membership allows you to add pattern validation to Input Fields, so you can require phone numbers, postal codes, or custom formats without writing code. This tutorial will show you how to set up pattern validation with built-in patterns or custom regular expressions.
Before getting started, make sure you've installed and activated the User Registration & Membership Pro plugin. Pattern validation is a Pro feature available with Personal plan or higher.
Adding an Input Field to Your Form
To add pattern validation, you'll first need an Input Field in your registration form. Go to User Registration & Membership > All Forms and either create a new form or edit an existing one.
From the form builder, drag and drop an Input Field from the Extra Fields section into your form.
Click on it to open the Field Options panel on the left. Then, navigate to Advanced Settings to access the pattern validation options.
Here, you'll see two key settings: Pattern Value and Pattern Message.
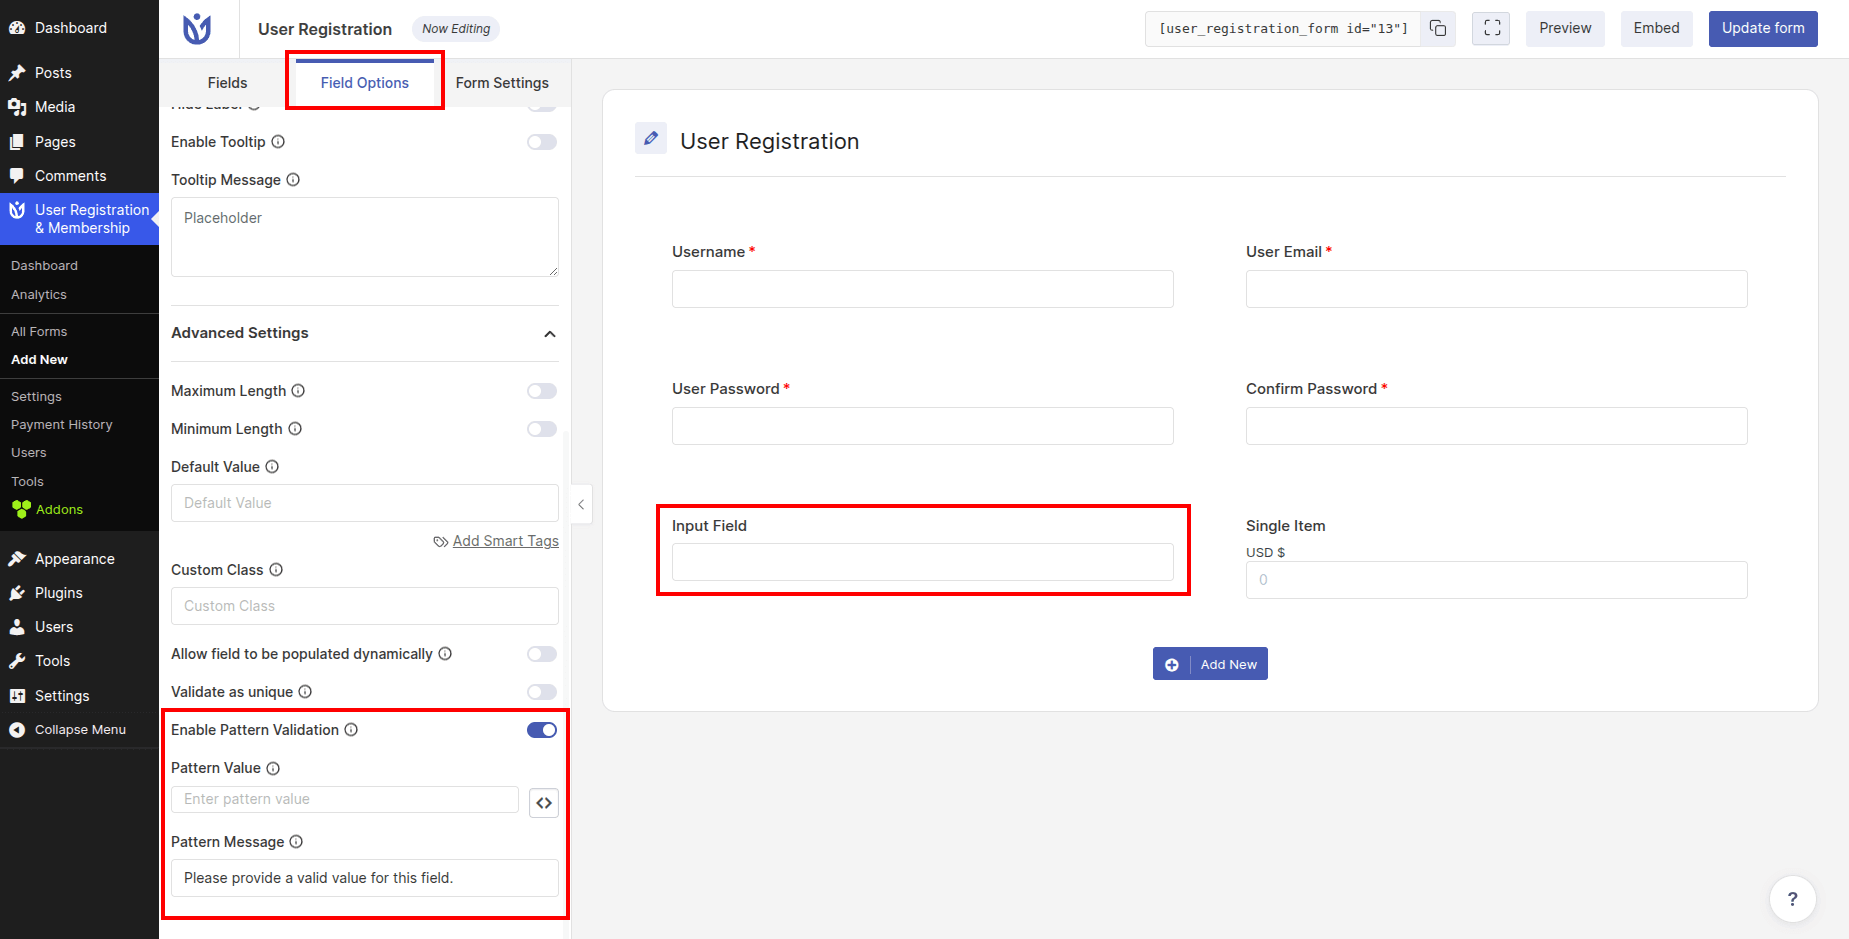
In the Pattern Value input, choose the patterns available in the lists. Or, you can write custom Regular expressions as per your need.
The list can be viewed by clicking the <> button. Similarly, write the custom validation message in the Pattern Message box.
Saving Your Field Settings
Once you've configured the pattern and message, click Update in the top right corner of the form builder to save your changes. Your Input Field now has pattern validation enabled.
When users fill out the form, they'll see your custom validation message if their input doesn't match the required pattern.