
File Upload Field
ProEnable users to upload documents, images, and files during registration with configurable file type and size restrictions using the File Upload add-on.
Last updated on Jul 15, 2026
Would you like to collect documents, images, or other files from users during registration in your WordPress websites? User Registration & Membership allows you to add file upload fields to your registration forms, so users can submit profile photos, resumes, certificates, or any other documents you need.
This tutorial will show you how to add a file upload field to your registration form and configure file type and size restrictions.
Prerequisites
Before getting started, make sure you've installed and activated the User Registration & Membership plugin on your WordPress site. Then, make sure you've installed and activated the File Upload add-on.
The File Upload field requires the File Upload add-on, available with Personal plan or higher.
Installing the File Upload Add-on
To use file upload fields in your registration forms, you'll need to activate the File Upload add-on first.
From your WordPress admin area, go to User Registration & Membership → Addons. Here, you'll see a list of available add-ons organized by category.
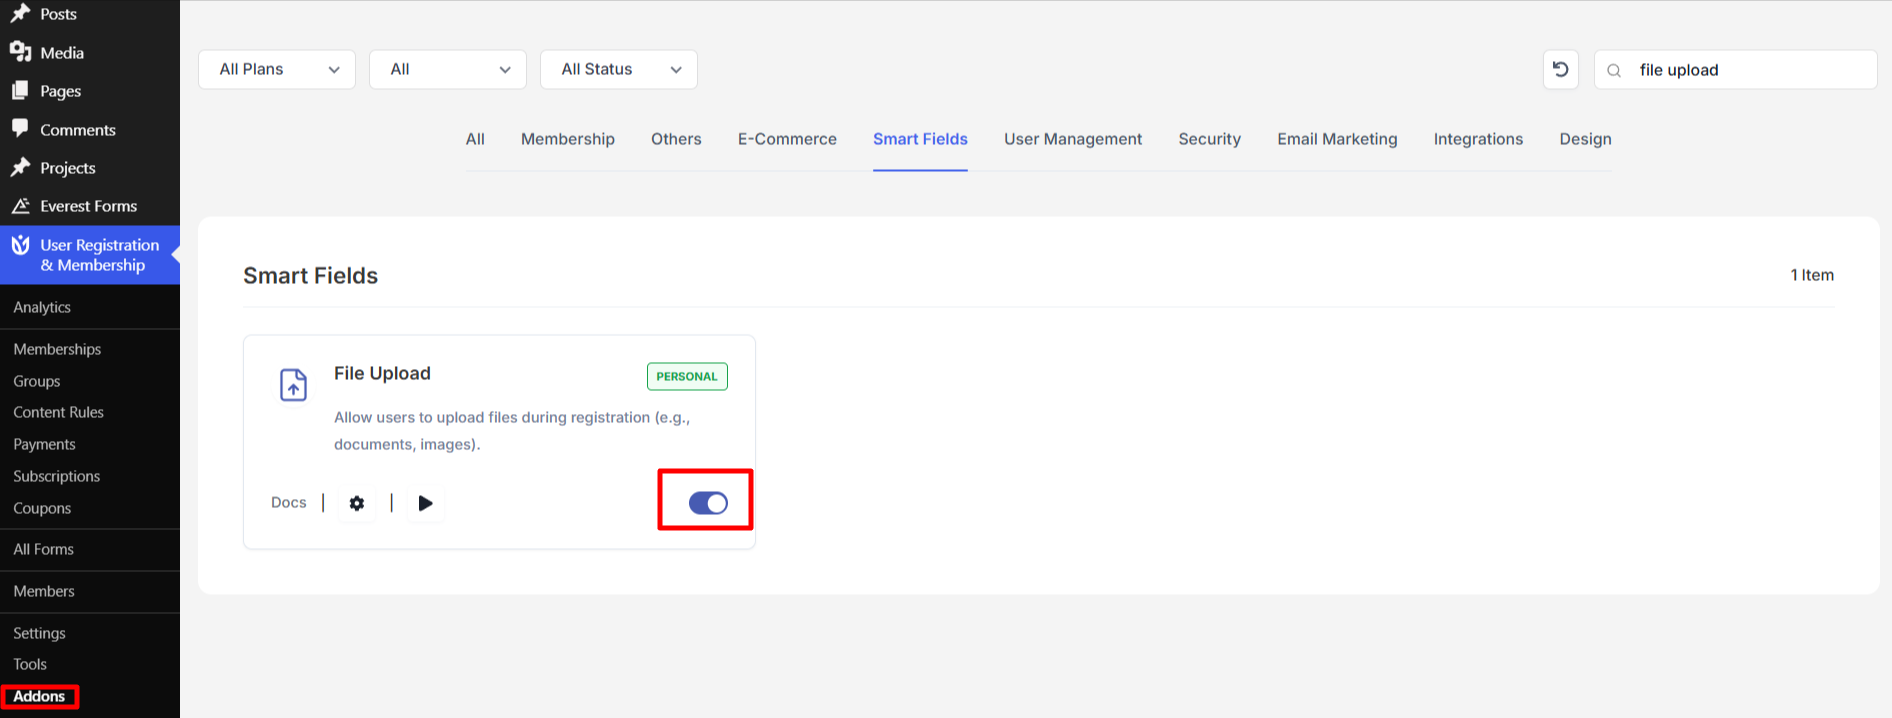
Locate the File Upload add-on and toggle the switch to activate it. Once activated, the file upload field will appear in your form builder.
Adding a File Upload Field to Your Form
Once the File Upload add-on is active, you can add file upload fields to any registration form.
Go to User Registration & Membership → All Forms and select the form you want to edit. If you don't have a form yet, click Add New to create one.
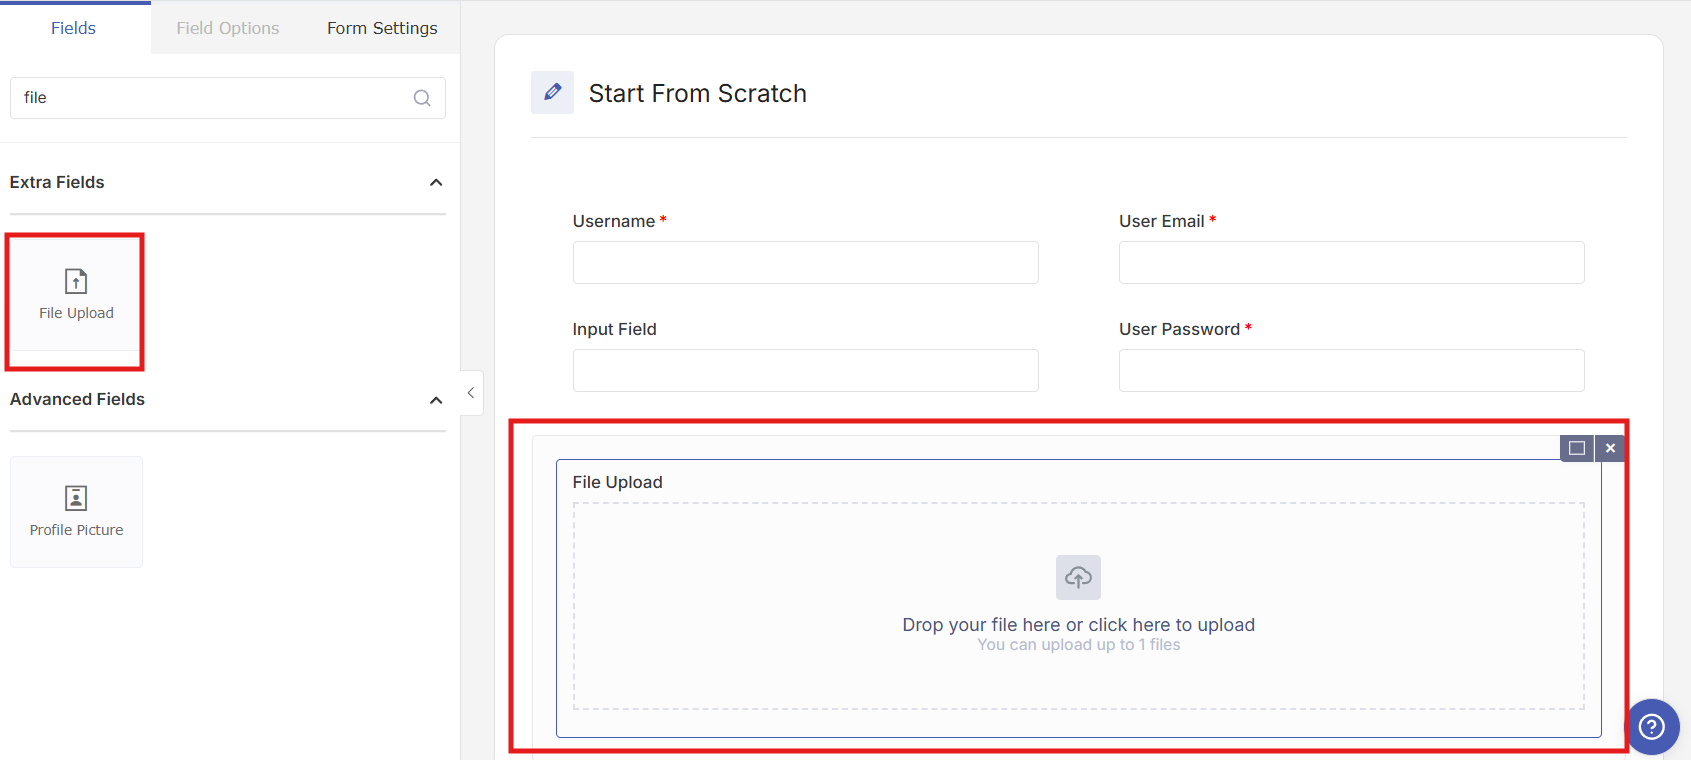
In the form builder, you'll see a list of available fields on the left side. Scroll down to the Extra Fields section and locate the File Upload field.
Drag the File Upload field from the left panel and drop it into your form builder canvas on the right. The field will appear in your form layout.
Click on the File Upload field to open its settings panel on the right side of the screen.
Configuring File Upload Field Settings
After adding the file upload field, you can customize how it works by configuring its settings.
General Settings
In the Field Options panel, you'll see several settings you can configure:
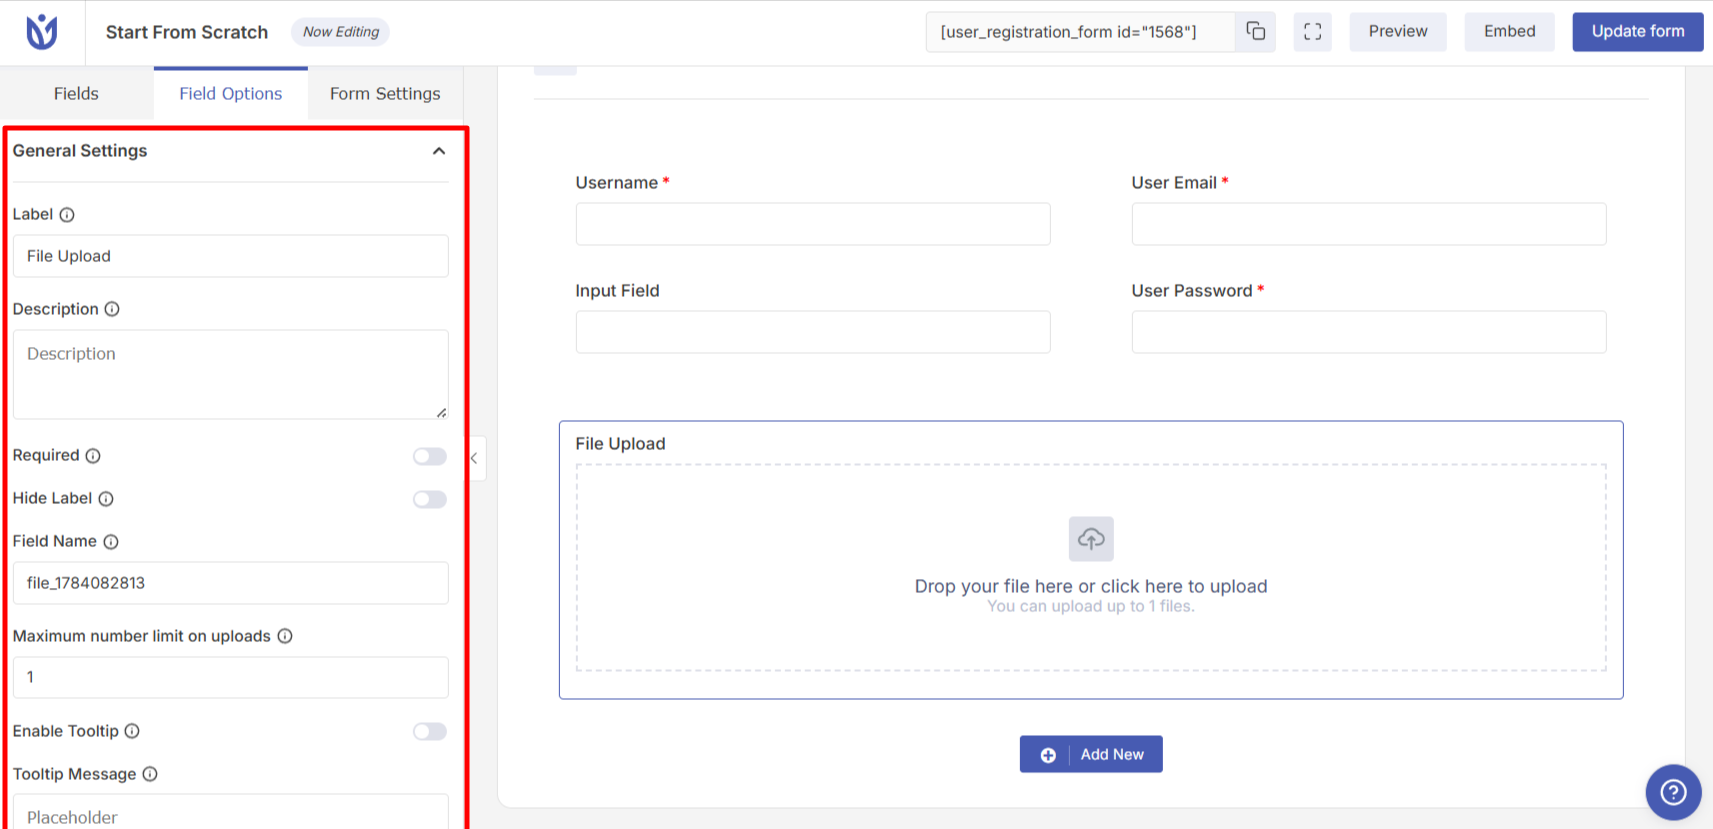
Label — This is the text that appears above the file upload field. For example, "Upload Your Resume" or "Profile Photo."
Description — Add helpful text below the field to guide users. For example, "Please upload a PDF file no larger than 2MB."
Field Name — This is the internal identifier for the field. It's automatically generated but can be customized if needed.
Required — Toggle this on if users must upload a file to submit the form.
Hide Label — Enable this if you want to hide the field label from the front-end form.
Advanced Settings
Click on the Advanced Settings tab to configure file restrictions:
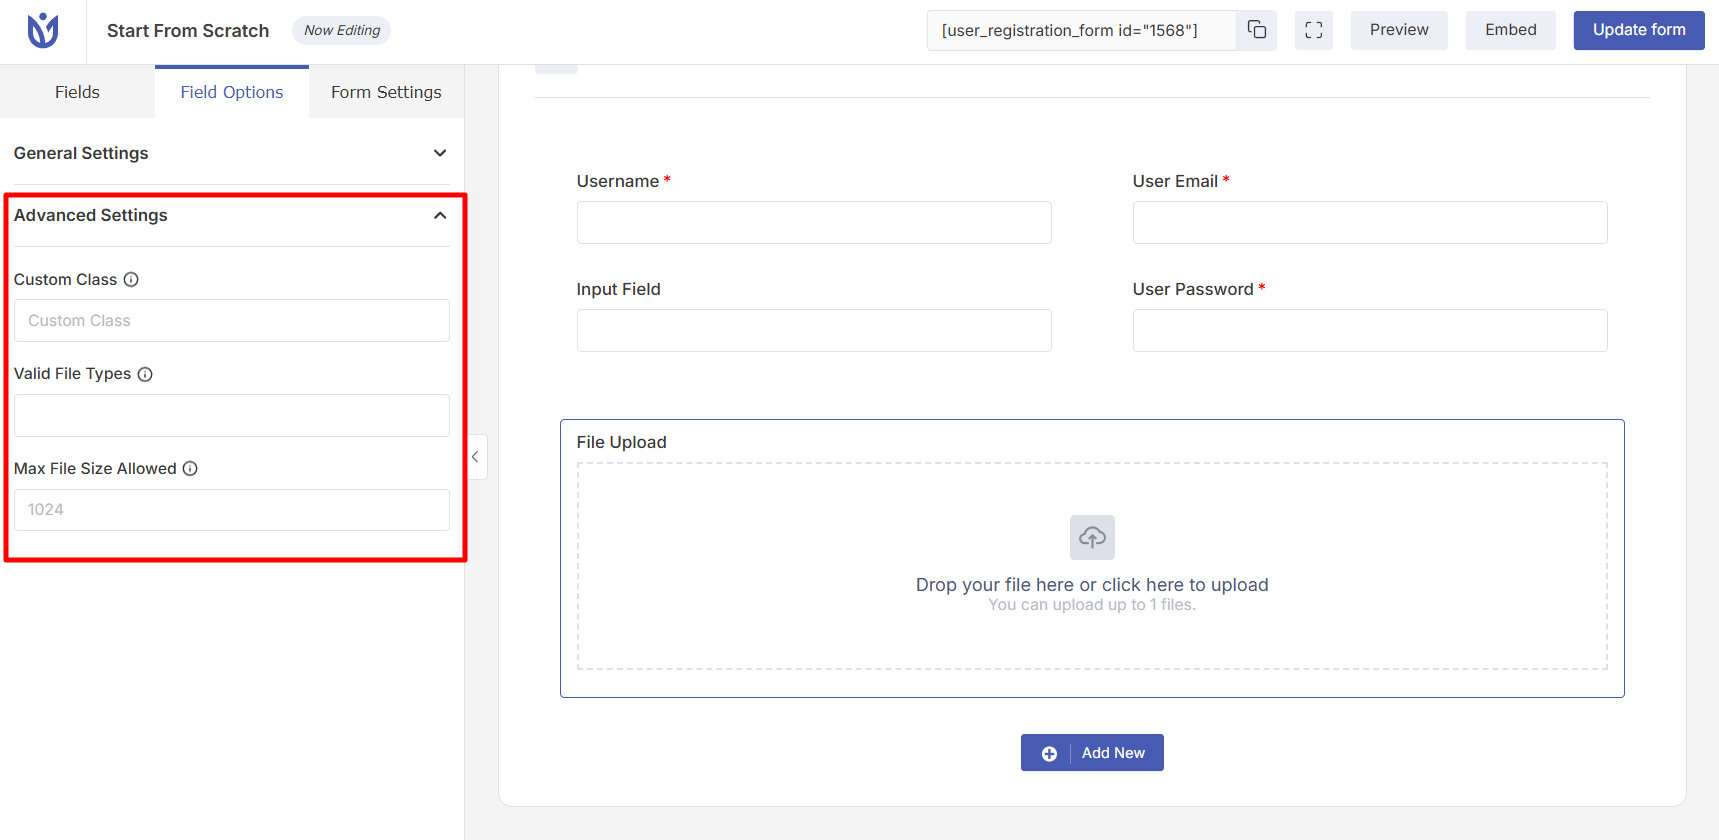
Valid File Types — Select which file types users can upload. Available options include pdf, doc, docx, jpg, jpeg, gif, png, and mp3. You can select multiple file types by holding Ctrl (Windows) or Cmd (Mac) while clicking.
Max File Size Allowed — Set the maximum file size in kilobytes (KB). For example, enter 1024 for 1MB or 2048 for 2MB.
Maximum Number Limit on Uploads — If you want users to upload multiple files, enter the maximum number of files they can upload. Leave blank to allow only one file.
Configuring Global File Upload Settings
You can also set default file type and size restrictions that apply to all file upload fields across your forms.
Go to User Registration & Membership → Settings → Registration & Login and click on the File Uploads tab.
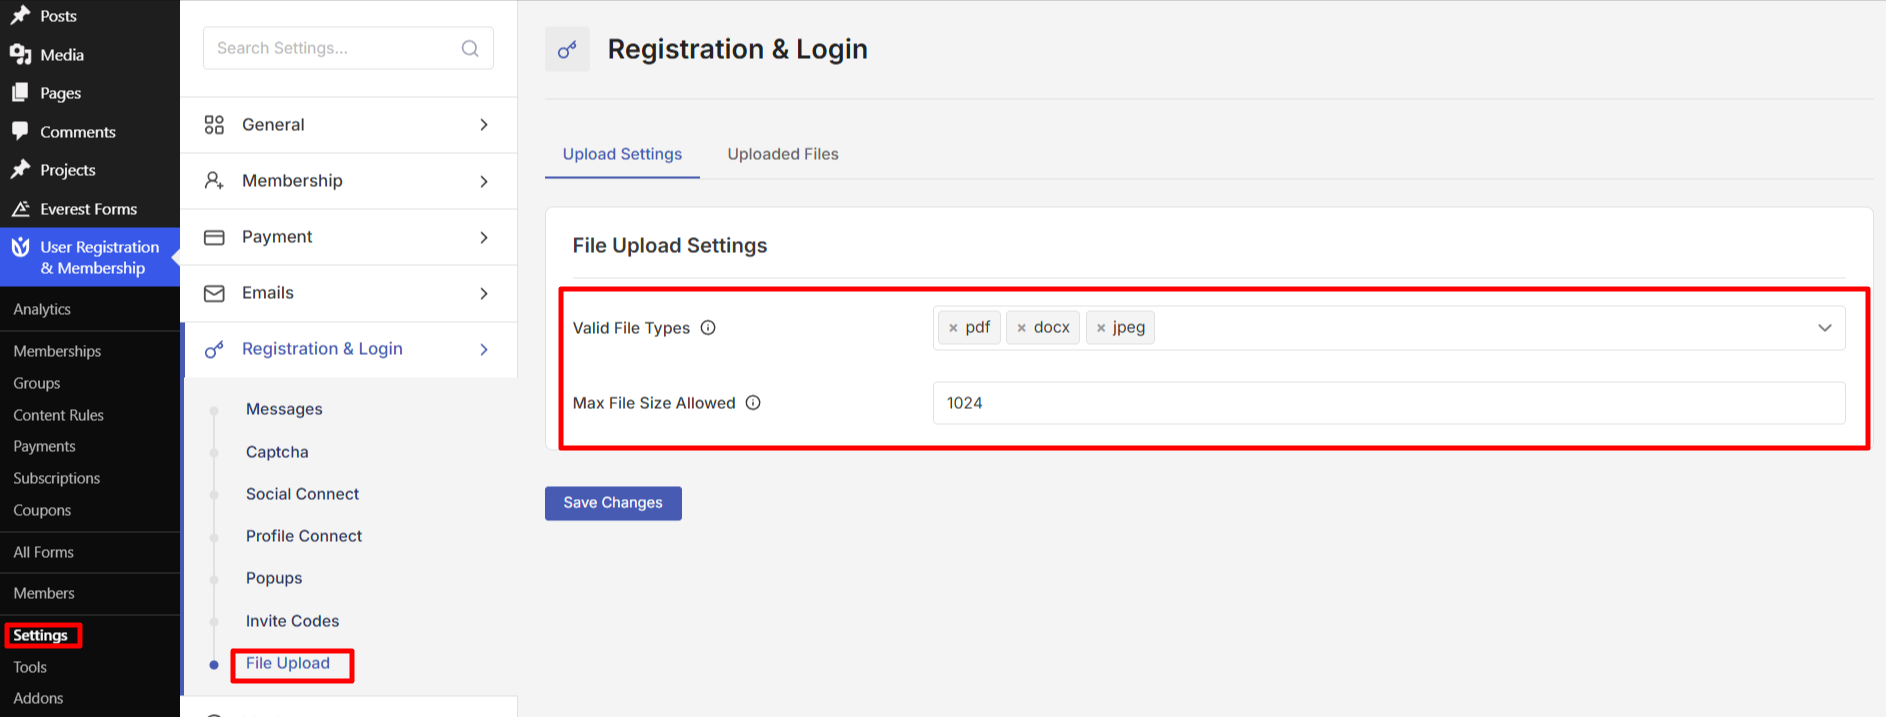
Here, you'll see two global settings:
Valid File Type — Select the file types allowed across all forms. This acts as a default setting, but individual fields can override it.
Max File Size to Upload — Set the default maximum file size in KB for all file upload fields.
Click Save Changes to apply your global settings.
Individual field settings will override these global defaults. If you set a specific file type or size limit on a field, that field will use its own settings instead of the global ones.
Viewing and Managing Uploaded Files
After users submit your registration form, you can view and download the files they uploaded.
Go to User Registration & Membership → Settings → Registration & Login → File Uploads → Uploaded Files.
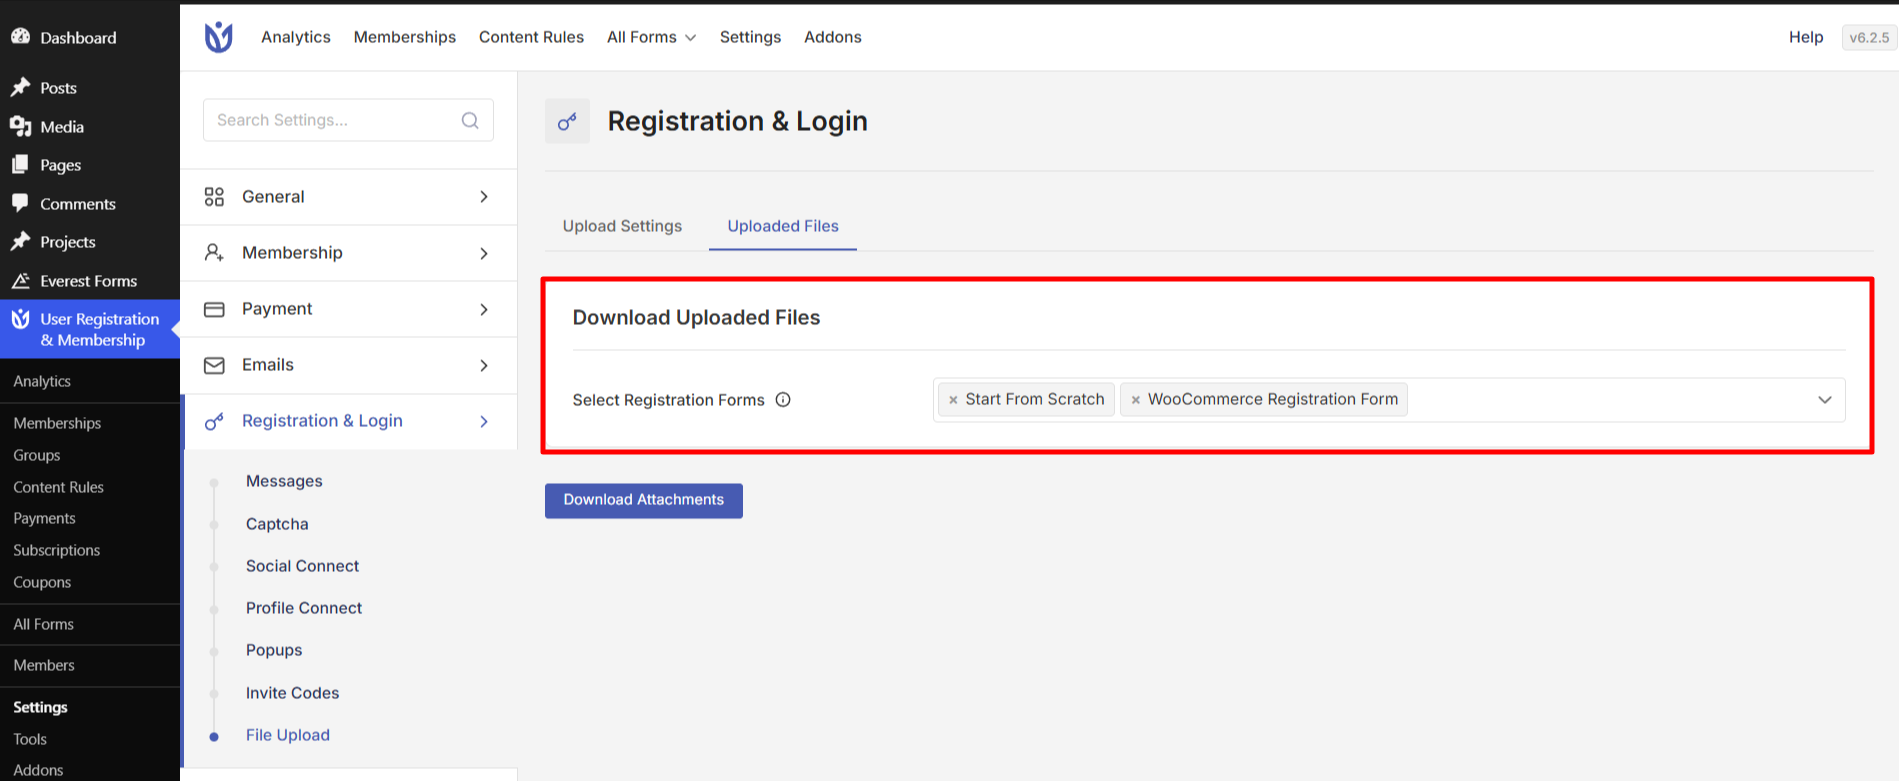
Here, you'll see a list of all files uploaded through your registration forms. You can:
View which form each file was submitted through
See the user who uploaded each file
Download individual files
Download all files from a specific form as a zip file using the Download Attachments button
Testing Your File Upload Field
Before making your form live, we recommend testing the file upload functionality.
Click Preview in the form builder to see how your form looks on the front-end. Try uploading a file to make sure:
The file type restrictions work correctly
The file size limit is enforced
Users see clear error messages if they try to upload invalid files
Multiple file uploads work as expected (if enabled)
If a user tries to upload an invalid file type, they'll see an error message. If they exceed the upload limit, a warning message will appear.
Managing User-Uploaded Files
Users can manage their uploaded files from the front-end after registration.
When users view their profile or edit their information, they'll see their uploaded files. Each file displays with a small cross (×) icon. Users can click this icon to delete and replace their uploaded file with a new one.
That's it! Now you know how to add file upload fields to your registration forms and configure file restrictions. Next, would you like to learn how to restrict which users can access uploaded files? Be sure to check out our guide on content restriction for more details.