Creating a Free Membership Plan
Learn how to set up a free membership plan to grant no-cost access to restricted content on your WordPress site.
Last updated on Jul 14, 2026
Would you like to create a membership website where users can register for free and access exclusive content? User Registration & Membership allows you to create free membership plans with content restrictions, so you can build a community site without charging for access. This tutorial will show you how to set up a free membership website from start to finish.
Creating Free Membership in WordPress
Before getting started, make sure you've installed and activated the User Registration & Membership plugin on your WordPress site.
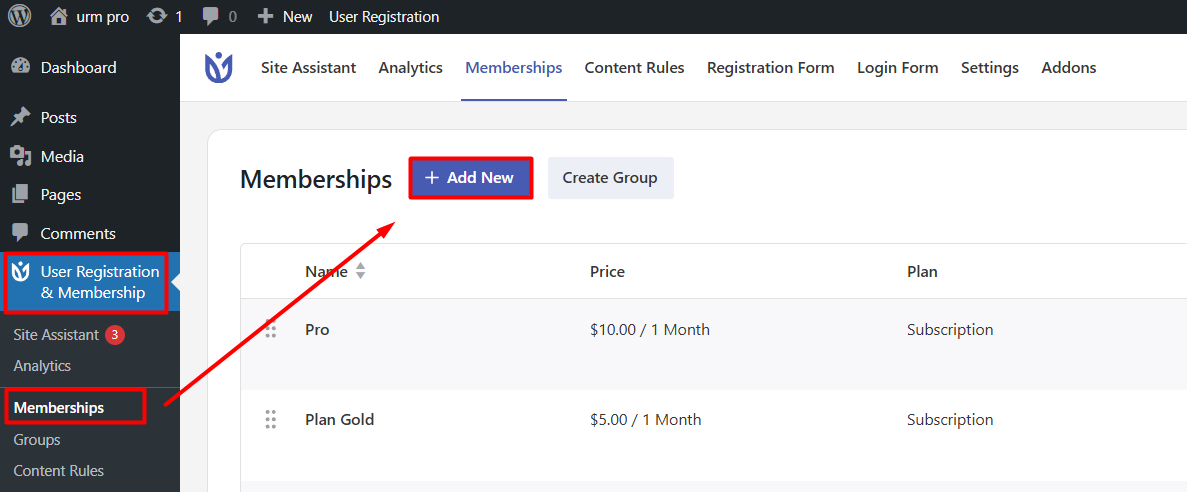
Step 1: Create New Membership
Log in to your WordPress dashboard
Navigate to User Registration & Membership → Memberships
Click the Add New button (or Create new Membership button)
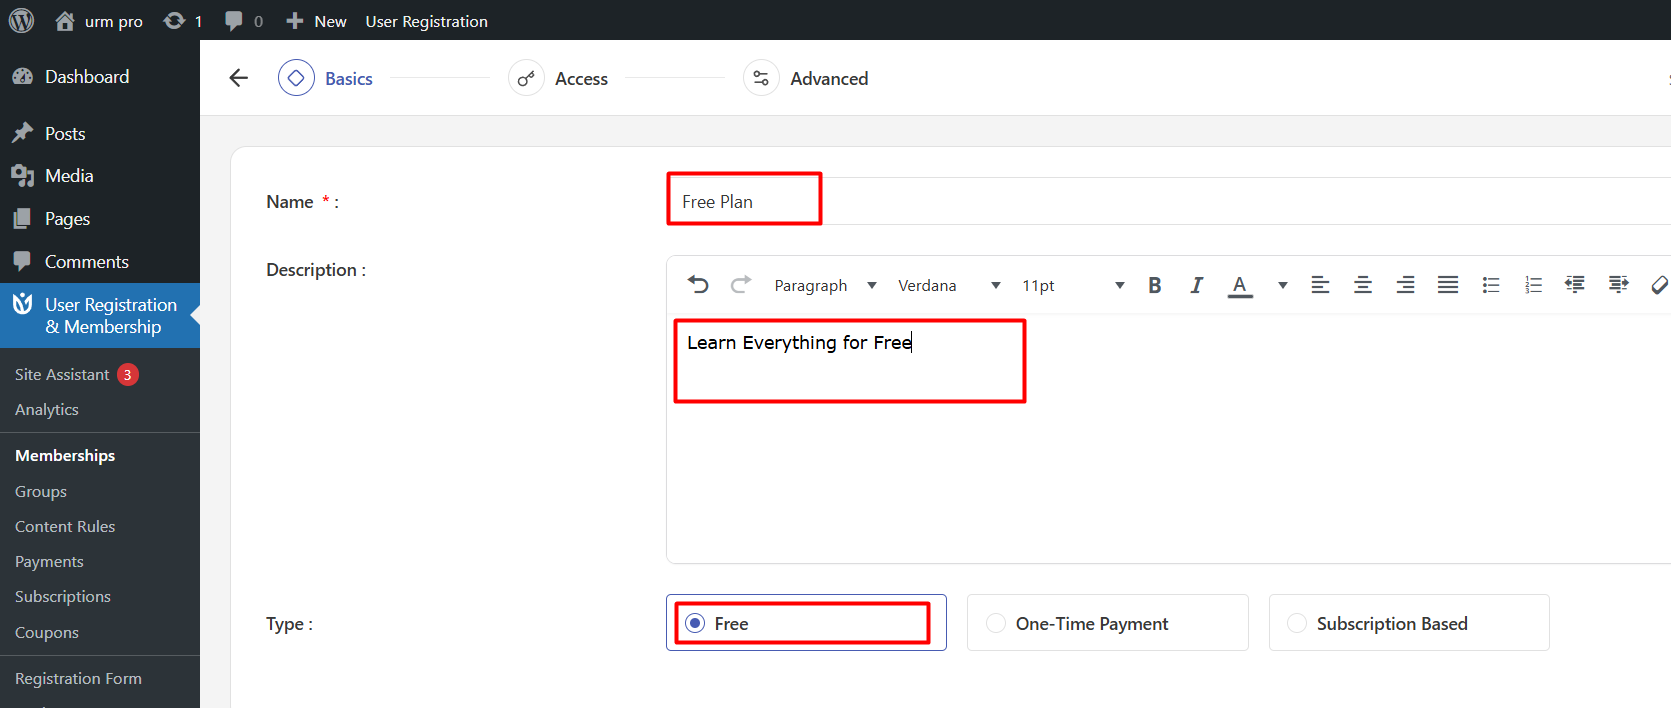
Step 2: Configure Basic Settings
On the Basics tab, configure the following:
Membership Name: Enter a clear name for your plan (e.g., "Free Member", "Basic Access")
Description: Add details about what this membership includes
Membership Type: Select Free from the option.
Step 3: Configure Access Settings
Switch to the Access tab to control what content members can view:
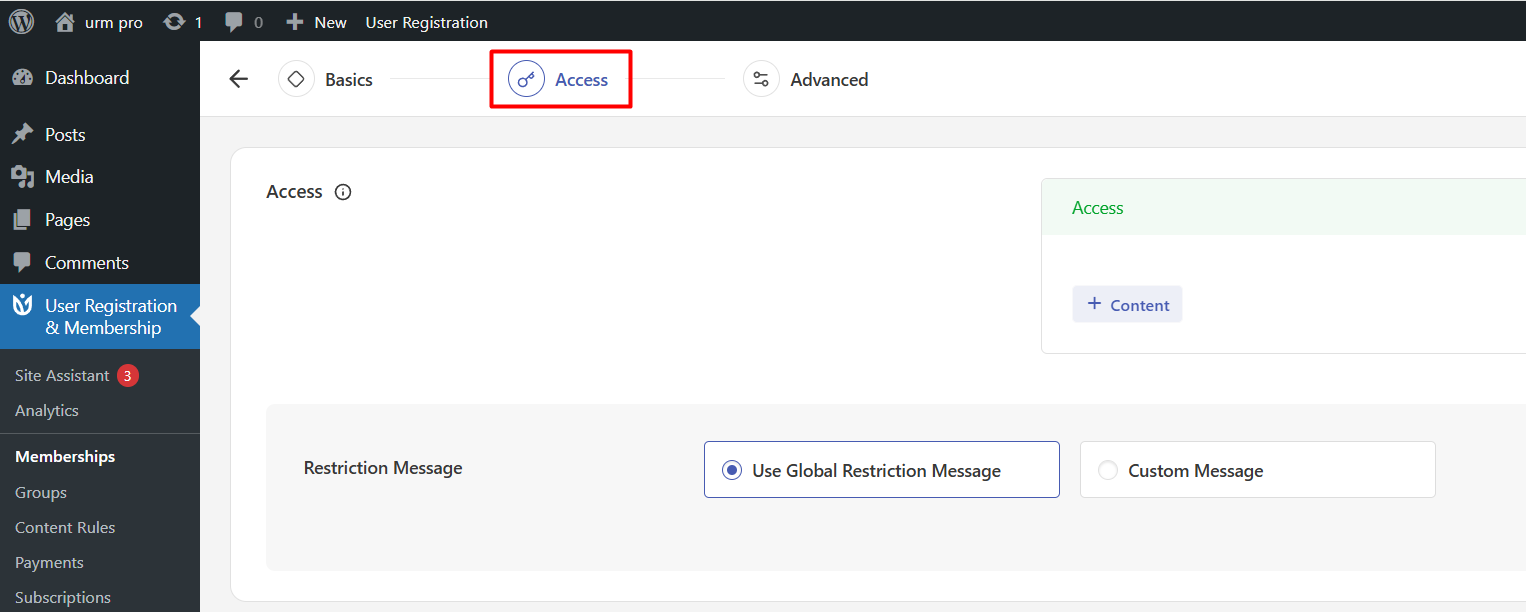
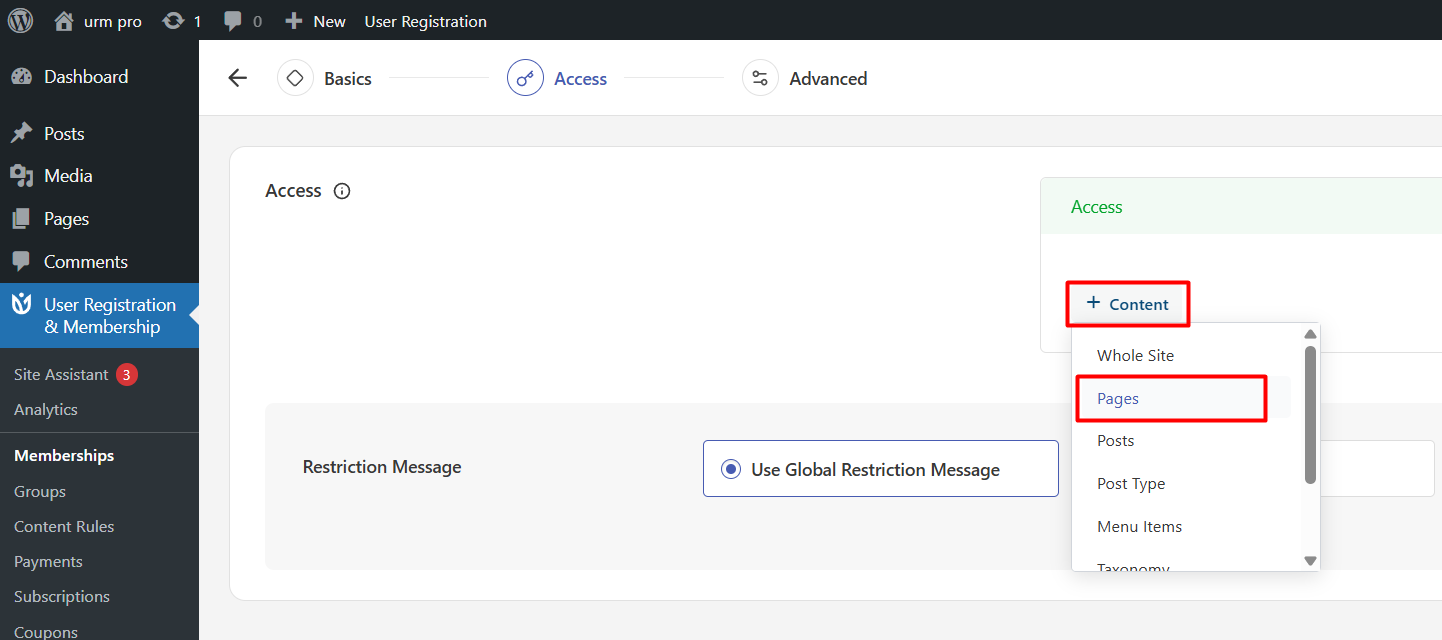
Click the Content.
Select the type of content to restrict:
Pages: Choose specific pages members can access
Posts: Select individual posts
Whole site: Grant access to your entire site
Custom post types: Restrict custom content types (Pro only)
Menu items: Control menu visibility (Pro only)
Taxonomies: Restrict by categories or tags (Pro only)
After selecting content type, choose the specific items like pages, posts, media.
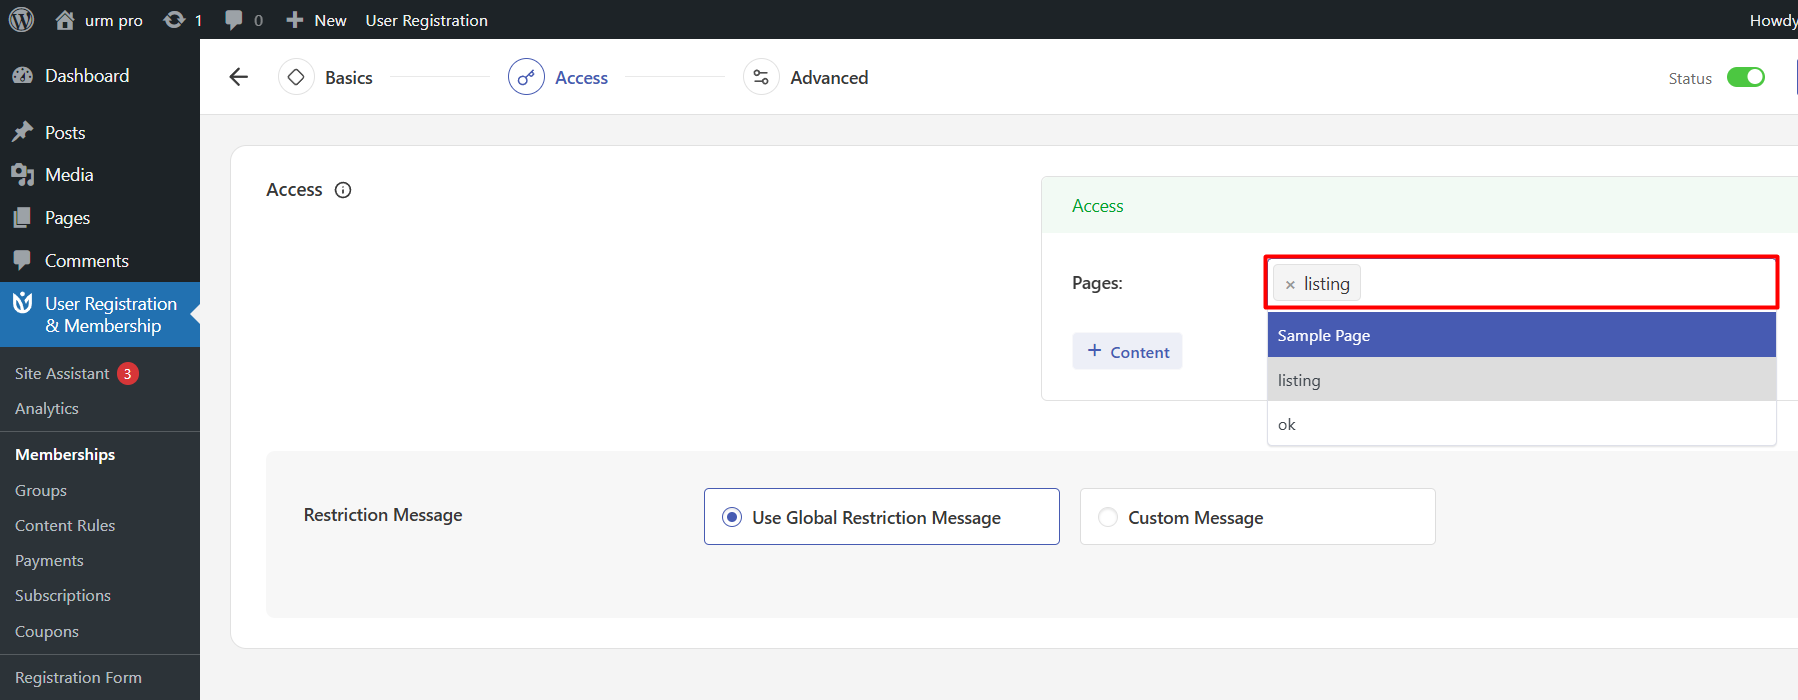
Configure the Restriction Message that non-members will see when trying to access protected content.

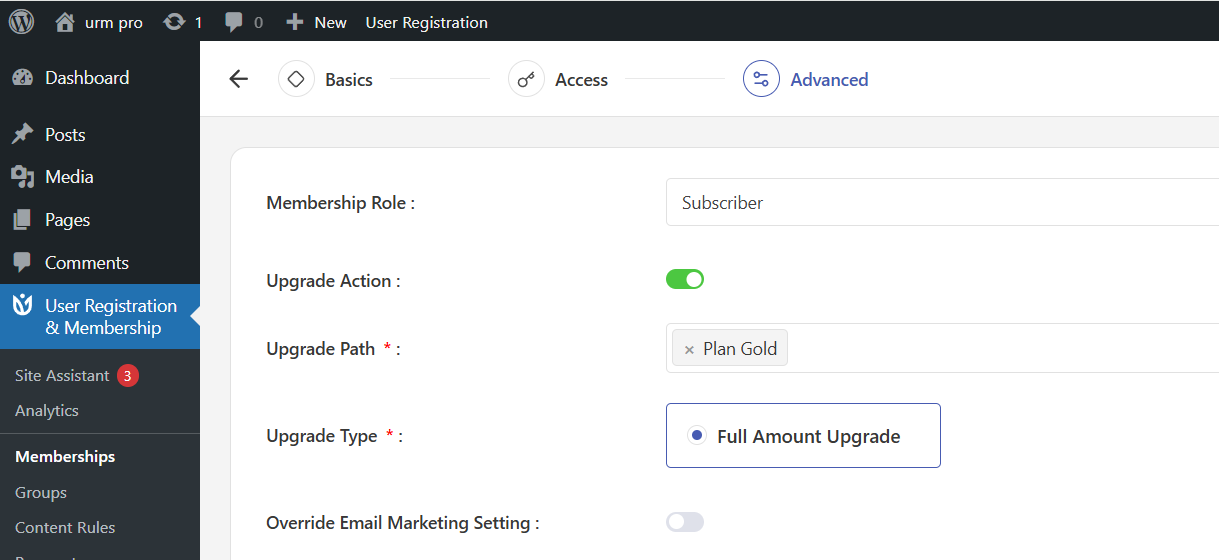
Step 4: Configure Advanced Settings (Optional)
Cn the Advanced tab, you can optionally configure:

Trial Period: Not applicable for free memberships
Upgrade Action: Enable if you want members to upgrade to paid plans later. Select which plan to go after the free plan.
Email Marketing Override: Override form-level email marketing settings if needed
Step 5: Save Your Membership Plan
Click Publish (or Save Changes if editing) to publish your free membership plan.
Add the Membership to a Registration Form
After creating your membership plan, add it to a registration form:
Go to User Registration & Membership → Registration Forms
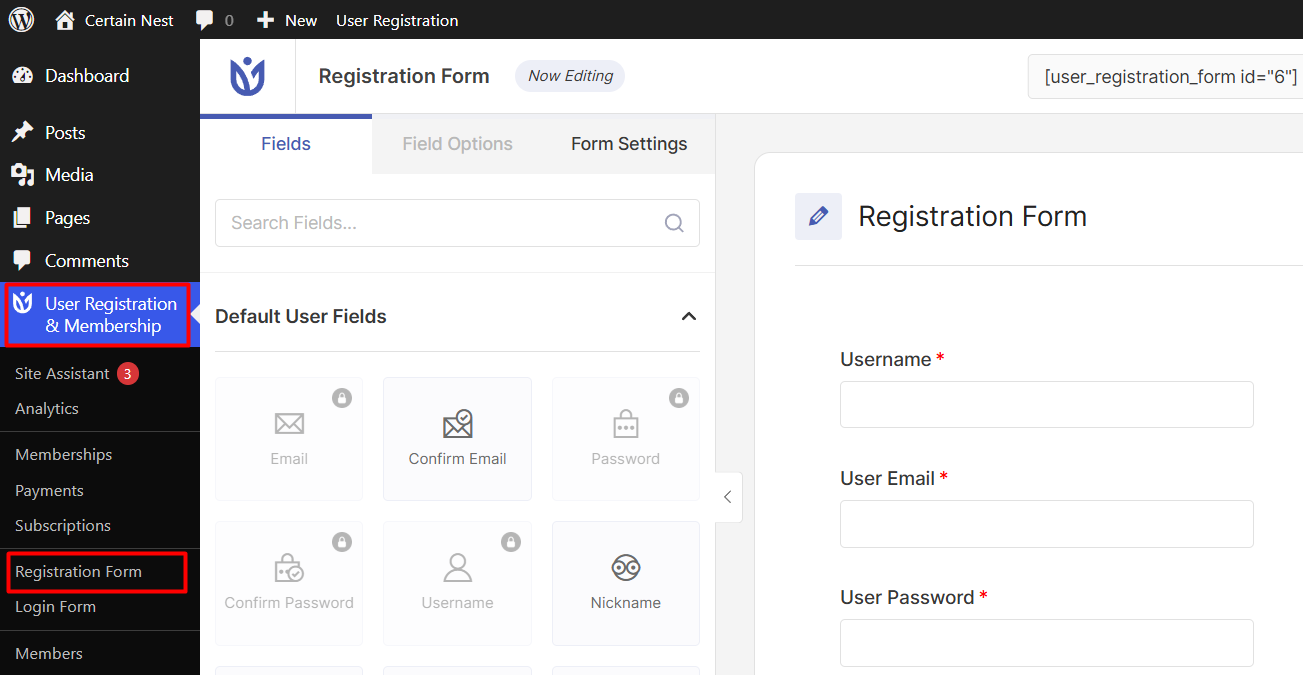
Select an existing form, but if you have no forms created, the default form will open.
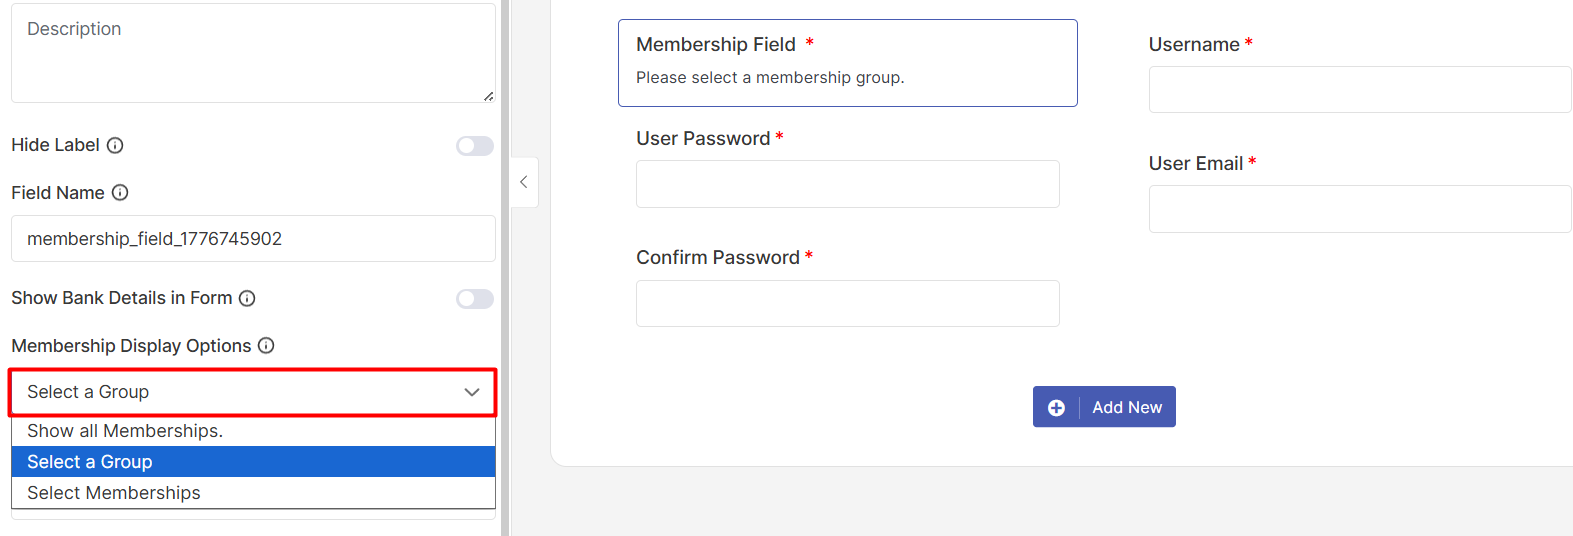
In the form builder, search for Membership Field in the left panel
Drag the Membership Field into your form
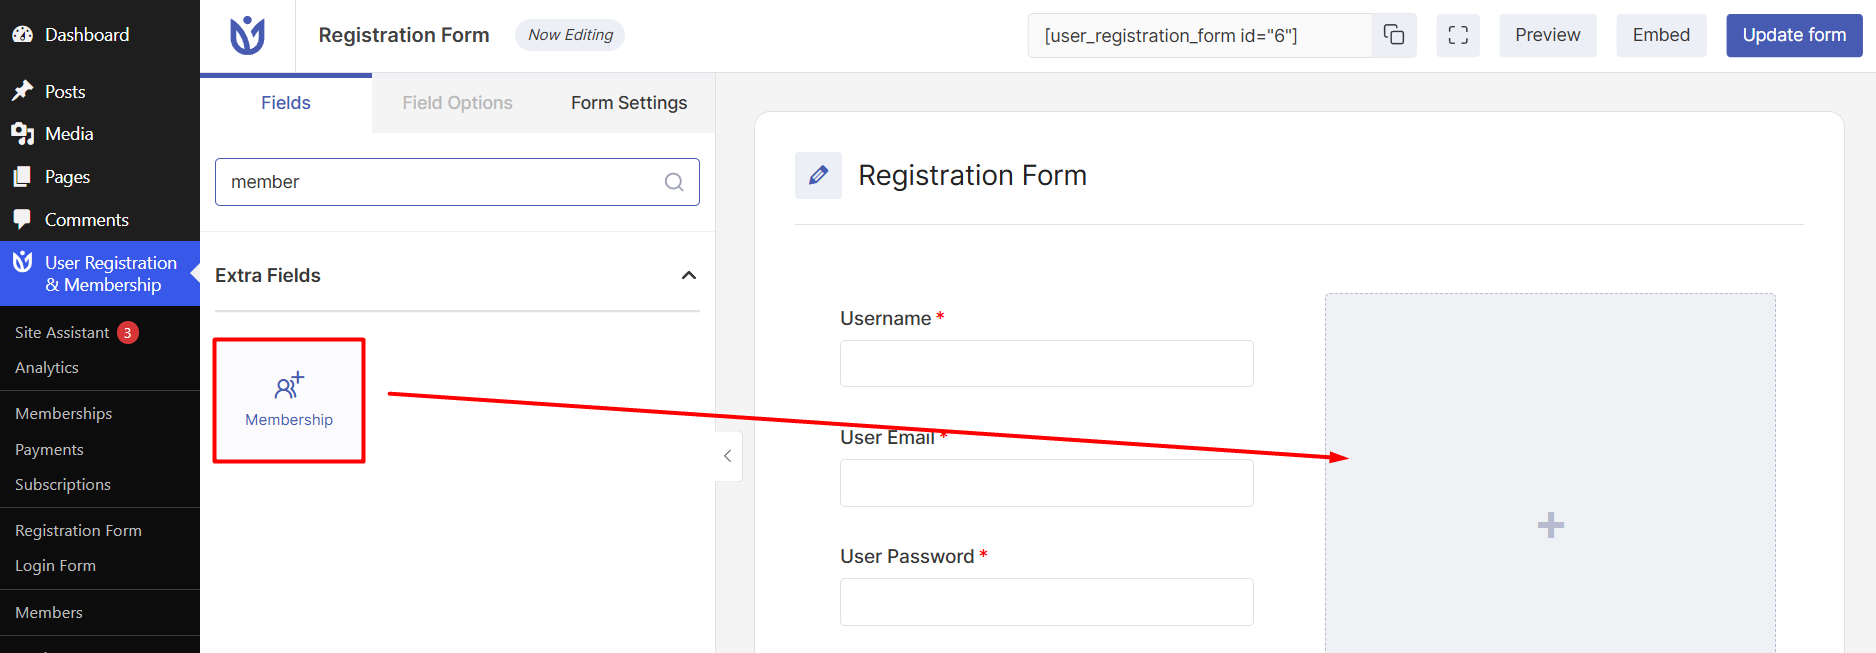
Click on the field to configure options: Choose Show all active memberships or Select a group
Click Update Form to save the changes.
Testing Your Free Membership Site
Before launching your membership site, test the complete user experience. Open your site in an incognito or private browser window to simulate a new visitor.
Navigate to your registration page and fill out the form with test information. Use a real email address you can access so you can verify any confirmation emails.
After submitting the registration form, check that you're redirected to the appropriate page. By default, users are redirected to the My Account page after registration.
Try accessing a restricted page while logged in as your test user. Verify that you can view the protected content. Then, log out and try accessing the same page again—you should see the restriction message instead of the content.
Test the login process by visiting your login page and signing in with your test account credentials. Verify that you're redirected to the correct page after login.